| Table of Contents | ||
|---|---|---|
|
...
- Log in as admin@d and type in the default password: admin.
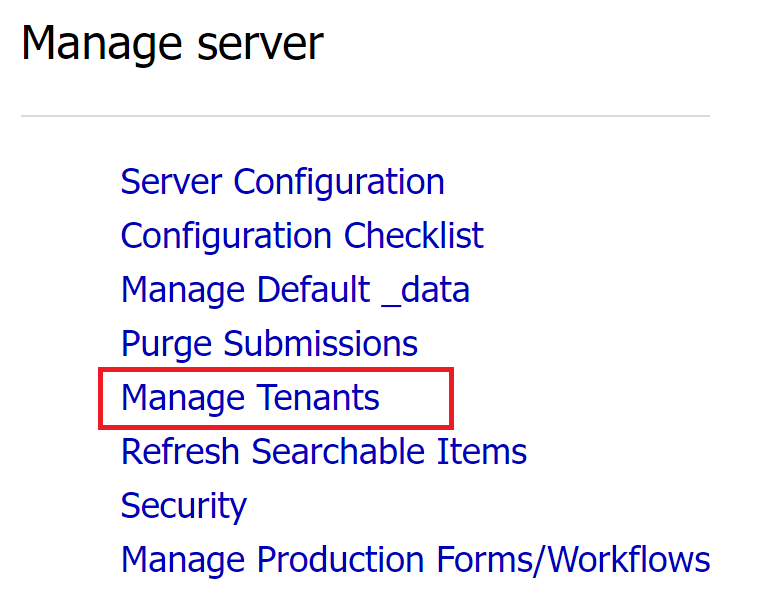
Click Manage Tenants.
- Click the
icon to create a new tenant
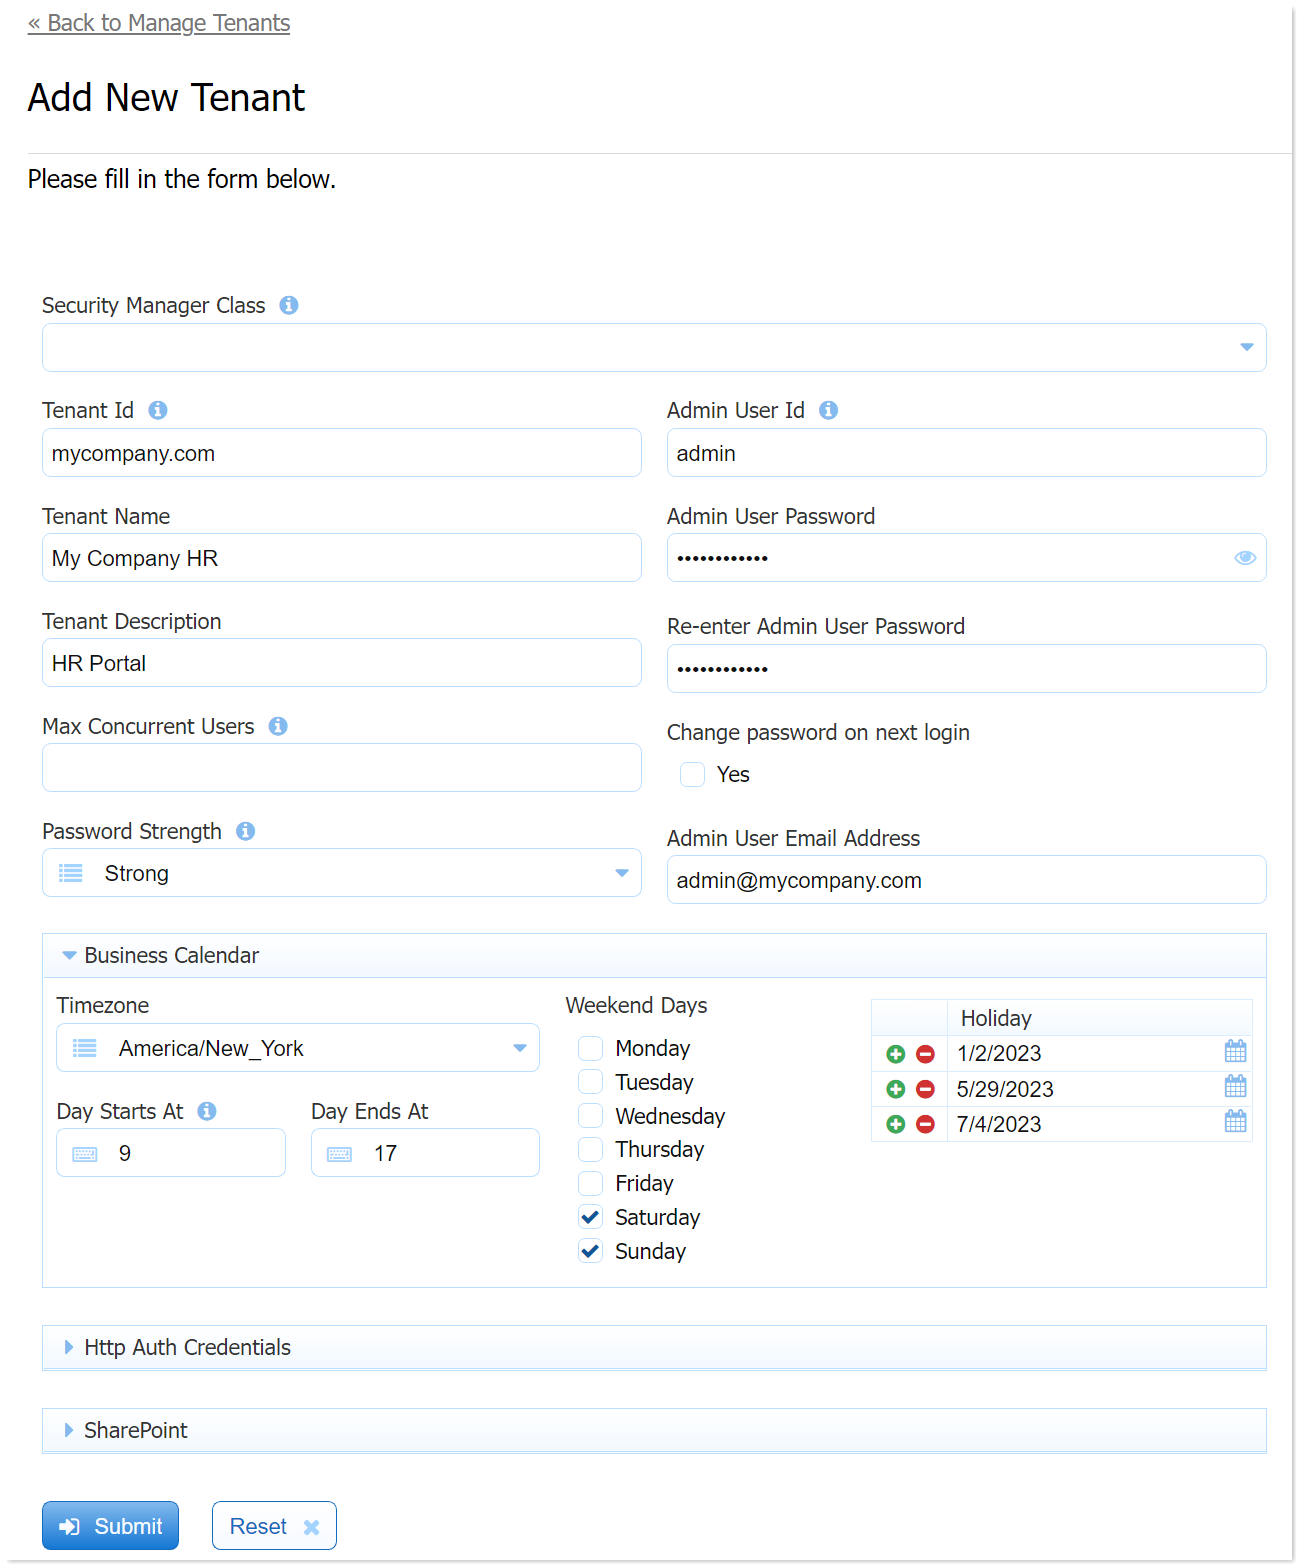
- Leave the Max Concurrent Users and the Security Manager Class blank.
- Fill in the rest of the fields for your tenant. Click Submit.
...
Creating the Leave Approval Workflow
- Log in to your frevvo tenant as the designer user i.e.designer@mycompany. Replace "company" with the name of your tenant.
On the My Project homepage, click the project name My Company HR that you created in the Build a Form tutorial. You can also select
- You will see the Forms and Workflows homepage.
- Click the
Name the workflow Leave Approval Workflow and give it a meaningful description. Click NEXT.
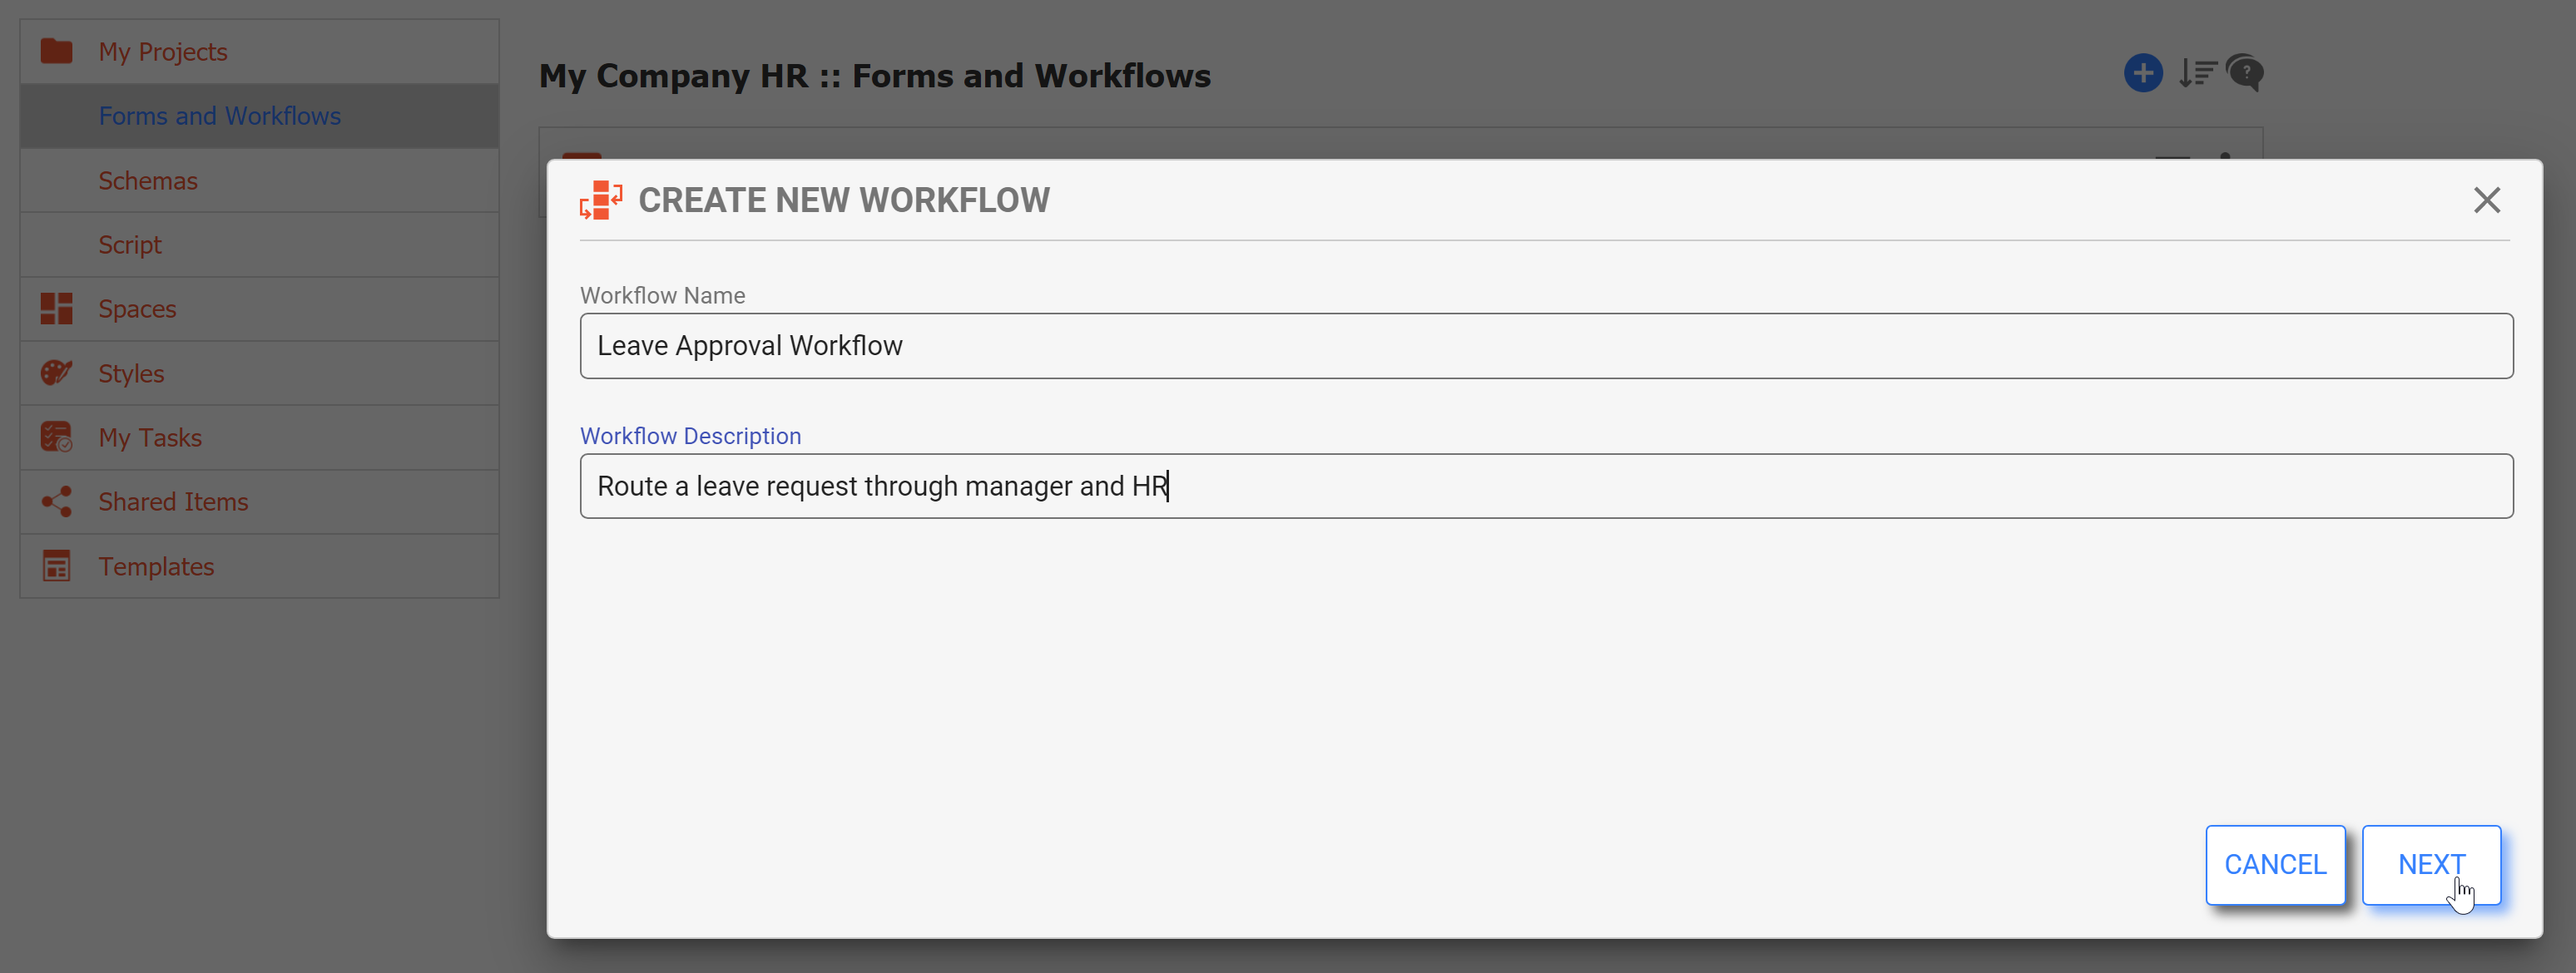
Tip You will be able to search your forms/workflows by Name and Description, so use keywords that will help you find it later.
- Now the Workflow Design Wizard will guide you through creating and assigning steps.
Rename Step 1 "Employee" and change the Step Type to Use Existing Form: Leave Approval. This will use your existing Leave Approval form to start the workflow.
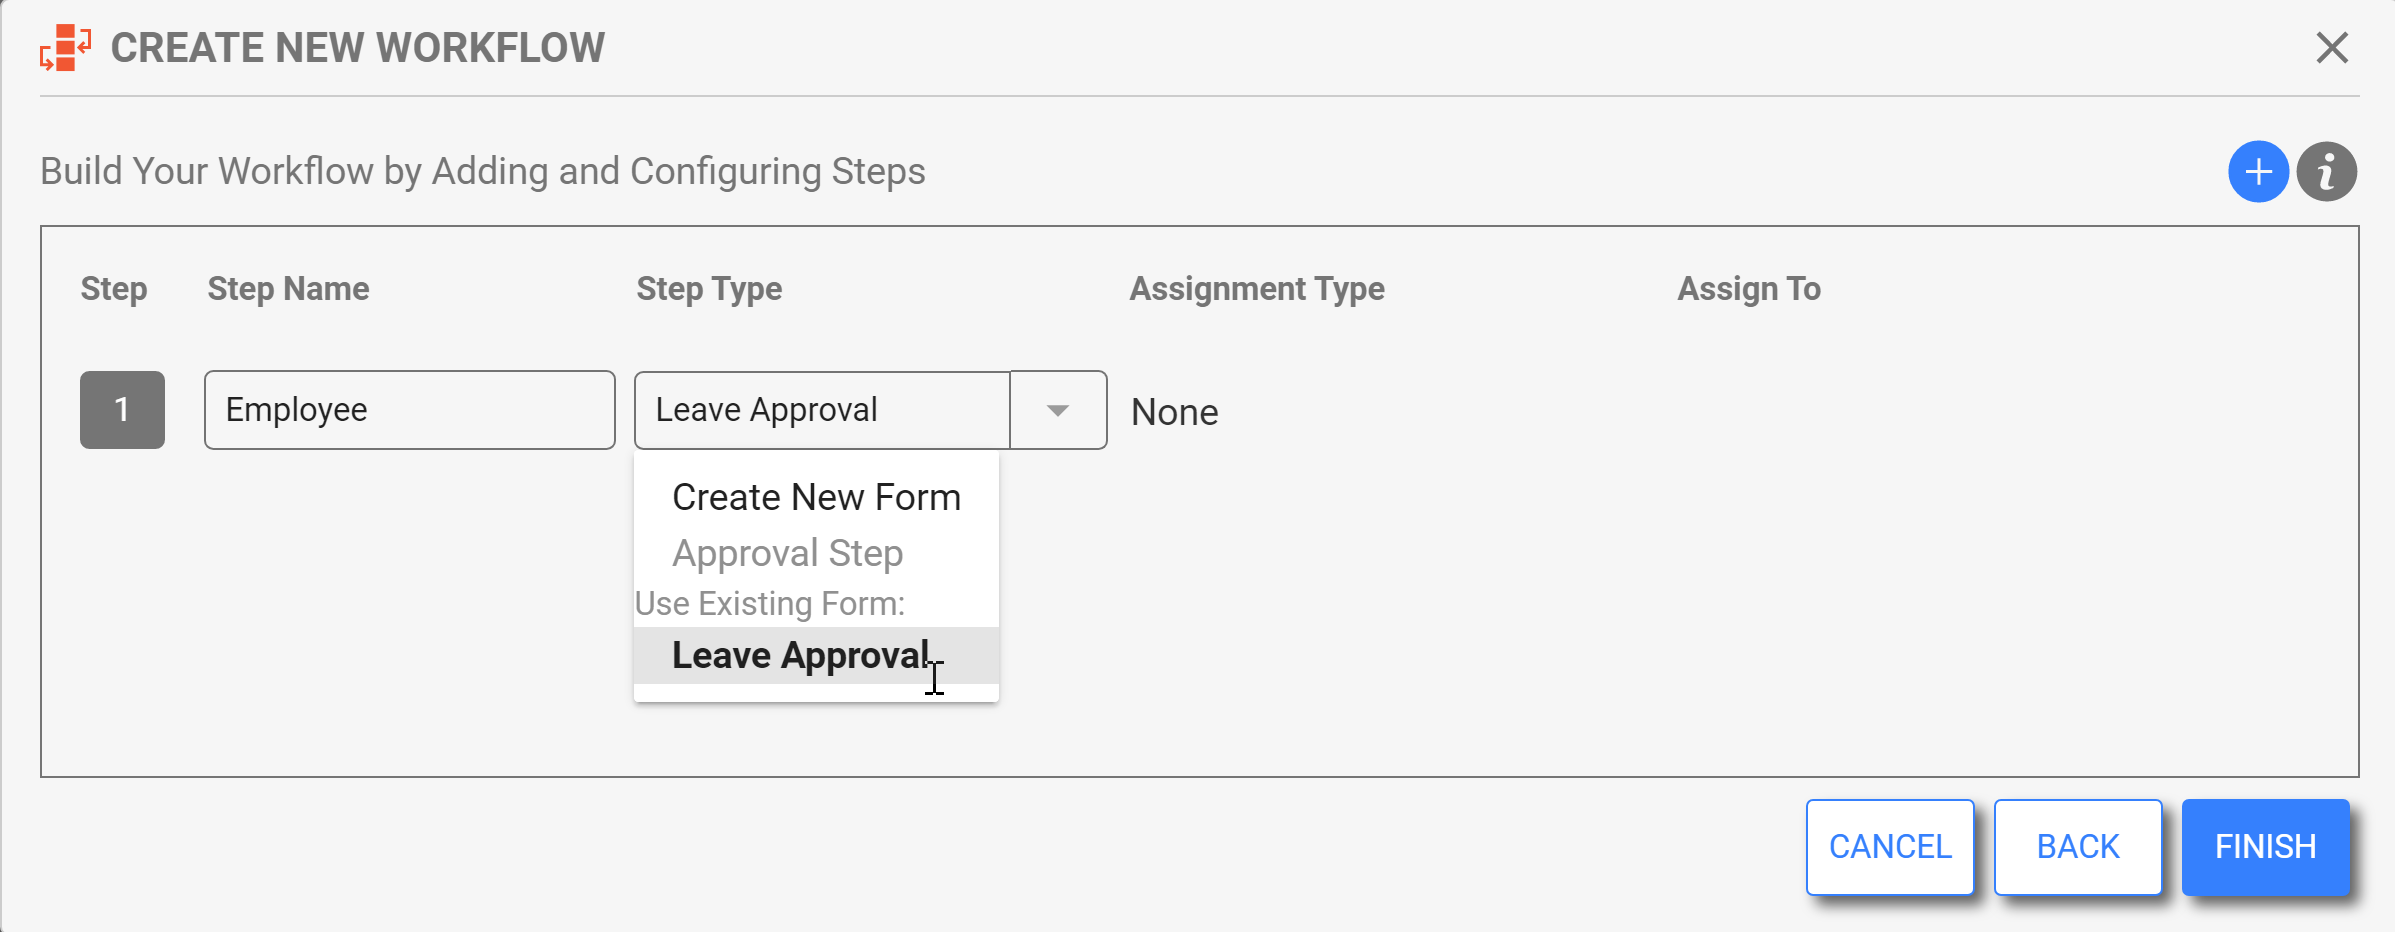
Tip If you completed the Getting Started with Forms exercise, you should have a Leave Approval Form listed. If not, you can select Create New Form instead.
- Click
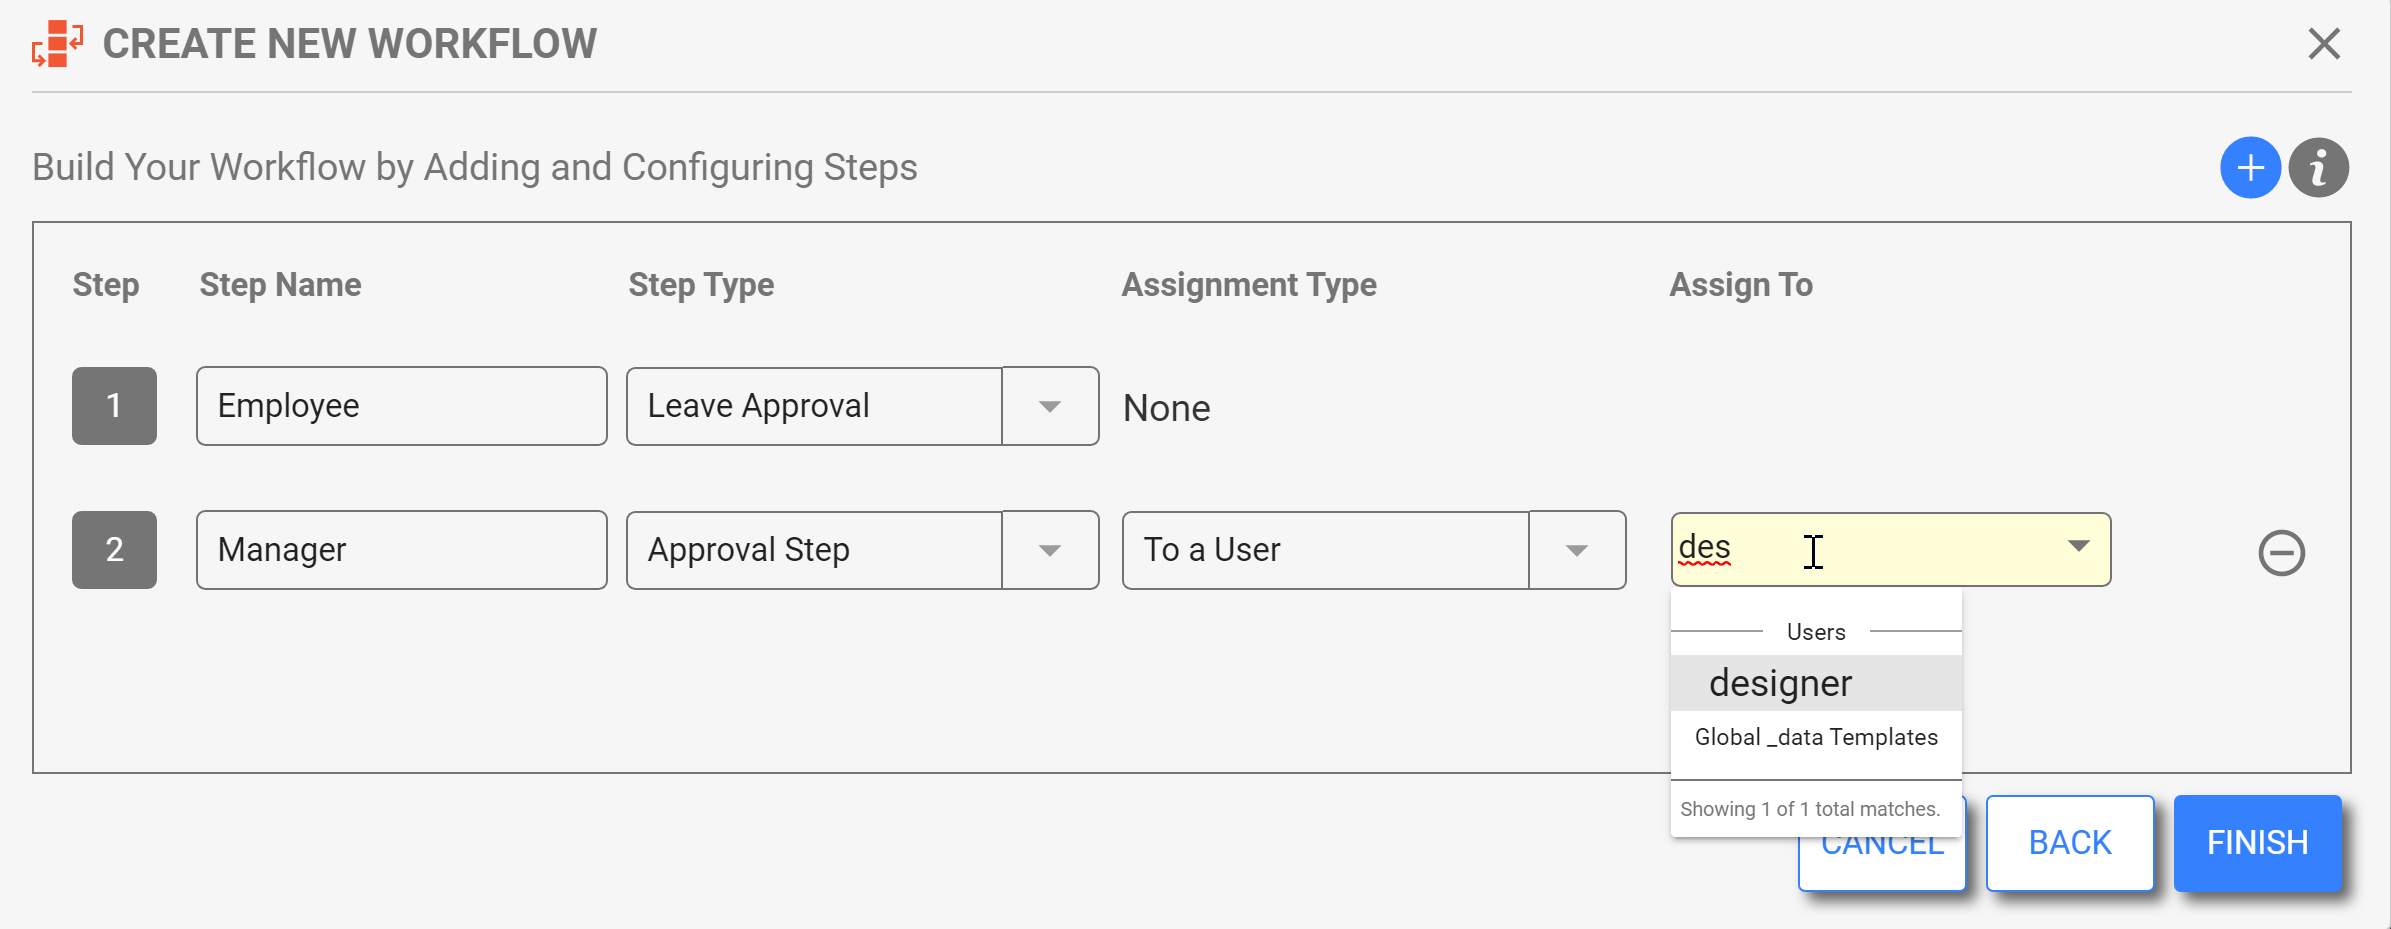
- Click
 Add and rename Step 3 "HR". Leave the default Step Type of Approval Step. Change Assignment Type to "To Role(s)" and select HR.
 - Click FINISH. Here is what your workflow should look like:
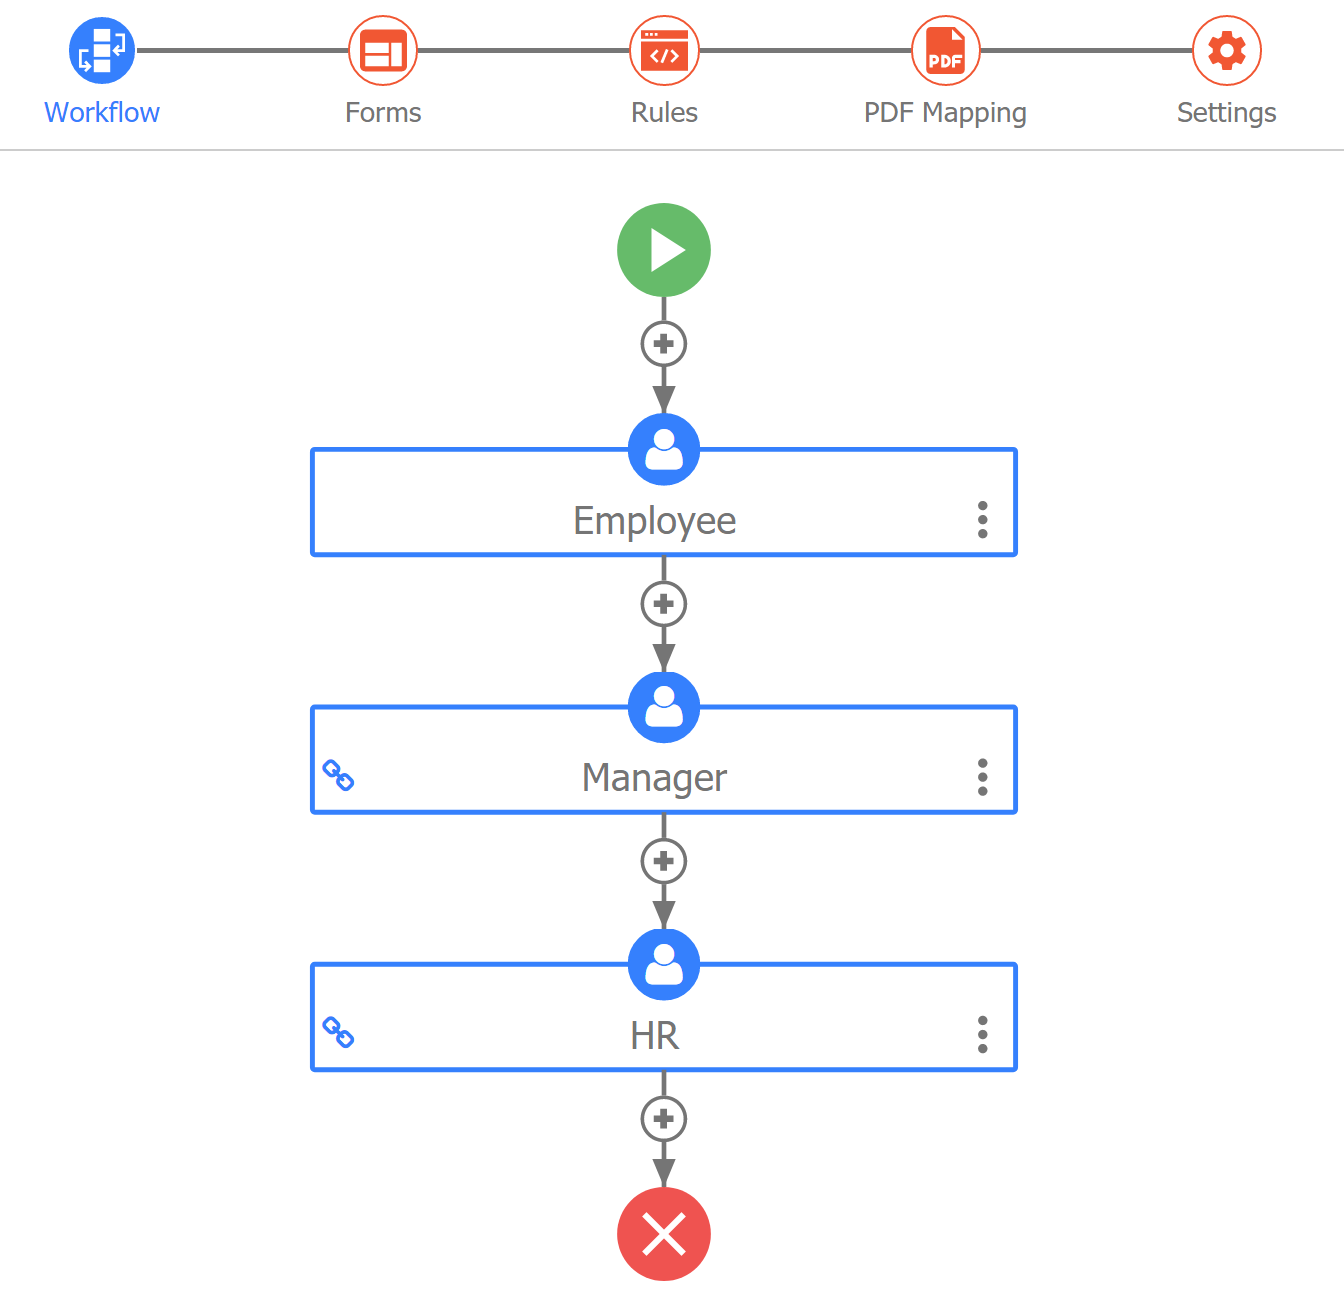
Workflow
Customize the User's Experience
Next we'll customize the buttons and messages the users will see as they interact with the workflow. First, click Workflow in the Guided Designer header to return to the Workflow Outline.
| Tip |
|---|
You can navigate Workflow Step Properties two ways:
This example suggests the 2nd approach, but choose what works for you! |
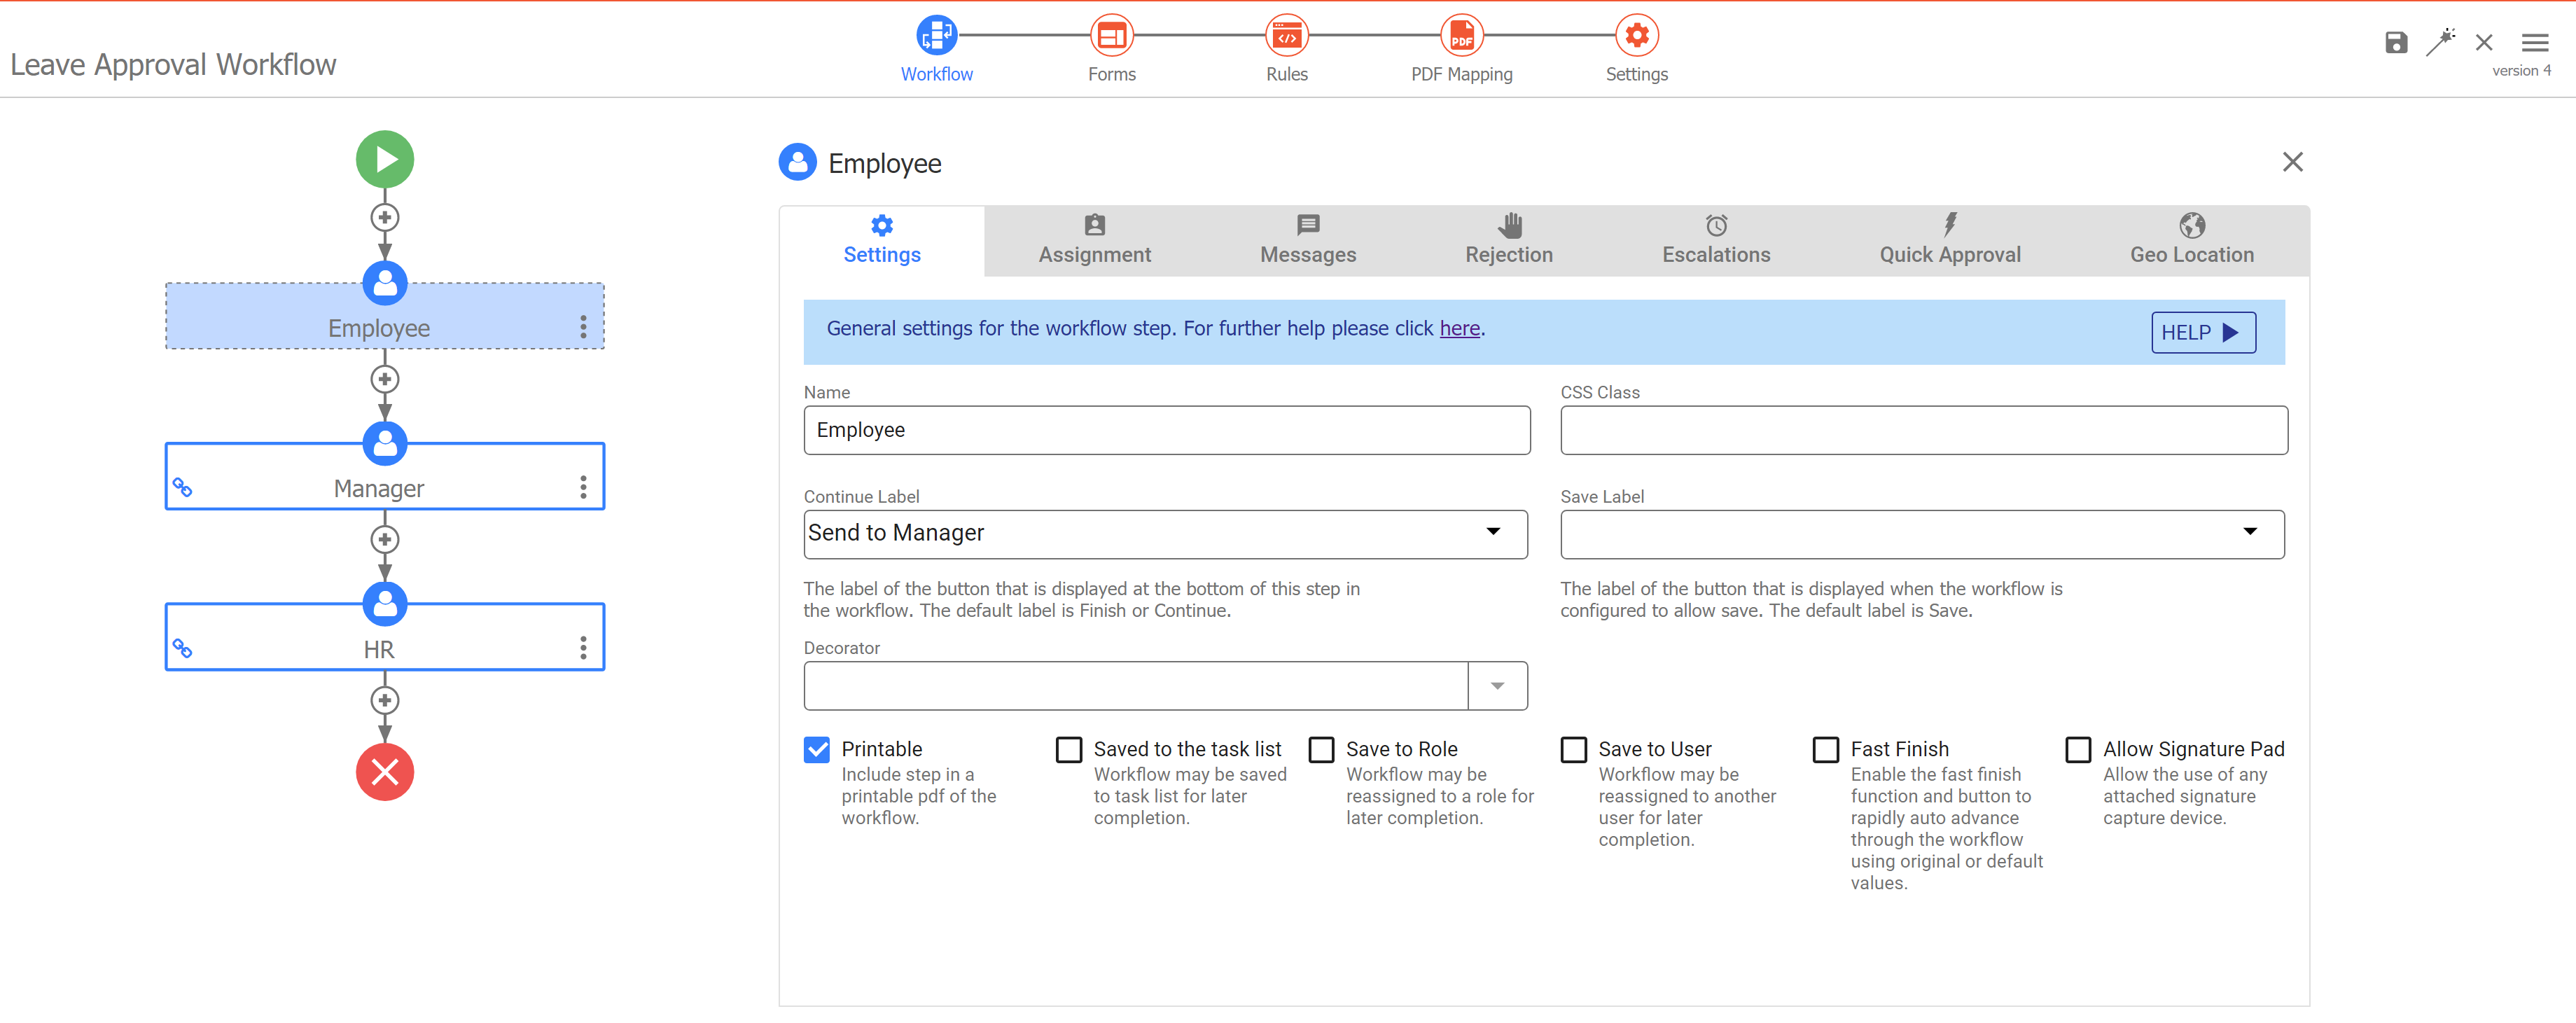
- Click the Employee Step. The Workflow Step Properties will appear on the right.
- Change the text of the Continue Label field to "Send to Manager." This is what the user will see on the Continue Button, and provides more context about what the workflow will do.
- Click on the Manager step.
- Change the Continue Label to Send to HR.
- Click on the Messages tab.
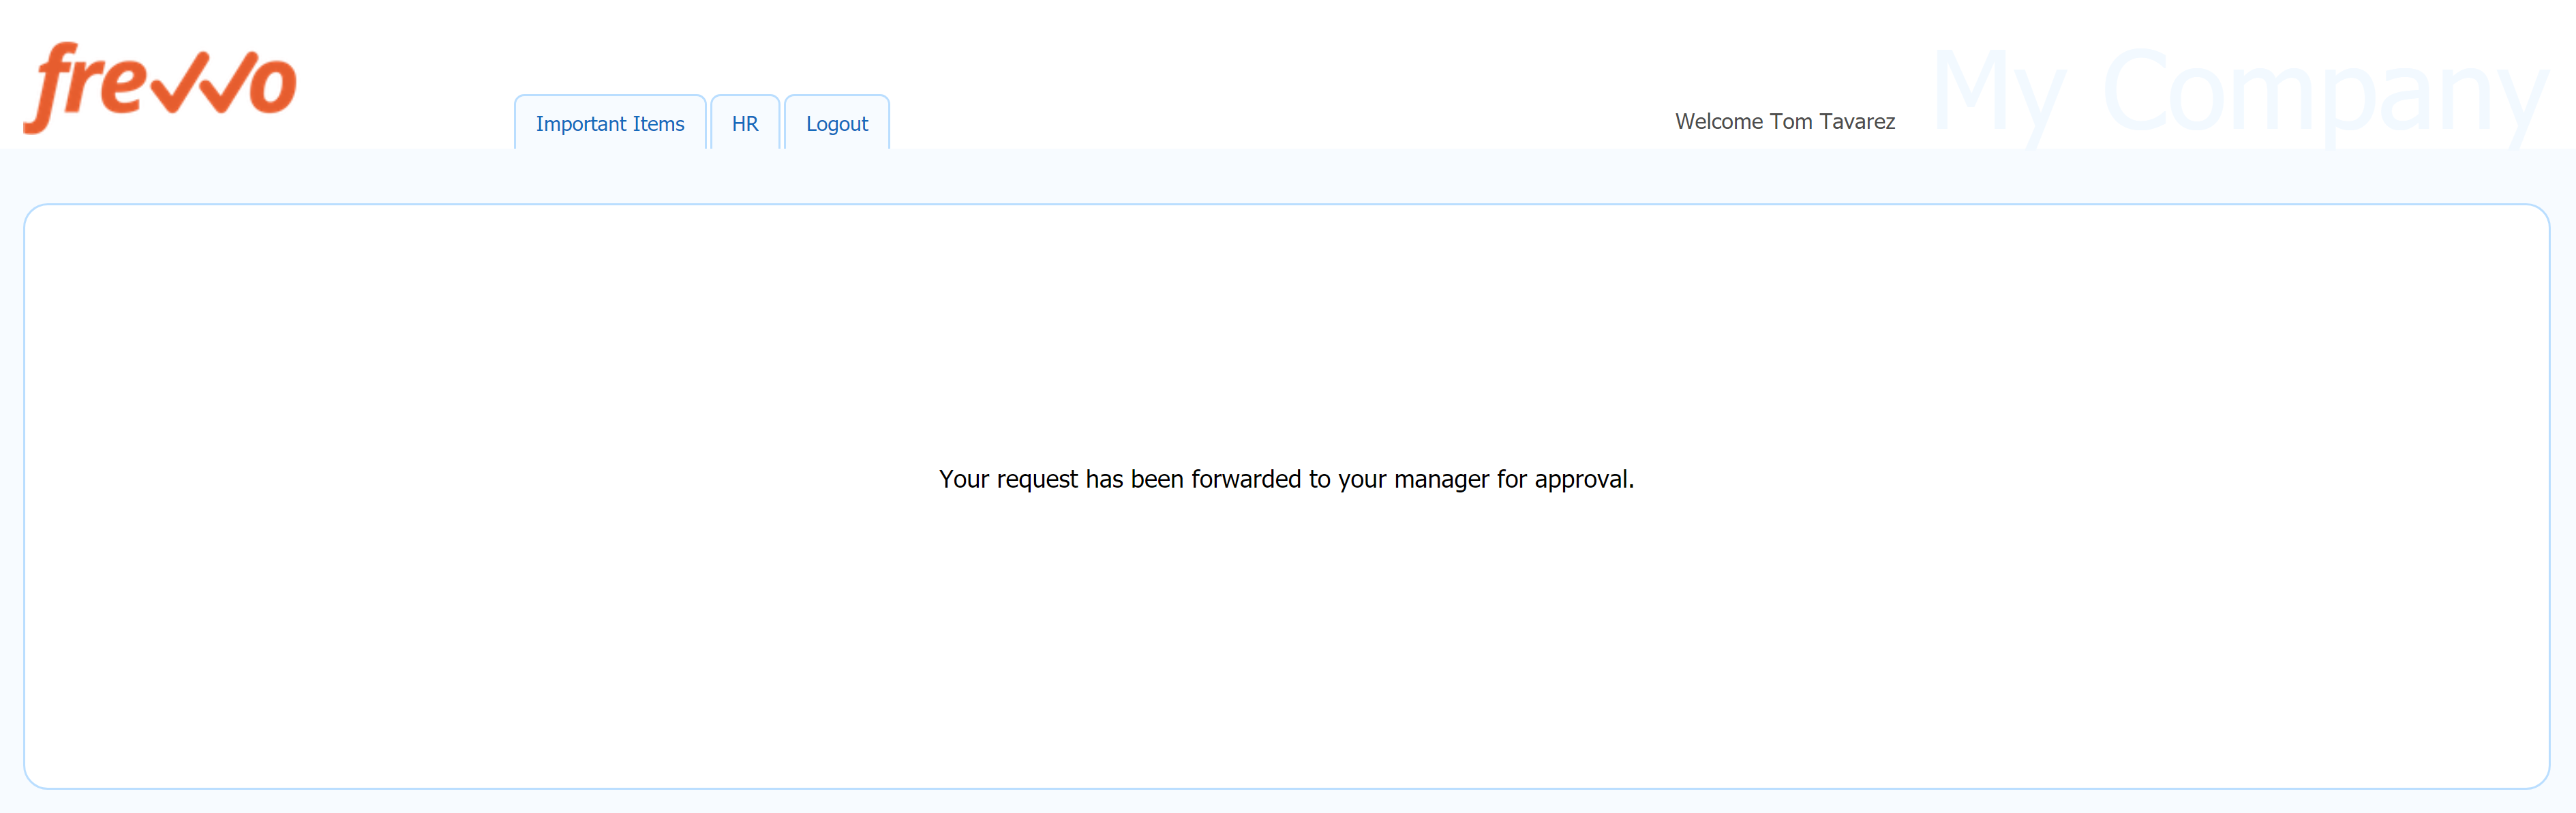
- Enter a Pending Message that Tom (employee) will see when he clicks the Send to Manager button. Ex: Your request has been forwarded to your manager for approval.
Add Task Information so manager Jerry can identify the task when he sees it on the Task List, such as "Leave Approval for {FirstName} {LastName}"
- Click on the HR Step
- Enter "Leave Approval for {FirstName} {LastName}" in the Task Information field.
- Enter a Pending Message that Jerry will see when he clicks the Send to HR button, such as "The Leave Approval for {EmployeeName} has been forwarded to HR."
Dynamically Assign the Manager Step
Dynamically assign this step to the right manager based on which employee starts the workflow.
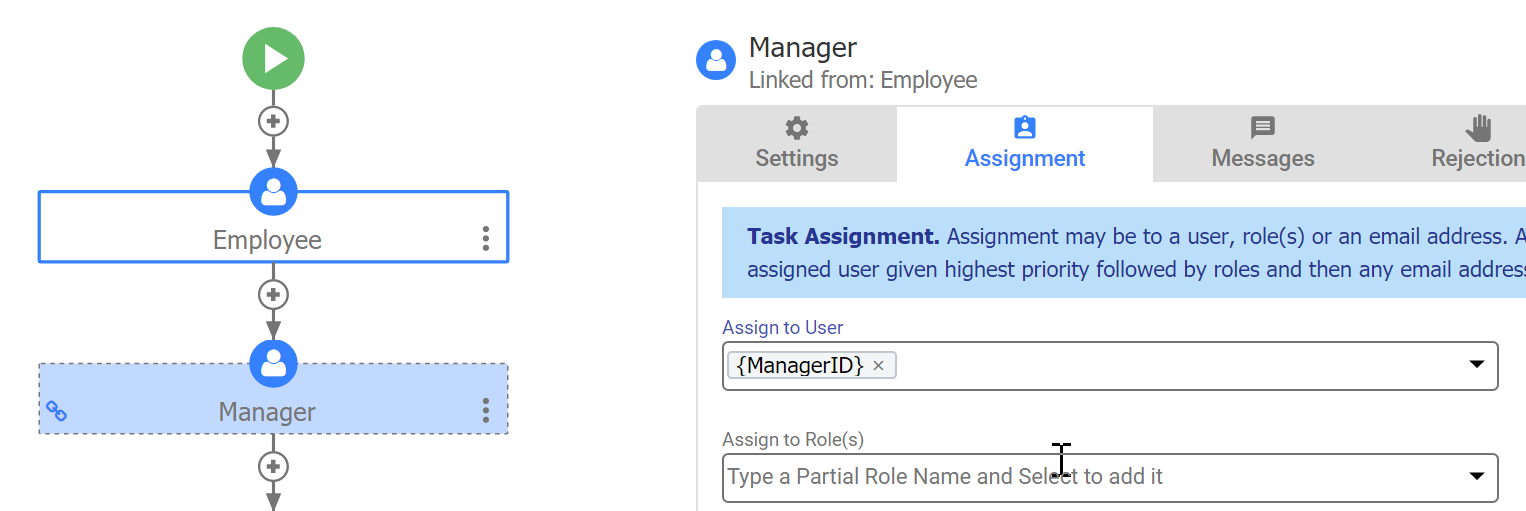
- Click on the Manager Step
- Select the Assignment tab. In the Assign to User field, delete the user you originally assigned.
- Type a left curly brace followed by Man. When you see {ManagerID} in the dropdown, click to select it.
| Tip |
|---|
{ManagerID} is an example of a template. At runtime, frevvo will evaluate the user id in this field and send the task to the Employee's manager. The ManagerID field will be populated by a business rule explained below when the workflow step loads. |
Forms
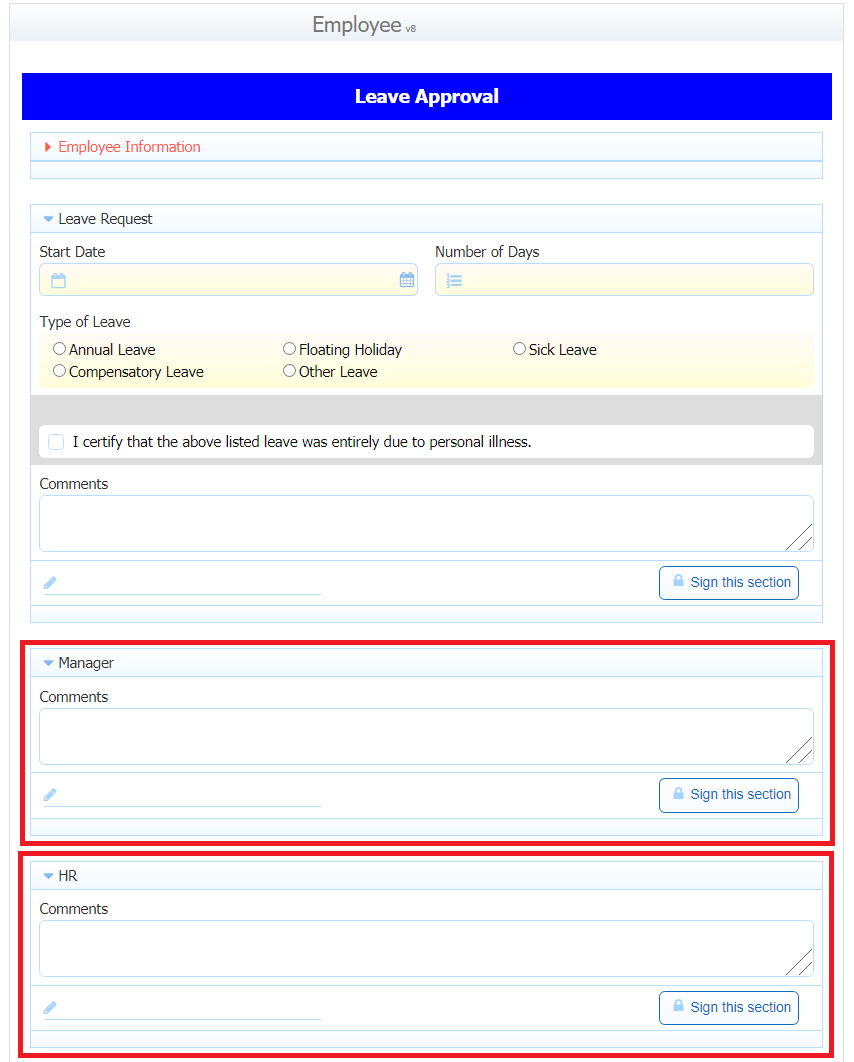
Click on Forms in the Guided Designer header. Notice that in addition to the Employee Information and Leave Request sections that you added, there are now also sections labelled Manager Approval and HR Approval. These were added by the Workflow Design Wizard, along with rules that show/hide them on the correct step.
You can edit the form in the Workflow designer Forms view.
| Warning |
|---|
Be aware that changes made to a form in the Workflow Designer are not reflected in the original form in the Forms designer. If you want your changes reflected in both designers, make the changes in the original form in the Forms Designer, then replace the updated form in your workflow in the Workflow Designer. |
Rules
Click the Rules icon in the Guided Workflow Designer header. Notice that several rules are already in the list - the rule you created earlier "Sick Certification", as well as several rules the Workflow Design Wizard created to show/hide our approval sections. We'll add one more.
Add a Rule to Prefill Employee Information
Let's add a rule to prefill the user name, email address and manager's id on our workflow. Follow these steps:
Click
Give your rule a Name and Description. Click Run Builder.
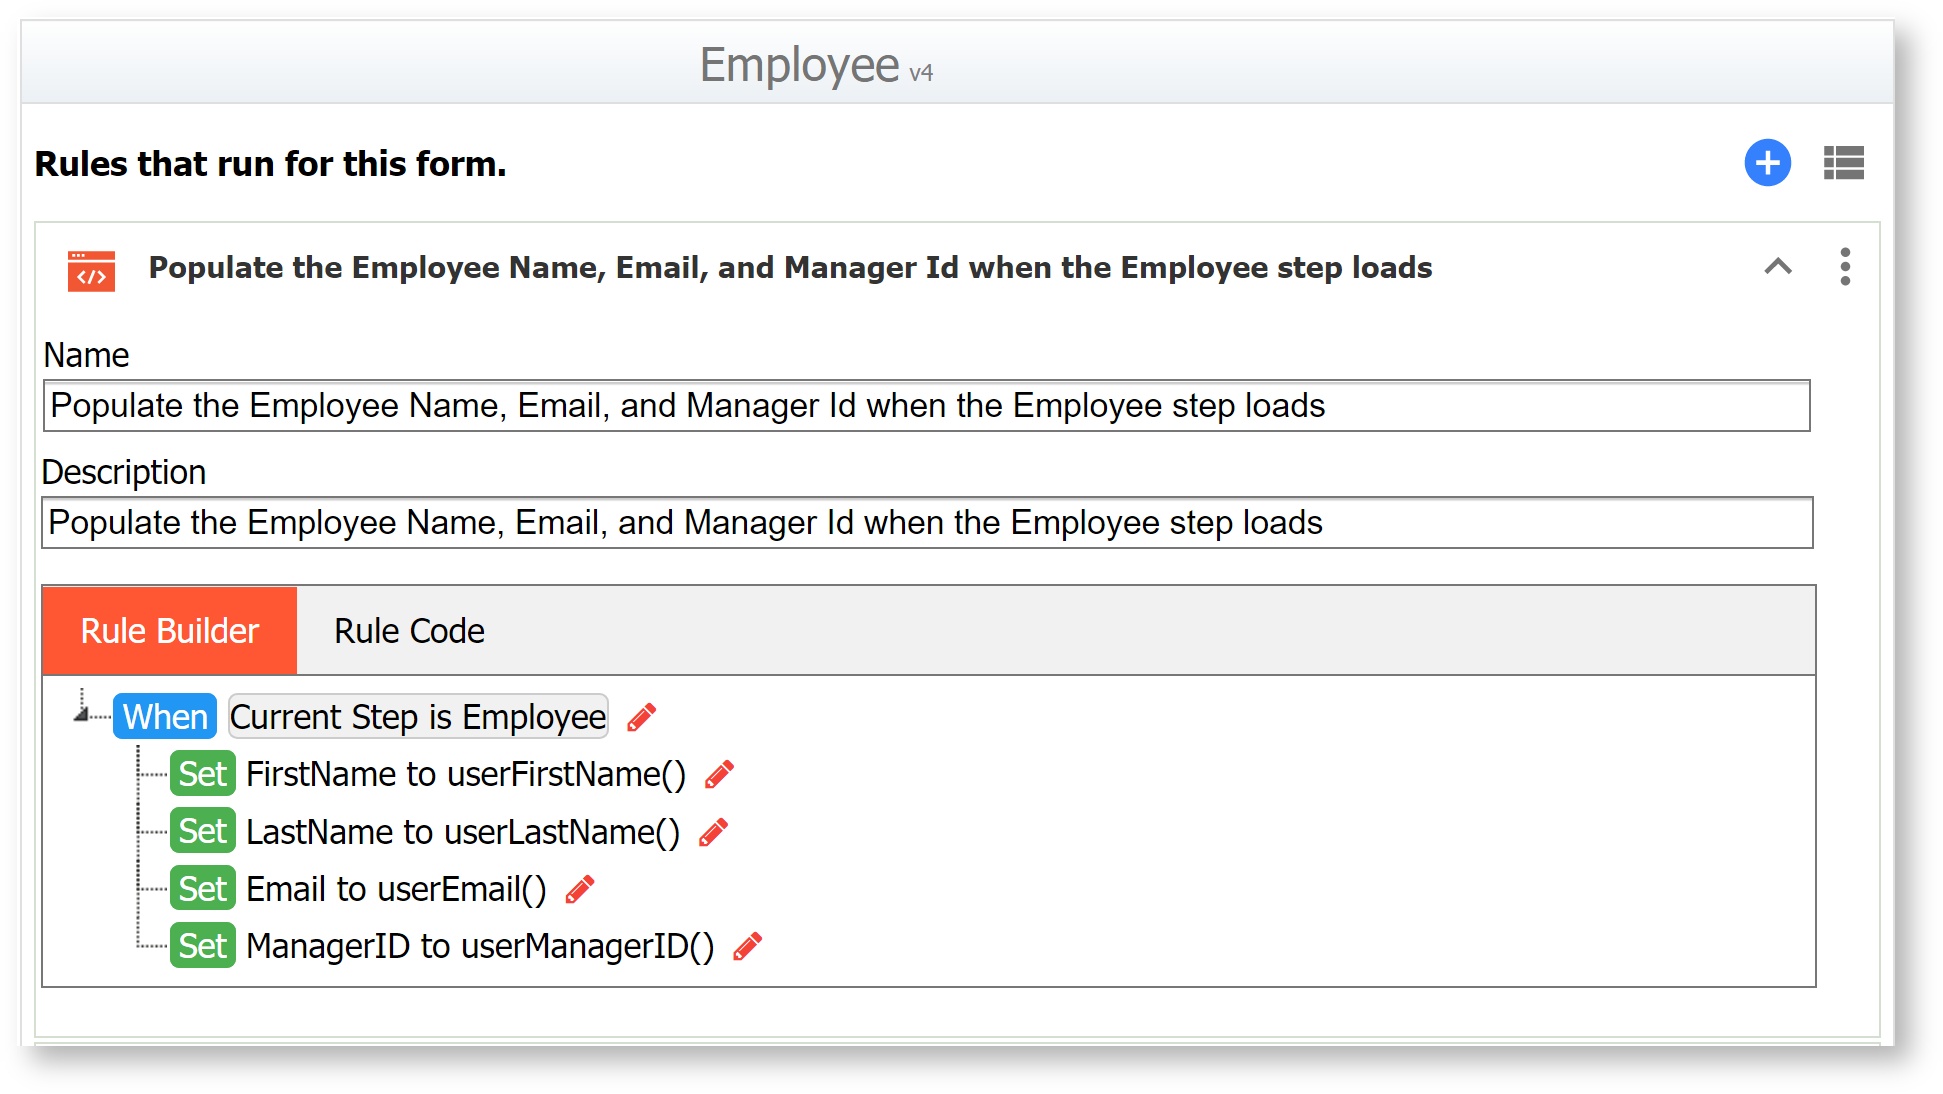
Add your condition and actions. For this rule, you don't need Else Actions. Your rule finished rule should look like this.
Expand title Click here for step-by-step instructions. Name the rule
No Format Populate the Employee Name, Email, and Manager Id when the Employee step loads
- Click the Run Builder button then click Add Condition. This is the Condition wizard
- Select the current step from the first dropdown.
- Select is from the second dropdown
- Select Employee from the third dropdown.
- Click Next
- This is the Action wizard where you set up actions that will happen if the condition is true
- Select FirstName from the first dropdown.
- Select to from the second dropdown
- Begin typing userFirstName in the third field then select the userFirstName function when it displays in the dropdown. Type in the closing parenthesis. Tab out of the field. This sets up theFirstName field to be populated with the Employee Name using the built-in userFullName function.
- Click the Add Action button.
- Select LastName from the first dropdown.
- Select to from the second dropdown
- Begin typing userLastName in the third field then select the userLastName function when it displays in the dropdown. Type in the closing parenthesis. Tab out of the field. This sets up the LastName field to be populated with the employee's frevvo user id using the built-in userLastName function.
- Click the Add Action button.
- Select Email from the first dropdown.
- Select to from the second dropdown
- Begin typing userEmail in the third field then select the userEmail function when it displays in the dropdown. Type in the closing parenthesis. Tab out of the field. This sets up the Email field to be populated with the employee's email address using the built-in userEmail function.
- Click the Add Action button.
- Select ManagerId from the first dropdown.
- Select to from the second dropdown
- Begin typing userManagerID in the third field then select the userManagerID function when it displays in the dropdown. Type in the closing parenthesis. Tab out of the field. This sets up the ManagerId field to be populated with the frevvo user id of the employee's manager using the built-in userManagerID function.
- Click Finish
PDF Mapping
We'll skip this for now, because this workflow will produce a built-in PDF snapshot. Visit Generate Pixel Perfect PDFs for more details about you could map form data to an existing PDF.
Settings
Save a PDF Snapshot
Next we'll make sure to save a PDF snapshot of this form that can be emailed for confirmation or added to the employee's file.
- Click the Settings icon in the Guided Workflow Designer header.

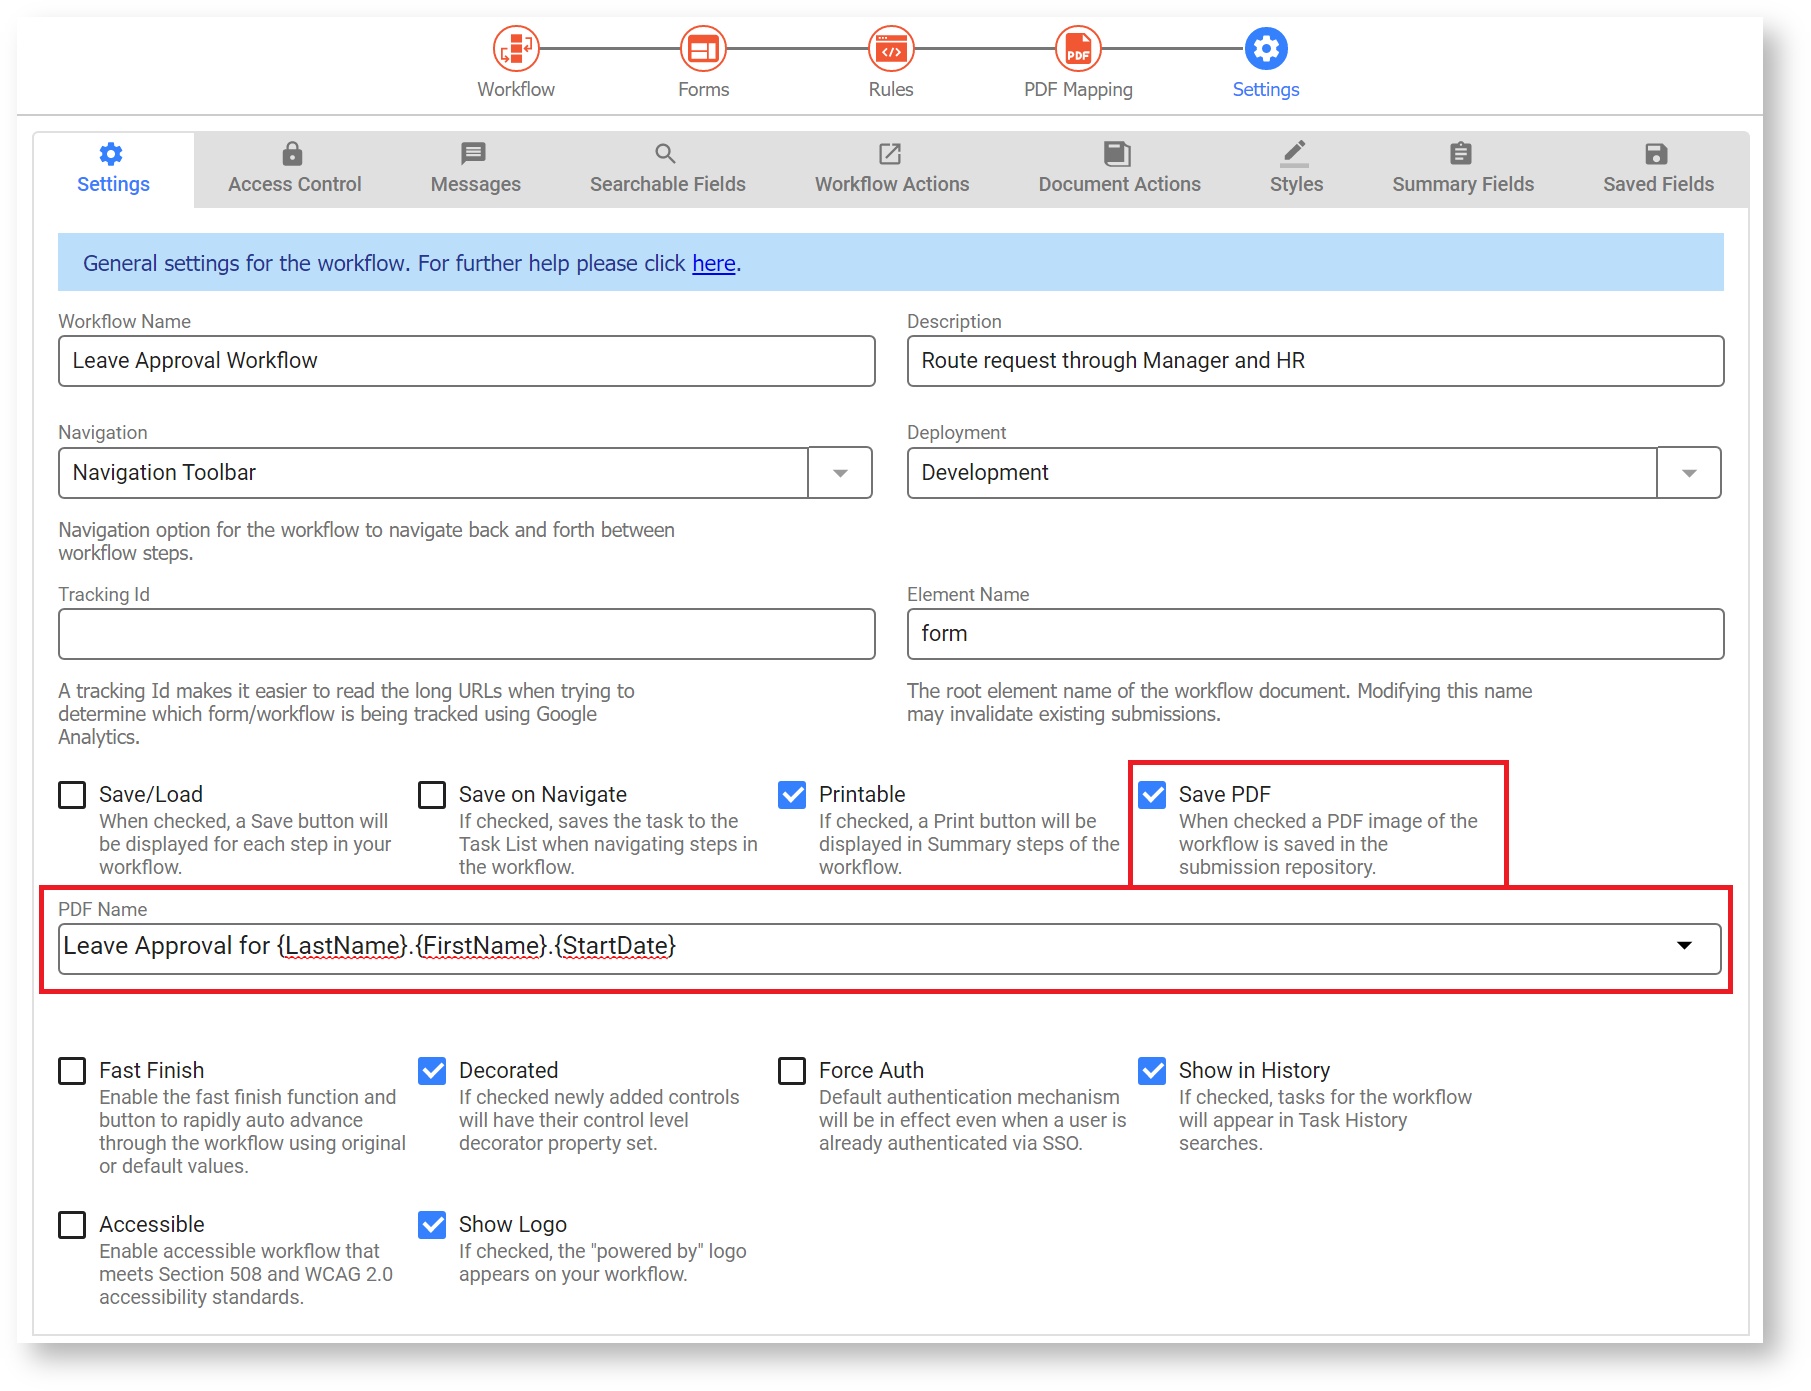
Check the Save PDF checkbox on the Settings tab so that a PDF image of the workflow is saved in the frevvo submission repository. Notice that a PDF Name area appears. Enter
Code Block Leave Approval for {LastName}.{FirstName}.{StartDate}Tip Entering a control name inside curly brackets will replace that text with the run-time form/workflow data, providing you with a dynamic experience. Many place have a dropdown to help you select the correct control name, as this is case-sensitive.
- Click
Add a Submit Message
Add a message that the HR user will see when they complete the workflow.
- Select the Workflow Actions tab. Select the Display Message when user submits workflow wizard.
Enter you custom message
No Format Leave Approval successfully processed for {FirstName} {LastName}.
...
A great way to test your workflow is to use a frevvo space. A space is a frevvo website that is very easy to create. Your deployed forms/workflows are automatically added.
Create a Space
Follow these steps to create the space:
- Ensure the visibility of your Expense Report workflow is set to public in tenant and that it is deployed to production:
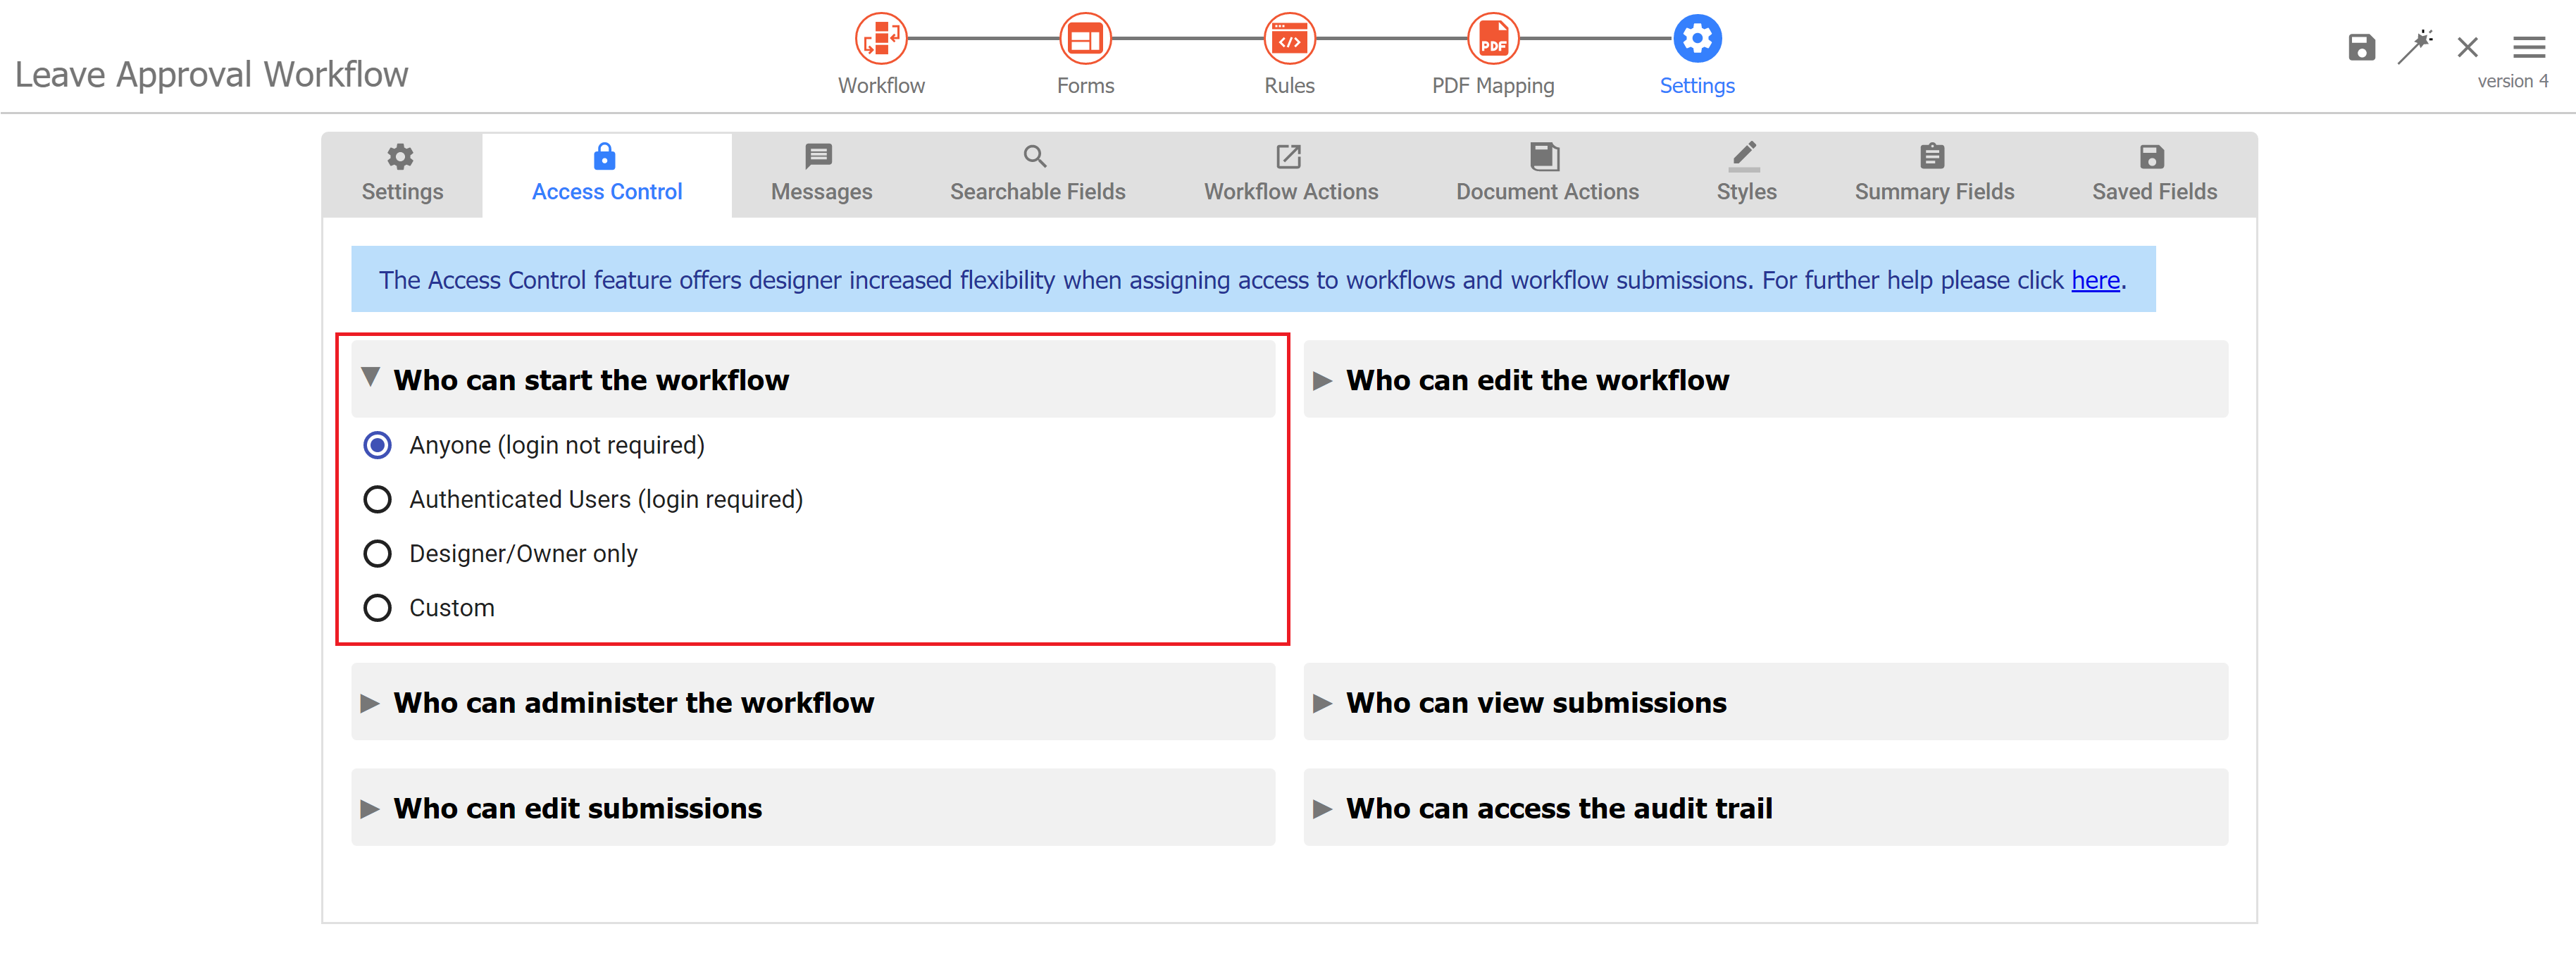
- In Workflow Properties, select the Access Control Tab. Set "Who can start the workflow" to "Anyone (login not required.)
- On the Forms & Workflows Homepage, click the
- In Workflow Properties, select the Access Control Tab. Set "Who can start the workflow" to "Anyone (login not required.)
- Click on the Spaces Tab. Click the
- Click the
- Copy the share URL for your space then log off frevvo.
Submit a Leave Request (Employee)
- Paste the space URL into another browser or a new tab of the browser you are using. Login as tom@<your tenant name>. frevvo automatically makes your project a tab on the space menu and your Leave Approval Workflow an option on the menu under the tab. Your space should look something like this:
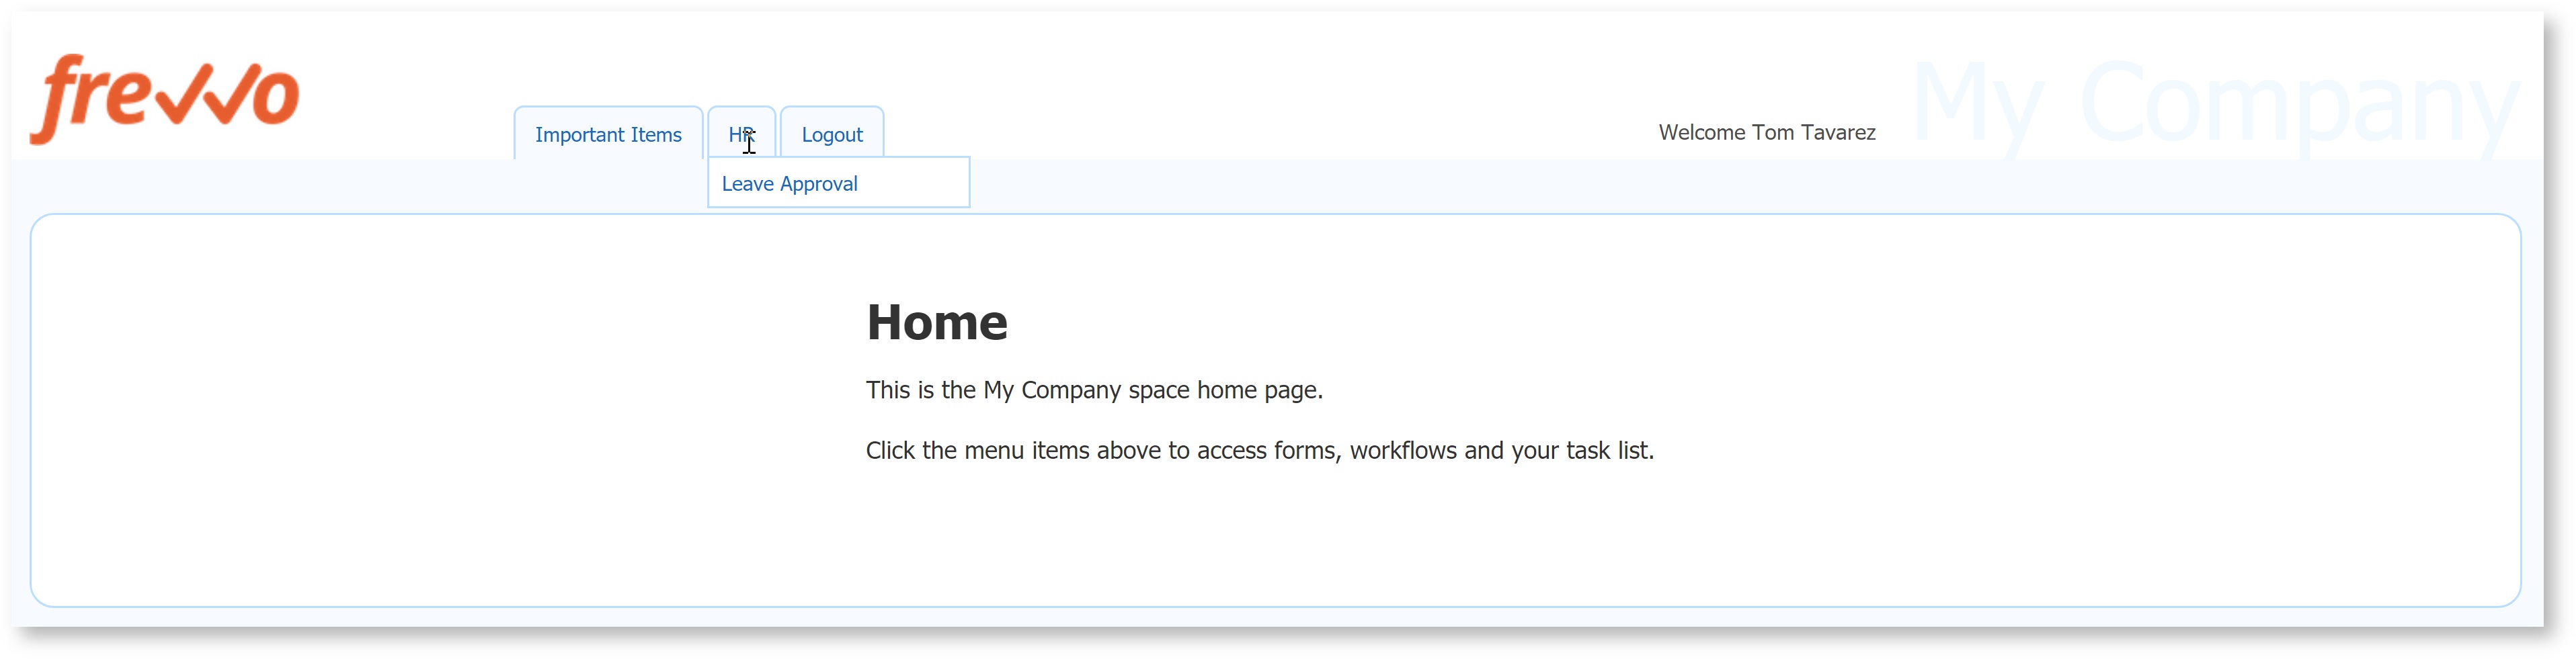
Click on the tab for your project and then click on the Leave Approval workflow. This brings you to the first step in your workflow. The workflow automatically has a navigation bar to indicate which step you are currently in as well as the next steps that are coming.
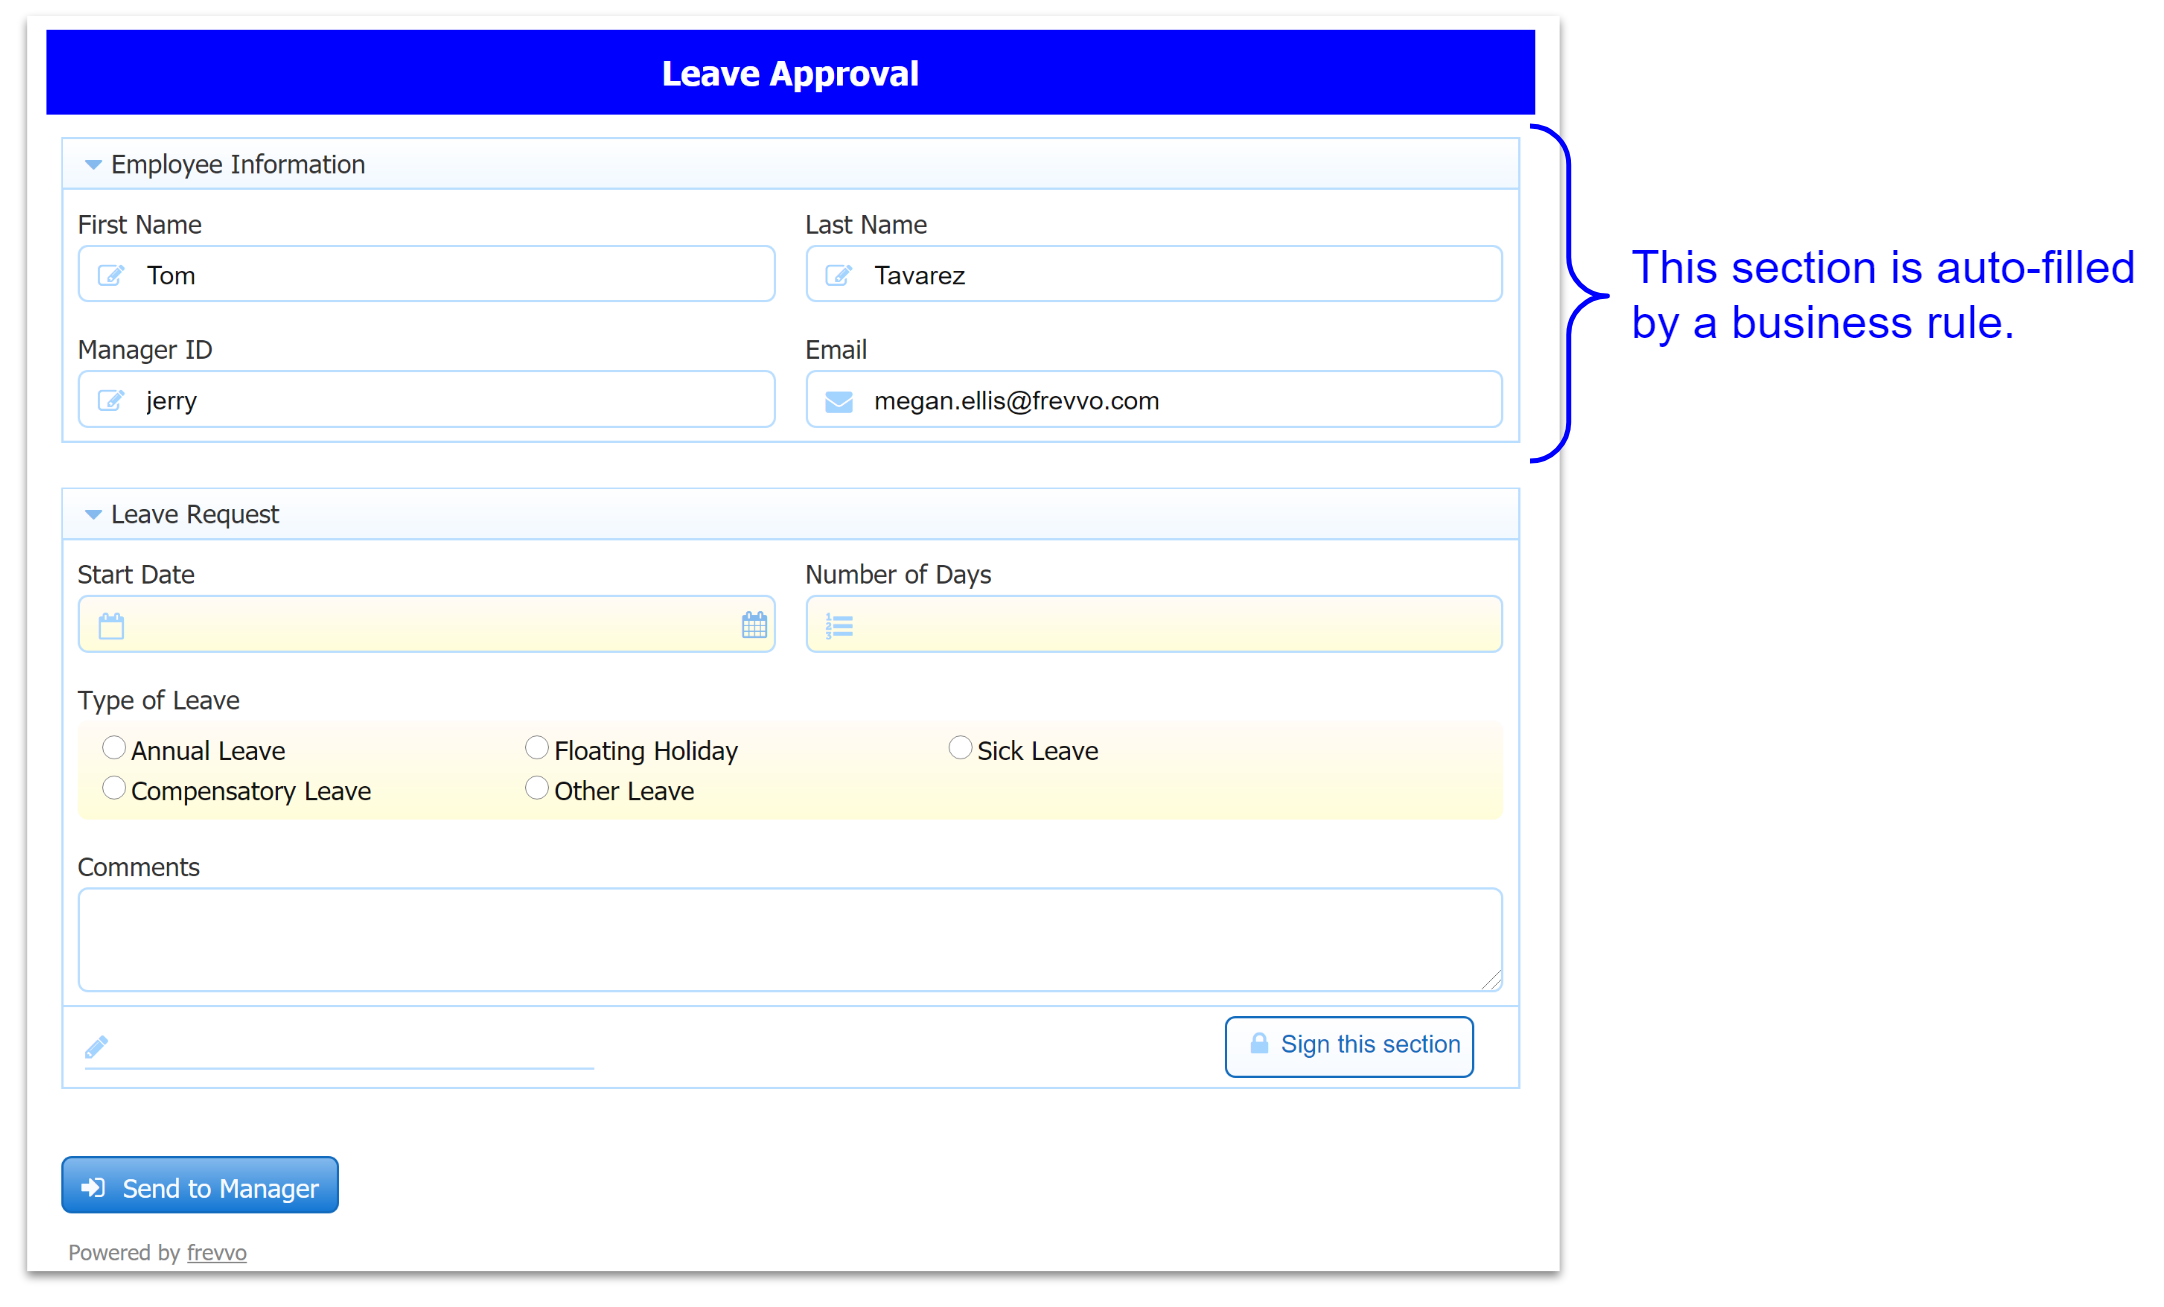
Fill in the fields in the 1st step, remember to sign and click the Send to Manager button to route the workflow to the Manager for approval.
Tom should see the customized pending message that you set up on the manager activity in the workflow.
...
Related Topics
...