Create a Dynamic Pick List from a Google Sheet
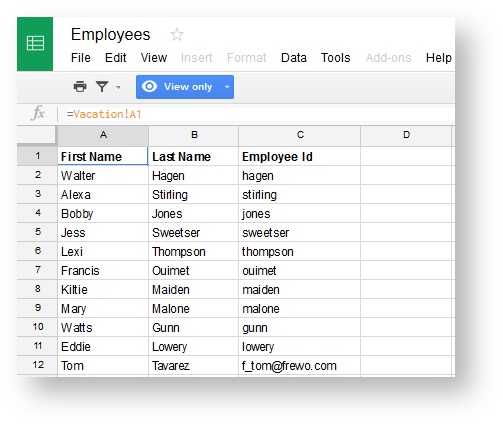
Let's take a look at populating dynamic pick lists (drop downs) using a frevvo business rule. It’s a very common scenario and, with frevvo, you can use business rules to dynamically initialize the options (choices) in a pick list from a Google Sheet. We’ll use this sample Google Sheet to discuss. It has a row for each employee: First Name, Last Name, Employee Id.
Rule syntax and best practices to follow are discussed in the Writing Rules to Retrieve and Update Data in a Google Sheet topic.
Step 1: Obtain an access token
If you do not have an access token for your Google Account, perform this one-time step.
Follow these steps to obtain your Google Account token.
Login to your Google Account
Go to:
Cloud customers: https://app.frevvo.com/google/consent
- In-house customers: http://<your frevvo server domain name>/google/consent
Click Allow if you see a screen like the one below (Google often updates their UI so this may differ from what you see).
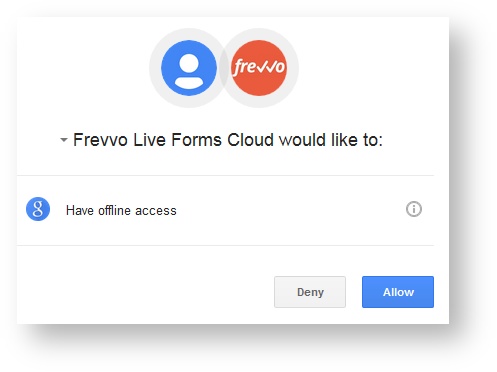
Copy the access token. Save it to a safe location, you will use it when configuring your forms/workflows.
- You must obtain a Google access token for every Google Account you wish to use with your forms/workflows. Repeat steps #1-4 above for each Google Account.
- In-house customers with multiple servers must obtain Google Access Tokens for each server / Google Account.
- Google limits the number of access tokens per Google Account. If the token limit is exceeded, older refresh tokens stop working.
- Google may revoke Access Tokens unused for ~6 months. If this happens you must obtain a new token and update your forms/workflows.
Step 2: Add the Business Rule
Use a rule to read information from the Google Sheet and populate the employee pick list. Here’s the relevant business rule:
Escape the slash characters in your OAuth token with a backslash in the rule below like this: OAuth21\/\/<###...>
/*member employeeid, firstname, lastname, password, user, results*/

var x;

if (Connect.clicked) {
  var headers = {"user":"<google id>","password":"<access token>"};
  var readquery = '/google/spreadsheets/query/key/<your spreadsheet key>?wsname=<the name of your worksheet>';

    var results = http.get(readquery,headers);
    GSResults.value = results;
    eval('x=' + results);

    var opts = [''];
    if (x.results) {
        for (var i = 0; i < x.results.length; i++) {
            if (x.results[i].employeeid) {
                opts.push(x.results[i].employeeid + '=' + x.results[i].firstname + ' ' + x.results[i].lastname);
            }
        }
    }
    EId.options = opts;
}
- It’s triggered by clicking on the Connect button.
- We set up headers and a query using your access token and spreadsheet key (the long ID in the URL of the Google Sheet).
- Run the query – perform an http.get() and eval the results.
- Parse the results into an array. The array elements are “hagen=Walter Hagen” etc.
- Set the options to the array.
The column name on a Google sheet must match the control name. The matching is case-insensitive and any spaces in the column name are ignored. A control named "FirstName" matches a column header "first name." However, references to Google Sheet columns in your rule must be lower case and cannot contain spaces. The correct reference for this example is "firstname."
Step 3: Try it yourself
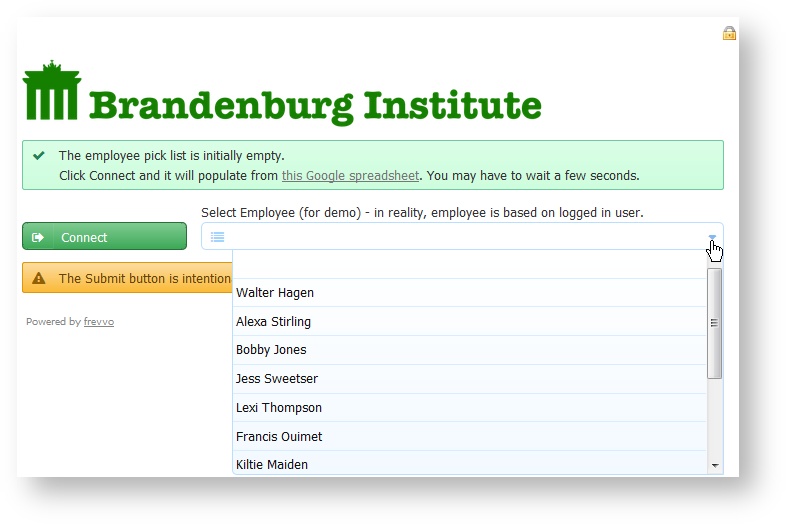
You can try it yourself by clicking this link or clicking on the image.
- The pick list will display the actual names (Walter Hagen, Alexa Stirling, etc.) whereas the values returned upon selection will be the ids (hagen, stirling, etc.) so it’s easy to perform further lookups.
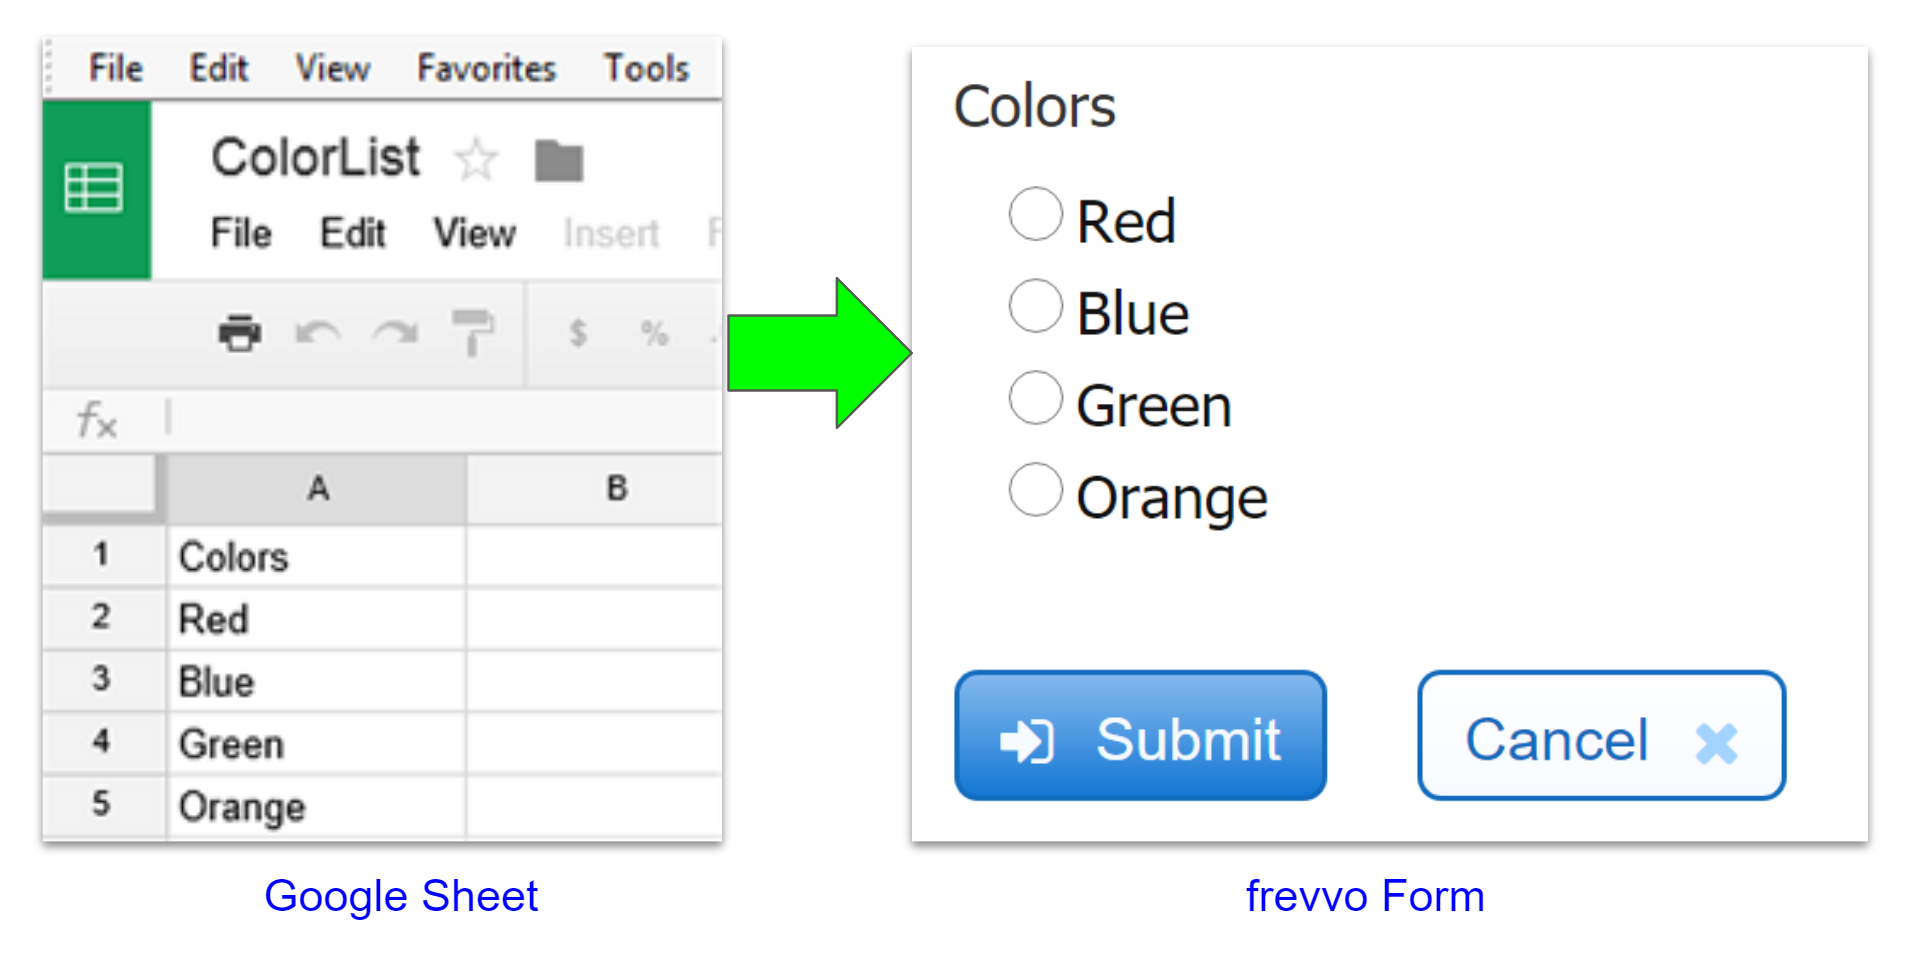
Populating Checkbox or Radio Options from a Google Sheet
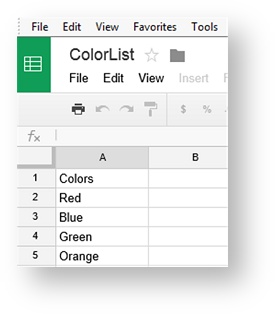
Here is another example of a simple rule that populates a Checkbox or Radio control named Colors with color options from a Google Sheet.
- Create a Google Sheet with a column named Colors containing a list of colors.
- Create a Form with a Checkbox/Radio control named Colors.
Use this rule to populate the Checkbox/Radio options with the colors Red, Blue, Green and Orange. Note this rule uses http headers to provide authentication information. The Google Sheet is identified by the spreadsheet key and the worksheet name is passed as a query parameter. This is the recommended approach.
Replace <Google User ID> and <Google Account access token> with your information in the user and password headers.
Change <your spreadsheet key> to the key for your Google Sheet and <the name of the worksheet> to reflect the name of the worksheet tab in your Google Sheet.
- The rule executes when the form loads and performs an http.get() then evals the results.
- The results are parsed into an array. The array elements are red=Red, blue=Bue, green=Green and orange=Orange
- The Color Checkbox/Radio control options are set to the array.
/*member colors, password, user, results */
var x;
if (form.load) {
var headers =
{"user":"<Google user Id>","password":"<Google Account access token>"};
 var readquery = '/google/spreadsheets/query/key/<your spreadsheet key>?wsname=<the name of the worksheet>';
    eval('x=' + http.get(readquery,headers));

   var opts = [];
   if (x.results) {
     for (var i = 0; i < x.results.length; i++) {
       if (x.results[i].colors) {
         opts[i] = x.results[i].colors;
       }
     }
   }
    Colors.options = opts;    //Colors is the name of the Checkbox/Radio control
}