| Table of Contents |
|---|
This page discusses the various types of workflow steps available in in frevvo, as well and when and how to use them.
...
- Select Step Type "New Form".
- Provide a Step Name (this will also be the Form Name). If you do not add a name, will frevvo will generate a unique and arbitrary name, i.e. Step 29. You can change the name in the Step Properties: Settings tab.
- Choose an Assignment Type.
...
- Select Step Type "Approval" (comes with approval sections and rules) or "Linked" (does not add any controls or rules).
- Give the step a name; if you do not provide a name, will frevvo will automatically name it <Parent Step Name> Copy.
- Select an Assignment Type.
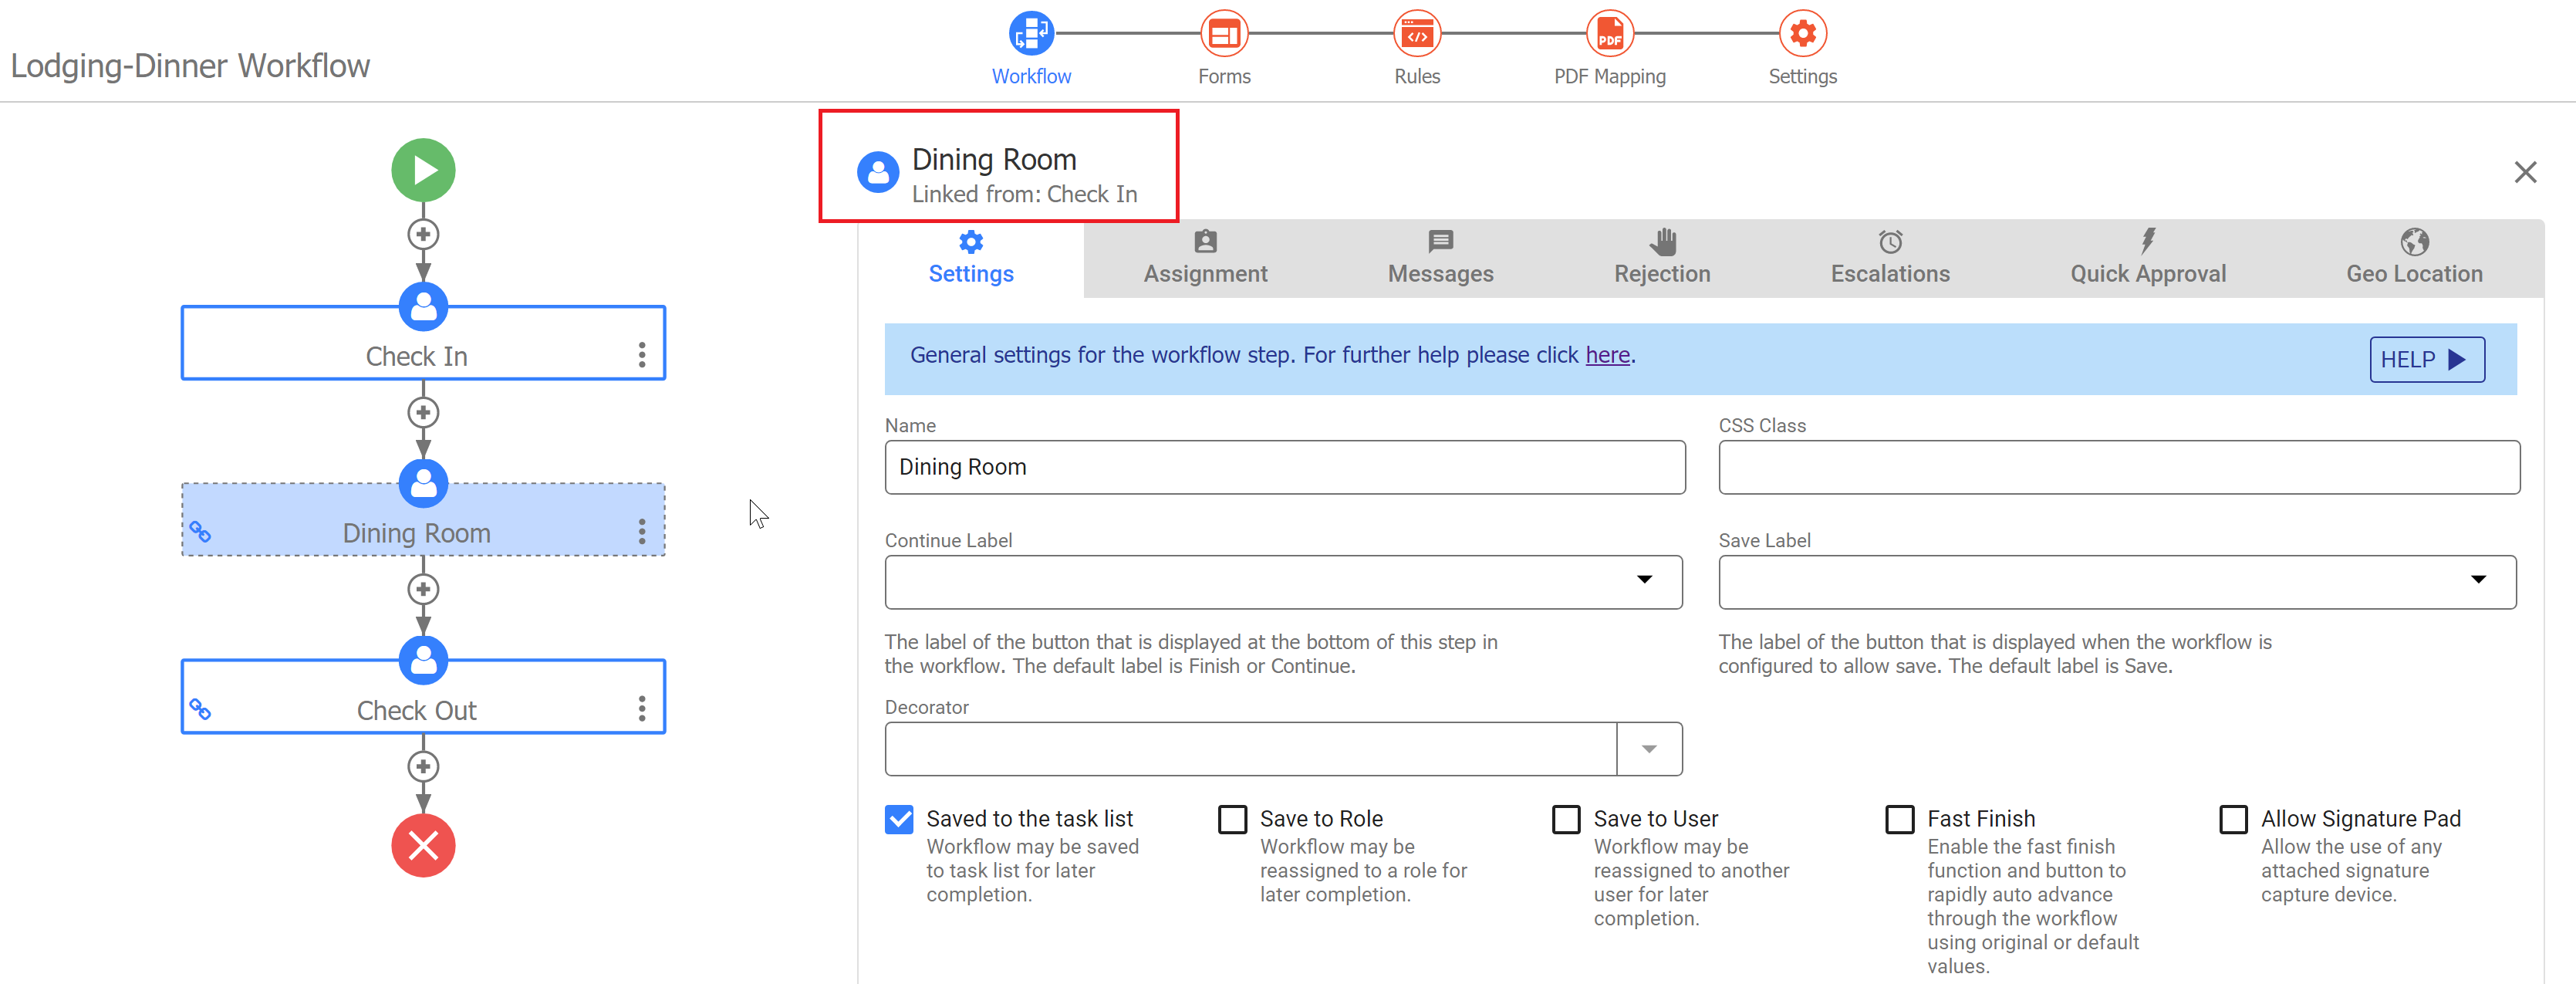
The new step will appear on your workflow diagram and the Step Properties will open on the page. The Step Name and "Linked from: <Parent Step Name>" are listed above the Step Properties wizard.

Linked Steps Workflow Example
Approval workflows lend themselves to a Workflow Design pattern that uses Linked Steps. Any changes made to the parent form propagate to the linked steps. The The frevvo Workflow Design Wizard is ideal for creating workflows with linked steps.
...
- Select Step Type "HTTP Wait-Notify".
- Optionally, add a Step Name. If you do not add a name, will frevvo will name the step "HTTP".
The new step will appear in your workflow, and the HTTP Step settings wizard will open on the page.
Consider this scenario. Your company has a purchase process workflow. One of the steps in the workflow requires approval from several other approvers before the workflow can continue to the next step. These approvals should happen in parallel and not one after the other. A web component that would manage those approvals is in place. An HTTP step can be added to the frevvo workflow with a URL to the web component to collect the signatures. The callback URL will be included in that post. The workflow frevvo workflow will be suspended until all the signatures are collected. The remote web component will notify the frevvo workflow using the callback URL when the signature task is completed. If the HTTP step in the workflow has doc actions configured, they will be performed and the workflow will proceed to the next step.
...
The Summary step type will simply display a summary view of all the data that has been entered into the various steps of the workflow prior to the Summary step at runtime. Clicking on the Details button navigates to the selected step for viewing/editing. The designer selects the fields that display on the Summary Step in the Guided Design:Settings mode Summary Fields tab.
To add a Summary step, click the + icon in the place you want to add the step. This launches the Add Step wizard.
- Select Step Type "Summary"
- Optionally, add a Step Name. If you do not add a name, will frevvo will name the step "Summary".
The new step will appear in your workflow, and the Summary Step settings wizard will open on the page.
Previously completed steps in a workflow can be viewed by all users but editing data is only allowed for the user that initiated the workflow. For example, if the Summary step is part of a screenflow performed by the same user, editing is allowed when this user clicks on the Details button. Once the workflow navigates to a different user, previous steps are rendered read-only and cannot be edited. Refer to Workflow Processing Modes for more information.
The Print button is available on Summary steps by default. Refer to Printing Workflows for the details. The designer can specify a CSS class, a Button label and a Decorator for the Summary step on the Settings property tab.
Existing Forms
You can also add a form you have already created and which is listed in your current project's forms home page. Adding an existing form to the workflow creates a copy of that form. If you later edit the standalone form, those changes will not affect the step in the workflow. It remains as it was at the time you copied it into the workflow. If you want to update the workflow to have a new copy of the form, delete the step from the workflow and re-add the updated form.
...
One common design pattern is a workflow with multiple separate forms where you want data entered on one form to be visible on another form. In this case, the natural the frevvo natural behavior of merging data based on Control Name is very helpful. If you have a control with the same name (and, if applicable, nested section name) on Form A and Form B, data entered on Form A will be visible on Form B. However, if the value is edited on Form B, the new value will overwrite the original value in the final submission. A best practice is to disable the control on Form B making it read-only. Please review the Form Control Names & Schemas section below for additional details.
...
When you create a workflow, creates frevvo creates an XSD schema of the workflow that combines all the fields in all the forms in the workflow.
...
When designing the forms you want to use in a workflow, be aware that if controls in different forms have the same name, their data will merge in the XML document that generates frevvo generates when the workflow runs and is submitted. While the Form Designer automatically prevents you from giving two controls the same name within the same form, it doesn't prevent you from giving controls in different forms the same name.
...