Go to your form/workflow's Settings tab in the Guided Designer Navigation bar.
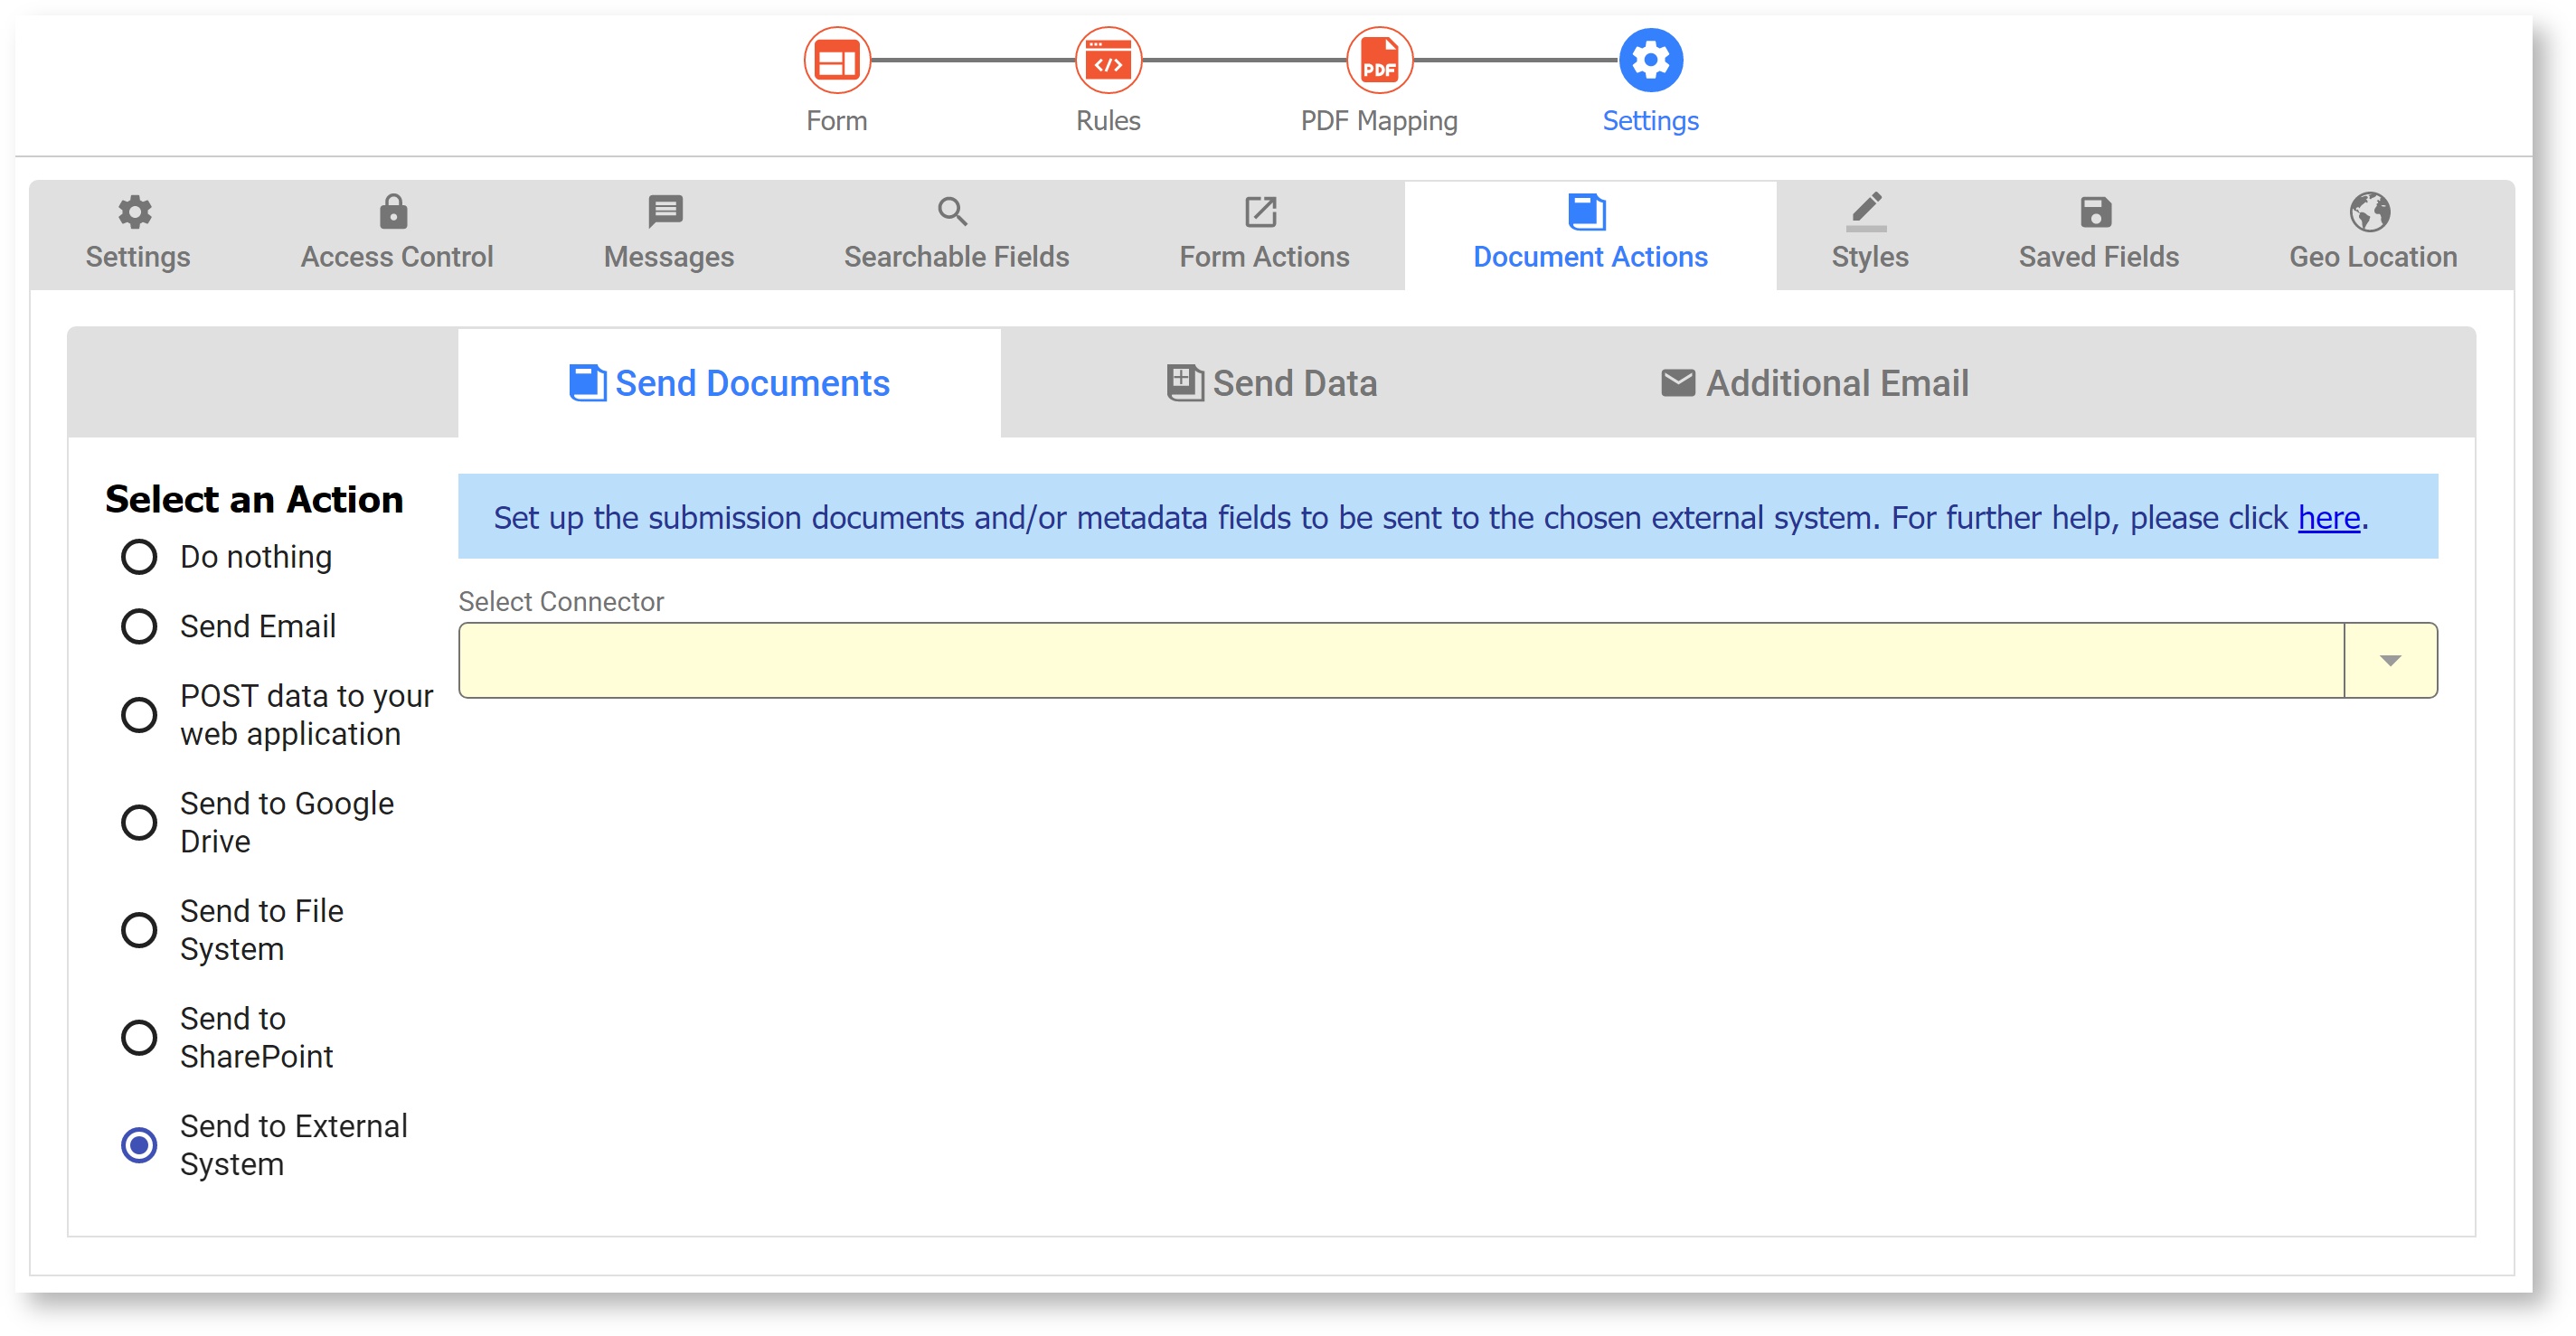
Click the Document Actions tab. You will automatically be on the Send Documents sub-tab. Select Send to External System.
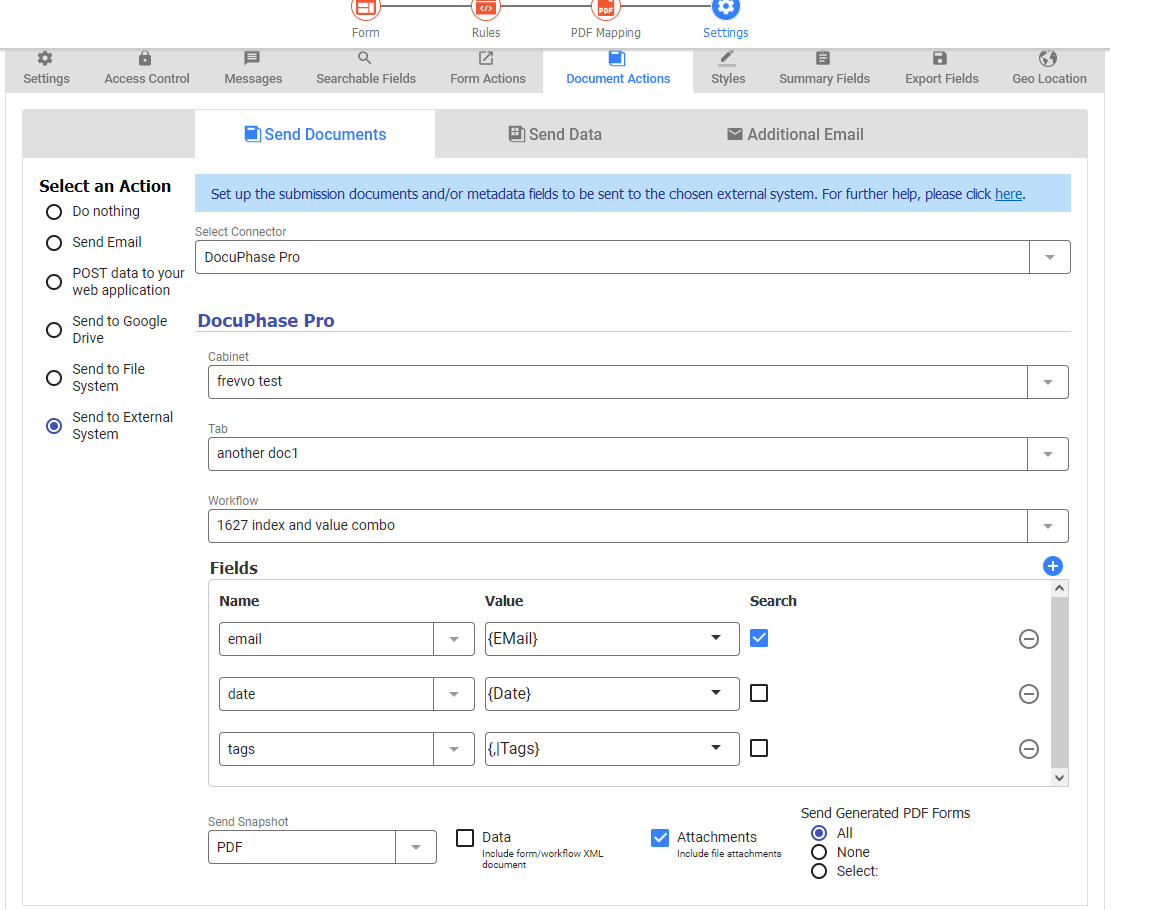
Select DocuPhase Pro from the Select Connector dropdown. The DocuPhase Pro Wizard will open.
Select a DocuPhase Pro cabinet from the dropdown.
Optionally, select a Tab from the dropdown. Tabs are also known as Document Types in DocuPhase Pro.
Optionally, select a workflow that will run when the submission is posted.
Add metadata Fields. Click Add to add rows.
In the first column, select the target field in your DocuPhase Protab. Each time you add a row, only the remaining available fields will display so you cannot accidentally map a field twice. One Once all available fields are mapped, the add button is disabled. If you wish to delete a row for any reason, simply click the Delete icon to the right of that row to remove it.
In the second column, add the value you want to send. At least one index field is required. To use a field from your form, type an open curly brace '{' following by the first few letters of the control name. Then, select the control name from the dropdown.
You can optionally select which field to search existing folders by. If none are selected, a new folder will be created. If the folder matching the values is not found, a new folder will be created.
Info
title
Repeat Controls
Multivalue fields like checkboxes and repeats are supported. The recommended approach is to use the template syntax for a comma-separated list, e.g. {,|controlname}.
Select any attachments you would like to send, such as the PDF Snapshot (set by default), the submission xml document, any attachments uploaded by the form user, and any mapped PDFs.