| Section | |||||||||||
|---|---|---|---|---|---|---|---|---|---|---|---|
|

...
- form.load : This event is occurs when a form or workflow step loads for the first time. It is useful for setting default values via rules that you need to be set before the user starts interacting with the form.
- form.unload : This event is true when users click the form's Submit or a flow's Continue button. It is useful for setting control values just prior to the execution of the form's Doc Actions and Form Actions. If you have a rule in your form that changes any control(s) after clicking Submit, thereby making the form invalid, the form will no longer be submitted and the invalid form will redisplay. Form and Document actions will not execute, PDFs are not generated, invalid controls become highlighted as expected and form.unload output displays in the debug console.
- form.positionUpdated : This event is used for the Geo location feature. You can fire a rule using this special identifier every time the position is updated.
- form.activate: This event indicates that a flow has navigated to a step. If form.activate is true, the workflow just moved to a step. Use the _data.getParameter to determine what step that is.
- form.deactivate: This event indicates that a flow has left a step. If form.deactivate is true, the workflow just left a step. Use the _data.getParameter to determine what step that is.
form.load vs form.activate
...
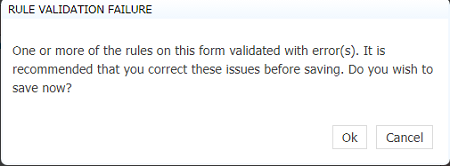
When you are designing a form/flow with many objects and a lot of business rules, reduce the number of page reloads when switching between the designer view, rules view, and the test view by clicking the save and test icon. Save and Test checks for Rule errors before the test popup displays. If rule validation errors are detected, the designer is notified and given the option to correct before the Test popup is displayed.
...
The validator also supports global directives. Use the global directive to identify additional global objects and functions defined in the execution environment and made available to the rule for which it is not appropriate to include a var statement in the rule code itself. One directive can be used to list all additional globals on a single line. Currently there are no known cases requiring the use of the global directive.
Rule Editor Functions
The Rule Validator includes an enhanced editor designed to provide an easy experience when developing rules.The rule editor box includes the following features:
| Features | Description |
|---|---|
| Line Numbers | Line numbers in the rule code editor make it easier to correlate reported validation errors with the line of code. |
| Bracket auto close | Type a {, ( or [ and the closing bracket is automatically inserted. |
| Match Bracket | Place the cursor on a bracket and both it and the matching bracket are shown in a matching distinctive color (green). |
| Syntax Hi-lighting | JavaScript syntax hi-lighting with keywords, variables, comments, etc. shown in distinctive colors. |
| Auto Indent | New lines are auto-indented according to generally accepted code formatting rules. |
| Code Folding | Bracketed code blocks (functions, if-then-else blocks, etc.) are collapsible. Click the |
| Full screen edit mode | Expand the editor to full screen mode if you need more space to work. Click the |
| Auto Complete/Hinting | When composing a rule, the designer can pick from a list of available controls and their properties directly within the rule editor. The pick list is context sensitive and will behave differently based on where the cursor is located when it is invoked. When on a blank space or immediately following an open bracket/brace, it can be manually invoked using Ctrl-Space to bring up a list of controls. Typing a dot (.) immediately after a control name or after the index ("[i]") that follows a control name will automatically bring up a context sensitive pick list of properties applicable to that control for selection. You can type the first letter of the item you are looking for and the property starting with that character will be highlighted in the list. Continue typing and the matching options will progressively narrow to the characters typed. Double click your choice using the mouse or press the Enter key to select an item. Any other key dismisses the pick list. . See the example below. |
| Help | The help icon displays a small help window listing the hot keys described above - (F2, ESC and Ctrl-Space) |
...
Follow these important points when writing your rule:
Your rule can set minOccurs to 0 even if the design time setting > 0, but you cannot set minOccurs to a value which is greater than the current maxOccurs.
Your rule can set maxOccurs to a value that exceeds the design time setting, but you cannot set maxOccurs to a value below the current minOccurs value.
Repeat items and table rows are added if your rule increases the Min# property and are removed when the rule decreases the Max#.
- Added rows due to increase in Min# will trigger the itemAdded property.
- This feature can be used for schema controls, but min/maxOccurs values have to be set within the limit given in the schema. For example, if the schema has text control defined with minOccurs=2 and maxOccurs=100. We cannot set minOccurs less than 2 and max greater than 100.
...
Security Subject Information from LDAP
LDAP supports both the standard subject attributes and custom attributes. When a user is successfully authenticated by the LDAP security manager, Live Forms automatically retrieves Last Name, First Name and Email Address for this user from the LDAP server. You can retrieve custom attributes in addition to the standard ones from Active Directory and pull the data into your form/flow using business rules.
...
Attributes with more than one value are also supported. For example, The carLicense attribute can return multiple licenses. You can write a rule to populate dropdown options with those values. Make sure the carLicense attribute is added to the custom field on the LDAP Configuration screen and of course, there are multiple carLicense attributes, each one containing a different value for the dropdown options, set up for appropriate users on the LDAP server.
...
| Note |
|---|
The manager attribute maps to the built-in data - subject.reports. to. This means you can retrieve this value in a rule or use subject.reports.to for flow navigation if you configure the manager attribute in your LDAP tenant. |
Execute a Rule on a Specified Workflow Step
...
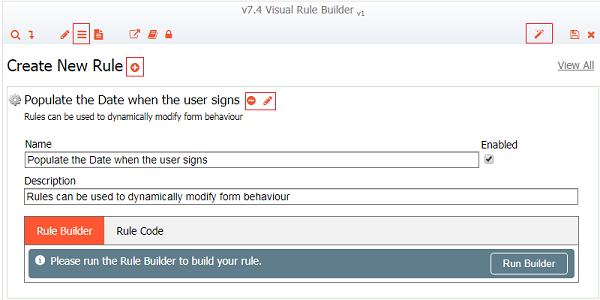
Click the View All button to display all the rules in your form/flow. Then use a browser search (Ctrl+F) to highlight all the places in your rules where a particular search item is mentioned. For example, if you were looking for all the rules that set the required property for a section, search for 'SectionName.required' (replace SectionName with the name of your section ) . This view might be helpful when correcting errors reported by the Rules Editor.
...