Live Forms v7.4 is no longer supported. Please visit Live Forms Latest for our current Cloud Release. Earlier documentation is available too.
Visual Rule Builder
- Former user (Deleted)
- Megan Ellis
- Former user (Deleted)
The Visual Rules Builder enables non-technical designers to add dynamic behaviors to a form/flow. Here are several behaviors that you can create:
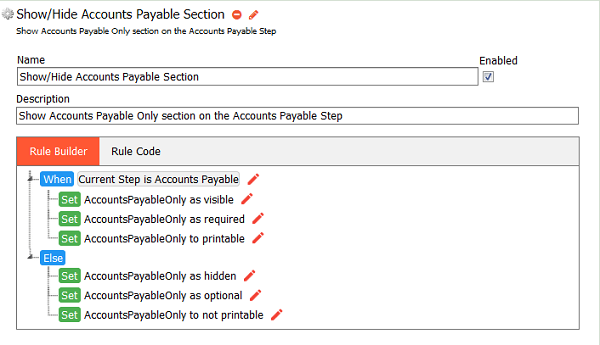
- Show/Hide a Control(s) based on a specified condition
- Show/Hide Steps in a flow based on the step that the flow is currently executing
- Dynamically setting default values and control properties such as valid, printable, required and more.
Compute a Subtotal and Total
Populate fields with the logged in user’s information
Concatenate field data
Populate a Date field when the user signs
and much more....
Watch this webinar for an overview of how to create dynamic forms/flows without writing code.
On this page:
When Do Rules Execute
Business Rules are executed under the following conditions:
- When the form/flow loads.
- When a control's value that the rule depends on changes.
- When you add a row to a Table control or click on the
 icon to add a repeating item.
If you want your rule to run Only when the form loads - check the Initialization Only checkbox at the top of the wizard. Typically, you would check this if there is some business logic that you want to execute before the form/flow displays and users begin interacting with it.

When the rule displays in the Rule Builder tab, it will indicate that the rule has been flagged to run only when the form loads, if this checkbox is checked. 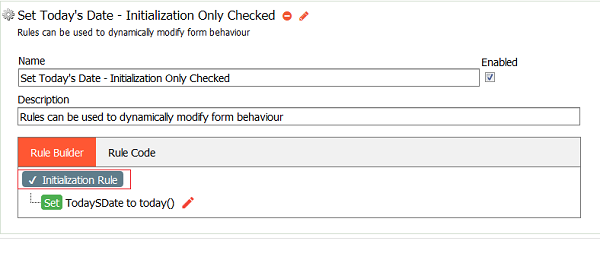
Rule Builder Wizards
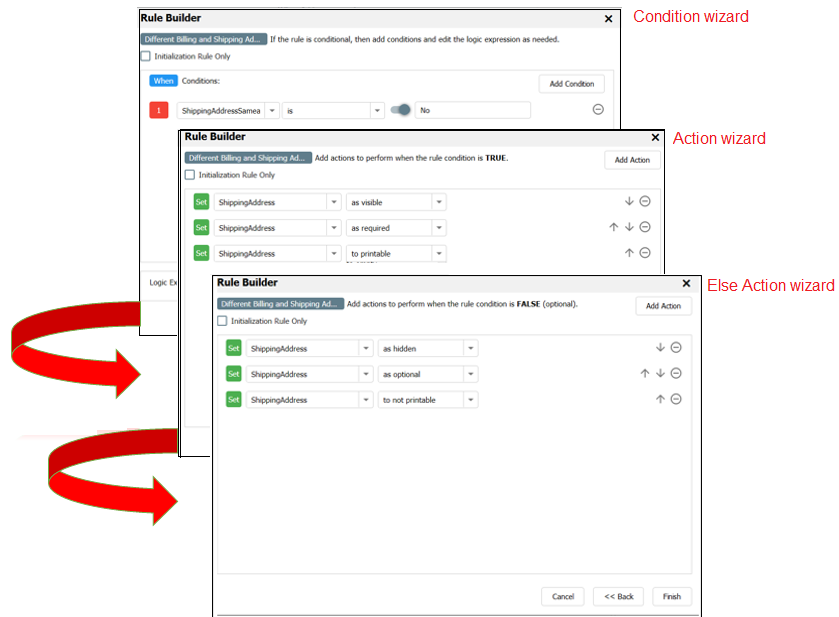
The Rule Builder walks you through three easy steps to define your condition and actions.
Condition wizard
Describe the conditions under which a set of actions should be executed. You can specify more than one condition in the same rule but you do not need a condition.
Each condition consists of the following:
| Part | Description |
|---|---|
| Field or current step (Optional) | What field or current workflow step do you want to evaluate?
|
| Operator | What condition do you want to test to see if it is true? Select to from the choices to use an expression or function in your rule |
| Value (Optional) | What value do you want to compare the Field or current step to? What function/operator do you want to use to build the expression? |
Builtin Functions --- NO CODE!
The following functions are available in the Rule Builder for building expressions. Function names may be entered in any case (case insensitive).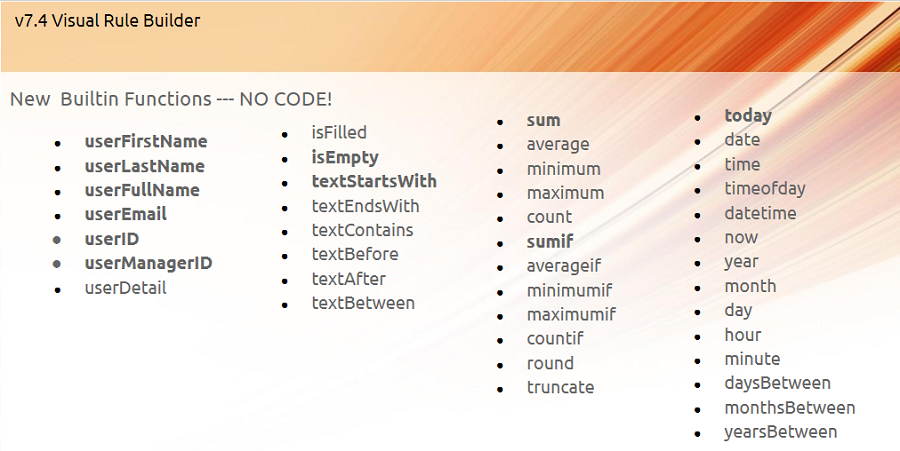
Functions are entered into the Enter an Expression field in the wizards.

This field has two modes:
- Lookup Mode
- Help Mode
Lookup Mode
Lookup mode displays functions and controls from your form/flow. The functions matching the typed text are displayed first followed by the form/flow controls.
Lookup Mode is triggered as you enter text in the Value fields of the wizards. 
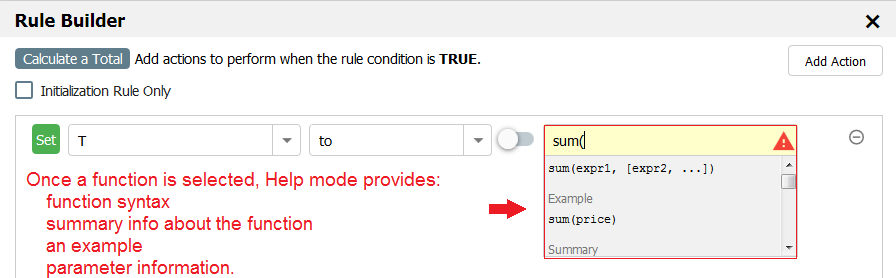
Help Mode
Help mode shows help text for the function in the dropdown area. The help information includes:
- function syntax
- summary info about the function
- an example
- parameter information.
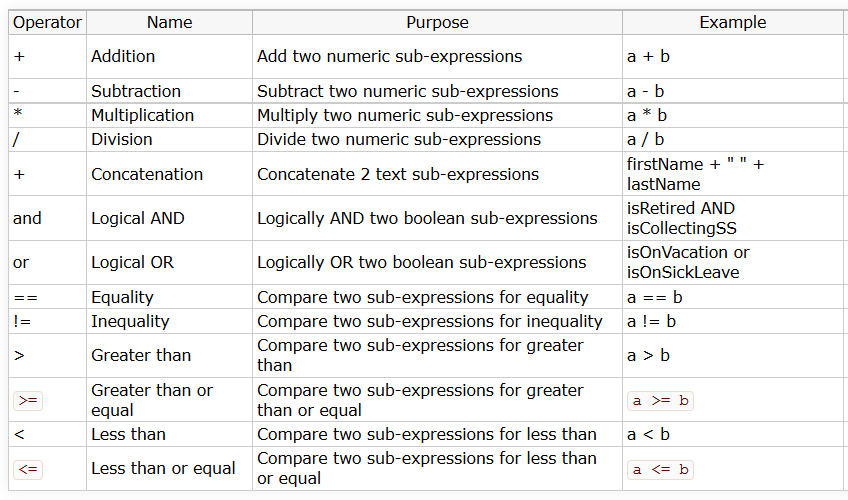
Operators
Use these operators to build useful expressions
Action wizard
Declare the actions that should be taken when the condition is true. The Functions/Operators listed above can also be selected as the value in this wizard.
Else Action wizard
Declare the actions that should be taken when the condition is false. The Functions/Operators listed above can also be selected as the value in this wizard. Else Actions are optional as not all rules require them. You cannot add FALSE actions if you do not have a condition specified in the rule.
Add A Rule
- Click the Run Builder button.
- Click the Add Condition button to create a new condition (optional).
- Select your Field or select current step to describe an action that will execute based on the workflow step currently executing.
- Select the Action from the dropdown.
Select the Value, expression or function(optional). To enter a text value, slide the
 toggle switch icon to the right and a field displays to the right.
If current step is selected as the condition for a workflow designed using Linked Steps, the value dropdown displays the names of the linked steps as choices. Workflows designed with individual forms as steps (not linked) will only show that step in the current step value dropdown.
For example,
- If you have one form (named form A) in a workflow, you will only see form A listed in the current step value dropdown,
- If you add 2 linked steps (named form B and form C), the current step value dropdown lists all 3 steps: form A, form B and form C.
- If you add form D (not linked) to the workflow, form D will not be listed in the current step value dropdown for form A
- Click Next to advance to the Action wizard.
- Specify the actions to be taken if the condition is true.
- Click Next to advance to the Else Action wizard
- Specify the actions to be taken if the condition is false.
- Click Finish.
- Save your form/flow.
- Click the Save and Test icon
 to verify that your rule is working as expected.

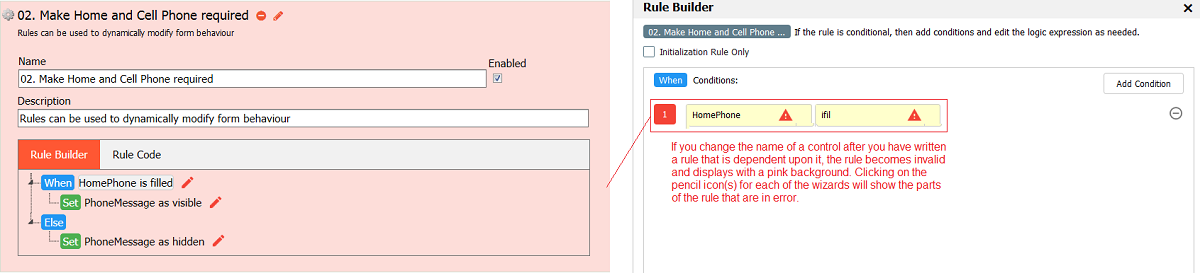
Modify a Rule
Once completed, the entire rule can be viewed in the Rule Builder tab.
- Click the
 pencil icon on whatever part of the rule you want to modify.
 - Click the up and down arrows on the right side to change the order of conditions and actions.

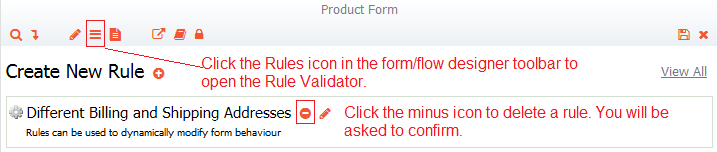
Delete a Rule
- Click the
 icon in the Rules Validator next to the rule you want to delete. You will be asked to confirm.
Multiple Conditions in a Rule
The Rule Builder allows you to create a rule that has more than one condition. You can write a rule that performs actions based on the values of more than one field. As you select conditions, a logic expression is built and displayed at the bottom of the screen. Notice the expression uses the AND operation by default. There may be business rules that require a change to the logic expression.
- The (AND operation) means that All of the specified conditions must be true before the actions set up in the Action Wizard are executed.
- Change the (AND operation(s)) to (OR operation(s)) if only one of the conditions needs to be true before the actions are executed.
- Group parts of the logic expression using parentheses if necessary.
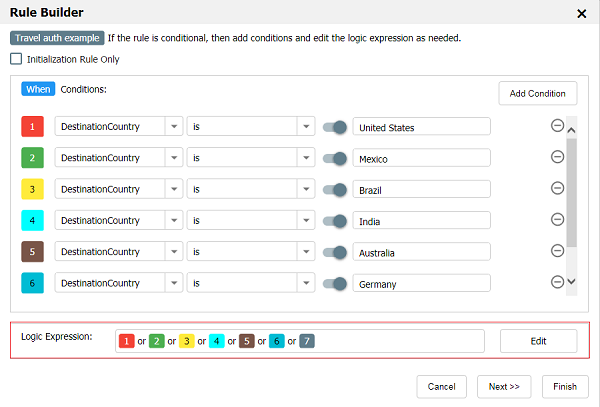
A Travel Request workflow contains a field where the user selects a destination country from a dropdown. Countries that call their subdivisions "states" are: United States, Mexico, Australia, Brazil, India, Germany and Myanmar.
The business requirement for this rule is: If any of these countries are selected, a Destination State field is enabled so the user can enter the Destination state. Otherwise, the Destination State field is disabled.
The Condition wizard for the business rule is shown in the image. Note that each condition is assigned a color coded number that is reflected in the logic expression. The logic expression is built with the and operator by default. Since we want the rule to execute when any of the conditions are true, we must change all the and operations in the logic expression to the or operation.
Switching to the Rule Code Tab
Rules created with the Rule Builder are automatically converted to JavaScript and co-exist with existing JavaScript rules. Of course, you can still add JavaScript directly or edit the generated code to make manual changes to your rule once you have created it with the Rule Builder.
- Click the Rule Code tab then click on Edit Code tab to add/edit JavaScript.
Clicking the Edit Code button permanently disables the Rule Builder for this rule.
Future Releases of the Visual Rule Builder
We’re constantly working on improving our product to reduce the need to write code. Making JavaScript rules easier is one of the highest priority items.
This version of the Visual Rule Builder does not currently support screenflows that use the Navigation toolbar to move back and forth between screenflow steps.
Examples
The Rule Examples chapter shows you how to use the Visual Rule Builder to create common rules for real world situations.
- The User Info, Numeric, Boolean and Date/Time functions, added to the Visual Rule Builder, are not available in the Precondition Rule Builder. Only the following operators are supported in precondition expressions:
- + (add and concat)
- -
- * (multiply)
- /