frevvo v10.2 is no longer supported. Please visit frevvoLatest for our current Cloud Release. Earlier documentation is available too.
Spaces
- Former user (Deleted)
- Megan Ellis
A space is a web site that organizes and displays projects, forms, workflows, tasks, etc. A space has a tab for each project, and each tab has a drop-down list of the deployed forms/workflows in that project. Forms/workflows with a visibility of public in tenant or private appear when the user logs into
. When you click on a form or workflow name, the space opens the form in the page. A space also has a home panel and two optional panels at the left and at the bottom of its page. You can edit the content of any of these panels; you can also choose not to include the optional panels. You can apply a style to a space as you do to forms/workflows. The selected style will be propagated to forms, workflows and the Task List.

Spaces can be used to simplify accessing forms/workflows/Task List from your iPhone or iPad. You can add thumbnail icons to your forms and workflows and the space will display on mobile devices.

Each designer user in a tenant can create, edit, and delete his or her own spaces. You can share the URL to a space with others inside or outside your organization.
If you share a space, you are essentially creating a website — anyone who has the URL can view the space. Whether or not someone can actually open a form or workflow and use it depends on the Visibility property of the form. A form or workflow must be Public for anyone to use it. An outside user will be blocked if he attempts to open a non-public form, and may even lose his session credentials with the space. Forms/workflows must be deployed to production for them to automatically appear in an project tab menu. If the visibility of a form is restricted to a specific role via the ACL feature, the form/workflow will not appear on the space menu unless the logged in user has been assigned that role or they are the designer.
A form action display message formatted using html tags will not work like they do in your own customer web site. XHTML in the display message is currently unsupported in spaces.
Notice the First and Last Names of the logged in user appear in the upper right corner.
Create a New Space
When you create a space, creates a tab on the space for each of your projects and also adds Task List, My Account, Shared Items, Home and Login/Logout tabs. Refer to the 1063405527. The project tabs display a list all of all currently deployed forms/workflows in that project; undeployed forms and workflows are not included. For testing purposes, forms/workflows with a visibility setting of private are added to the space menu if the user is logged in as a designer. A form/workflow with a visibility set to "Authenticated Users (login required)" cannot be accessed unless the user logs in to the
tenant. If the visibility of a form/workflow is restricted to a specific role via the ACL feature, the form/workflow and it's associated tab will not appear on the space menu unless the logged in user has been assigned that role or they are the designer. If a project has no forms/workflows,
doesn't create a tab for it.
You create a new space from the spaces home page.
- Log in as the designer, and then click on Spaces.
Click
 Add to create a new space, enter a Space ID. The Space ID must be unique, start with a letter, cannot contain spaces or special characters and cannot exceed 16 characters. Non-ascii characters are not supported in a space id.
Space IDs must be unique. If a duplicate Space ID is found you will see this message.

- Enter a Space Name - this name will display in the top right section of the space. The Space Name should not exceed 50 characters but you can type spaces here.
- Click Create.

will bring you directly to the Space Designer where you can begin editing your space. The new space is also added to the list on the Spaces home page.

The spaces home page lists any spaces that you've already created. On this page, you can:
- Click Add to create a new space.
 Sort the space list alphabetically (A-Z or Z-A)
- Use the
 Action menu:
  Edit edit a space. You can also go directly to the space editor by clicking the name of the space.
 Test a space.
 Share a space.
  Delete an existing space.
The space will not automatically pick up changes such as newly deployed forms/workflows.
If you add or remove projects or add or remove forms or workflows from projects, and you want to update the space that contains them, a quick way to do that is to delete the old space and create a new one. You can use the same name as the original space. The new space will contain all your current projects and all deployed forms and workflows. Customization made to the space, such as adding your logo or HTML, will have to be redone. If you do not want to redo your customization, 1063405527 manually.
Relative URLs
Menu items are created using URLs relative to the project root, i.e. /frevvo/web/… The use of Relative URLs can help avoid issues that might be cause by hardcoded hosts, protocols (http vs https) and ports and improves portability. It is the recommended best practice to use Relative URLs when 1063405527.
When you create a new space, you will see:
* Important Items
** Task List|/frevvo/web/tn/mycompany/subject/(subject.id)/tasks?embed=true
** My Account|/frevvo/web/tn/mycompany/subject/(subject.id)/profile?embed=true&edit=true
** Shared Items|/frevvo/web/tn/mycompany/subject/(subject.id)/shared?embed=true&hidenav=true
*HR
** Expense Report|/frevvo/web/tn/mycompany/u/8aa27da6-4bef-427c-92e3-6ad8d58e506a/space/v73space/home?embed=true
instead of
 Important Items
** Task List|https://app.frevvo.com:443/frevvo/web/tn/mycompany/subject/{subject.id}/tasks?embed=true
** My Account|https://app.frevvo.com:443/frevvo/web/tn/mycompany/subject/{subject.id}/profile?embed=true&edit=true
** Shared Items|https://app.frevvo.com:443/frevvo/web/tn/mycompany/subject/{subject.id}/shared?embed=true&hidenav=true
*  HR
** Expense Report|https://app.frevvo.com:443/frevvo/web/tn/mycompany/u/8aa27da6-4bef-427c-92e3-6ad8d58e506a/space/mycompany/home?embed=true
You may also notice that Share links for the Important items now show parenthesis instead of curly braces. You will see the parentheses in any newly created space. Tomcat 8.5 doesn't allow curly braces in URLs since they are not valid URL chars and deemed a security vulnerability. frevvo currently supports parenthesis as well as curly braces, however, support for curly braces {} will be dropped in a future releases . Use parenthesis () moving forward.
Edit a Space
Click ![]() Edit (or click on the name of the space) to display the space editor. The editor displays your space as it will appear if you share it with others. The editor also includes a Properties panel at the left of the space, a toolbar at the top with
Edit (or click on the name of the space) to display the space editor. The editor displays your space as it will appear if you share it with others. The editor also includes a Properties panel at the left of the space, a toolbar at the top with  Finish and
 ![]() Cancel icons, and editing tools you can use for the three panels in the body of the space, the logo area, and the project and Task List tabs.
Cancel icons, and editing tools you can use for the three panels in the body of the space, the logo area, and the project and Task List tabs.

Edit Space Properties
Use the Properties panel to edit the the space Name, choose a different Width, or apply a style to the space. If you change any of the properties, refreshes the space so you can see your changes.

When calculating the width of your space, consider the width of your forms plus the added space needed to fully display your forms when performing a task from the Task List. Showing/Hiding the left panel may also be a factor.
Show/Hide the Login/Logout Link
It is possible to hide the login/logout link in a space. You may want to do this if your users are accessing a space through your own portal using your own authentication system and the login/logout function is handled external to frevvo.
The Login link checkbox is checked by default so when you create a new space the login link is visible. To hide it, uncheck the Login link checkbox. 
The Login link will be checked when migrating Spaces from previous versions of .
Edit the Panels and Logo
You can edit all three panels in your space, and you can show or hide the left panel and bottom panel. You can also remove or replace the logo. The logo filename can contain up to 50 characters.
- Click
 to edit a panel, upload a graphic file to use as a logo, or to edit the project tabs.
 - Click
 to remove the logo.
 - Click
 to either hide or show the left and bottom panels. When hidden, the editor displays the panels grayed out.
When you edit a panel, displays its contents. You can add your own content and format it using HTML tags.

Modifying the Default Copyright Panel
The designer can modify the default copyright notice located in the bottom panel. The default content is:
Your Copyright Notice. All rights reserved.
You can edit this content in the designer.
Click the icon to edit the content.
Click the icon to hide the panel.
Changing the Default logo
To replace the logo, browse for the graphic file you want. Click the Finish icon when you're done.
In-house customers can change the default logo to your company logo with a configuration property. You can configure the frevvo.logo.URL property where the value is the URL to your company logo in the <frevvo-home>\tomcat\conf\frevvo-config.properties file. Click here for the details. This configuration property will change the default logo to your image for all of
including Spaces.
Adding a Tab and Forms/Workflows to the menu
Click to edit the project tabs. You can use the editor shown below to add, delete, or rearrange the tabs in your space, and add or remove forms or workflows from the drop-down tab menus. The editor uses this format:
- Text that begins with a single asterisk is a tab name — * Human Resources is a tab name.
- Text that begins with two asterisks is a form or workflow name — ** Expense Report is a form or workflow name.

To add a new tab, type its name and begin it with a single asterisk. Use two asterisks for a form or workflow name. Notice that a form or workflow name is followed by a URL that identifies it. For example, the full entry for the Human Resources > Expense Statement form in this example is:
** Expense Statement|http(s)://<server>:<port>/frevvo/web/tn/mycompany.com/u/8aa27da6-4bef-427c-92e3-6ad8d58e506a/app/_N4cF4ZuwEeCwk5wyBHqHrQ/flowtype/_g6-MkJu5EeCwk5wyBHqHrQ?_method=post&embed=true
It is recommended that you use 1063405527 when adding forms/workflow to your Space menu. To make the URL above relative, remove the protocol, server and port information.
** Expense Statement|/frevvo/web/tn/mycompany.com/u/8aa27da6-4bef-427c-92e3-6ad8d58e506a/app/_N4cF4ZuwEeCwk5wyBHqHrQ/flowtype/_g6-MkJu5EeCwk5wyBHqHrQ?_method=post&embed=true
Notice there is only one forward slash - / - after the pipe symbol in the example.
To add a form or workflow name to a tab, you'll need its URL. Follow these steps:
- On the projects home page,
 Edit the project that contains the form or workflow you want to add.
 - Select
 Share from the Action Menu for the form/workflow you want to add.
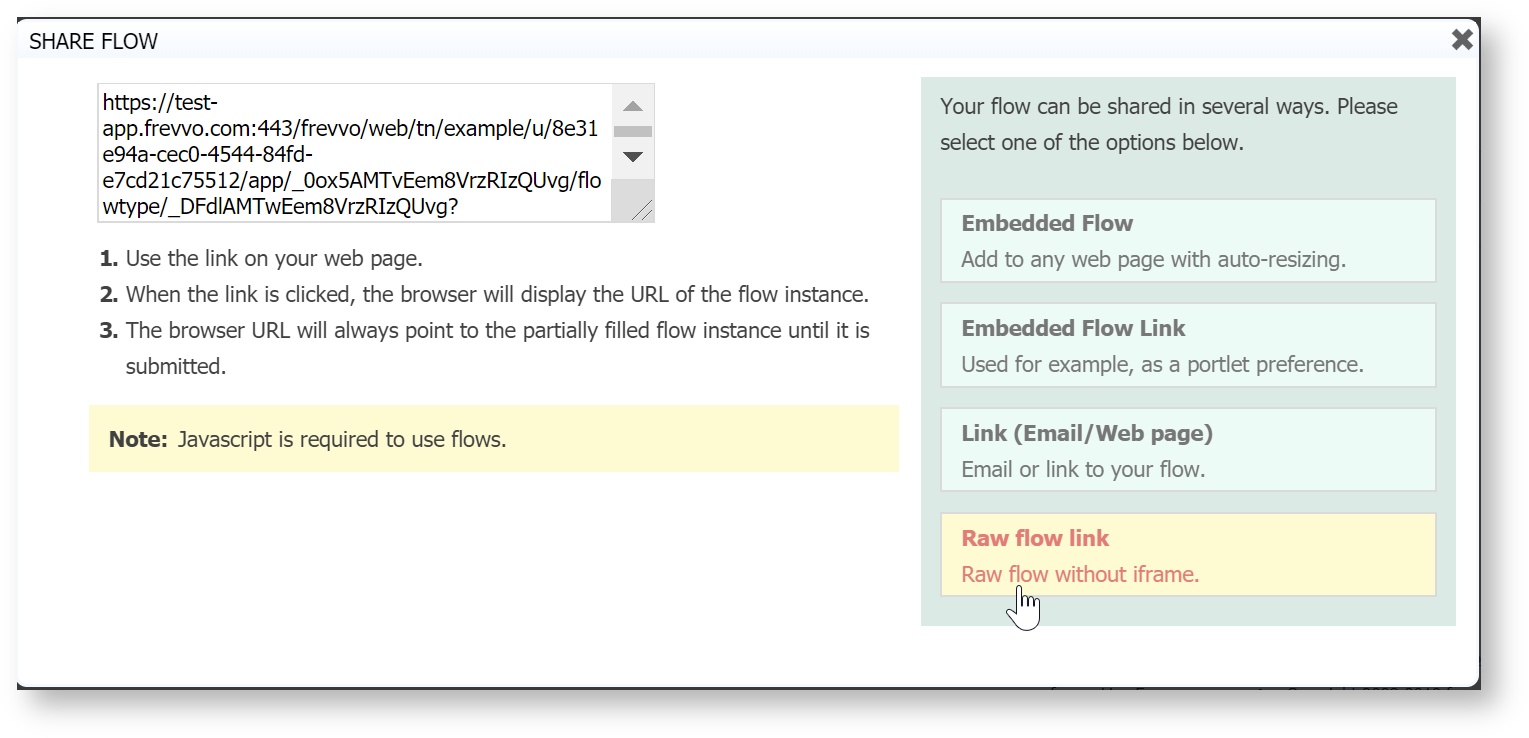
 - Click Raw form/workflow link to display the raw URL. Copy the URL.
- In the tab editor, type a | character after the form name. Paste the form's URL after it.
- Click Finish to update the tab menus.
Forms/workflows in a space should be located on the same Server. They can be created by other designer users in same tenant or a different tenant.
Forms/Workflows displayed on the Space menu will only show the forms/workflows which the logged in user is authorized to view.
Refer to the 1063405527 topic for tips and information about more "cool" items you can add to your Space menu.
How to Locate a Form or Workflow using the Share URL
Let's say you 1063405527 or 1063405527 and now you must find that form or workflow to make changes to it. The Share URL for a form/workflow can be used to determine the frevvo designer account where a form/workflow is located.
A designer must make changes to a form/workflow in their company space at the request of a co-worker. The requesting employee logs into the company space, selects the form/workflow from the menu and copies the form/workflow instance URL from the browser. An opaque URL such as the one shown below is emailed to the designer. The designer can't remember what user, app, form/workflow name that opaque url maps to and uses the lookup feature to find the form/workflow they need to fix/enhance.
https://app.frevvo.com/frevvo/web/tn/mycompany/u/8aa27da6-4bef-427c-92e3-6ad8d58e506a/space/mycompany?mi=12&_formTz=America%2FNew_York&locale=en_US,eng_US,eng,en
Paste the opaque URL into your browser. Remove everything after the uuid. Replace it with lookup after the slash. Press the Enter key. Login to the tenant (determined by the tenant name after the /tn in the URL) as an admin, designer or publisher user if presented with the login screen.
https://app.frevvo.com/frevvo/web/tn/mycompany/u/8aa27da6-4bef-427c-92e3-6ad8d58e506a/lookup
The uuid is converted to the user id of the designer who owns the space.
https://app.frevvo.com/frevvo/web/tn/mycompany/user/designer
Login to the tenant as the specified user and edit the space menu to get the raw form/workflow link. Remove everything after the formtype, flowtype, value in the opaque Raw Form/Workflow link. In the example shown, you would remove all characters starting with the question mark ![]() .
.
https://app.frevvo.com/frevvo/web/tn/mycompany/u/8aa27da6-4bef-427c-92e3-6ad8d58e506a/app/_ngEekDxNEeWSMvnDVXXIRg/flowtype/_DxUxwZ8eEeScQa8_3O7FuQ?_method=post&embed=true
Add /lookup to get the project and form/workflow name.
https://app.frevvo.com/frevvo/web/tn/mycompany/u/8aa27da6-4bef-427c-92e3-6ad8d58e506a/app/_ngEekDxNEeWSMvnDVXXIRg/flowtype/_DxUxwZ8eEeScQa8_3O7FuQ/lookup
The workflow named Example 3 - PO for Sales Review is located in the tenant mycompany, in the designer user account, in the project Purchase Order Completed.
User: designer
Application: Purchase Order Completed
Workflow: Example 3 - PO for Sales Review
In versions prior to v9.1 Projects were known as "Applications." The /lookup parameter will still return "Application" as a result populated with the Project name.
Test a Space
Select ![]() Test to test a space. The space is displayed as it will look to anyone who browsed its URL. If a user has the correct credentials, she can fill out and submit forms and workflows. Close the window when you are done testing.
Test to test a space. The space is displayed as it will look to anyone who browsed its URL. If a user has the correct credentials, she can fill out and submit forms and workflows. Close the window when you are done testing.
Share a Space
Select ![]() Share to share a space.
Share to share a space. displays your space's URL — this is the link you distribute to those who you want to view your space. Remember, whether or not someone can actually open a form or workflow and use it depends on the Visibility property of the form/workflow.

You may use either an http or https Space URL. However if you use https to access the Space then all the forms/workflows in the space must also have https URLs. And if you use http to access the Space then all the forms/workflows must all have http URLs. Spaces do not support a mix of http and https.
When you access your space with the Share URL, then click the Login tab, the whole screen becomes the login screen. Enter your credentials to view your space.
Spaces are always ‘public’ which means anyone with the link can access them. However, any forms or flows in the space that require authentication cannot be accessed until the user logs in. If you would prefer that users log in before accessing a space you can construct a share URL that used the target-uri query parameter to accomplish this. For example:
Cloud: https://app.frevvo.com:443/frevvo/web/login?target-uri=<spaceurl>
In House: https://<your server host>:<port>/<frevvo home>/web/login?target-uri=<spaceurl>
Space Content
Your space contains links for your users to easily access any forms and workflows your designers created in your tenant. Your space also automatically contains the following:
- Task List
- My Account
- Shared Items
- Home
- Operational Reports - Active Processes, Submission Failures, Recent Submissions, Productivity. These Reports are only accessible to the tenant admin and users with the role frevvo.Reports. Refer to Operational Reports in a frevvo Space for information about the links to these reports and
- Login/Logout - You 1063405527if you choose.
Shared Items (Submissions View or Edit), Home, My Account, and Report links are automatically added under the Important Items tab along with the Task List and Login/Logout when your space is created. Existing spaces must be manually edited as described below to add these items.
To manually add these and other useful features to your space, follow the instructions described in detail below.
- Form/Workflow Submissions View or Edit.
- Home Link
- My Account link
- Anonymous signup form
Adding the Task List
The Task List link is automatically added to the tab called "Important Items" when you create a space. If you delete it from the menu and need to added it back, add this link:
* Important Items
** Task List|/frevvo/web/tn/<your tenant name>/subject/(subject.id)/tasks?embed=true
Adding Form/Workflow Submissions
Spaces can also contain form submissions. Copy/Paste the Shared Item URL and append the URL parameter ?embed=true&hidenav=true. Here is a tab menu item link for Shared Items:
Shared Items|/frevvo/web/tn/<your tenant name>/subject/(subject.id)/shared?embed=true&hidenav=true
The user must log into the space to see the shared items. And once logged in they will only see submissions for the forms and workflows to which they have been granted either submission view or edit permission. The designer configures these permissions using the Access Control wizard. If a user is not authenticated to view the form/workflow submissions, then the error message "Access Denied. Authentication Required." will display.
Shared Items are currently only accessible on desktop browsers. Mobile browsers will support this in a future release.
An alternate method of adding shared submissions to your spaces is to add the URL directly to each form/workflow as shown in the example below. To do this:
- Right click the Submissions button for the form or workflow submissions you want to add to your space and select Copy Link Address.
- Append ?embed=true to that URL
- Add that URL to your space menu as shown below.
Note that the server host and port, tenant name, username, project (app) and formtype/flowtype ID will be different then the sample show below as they are specific to your particular form or workflow's submissions.
* Documents
** Membership Applications|/frevvo/web/tn/mytenant/user/designer/app/_JTJEeOtUsA2sMV2cg/flowtype/_JToEeOtUsA2sMV2cg/submission?embed=true
** Board Approvals|/frevvo/web/tn/mytenant/user/designer/app/_JTJEeOtUsA2sMV2cg/flowtype/_gJl0EeOtUsA2sMV2cg/submission?embed=true
** Approved PTO|/frevvo/web/tn/mytenant/user/designer/app/_JTJEeOtUsA2sMV2cg/formtype/_KCREeOtUsA2sMV2cg/submission?embed=true
Adding a My Account link
You can add a link to the user's My Account page. This page lets the user change their password, email address and configure task notification emails. Here is the tab menu item for My Account:
** My Account|/frevvo/web/tn/<your tenant name>/subject/(subject.id)/profile?embed=true&edit=true
Adding an Anonymous Signup form link
You can add the URL to an anonymous signup form for your tenant. Users can create a user account in your tenant using this published registration URL. The designer does not have to create the form, the URL shown below accesses the Add User Anonymous Register form included with . When this form is submitted, the user receives an activation email which enables the account.
You must check Anonymous Users in your tenant to take advantage of this feature. Also, there is an invisible control on this form which requires the tenant name. The form will not submit if this field is left blank. Append the _data parameter to initialize the control with your tenant name:
Cloud Customer:
If you are a cloud customer, follow these steps to add the Anonymous Signup form to your space menu:
- 1063405527 the space menu.
- Click to edit the space menu.
- Add the URL shown below under the menu Tab where you would like the form to be displayed - remember to provide your tenant name in the _data parameter.
** Signup|https://app.frevvo.com:443/frevvo/web/tn/d/user/frevvo/app/_bDd4YX76EduXFsA4l9RQeQ/formtype/_NQascBXoEd-Cn_oBMDPlNQ?_method=post&embed=true&_data=(Tenant:"<your tenant name>")
4. To add it as a tab, precede the word Signup with one asterisk instead of 2.
5. To add it as a selection under the Important Items tab, precede the URL with 2 asterisks and place it in the menu under the * Important Items entry.
6. Save your changes.
In-house Customer:
If you are a in-house customer, follow these steps to add the Anonymous Signup form to your space menu:
- 1063405527 the space menu.
- Click to edit the space menu.
- Add the URL shown below - remember to provide your
** Signup|http://your server host:port/frevvo/web/tn/d/user/admin/app/_bDd4YX76EduXFsA4l9RQeQ/formtype/_NQascBXoEd-Cn_oBMDPlNQ?_method=post&embed=true&_data=(Tenant:"<your tenant name>")
4. To add it as a tab, precede the word Signup with one asterisk instead of 2.
5. To add it as a selection under the Important Items tab, precede the URL with 2 asterisks and place it in the menu under the * Important Items entry.
6. Save your changes.
Adding Operational Reports
Both in-house and online customers can add Operational Reports to an existing space by simply adding ** |<FREVVO_REPORTS> to the space menu. Follow these steps:
- 1063405527 the space menu.
- Click to edit the space menu.
- Add the ** |<FREVVO_REPORTS> keyword to the space menu. In the example, the Operational Reports display under the Important Items tab,
* Important Items
** Task List|/frevvo/web/tn/mycompany/subject/(subject.id)/tasks?embed=true
** My Account|/frevvo/web/tn/mycompany/subject/(subject.id)/profile?embed=true&edit=true
** Shared Items|/frevvo/web/tn/mycompany/subject/(subject.id)/shared?embed=true&hidenav=true
** Home|/frevvo/web/tn/mycompany/u/e5a0e839-1026-4bcf-92a0-5c8e4db9685e/space/test/home?embed=true
** |<FREVVO_REPORTS>
4. If you want to customize the names of the 4 reports, add the custom names for the 4 reports in front of the pipe symbol preceeding the <FREVVO_REPORTS> keyword. The Reports will be named Active Workflows for Tenant, Submission Errors, Resent Submission Activity, Workflow Bottleneck Analysis if the space menu is modified as shown in the code box below.
* Important Items
** Task List|/frevvo/web/tn/mycompany/subject/(subject.id)/tasks?embed=true
** My Account|/frevvo/web/tn/mycompany/subject/(subject.id)/profile?embed=true&edit=true
** Shared Items|/frevvo/web/tn/mycompany/subject/(subject.id)/shared?embed=true&hidenav=true
** Home|/frevvo/web/tn/mycompany/u/e5a0e839-1026-4bcf-92a0-5c8e4db9685e/space/test/home?embed=true
** Active Workflows for Tenant|Submission Errors|Resent Submission Activity|Workflow Bottleneck Analysis|<FREVVO_REPORTS>
5.If you want the Operational Reports to display under a customized tab instead of under the Important Items tab, add the name of the Report tab preceded by a single asterisk followed by the pipe symbol followed by the <FREVVO_REPORTS> keyword.
* Important Items
** Task List|/frevvo/web/tn/mycompany/subject/(subject.id)/tasks?embed=true
** My Account|/frevvo/web/tn/mycompany/subject/(subject.id)/profile?embed=true&edit=true
** Shared Items|/frevvo/web/tn/mycompany/subject/(subject.id)/shared?embed=true&hidenav=true
** Home|/frevvo/web/tn/mycompany/u/e5a0e839-1026-4bcf-92a0-5c8e4db9685e/space/test/home?embed=true
* My Reports|<FREVVO_REPORTS>
6. Save your changes.
Locale Preference for Spaces
Space URLs appended with a locale parameter take precedence over locales appended to individual forms/workflows in the space. As expected, if no locale parameter for the space is found the browser setting is used.
Default Spaces
A default space can be set for the tenant. Once a default space is selected, task notification links will direct the user to the task and/or Task List rendered in the space (rather than in the tenant.) Default spaces must be set by tenant admins. Click here to learn more.
Spaces and Mobile Devices
You do not have to use Spaces to access your mobile forms but it is a convenient way to do so. Simply bookmark the space URL on your mobile device to access it. You can add icons to your forms and workflows which will display on mobile devices when you access the space. Spaces can be a valuable tool for testing your forms/workflow on the iPhone and iPad.
Selecting the Download to CSV features the when viewing submissions from the Shared Items tab (inside or outside of a space) on an IOS device (iPad,iPhone), may require the installation of an application to edit and save .xls files. This requirement is browser specific.
Refer to the Employee On Boarding tutorial for more information on Spaces and mobile forms design.
Of course, you can still embed your forms and workflows in your own website.