Live Forms v8.2 is no longer supported. Please visit Live Forms Latest for our current Cloud Release. Earlier documentation is available too.
Planning for v8.2
- Former user (Deleted)
- Former user (Deleted)
The initial release of Version 8.2 will be deployed to the frevvo Cloud on 4/20/2019.. A future release will be available for in-house customers.
v8.2 contains a major new feature to get you started designing forms/flows.
New Features:
- Search available published Installable Templates and install them into your
Cloud tenant with a single click.
- Updated UI for publishing Forms/Flows.
- Spaces are allowed in Form/Flow Category Names.
- Internet Explorer 11 is no longer supported in Design Mode.
On This Page:
We recommend that you read the information below before you begin.
Automatic Upgrade for Live Forms Online (Cloud Hosted) Customers
Live Forms Online cloud hosted customers will be automatically upgraded on 4/20/2019. The automatic cloud upgrade will be seamless. Cloud customers should review these topics to prepare for the new version of .
If you have any questions, please email support@frevvo.com.
New Features for Cloud Customers
frevvo is committed to making more intuitive and easier to use. More features/improvements are coming in future releases.
Installable Templates
Looking for an example form/flow that you can use to build one that meets your business requirements? Whether you are new to or a valued customer, pre-built templates are designed to let you quickly try a form/flow for evaluation.
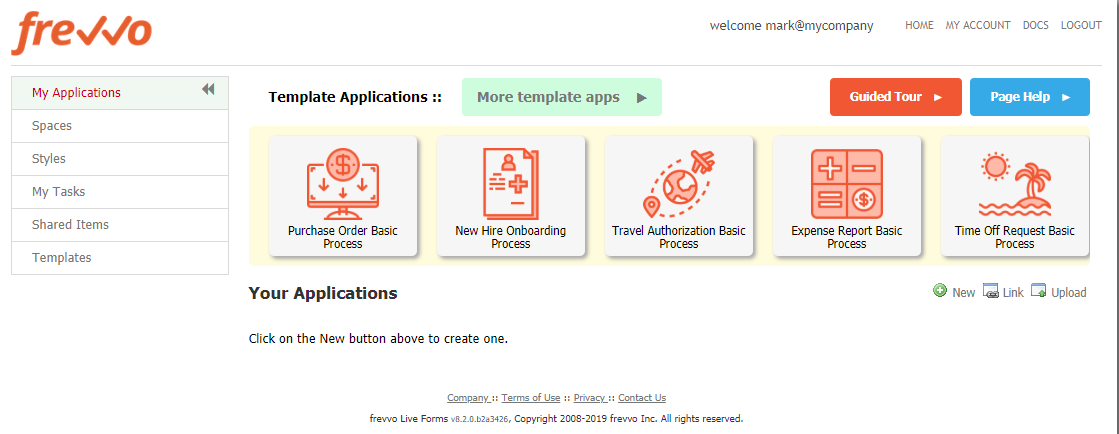
When designer/tenant admin users login to a tenant, several pre-installed form/flow templates appear in a box at the top of the Applications Home Page. Hover over any template and click the green button to install it into your Cloud tenant.
Now you can also search the list of available installable templates and install them in your Cloud tenant with a single click. All Workflow Templates come with a Guided Tour that automatically launches after installation. The Guided Tour shows you how to run the workflow, explains application screens and guides you through some small modifications. Installable Templates are an excellent way to get started designing Forms and Flows.
Follow these steps to search the frevvo website for an Installable Template:
- Log into your frevvo Cloud tenant as a designer user. This user must have the ability to create forms/flows (frevvo.Designer role). If you just signed up for your free trial tenant, try logging in with designer@<your tenant name>.
- Click the More template apps button at the top of the page. You will see an All Templates tab and Category tabs created by the frevvo superuser i.e. HR, Finance, Education.
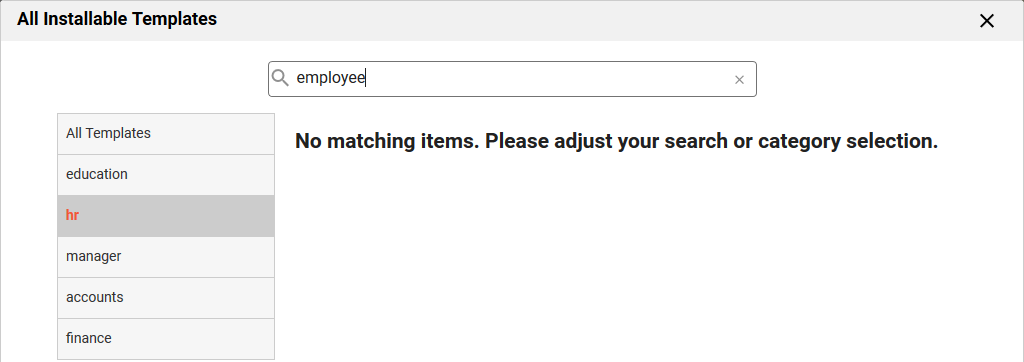
There are two ways to search for Installable Templates:
When the search screen displays, the All Templates tab is highlighted. Type your search criteria into the search box.
Click a Category tab of interest and type your search criteria into the search box.

- Templates that match the template name, description, category or tags set up by the frevvo superuser display. You will see this message if there are no matches.
- Hover over the template of your choice and click Install. The selected template immediately appears in the application list. You will see the Forms/Flow Home page for that template. Refer to Templates for more information about this awesome feature.
Publish Flows as Templates
Designers can now publish form AND workflows they have created as templates. The ability to publish workflows as templates was only available for forms in previous releases. Form/Flow Templates make it easy to reuse existing work you have done in previously created forms/flows and to share that work with other designers.
Follow these steps to publish a workflow:
- Click the
 Publish icon on the Flows Home Page for the workflow that you want to publish.
- Fill in the fields on the workflow Publish Template wizard.
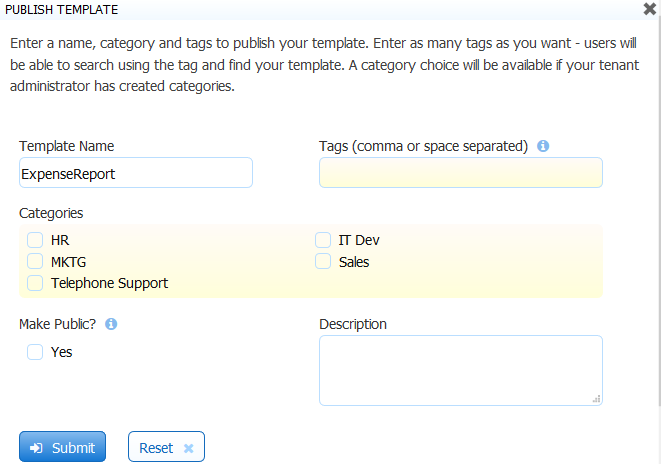
- Template Name – This defaults to the name of your form. You can keep this name or overlay it with a different one.
- Tags – Type at least one tag that will help you quickly find your template. Type as many tags as you like; if you type more than one, separate them with a comma or a space.
- Categories - Check the category you want to assign the form to. If no categories appear in the wizard contact your tenant admin to create Categories. It is the responsibility of the tenant admin to create Categories and Manage Templates. You can assign the template to more than one category.
- Make Public - Check this box to add your form/flow to a queue of Installable templates that can be made available to designers in all tenants. The frevvo global template administrator must share your Installable template across all tenants in the frevvo Cloud for your template to be available to everyone.
- Description – Enter a description of your form that will display when Forms By Category or Forms By Tag is selected.
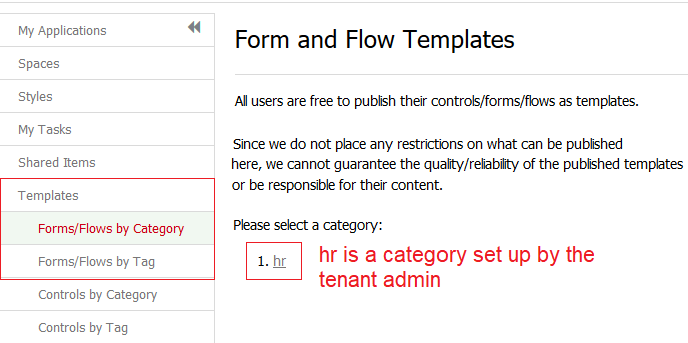
- When you or other designers in your tenant are ready to use the published workflow template to create a different flow, click the Templates tab, select Forms/Flows by Category or Form/Flows by Tag then click the category/tag that you specified when you published it.
- The Form and Flow Templates table displays
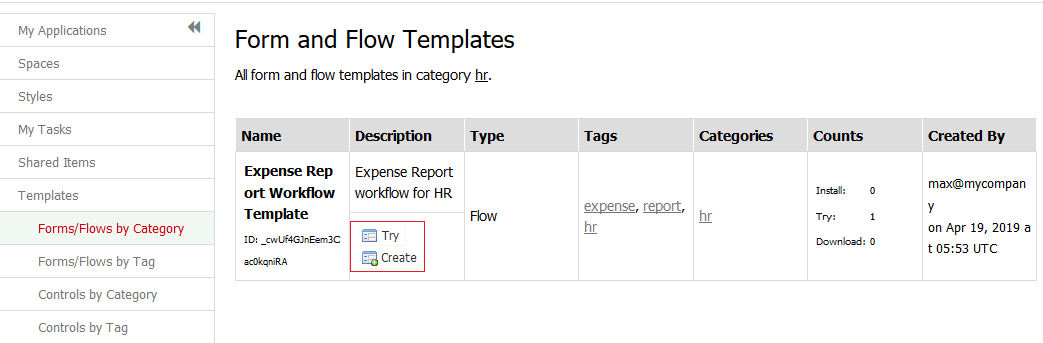
- Click the
 Try icon for a preview of the workflow.
 - Click the
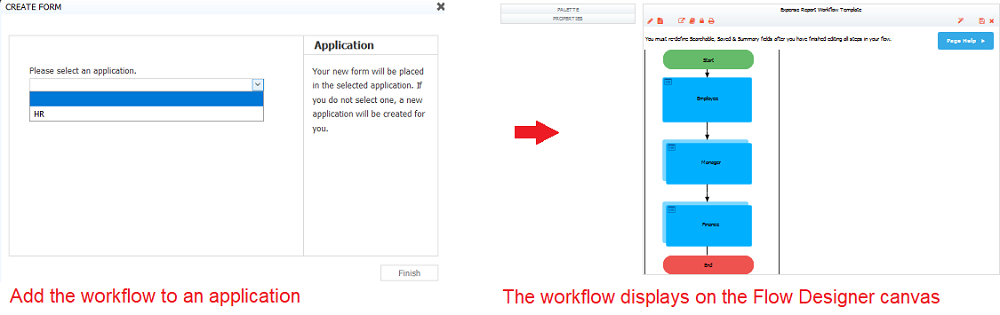
 Create icon to to add it to an existing application. If you do not select an application,
 - Click Finish. The Workflow template is imported onto the Flow Designer canvas.
- Now you are ready to modify the workflow template to create a different workflow.
Refer to Templates for more information about publishing forms/flows.
Form and Flow Catagories
It is the responsibility of the tenant admin to create Categories and Manage Templates. Category names now support spaces.
Internet Explorer 11 no longer supported in Design Mode
Designing forms/flows in Internet Explorer 11 is no longer supported. You will see these error messages if you attempt to do so.
You can still run in this browser. Refer to Supported Platforms.
Additional Locale options for Internationalization
Creole, Hatian (Creole) and Somali locale options have been added to the locale dropdown when internationalizing forms/flows in the v8.2.2 patch.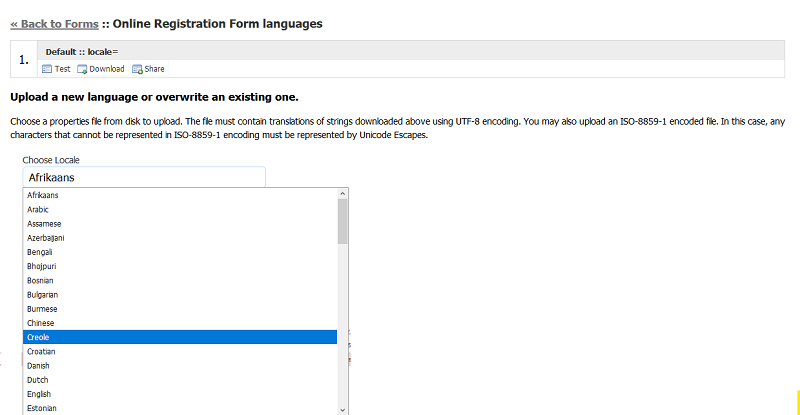
You May Notice...
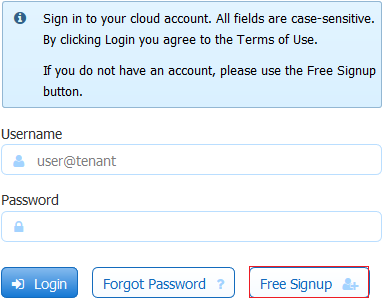
Sign Up for a free 30 day trial
A Free Signup button has been added to the login screen. Click this button to sign up for a free
30 day trial tenant. Install form/flow templates from our website to get started. Workflow templates automatically launch a Guided Tour to show you how to run the workflow, explain application screens and guide you through some small modifications.
Error Description Column in the Submissions Table
The Error and Error Description columns in the Submission table provide troubleshooting information if a submission logs an error. The Error column displays the error icon  and the Error Description column shows a description of the error . The Error Description column has been moved to the last position in the table. Click the
  Plus icon to see this column if it is not automatically displayed.
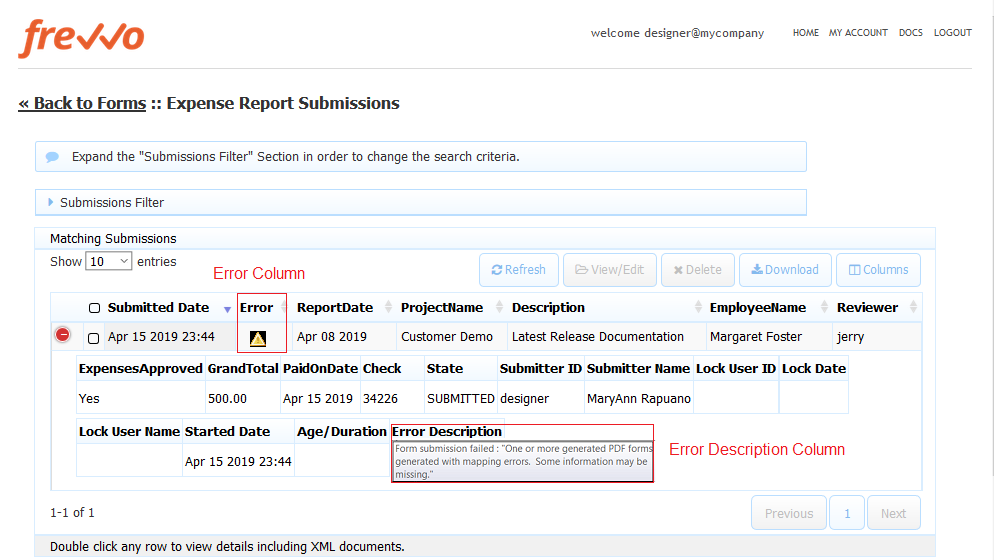
Announcements
Stay tuned for announcements about existing and exciting new features, upcoming webinars/training sessions, new feature blogs and other important information.
