Live Forms v8.0 is no longer supported. Please visit Live Forms Latest for our current Cloud Release. Earlier documentation is available too.
Planning for v8.0
- Former user (Deleted)
- Former user (Deleted)
The initial release of Version 8.0 was deployed to the frevvo Cloud on 12/15/2018. A future release will be available for in-house customers.
v8.0 contains new features that improve usability and makes designing forms/flows easier.
Here are a few of the new features included in this Cloud Only release.
New Features:
Flow Designer Improvements:
- Redesigned Flow Designer canvas displays flow routing more clearly.
Simplified Workflow Routing to Users, Roles or an Email Address:
- Tasks performed by Anonymous users are now simple to design. Anonymous Task steps in a workflow are implemented as a form step that is routed to an email address.
Intuitive UI for Flow Step Properties:
Flow Step Properties wizard displays tabs for each property. Help text provides information about the property to make configuration easier. Data is validated in some fields to prevent errors.
- Workflow designer step on-hover feature shows more information about the underlying form for linked/non-linked steps.
Task List:
View your Tasks: Users can review the tasks they completed.
- Designers can specify a templatized value to replace "Anonymous" in tasks which are created by anon users.
- The Task List no longer automatically refreshes every 5 minutes.
Tasks performed by Anonymous Users:
- A task returned from an anonymous user shows the email address in the Audit Trail. This is not supported for Email/Anonymous Task steps.
- Workflows can be rejected to a step that is performed by an Anonymous user.
- Tenant/Flow admins and the user who performed the prior step in a workflow can search the Task List for tasks waiting to be performed by an Anonymous user, perform the tasks themselves or reassign to another email address.
- "Error Access Denied. This submission has already been processed" error message now displays when clicking the link in an Anonymous Task step email more than once.
Refresh Searchable Fields:
- Designers, administrators or anyone given the Edit form/flow permission can initiate a Refresh Searchable Fields process for Individual Forms/Flows to update existing submissions for changes to Searchable Fields. This no longer requires Admin privileges.
- Refresh Searchable Fields table shows if the process was run for all tenants or a specific tenant.
It is no longer necessary to enter a single space in a Message control that is used as a spacer in a form/flow. Message controls can now be set to an empty string.
Doc Action post failures now include the Server name.
The Apache Tomcat version in the Live Forms cloud has been upgraded to 8.5.32.
Visual Rule Builder now generates code for itemAdded if a rule contains repeating controls.
- Template syntax expanded to force
to use the value instead of the label in the Options URL for Selection Controls.
Flow designer functionality is not supported in the Internet Explorer 11 browser.
On This Page:
We recommend that you read the information below before you begin.
Automatic Upgrade for Live Forms Online (Cloud Hosted) Customers
Live Forms Online cloud hosted customers will be automatically upgraded on TBD. The automatic cloud upgrade will be seamless. Cloud customers should review these topics to prepare for the new version of .
If you have any questions, please email support@frevvo.com.
Migration Considerations for Cloud Customers
frevvo is committed to making more intuitive and easier to use. Version 8.0 is the first phase of this effort. More features/improvements are coming in future releases.
Redesigned Flow Designer Canvas
When you launch the Flow Designer, you will see a more intuitive canvas to create/edit workflows. Designer can quickly see how the flow is routed and have easy access to the properties for each workflow step.
The new canvas:
- Displays workflows in a flow chart format.
- Adds Lines and arrows are automatically as you build/edit your flow.
- Flashing green “bulls eye” to indicate the exact place where a step is to be placed.
- Flow Step Properties are located on tabs that are easy to get to from the flow step or the Properties Navigator. Help text is provided to make configuration quicker and easier. Each tab contains a link to the documentation if more information is required.
- Designers are notified if tabs contain invalid information and in some cases, you cannot continue until it is fixed.
- Selecting a flow step shows important properties and their values via a new Properties Navigator and action icons relevant to the step e.g. create a linked step, edit the form associated with a form step etc.
- Preconditions represented as a decision box (yellow diamond)
- Simplified routing to a user, role or email address
- Linked steps display a double box indicating that the step is a copy of a prior step in the flow.
- On hover feature for Linked steps shows the name of the parent form that the linked step was copied from.
Existing workflows will automatically be converted to the new format when the Cloud is upgraded. No worries - at runtime your existing flows will work as before but they will look different when you edit them in the Flow Designer.
Easily Add an Anonymous Step to your Workflow
Anonymous steps in a workflow are steps that are performed by an non-authenticated user. This means the user does not have to login to to perform their step in the workflow.
This a common workflow scenario. Some examples are:
- a Membership workflow that requires reference letters from an external person.
- a Purchase Order Approval requiring the customers review and signature.
- a workflow that is sent to an External Vendor for a Quote.
Anonymous steps are simply form steps that route to an email address in version 8.0. That's it.
Create an anonymous step in your workflow by following these simple steps:
- Create the step you want the recipient to see or link to an existing one.
- Click on the step then click the
 Edit Step Properties icon
 - Navigate to the Assignment tab.
- Enter a valid email address in the Assign to Email field. Leave the Assign to User and Assign to Role fields blank. Only one email is allowed.
- You can use Control Templates in the email field so that it’s dynamic. Enter the left curly brace - { - then start typing the control name and a pick list will appear with matching controls. Selecting the control form the list enters it into the field with the closing curly brace - }
- Customize the email that the anonymous user receives. Control Templates can be used in the email Subject and Message for dynamic behavior as well.
- Click Submit.
At runtime, the value in the Assign to Email field is evaluated and an email that contains a link to the anonymous step is sent. The recipient clicks the link to perform the anonymous step. Logging into is not require
- It is no longer a requirement to set the Who can start the form/flow permission to Anyone (No login required) - called Public in previous releases. The anonymous step will work with any of the Form/flow Visibility choices.
- Designers can now design a workflow that rejects to an Anonymous step.
- The Modify a Task feature now allows Tenant/flow administrators to reassign an anonymous step to a different email address.
Existing workflows, created with Email/Anonymous steps, will continue to work after the upgrade to v8.0. However, the ability to reassign an anonymous step to a different email address or rejection to an anonymous step are not available for workflows created with these types of steps. Please review Migrating Flows with EMAIL/Anonymous Task Steps for information to manually migrate these flows to take advantage of the new features.
Migrating Flows with Email or Anonymous Task Steps
Designing a workflow step performed by a non-authenticated (anonymous) user in previous versions required dragging/dropping an Anonymous Task Step from the Flow Designer Palette and configuring it with an email address. The step that followed the Anonymous Task Step was the actual step that the recipient would perform. This design approach was confusing and error prone.
To convert your flow from pre v8.0 to v8.0, we suggest you follow the same procedure that you use to update any other form/flow in Production. Review Administrator Best Practices if you need a refresher.
To convert your Anonymous Task Step to the v8.0 Simple Anonymous step(s) follow these instructions:
- Login to your Production tenant or the user account where your Production forms/flows are located.
- Ensure there are no flows in flight for the workflow you want to update.
Download the workflow from your Production tenant or Production designer account.
Upload it into a different application in your test tenant or designer test account
Edit the existing Email/Anonymous Task step.
- Click the Edit Step Properties icon. Click on the Assignment tab.
- Copy the information in the Assign to Email, Task Notification Subject and Message fields. Paste this information to a text pad and save to your desktop. Click Cancel.
- Click on the step following the Email/Anonymous Step. (the step performed by the anonymous user)
- Click the Edit Step Properties icon. Click on the Assignment tab.
- Paste the information you copied in step 7 into the Assign to Email, Task Notification Subject and Message fields.
- If the Message field contains the {task.notify.url} template, change it to {task.perform.url} or {task.list.url}.
- Click Submit.
- Delete the Email/Anonymous Task step from the workflow.
- Save and Test the workflow.
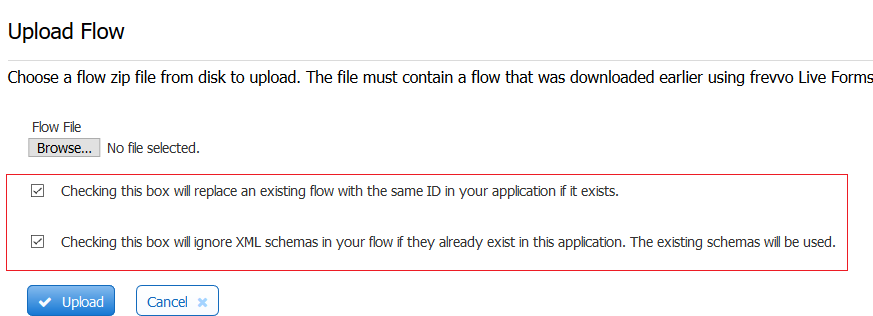
- To replace the production workflow with the updated flow, download the updated flow from your test tenant or designer test account.
Upload the updated workflow to your Production tenant. Be sure to check the checkbox to REPLACE an existing flow with the same ID. The checkbox to use existing schemas is checked automatically.
Workflows with steps performed by anonymous users no longer require the Who can start the form/flow (called Who can use the form/flow in previous releases) permission to be set to Anyone (No login Required) (called Public in previous releases). In version v8.0, you can change the Flow Visibility to one of the other choices and the workflow with the Anonymous step will still work.
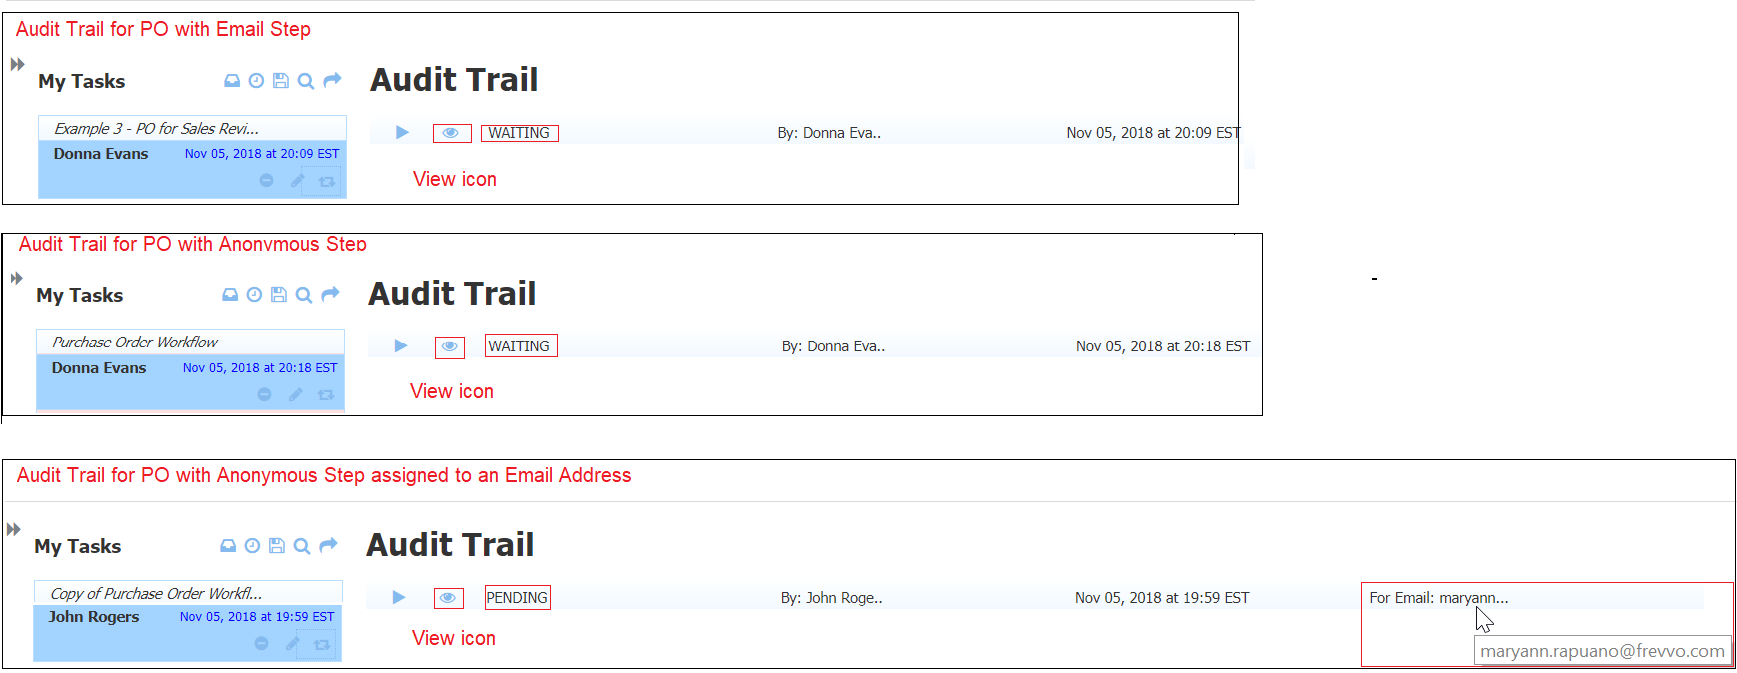
Anonymous Steps and the Audit Trail
If your workflow was created in a version of previous to v8.0, then the step performed by the customer (anonymous user) was designed by dragging an EMail or Anonymous Task step from the Palette and dropping it on the Flow Designer canvas. Workflows designed in this manner will still work in v8.0 but the Audit Trail will show the task in a WAITING state.
In version 8.0, the same flow can be designed by simply assigning the step to an Email Address. The Audit Trail, shows the step performed by the customer (anonymous user) in a Pending state and displays the Email address it was sent to.
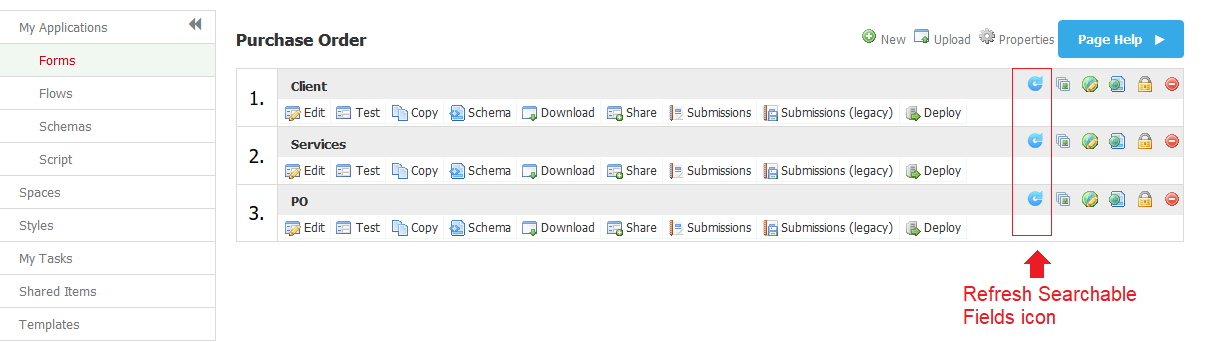
Refresh Searchable Fields per Form/Flow
Designers now have the ability to run a Refresh Searchable Fields for an individual form or flow. You may want to run this process to update existing submissions to reflect changes to Searchable Fields. In previous releases, this process could only be performed by the tenant or superuser administrators and could only be done for the entire instance or the entire tenant.
Administrators can still run the process, of course but version 8.0 provides a way for form/flow owners ( the designer user that created the form/flow) or any designer user given the Who can edit the form/flow permission to run it for a single form/flow. The designer can start/stop/abandon the process and view a list of processes run.
It's easy. Simply login to your tenant as a designer user and click on the  Refresh Searchable Fields icon that you see on the Forms Home Page or the Flows Home Page. Follow the onscreen directions or check the docs for more details.
Forms Home Page
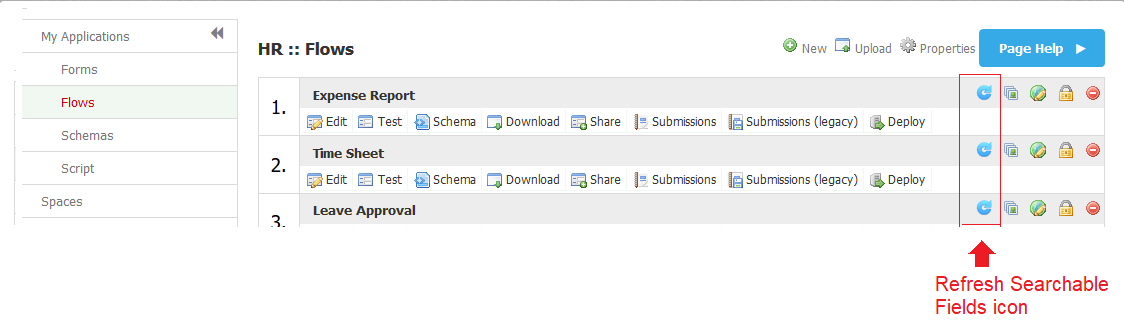
Flows Home Page
View My Task
Let's say you submitted an Expense Report or a Vacation Request to your manager. A few days later, you want to check the status of your request and view the information you submitted. users now have the ability to view completed tasks in a workflow that they performed. You search for your task and view the Audit Trail to see the progress of the workflow. You will see a new
 View icon for the steps that you performed. Click it and a read-only view of the workflow step with the submitted data displays. Screenflows and tasks with multiple submissions i.e. Save on Navigate is turned on, display a Next button to move forward. Only the last step will be viewable for multiple submissions but the first step displays when you click the View icon.
A watermark displays to to remind you that you can view data but you cannot change it.
In previous releases, designers had to send an email with a PDF to the user at the completion of a step to provide them with a record of the submitted task. This is no longer necessary with the View My Task feature.
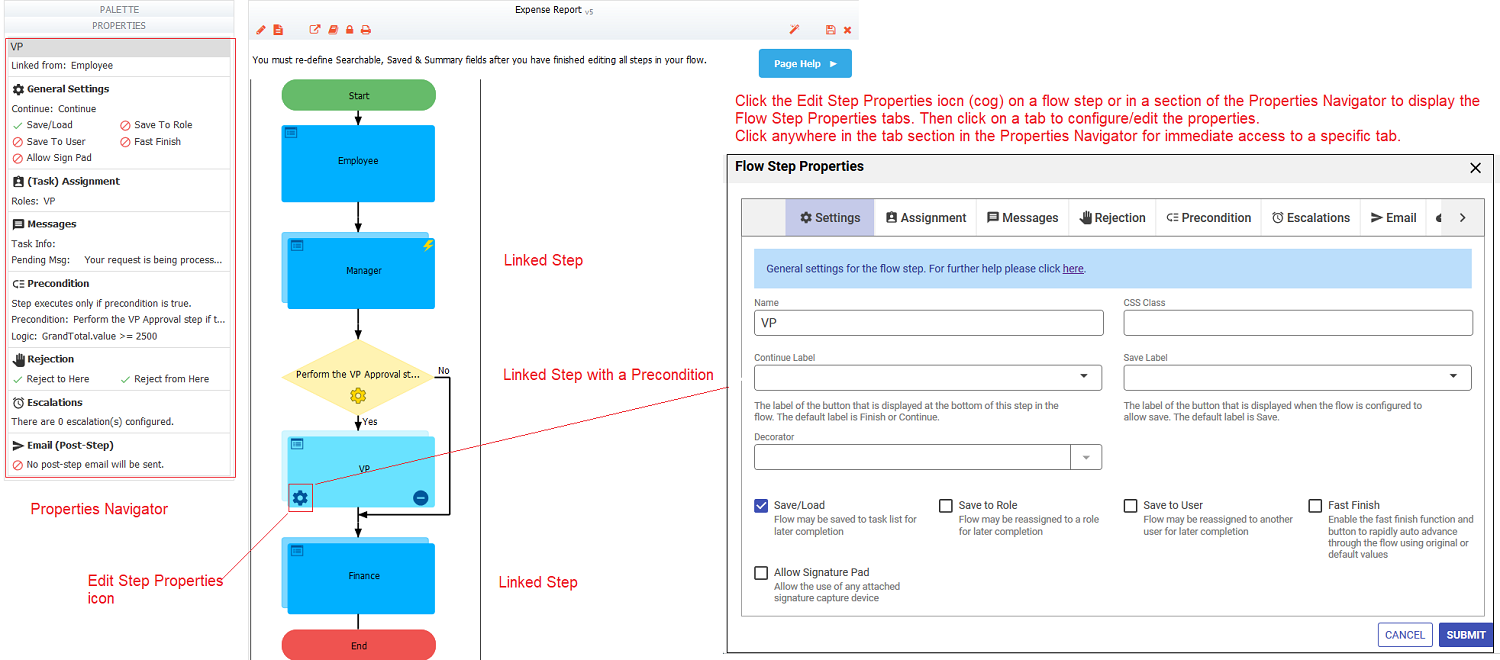
Workflow Step Properties Wizard
The configuration/editing of workflow step properties is easier and more intuitive in v8.0. The wizard consists of a series of easy to get to tabs designed to collect the necessary information for each property.
A Properties Navigator provides a quick view of important flow-step properties. This view changes based on the type of workflow step i.e. form, HTTP or Linked step.
There are three ways to open a properties tab:
- Click on the workflow step then click the Edit Step Properties icon. Navigate to the relevant tab when the wizard appears.
- Click anywhere in a section of the Properties Navigator for quick navigation to the relevant tab for immediate editing.
- Click the Edit Step Properties icon in a section of the Properties Navigator.
Once the tab is displayed, the following features make the properties setup/editing easier to understand help with property
- On hover feature providing explanatory help text
- Links to the
- Many fields have pick lists that can be filtered by typing ahead. Controls from your form/flow and built-in
- Type a left curly brace - {followed by a control name then select the field from the pick list that displays and the selection will be added to the field as a Control Template automatically adding the right curly brace - } -.
- Changes are saved when you click the Submit button. If there are invalid property settings on any of the tabs, tabs with validation errors are displayed in red with a red asterisk.
Refer to Editing Flow Properties for detailed information about properties and feature setup.
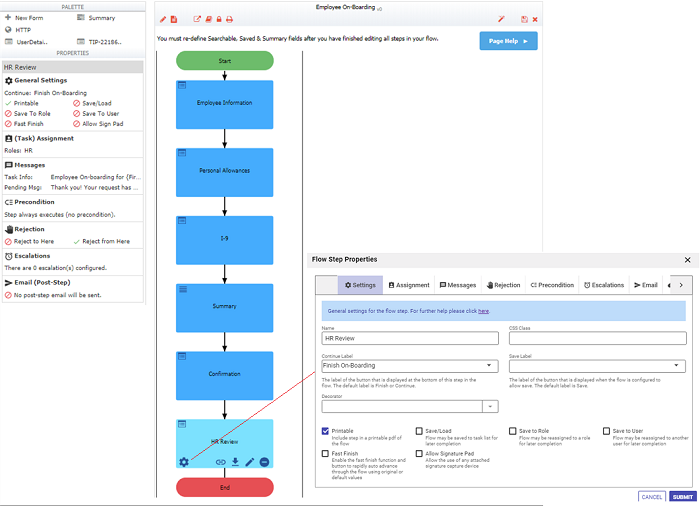
Flow Step Properties Wizard
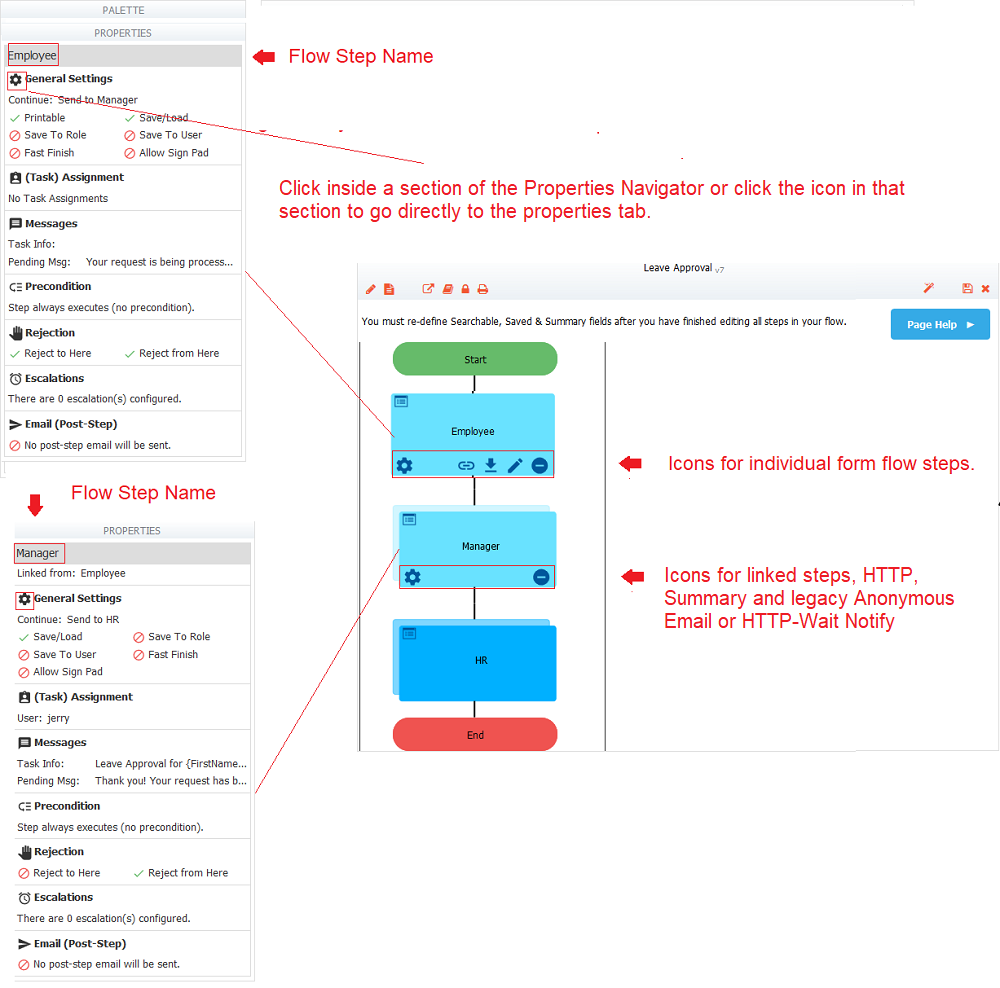
Properties Navigator
Dynamic Option Improvement
Options for Selection Controls (Dropdowns, Checkbox, Radio) are set up using the syntax: value=label. When these controls are used in a template, uses the option label when resolving the template at runtime. This is desirable when you want your users to see the labels as options. If you are using the Dynamic Options feature and you have a template in the Options URL for a Selection Control, the template resolves to the label at runtime. This may cause the query to fail. Template syntax has been expanded to force the use of the true value as opposed to the option label if the template control is a Selection Control. Use {controlName.value} in place of {controlName} in the options URL to substitute the value instead of the label at runtime.
Refer to Populating a Selection Control based on the Value of Another Dynamically Populated Selection Control for an example.
Message controls as a spacer
Message controls re commonly used as a spacer to center other controls in forms/flows. In previous releases, the Message property had to be set to a single space. The Message control can now be set to an empty string eliminating the need to add the space. Refer to Centering Images using the Message Control for an example.![]()
IE11 Browser no longer supported for Design mode
The new Flow Designer UI is no longer supported in the Internet Explorer 11 browser. A warning message "The flow designer functionality is not supported in this browser" displays if IE11 is detected. Internet Explorer 11 is still supported when using forms/flows on a desktop.
Tomcat Upgrade
Apache tomcat for the frevvo Cloud has been upgraded to version 8.5.32 to address important security updates. This version is certified by frevvo.
You May Notice....
Flow Visibility option description changed.
The explanatory test for the Who can use the form/flow permission in the Access Control list has been changed to Who can start the form/flow. The functionality remains the same.
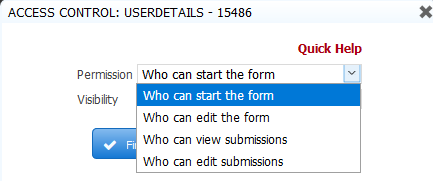
ACL Permissions for Forms

ACL Permissions for Flows
Email/Anonymous Task Step removed from the Palette
The Email/Anonymous Task has been removed from the Flow Designer Palette. Workflow steps performed by an anonymous user are form steps that route to an email address in version 8.0.
box.com connector and wizard
The box.com connector will no longer be supported. The Save to box.com wizard will be removed in the next release.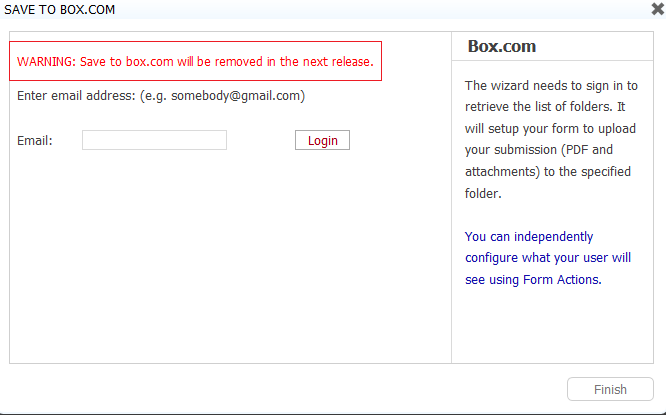
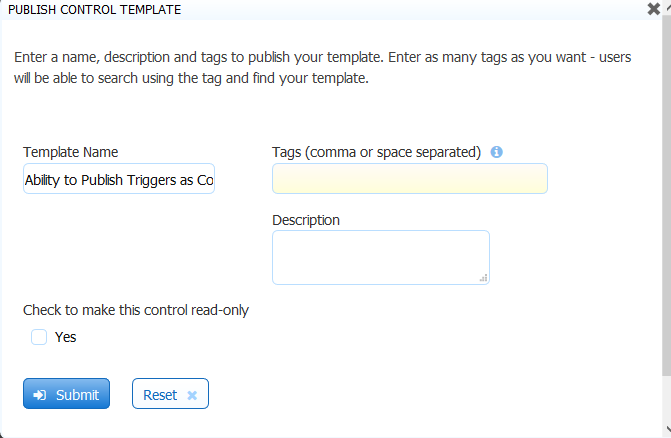
Publish Trigger Control as a Control Template
The ability to publish a Trigger control as a Control Template has been restored. This feature will be supported in v7.2.8+, v7.4.6+ and v8.0.0+ going forward.
Document Action Post Failures include the server name
When A Document Action post fails to reach it's destination, tenant/flow admins receive an email notifying the admins doesn't include any info about the server hosting the form which makes it impossible to know which environment the failure originated (e.g. app.frevvo.com vs staging-app.frevvo.com). Including the server name in the message would help.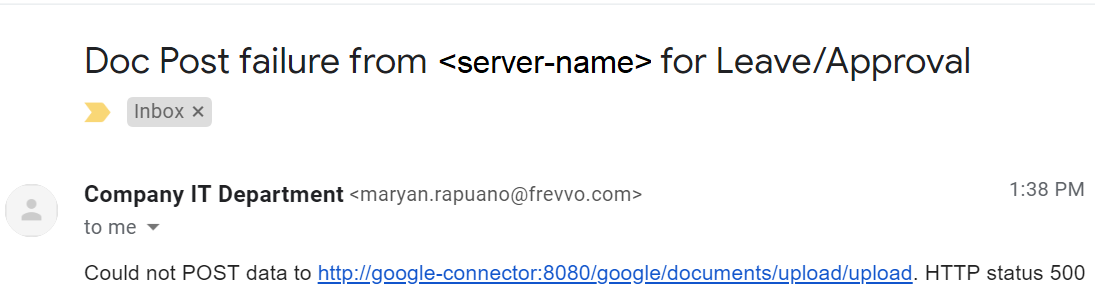
Logging Changes
Log Messages with Log Message property names that include a . (period) are difficult to filter with cloud watch filters. Properties have been renamed to include the _ (underscore) instead of the . (period) i.e. tenant.id = tenant_id.
frevvo Cloud log messages now include session information such as tenant.id, subject.id, correlation.id, session.id, owner.id, application.id, and type.id (formtype or flowtype). This additional information can be extremely helpful when troubleshooting errors particularly in the frevvo cloud environment.
Java exceptions during rule execution are now logged to help with troubleshooting.
Visual Rule Builder and Rules with Repeat or Table Controls
The Visual Rule Builder now adds the itemAdded code to a rule that references Repeat or Table controls. The itemAdded code is needed to guarantee that the rule runs when the user clicks the  Plus icon to add a Repeating Section or a row. This code will be added to rules with/without conditions. It will not be added if the Initialization Only box is checked. Here is an example of a rule created using the Visual Rule Builder, that makes a Repeat Control visible when a text field starts with a.
var Text_start_index = Repeat1794.itemAdded ? Repeat1794.itemIndex : 0;
var Text_end_index = Repeat1794.itemAdded ? Text_start_index + 1 : Text.value.length;
var event = form.load;
for (let i = Text_start_index; i < Text_end_index; i++) {
 if (Text[i].value && Text[i].value.startsWith('a')) {
 Repeat1794.visible = true;
 }
}
Since Tables are grid layouts of Repeating items, the itemadded event will be generated for rules with Tables as well.