Tomcat Bundle on Windows
- Megan Ellis
On This Page:
Windows Installation
frevvo provides a bundle that includes Tomcat version and has the frevvo web application, pre-deployed and pre-configured. The bundle works on Windows, Linux, and Mac systems without any further configuration. If you are evaluating frevvo, we strongly recommend the bundle.
- Follow the Windows installation instructions in the Quick Start Installation Guide: frevvo™ in-house.
- You may configure frevvo as a Windows Service. Follow the instructions below for the configuration details
- Continue to Database Setup for more configuration information.
Next Steps
Your frevvo server installation is complete. You are now ready to create your first tenant, users, forms, and workflows. See the documentation for creating a tenant and users.
Setup for Forms and Workflows
- Login to frevvo as the tenant admin.
- On the page that is displayed, click Manage Roles.
- There are five default roles listed, frevvo.Designer, frevvo.Editor, frevvo.Publisher, frevvo.Reports and frevvo.ReadOnly.
- Click the
 icon, fill in the form, and submit it to create new roles. Create Employee, Manager and HR roles if you are planning on trying some of the frevvo In-Depth Tutorials.
 - Click Back to Manage Tenant.
- On the page that is displayed, click Manage Users.
- There is a single user (the administrative user you defined when you created the tenant). By default, only users beginning with the letter A are displayed. Click All to display all users.
- To add more users, click the
 icon, fill in the form and submit it. Assign roles to the user as desired. You must assign the frevvo.Designer role to any users who wish to design forms.
 - Create as many users as needed and assign them roles. If you plan to try the Employee On Boarding Tutorial, you will need a designer user who can create forms/flows, a user that does not have an assigned role, a user with the Manager role and a user with the HR role.
- Logout of the tenant admin account.
- Login as one of the newly created users with the frevvo.Designer role by filling in the Username (user@tenant) and Password fields. Start building forms and workflows immediately.
You can find examples on creating your own workflows on the Quick Start Video Guide page.
Installing frevvo as a Windows Service
frevvo recommends that you install frevvo as a Windows service only on a 64-bit Windows system. Follow the instructions listed here.
frevvo can be installed and started/stopped as a Windows Service. Batch files provided in the <frevvo-home> directory can install, configure and monitor the service:
The batch files provided are:
- Install-Service.bat file - Double click this file to install the service.
- Configure-Service.bat - Double-click this file to change the Startup type to Automatic or change the name of the service.
- Monitor-Service.bat - Double-click this file to monitor the bundle service.
- Remove-Service.bat - removes the service. You may have to close the Windows Services panel and reopen it to see the change.
frevvo will run as a Windows Service whether you are using the Development Kit (JDK) or Java Runtime Environment (JRE).
Follow these steps to install as a Windows Service:
Make sure that the name of the directory where you installed frevvo does not have any spaces in it.
- Verify that these steps have been performed to add JAVA_HOME as a system Environment Variable with the appropriate path to your JDK or JRE installation directory.
- Copy the x64 Windows Binaries, tomcat9.exe, tomcat9w.exe and tcnative-1.dll from the <frevvo-home>\tomcat\bin\x64 directory. Replace the existing binaries in the <frevvo-home>/tomcat/bin folder with the binaries from the <frevvo-home>\tomcat\bin\x64 directory.
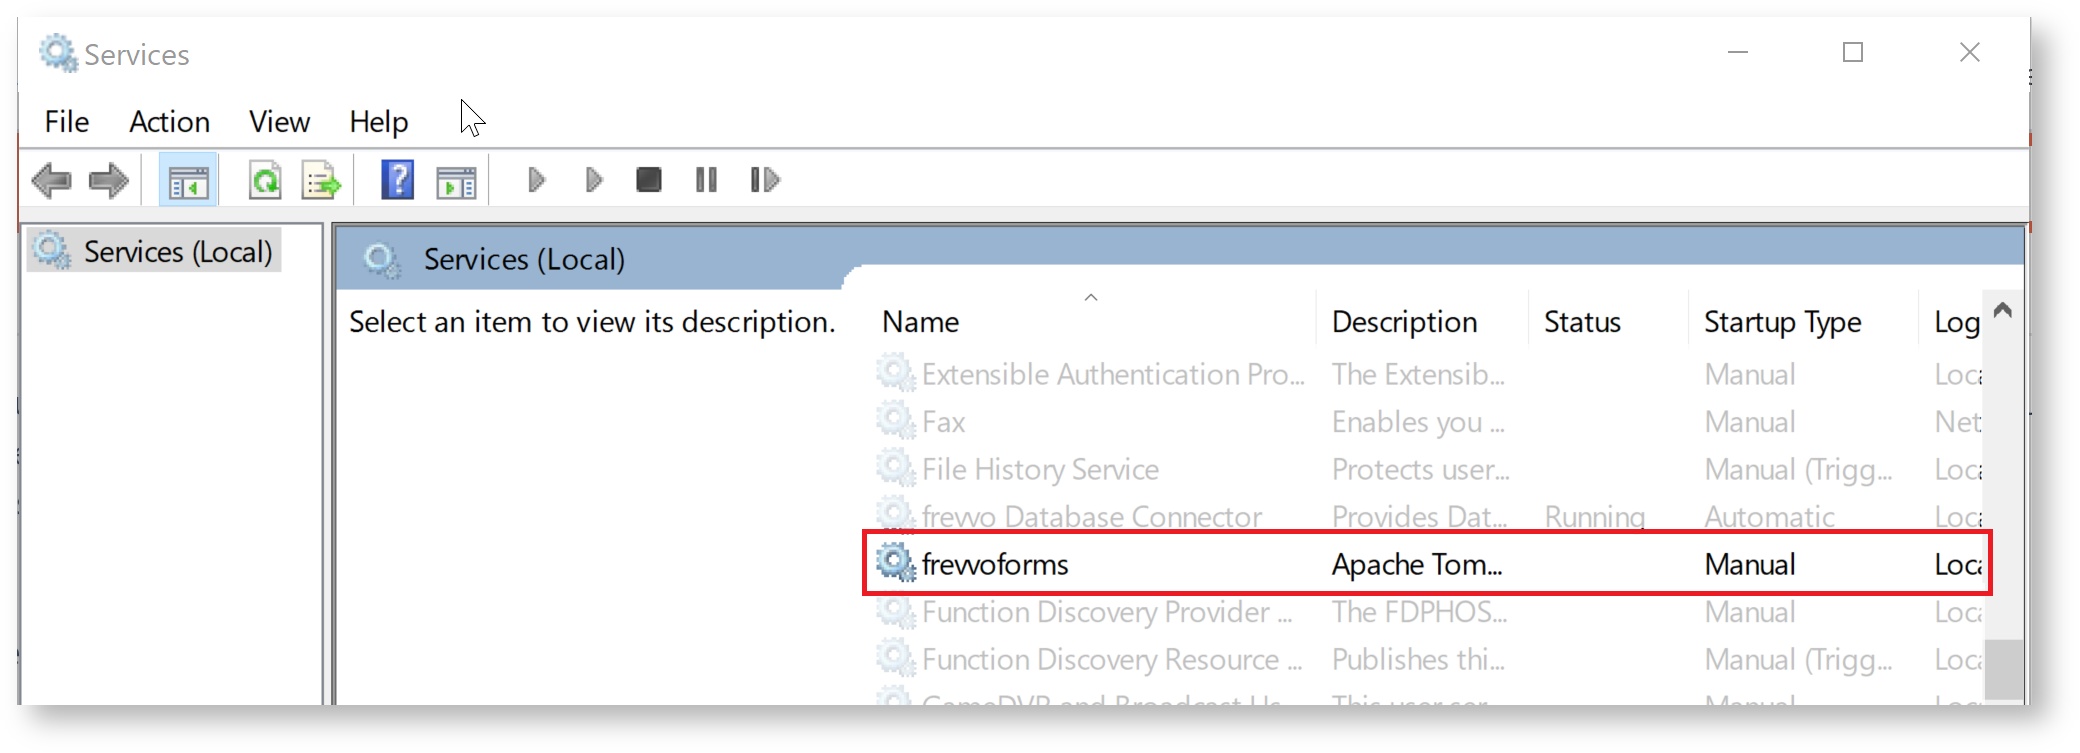
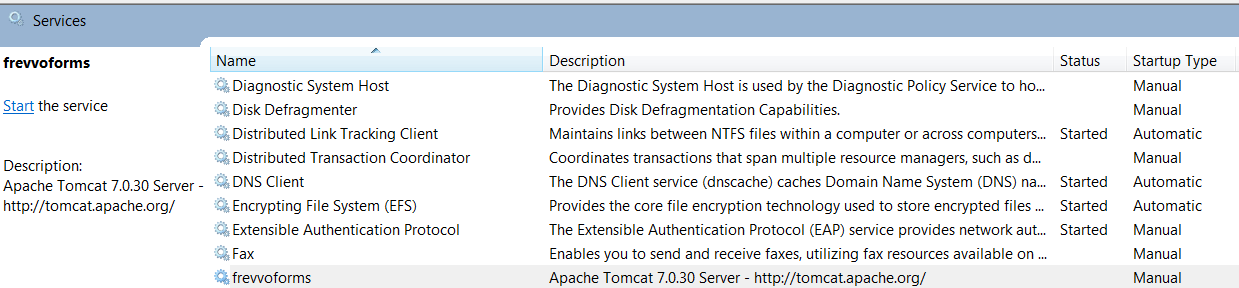
- Navigate to the directory where the batch files are located: usually <frevvo-home>. Right-click the Install-Service batch file and select Run as Administrator. The Install-Service batch file will put the frevvoforms service in the Services list in manual startup mode. The service will be called frevvoforms but the display name can be changed when you run the Configure-Service Batch file.
- Right-click the Configure-Service batch file and select Run as Administrator. Execute the batch file.
- Change the Display Name of the frevvoforms service, if desired, and change the Startup Type to Automatic
- Click Apply and then ok to save your changes.
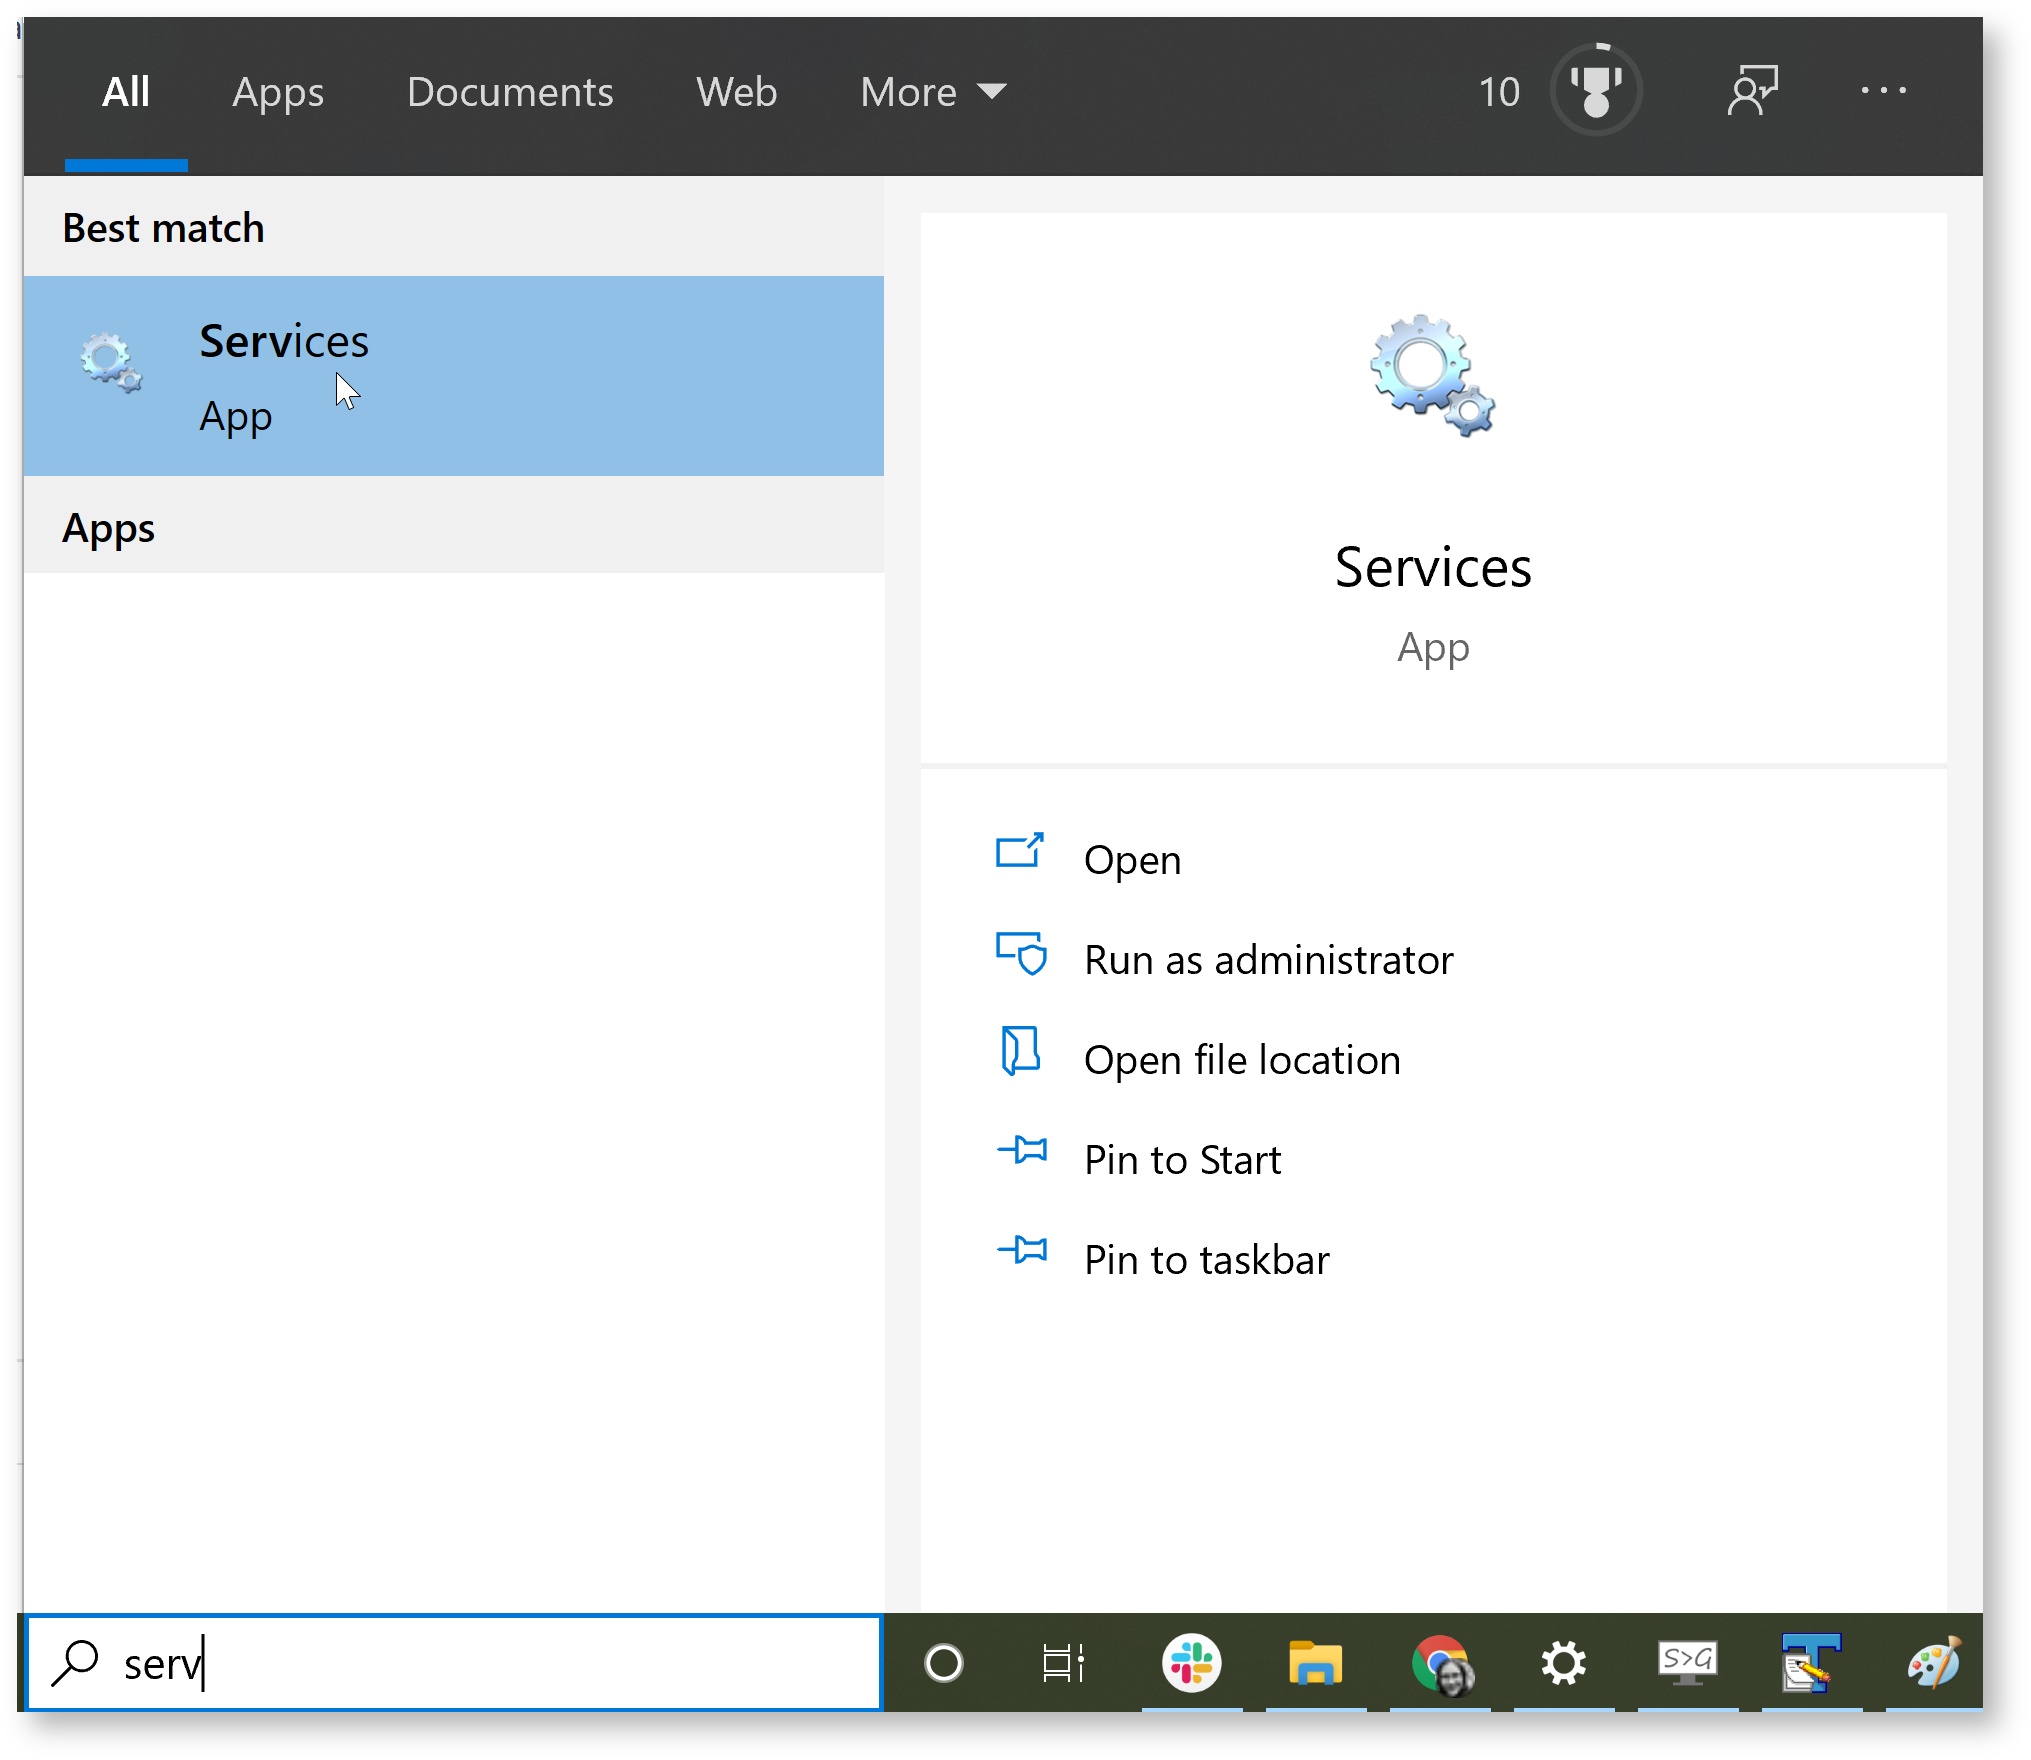
- Find the Services list for your operating system by typing Services into the search bar. Verify that the newly installed frevvo service is listed.
- Double click on the Service and go to the Log On tab. Notice that Log on as is set to This Account: Local Service. This is a Tomcat default security setting.
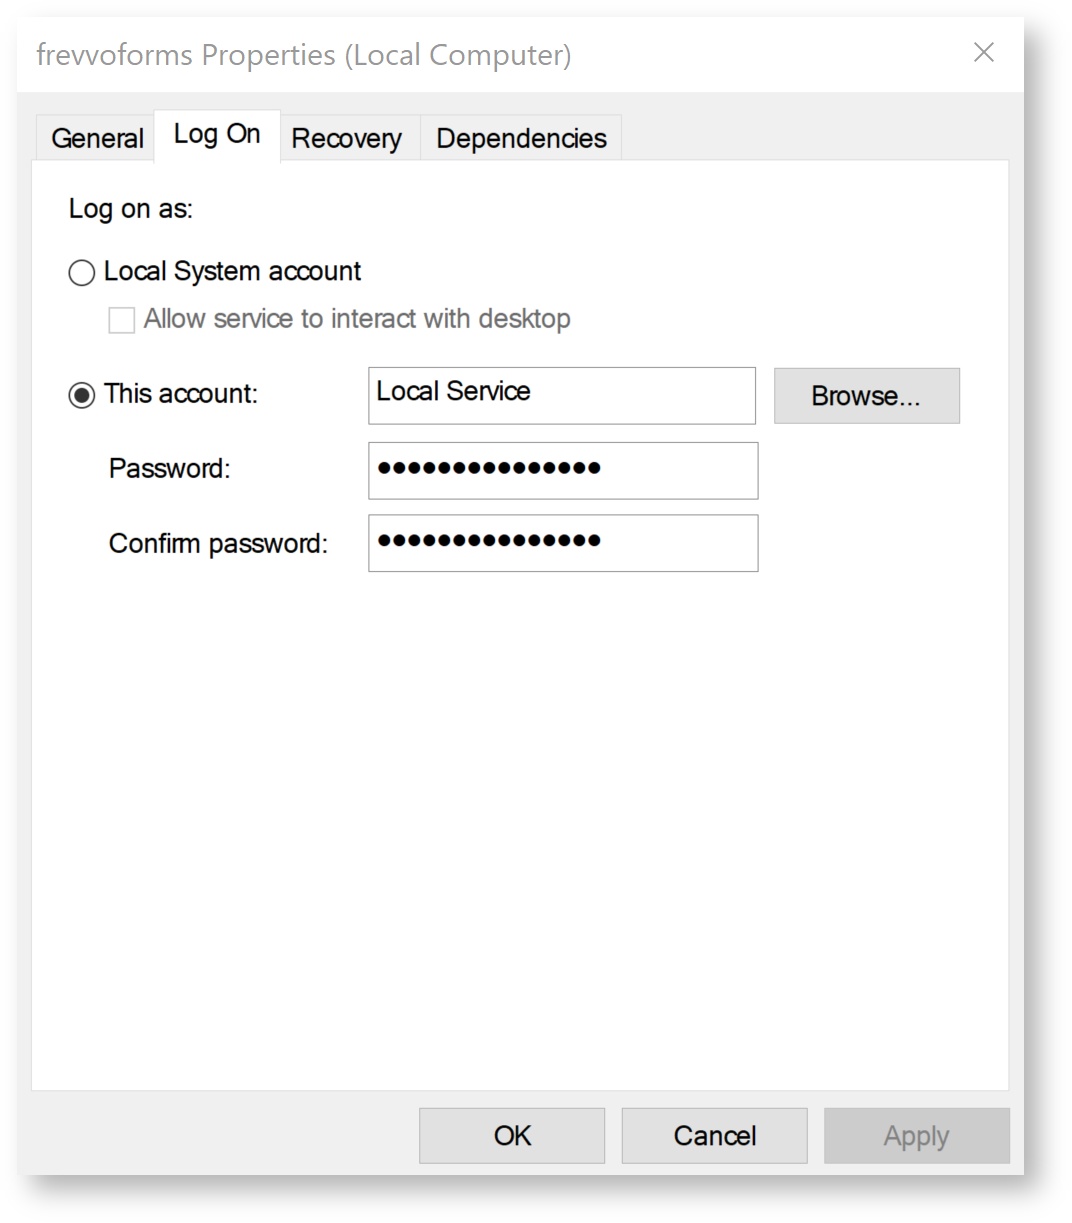
You must make one of the following changes:- To continue running as "Local Service", you have two choices.
- Give "full control" to the "Local Service" account for the frevvo installation folder (e.g. using File Explorer on Windows 10: properties->Security -> Advanced -> Add -> Select a Principal -> Enter "Local Service"), or
Use this command to give specific access to only the Administrators, SYSTEM and LocalService (replace the frevvo-install-directory placeholder with the actual folder path):
"%SystemRoot%\system32\icacls.exe" "<frevvo-Install-Directory>" /inheritance:r /grant *S-1-5-19:(OI)(CI)(F) /grant *S-1-5-32-544:(OI)(CI)(F) /grant *S-1-5-18(OI)(CI)(F)
Or, switch the Log on as setting to "Local System account"
The windows documentation describes the security implications as "The LocalSystem account has broad permissions, including the ability to write to the event log. Use this account with caution, because it might increase your risk of attacks from malicious software. For other tasks, consider using the LocalService account, which acts as a non-privileged user on the local computer and presents anonymous credentials to any remote server".
- To continue running as "Local Service", you have two choices.
- Start the Service.
frevvo fails to install/start as windows service
If running c:\frevvo\Install Service fails to install the frevvo service and fails to run as a windows service, make sure the %JAVA_HOME%/bin is added to the system PATH Environment Variable.
If this fails to solve the problem, the tomcat service may not be able to find msvcr71.dll even though it is in the bin directory of your JDK installation. Copy msvcr71.dll from the bin directory of your java installation the bin directory of your tomcat installation or to your C:\WINDOWS\System32 directory. You may see these errors in the windows service log file:
[174 javajni.c] [error] The specified module could not be found. [986 prunsrv.c] [error] Failed creating java C:\Program Files\Java\jdk11.0.2\bin\server\jvm.dll [1260 prunsrv.c] [error] ServiceStart returned 1