frevvo v9 is no longer supported. Please visit Live Forms Latest for our current Cloud Release. Earlier documentation is available too.
Flows Home Page
- Former user (Deleted)
- Megan Ellis
Forms can be used standalone or composed into flows where you can create both multi-page forms and workflows that route your form through an approval process collecting digital signatures along the way.
The Flows home page appears when you click on the Flows tab.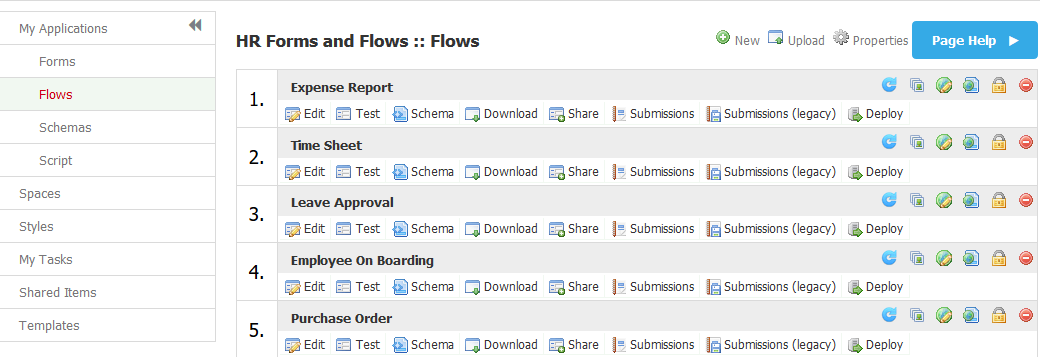
On this page:
You won't see any flows the first time you use frevvos, but as you soon as you create some or install a Workflow Template Application you'll see them here.
Click the Page Help button  for information about the features on the Forms Home page. This feature is only available for Cloud customers.
There are three icons at the top of the flows home page. Each is described below.
- Click the
 icon to create a new flow. Once you have created some flows, the flows will be displayed based on the creation date with the oldest flow on top. You cannot change this default sort order.
 - Click the
 icon to upload a flow zipfile previously downloaded to disk. When uploading a flow to a new tenant make sure the roles set on the flow steps exist in the new tenant otherwise flow navigation will not work properly.
 - Click the
 icon to edit the application properties.
To the right of each flow name are five icons. Each is described below.
- Click the
 Refresh icon to update previous submissions when a change is made to the Searchable Fields in your flow. Refer to Refresh Searchable Fields for the details.
 - Click the
 icon to attach a thumbnail icon to your flow. You can select one of the icons provided by
 or you can upload your own. The icons will display on the iPhone and iPad mobile devices.
- Click the
 icon to internationalize a flow with translations in different languages.
 - Click the
 icon to publish your form as a template that you can use when creating other new forms. See Templates.
 - The next icon controls the Visibility of the flow. Clicking the
 icon brings up an enhanced Access Control wizard that allows the designer to specify runtime access for the flow, configure selected users or roles that can execute the flow and view/edit flow submissions. Additionally, the designer can allocate view permissions for the flow audit trail.
 - Click the
 icon to delete the flow. Keep in mind there is no Undo feature so this action is permanent. Deleting a flow also deletes all associated flow submissions, saved and pending tasks. See replacing flows.
Below each flow name are six more icons. Each is described below.
- Click the
 icon to open your flow and edit it in the Flow Designer.
 - Click the
 icon to test your flow. See Testing Flows.
 - Click the
 icon to download the automatically generated schema associated with your flow. See Schemas for full details.
 - Click the
 icon to download a zipped version of the flow to disk. A single zip file will be created with the name of your flow, followed by _flow.zip. This icon also appears on the Applications home page so you can zip your entire application, including all the flows & forms it contains. The zip file name will be the name of your application, followed by _app.zip.
 - Click the
 icon to share your flow in a number of different ways. Before you click this remember to mark your flow public or you will not be able to share it with others. See Sharing Forms & Flows.
 Click the
 icon to view the submissions for this flow. Click the
  icon to view submissions in the Legacy view.The Export of submissions to Excel feature has been replaced by the Download to CSV. If you have not used the Export to Excel feature in the past, we recommend that you become familiar with the Download to CSV .You can still use the Export to Excel feature by accessing it from the Submissions Legacy view. However, the Legacy Submissions view and the Export to Excel may be removed in a future release.
- Click the
 icon to deploy a flow to Production state and remove the Development watermark. This toggles the icon to the
  undeploy icon. If your form server license enables a limited number of Production forms/flows you will get an error message when you hit your license production form limit.
 - Click the
 icon to undeploy a flow and move it from the Production state back to the Development state.
Refresh Searchable Fields
Searchable Fields are fields in your flow that can be used to search submissions and tasks. It is up to the flow designer to designate which controls should be set up as Searchable fields.
Flow requirements may change over time. What happens if you need to add or delete Searchable fields and you want your previous submissions to reflect your changes? Designers, tenant or superuser administrators or any user given the permission to edit a form can initiate a Refresh Searchable Fields process for a particular flow. Once the process completes, new submissions will reflect the changes made to the Searchable Fields but to show them in previous submissions you must run the Refresh Searchable Fields process for your flow.
For example, let's say you have an Expense Report workflow for your employees with the Employee Name field set up as a searchable fields. You can search existing submissions or tasks by setting up a filter using the data in these fields.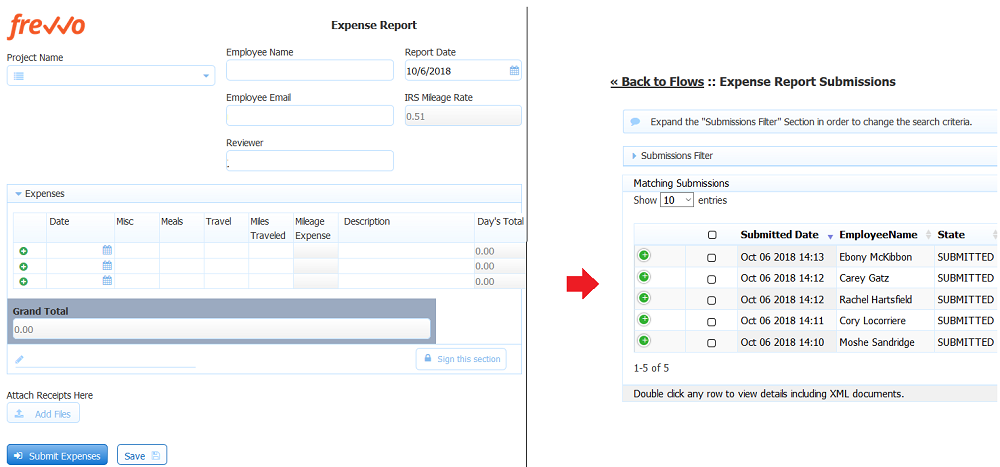
Your users have requested the ability to search submissions and tasks by the Grand Total amount in addition to the name of the employee. You must add the Grand Total field to the list of Searchable Fields in your flow.
- Login as a designer user or your production account if the form is deployed.
- Edit the Application where your flow is located.
- Click on the Flows tab.
- Edit your workflow.
Add the Product Name control in your form to the Searchable Fields list using the Setup Searchable Fields wizard.
Searchable fields configured for a form or flow are the fields that may be used to filter submissions in the submissions view. By default, all your data is saved as an XML document. This is the most efficient way to store/access your data both in terms of speed as well as storage. However, if you prefer to view your data via the submissions user interface, you can choose which fields are available to the user as search criteria in addition to the XML data.
Considerations when deciding which types of fields to configure are listed below.
Searchable fields are indexed for easy search of form/flow Submissions. They can also be used when searching Tasks on a user's Task List. You will see columns for the controls in your form/flow designated as Searchable fields in the Submissions table. This is helpful when trying to locate a particular submission from a long list. Searchable Fields are downloaded into the Submissions Download to a CSV file along with the submission default columns.
Cloud customers can configure up to 20 Searchable Fields.
In-house customers can change change the default value by adding the frevvo.max.searchable.fields configuration parameter to the <frevvo-home>\tomcat\conf\Catalina\localhost\frevvo.xml file.
Saved fields do affect performance as they are independently stored in addition to XML data. This can significantly reduce performance, especially for large forms and require additional storage in the repository. Saved fields are not rendered in the submission table and cannot be used as search criteria for submissions. The only reason to configure Saved fields is if you want to use the Export to Excel feature which is available on the Legacy Submissions view
The Export of submissions to Excel feature has been replaced by the Download to CSV. If you have not used the Export to Excel feature in the past, we recommend that you become familiar with the Download to CSV .You can still use the Export to Excel feature by accessing it from the Submissions Legacy view. However, the Legacy Submissions view and the Export to Excel may be removed in a future release.
Designers should carefully consider which fields to designate as Searchable fields. The selection of the correct fields as search criteria can be very helpful with submission and Task List searches.
The wizard displays the fields from your form/flow. Only controls that are considered form data will be listed. For Example, the link, signature, image, upload, trigger, section, PageBreak, Message, Form Viewer and video controls will not show up in the Searchable field lists as there is no value to save or query against. Also, group controls (tabs, panels, repeats) will not show up on the list of Available Fields.
We do not recommend using columns from Tables or Repeats as Searchable fields. The data will be hard to interpret since there can be multiple data values for the same field.
- Do not select a Textarea field as a Searchable Field if the amount of text stored in the field is greater than 32k.
Searching submissions using a Repeat control from schema is not supported.
- If the value of a field contains the < sign, the data in the Submissions Table will be incomplete. For example, if the value = a<b only the "a" will show in the Submission Table.
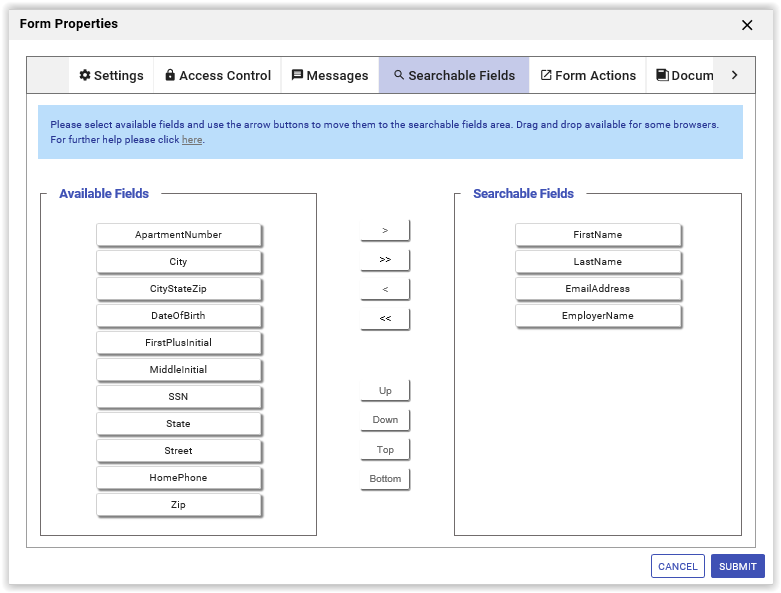
Move the the fields listed in the Available Fields tab that you want to use as search criteria to the Searchable Fields tab. You can change the order of the fields when you move them into the Searchable Fields area. The order of the form fields will be reflected in the Submission Table and the export to a csv file once existing submissions are resubmitted or a new submission is created.
There are two ways to select/unselect or reorder Searchable fields :
Drag and Drop - You can drag the fields from the Available Fields list and drop them into the Searchable Fields list if you re using Firefox, Chrome or Safari browsers. Items may be dragged between lists and within the Searchable Fields list. Items may be dropped between existing items and before the top-most item and below the bottom item. Only a single item may be dragged. Currently, the drag and drop function will not work in the Internet Explorer browsers. This issue will be addressed in a future release.
Center arrow buttons
- The > right arrow moves the selected field from the Available Fields list to the bottom of the Searchable Fields list.
- The < left arrow moves the selected field from the Saved Fields list to the bottom of the Available Fields list.
- The >> double right arrows move all the form fields in the Available Fields list to the Searchable Fields list.
- The << double left arrow moves all the form fields in the Saved Fields list to the Available Fields list.
Click Finish to save. Selecting the X in the upper right corner cancels any changes. Remember to save your changes when you exit out of the designer.
Controls are listed in the Available and Searchable Lists using control names. If the name changes, it will unset the Searchable field. The newly renamed control will now show on the Available list and the designer must move it to the Searchable List again. Hover the cursor over any control name for a tooltip showing the section where it is located, which is helpful if multiple controls have the same name.
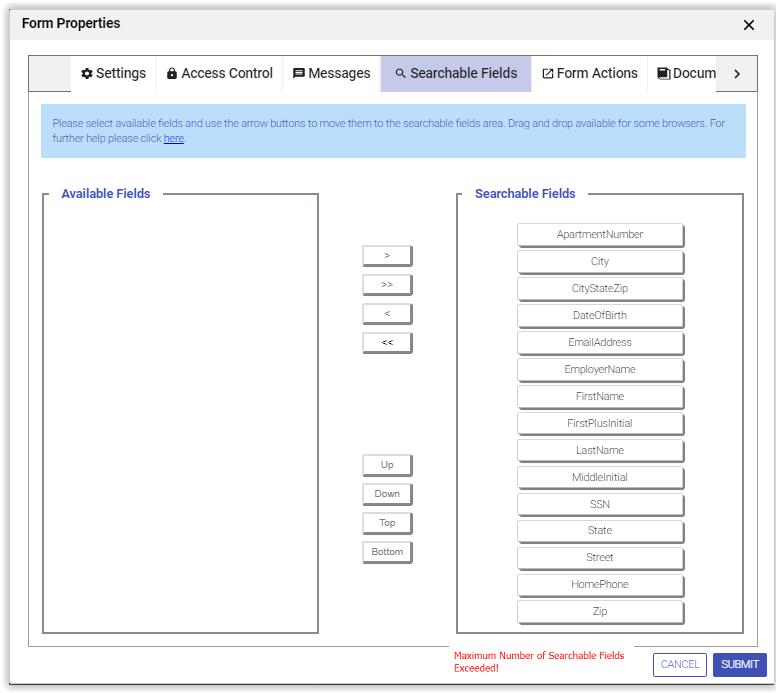
Maximum Number of Searchable Fields
Cloud customers can configure up to 20 Searchable fields. In-house customers can change the maximum number of Searchable Fields with a configuration parameter.
When an attempt is made to add more than the maximum configured number of Searchable fields, an error message ("Maximum Number of Searchable Fields Exceeded!"). displays on the lower right of the screen and will disappear after a short time. Any fields in excess of the maximum configured number will not be allowed.
Adding/Removing Searchable Fields
If you make changes to Searchable Fields in a form or flow, the changes will take affect for new submissions. If you want to update existing submissions to reflect your changes, run the Refresh Searchable Fields process.
Searchable fields can be refreshed for:
All forms/flows in all tenants (in-house) or a specific tenant (Cloud or in-house) - must be initiated by the frevvo Cloud or customer in-house superuser administrator. Cloud customers must contact frevvo to request a refresh of Searchable fields for your entire tenant.
frevvo will run the Refresh process during a time when your users are NOT using
In-house superuser administrators should refer to the Refresh Searchable Fields topic for the instructions.
- An individual form - can be initiated by Designers (owners), Tenant Admins or any designer user given permission to edit forms/flows for a
- An individual flow - can be initiated by Designers (owners), Tenant Admins or any designer user given permission to edit forms/flows for a
If refreshing production forms or flows, run the job during a time period when the forms or flows are not being used.
- Follow these steps to run the Refresh Searchable Fields process.
- Click the Refresh icon for the flow you want to update.
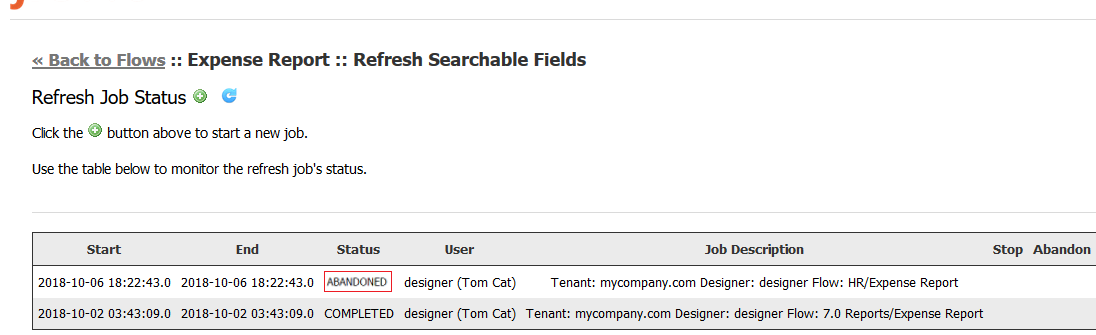
- Information about previously run Refresh processes for the flow display in a table.
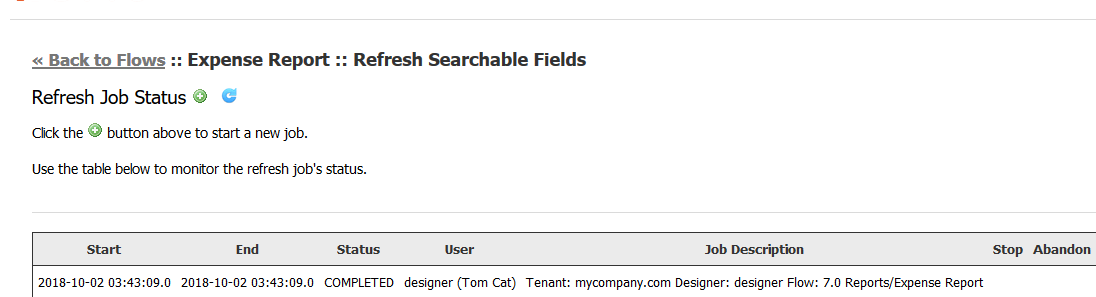
- Starting and Ending date/Time of the process
- Status of the process - completed/failed/stopped/abandoned
- The user id and name of the process initiator
- A description providing the Application/Form Name
- Click the
 icon to start the Refresh Process.
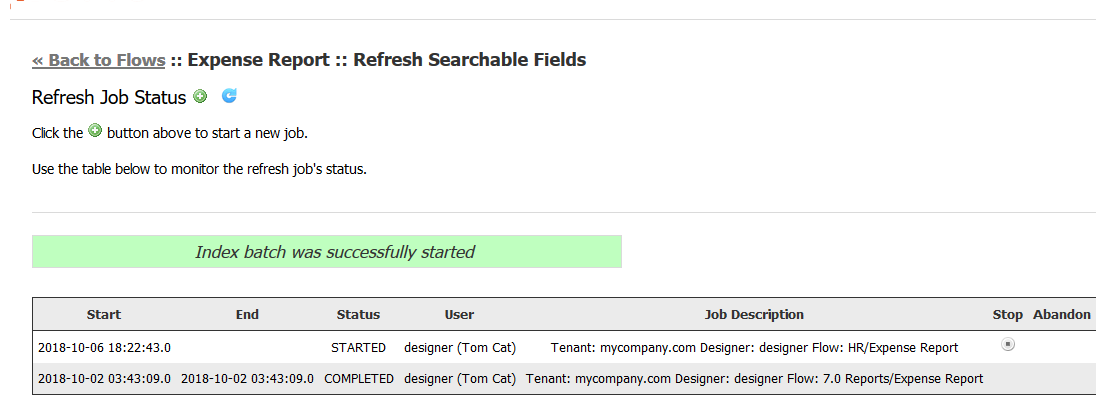
- Click Submit.
- The message "Index batch was successfully started" displays and the submitted process shows in the Refresh Process list table.
- Click the Refresh icon to update the table with the most recent information.
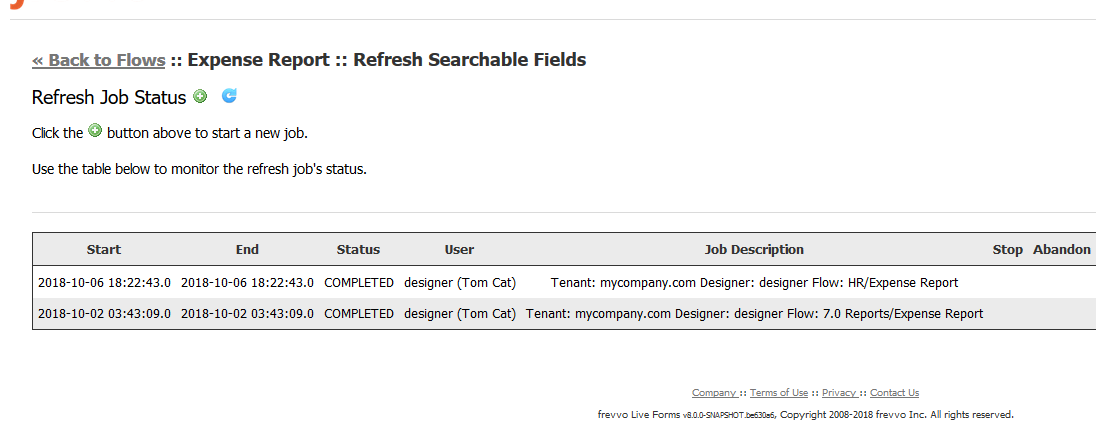
- Click the Back to Flows link to return to the Flows Home Page.
- Click the
Once the Refresh Searchable Fields process for the form is completed, the Product control and the associated data displays as a column in the Submissions Table.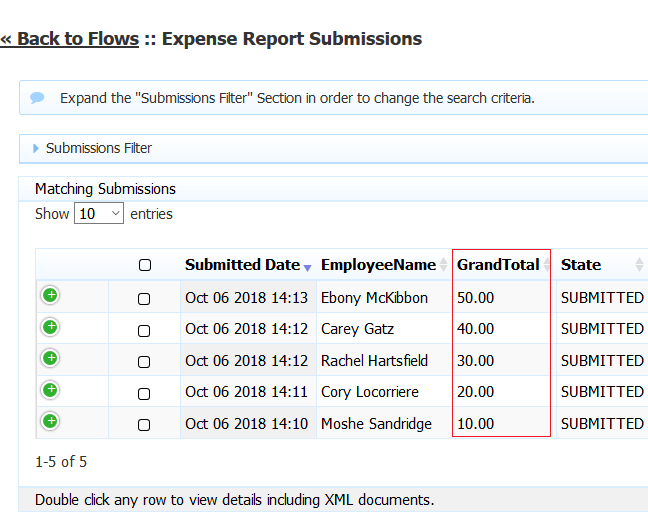
The Refresh Process can be stopped or abandoned once started.
Stopping the Refresh Searchable Fields Process
Once you have initiated the Refresh Searchable Fields process, the UI allows for the job to be stopped or aborted. The process can be stopped if it is in the STARTING or STARTED state.
You will notice a Stop column in the row in the table for the process that was started. To stop the job:
- Click the Stop icon
 .
.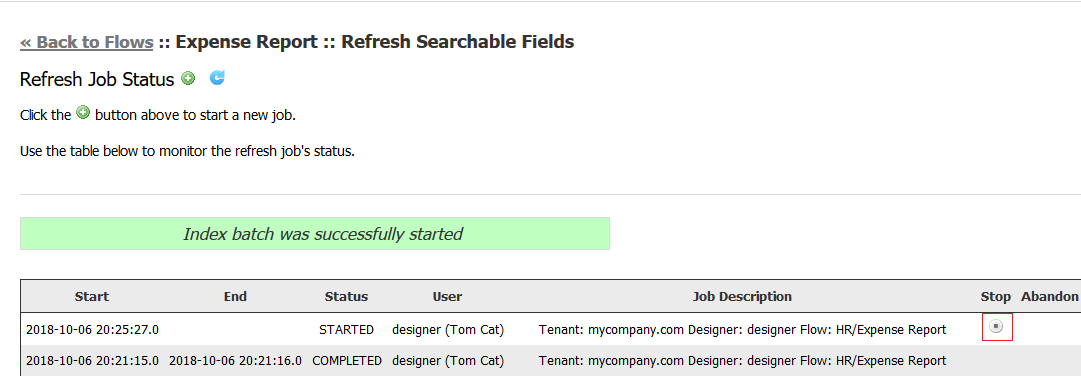
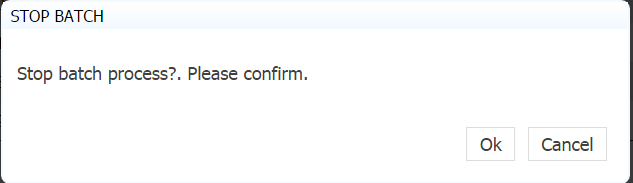
- Click Ok to confirm.
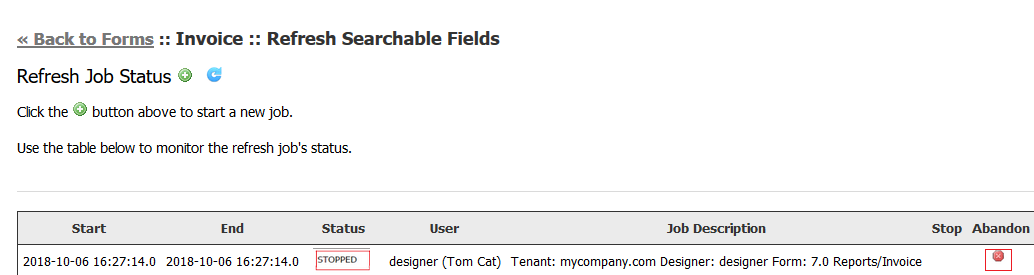
- When the process is stopped, the status column will update.
Restarting a Stopped Refresh Searchable Fields Process
When the Refresh process runs, tables that store the state of the process are created in the frevvo database. By default, if a process were to fail or be stopped, starting it again would restart the failed/stopped job from where it failed/stopped.
To restart a Stopped/Failed refresh process, simply start the batch job again with same tenant and it will resume the last stopped job.
To prevent the last stopped job from restarting, change the status to Abandoned.
Abandoning the Refresh Searchable Fields Process
The Refresh Searchable Fields process can be abandoned if it is not in the STARTING or STARTED state. The process must be stopped to mark it as abandoned. This prevents it from being restarted. You may want to abandon a batch job if it failed and restarting it would result in another failure. Abandoning the batch job allows you to start over again with a new process.
When you stop a Refresh process, you will notice Stop and Abandon columns in the row in the table for the process that was started. To abandon the job:
- Stop the Refresh Searchable Fields Process
- Click the
 Abandon icon in the row in the Abandon column for the process you want to prevent from restarting.
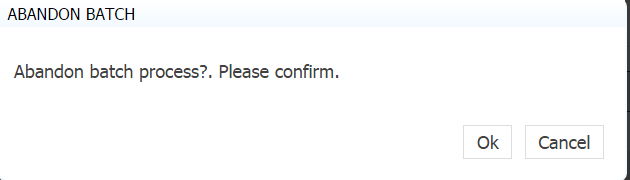
 - Click Ok to confirm.
- The Refresh Job Status screen will update.
Assigning a Thumbnail Icon to a Flow
The same details apply to forms and flows. See Forms Home Page.
Production Flows
The same details apply to forms and flows. See Forms Home Page.
Deleting Flows
When you delete a flow by clicking the icon the form, the flow is permanently removed and cannot be restored. The delete operation also deletes all submissions from frevvos; submission repository and any saved in process form instances and pending workflow tasks.
Before deleting you may wish to download a copy of the flow to disk by clicking the download icon.
Uploading/Replacing Flows
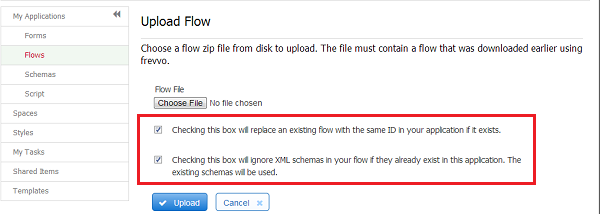
If your goal is to update your flow to a new version that you had previously downloaded to disk or to revert to an older version previously downloaded to disk, do not first delete it since, as stated, this removes all associated saved/submitted/pending flow instances. Instead leave the original as it is and upload the version from disk by clicking the upload icon. A dialog will display that lets you browse to the flow on disk.
Notice there are two checkboxes for uploading your flow:
Checkbox 1: Check this box to replace the current version of your flow with an updated version. The updated version will have the same ID in your application if it exists.
Checkbox 2: Check this box if the flow you are uploading has XML schemas and you want these schemas to be ignored if they already exist in the application. The existing schemas will be used.
To copy a flow, you must download it first then upload it to the same user. The uploaded flow will appear on the Flows Home Page named Copy of followed by the name of the flow that was uploaded. Access Control permissions assigned to the original flow are retained in the copy.

Error Messages
When uploading a flow with the same ID as an existing flow, without checking Replace, a copy will be created and the designer will see an error message: "The flow that was uploaded matches the id of one that already existed so a copy was made. If you intended to replace the existing flow, delete the flow you just uploaded and upload it again but check off the ‘Replace’ option."
When uploading a flow with Replace checked that is currently being edited by another user, the designer will see this error message: "This flow is currently being edited by <user@tenant>. Please try again later."
Designer ACL
Designer users can grant other users the ability to edit a flow and access related submissions. The Access Control and Shared Items topic explains the details.