Live Forms v7.4 is no longer supported. Please visit Live Forms Latest for our current Cloud Release. Earlier documentation is available too.
Company Picnic Invitation Form with CSV Download in Confluence Tutorial
What are we going to build?
We're going to see how easy it is to create a company picnic invitation form, add it to a Confluence page and view the results in Confluence or download them to a csv file that can easily be opened in Microsoft Excel.
On This Page:
Create the Survey Form
Read the general Live Forms documentation on designing forms for a detailed discussion of and their features.
Add a new form to a Confluence page
Create a new page in Confluence for your survey. Add a form to the page by selecting the Form menu item. This menu item is available only when the Confluence plugin is correctly installed and configured and you are logged in to Confluence as a user with the appropriate permissions (you must be able to Edit the Confluence page and, if you configured a Form Designer group in the plugin configuration, you must belong to that group). The Add Menu looks like the image below for Confluence Versions 4.x.

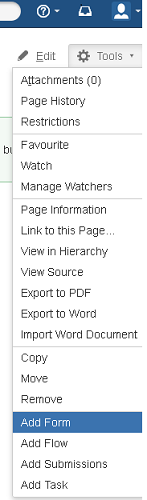
If you are using Confluence v5.1, the Add Menu is a choice on the Tools Menu. Click on Tools and select Add Form from the dropdown choices.
The Add Form page will be displayed. You can create a brand new form, create a new form by starting from a template or add an existing form. We'll create a brand new form. Select the Create a new form option, enter a name and click Add.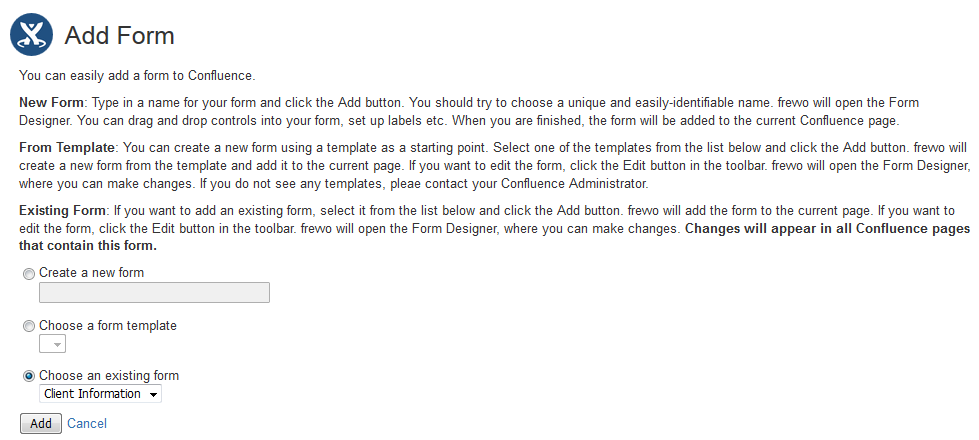
Design the form
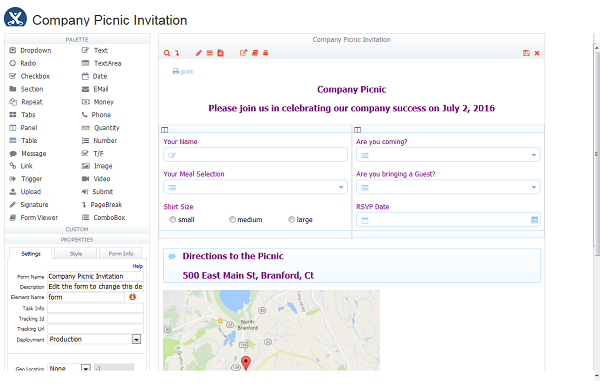
This will launch the Form Designer where you can drag and drop controls, change labels etc. Drag and drop your desired survey questions into the form: you can use Text controls for free text answers, Radio controls for a single selection, Checkboxes for multiple selections etc. There are pre-formatted controls for Dates, Money, Phone numbers and you can also create custom patterns for your needs such as Zip Codes or Social Security Numbers.
You can use Business Rules for skip logic, computing totals and many other functions.
Set a Confirmation message
You can use the Form Action wizard to display a custom message when your survey is submitted. Click on Form Action and select the 'Display message when users submit your form' action. In the wizard that is displayed, enter your custom message. For now, just enter the text "Thank you for taking the survey". See the Display Message Form Action documentation for more detailed information including instructions on using dynamic display messages.
When you click Finish in the Form Designer the form will be added to your Confluence page.
Add a Submissions Confluence page
Form submissions can be viewed directly in Confluence. Create a Confluence page and, select the Add Submissions menu item. This menu item is available only when the Confluence plugin is correctly installed and configured and you are logged in to Confluence as a user with the appropriate permissions. The Confluence 4.x Add menu is shown below.

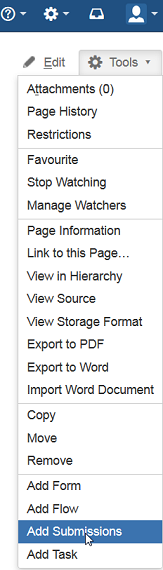
The Add Menu in Confluence v5.1 has changed. Click on the Tools Menu then select Add Submissions from the dropdown choices.
The Add Submissions page displays. Select the Survey form you we created from the dropdown and click "Add". The submissions view will be added to your Confluence page.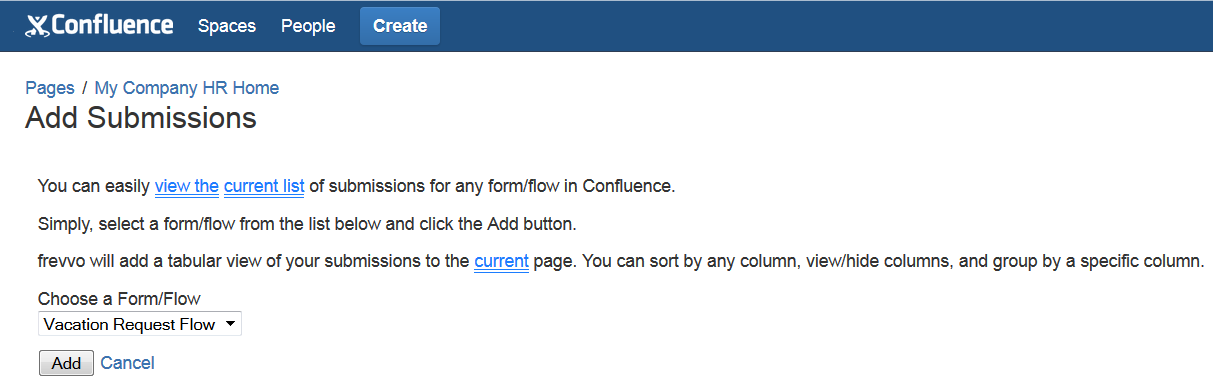
Submissions are displayed in a table view. Double click on any submissions to view all of the data. Please refer to Viewing Form Submissions in the documentation for a full description of all the features.
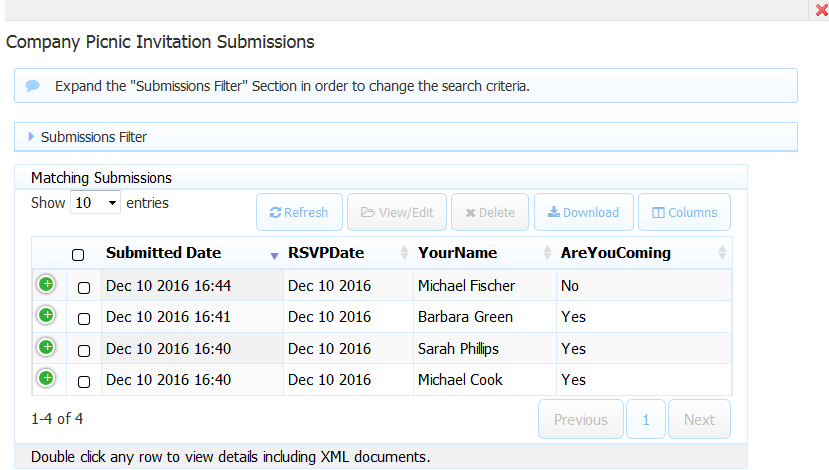
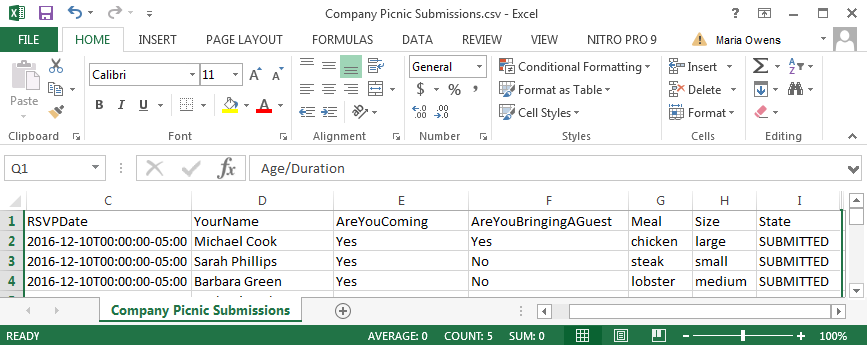
Downloading Form Submissions to a CSV file
Click the Download button above the table to generate and download the submissions csv file. Open the file in Excel. Show/hide columns in the spreadsheet if desired.