Live Forms v8.0 is no longer supported. Please visit Live Forms Latest for our current Cloud Release. Earlier documentation is available too.
Testing Forms
- Former user (Deleted)
There are two ways you can test your forms.
Method 1: Click the  save and test icon from within the forms designer to save the changes to your form and automatically display the test popup window. Complete the form in the popup window to test it. When your testing is completed and the test mode screen is closed you will be returned to page in the forms/flow designers where you clicked the save and test icon if you need to make additional changes.
Method 2: Click the  save and exit icon on the Forms Designer toolbar to save the changes to your form and exit the form designer. Then click the
 ![]() Test icon for the form on the Forms Home Page to enter Test Mode. Complete the form in the popup window to test it.
Test icon for the form on the Forms Home Page to enter Test Mode. Complete the form in the popup window to test it.
Both methods display the test mode popup which includes the Test Mode Views discussed below.
The Save and Test feature is not available for frevvo customers integrating with Confluence. The icon can be hidden with a /wiki/spaces/frevvo80/pages/975572229.
On This Page:
Method 1 - Save And Test
The save and test feature reduces form development time by allowing designers to test forms, business rules and mapped PDFs without leaving the form designer. Modifications needed after testing can be quickly addressed since you will still be in the form designer once you close the popup window. This is particularly helpful when building, troubleshooting, and testing forms, business rules and mapped PDFs.
When the save and test is clicked, the form is saved in the background, and the Test popup window displays reflecting the newly saved version of your form. The form will behave exactly as it will when users access it. To test the form, just complete it as your users would and click Submit
When you close the Test popup, you will be on whatever designer page you were on when the save and test icon was clicked. This allows the designer to go right back to making changes after closing the Test popup.
You will see the save and test icon:
- On the designer , rules and PDF mapping pages.
- An informational processing message as shown in the image is displayed after the icon is clicked until the test window opens.

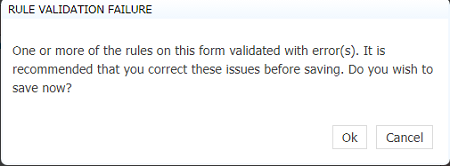
- if your form contains business rules they will be validated before the test popup displays and you will see this message:

- If form/field validation errors are detected, closing the test popup returns you to the designer where you can quickly make corrections and retest.
- Save and Test checks for Rule and pdf mapping errors before the test popup displays. This gives the designer the option to correct first before saving and testing.
- If rule validation errors are detected, the designer is notified and given the option to correct before the Test popup is displayed.
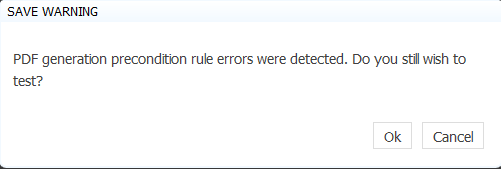
- If PDF mapping errors are detected, a warning message with information about the error displays.
- If rule validation errors are detected, the designer is notified and given the option to correct before the Test popup is displayed.
- The form version increases by 1 every time you click on the save and test icon. It is reflected on the on the form edit page, when viewing/editing submissions and when you download/upload a form.
If you use the Save and Test feature to save the latest versions when developing your form, simply click the  Cancel icon when you are ready to leave the designer.
Refer to Test Mode Views for information about the features that are available when the test popup displays.
Browser Popup Blocker Message:
If your browser is configured to block popups, you may see this message the first time you click the save and test icon. If so, clock ok to open the test window then check your browser settings to allow pop-ups.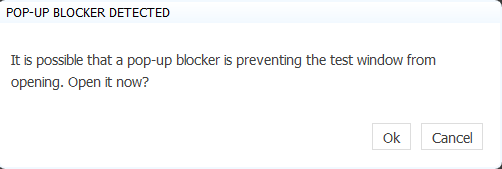
Method 2 - Save then Test
Of course, you can always click the save and exit icon to save the changes to your form but you will be returned to the Forms Home page after the changes are stored. The test popup is accessed by clicking the  Test icon. To continue making modifications to your form you must click the
  Edit icon to return to the form designer for subsequent modifications.
Refer to Test Mode Views for information about the features that are available when the test popup displays.
Test Mode Views
There are three icons in Test mode that you can use to see what your form will look like and how it will work on an iPhone or an iPad. Theses icons appear at the top of the screen - desktop, tablet and smart phone. The default view is desktop.
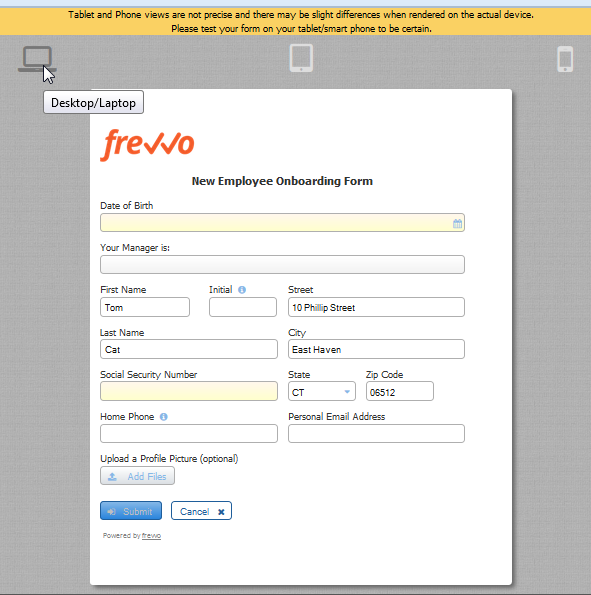
Clicking on the the tablet and smart phone icons gives you an approximate view of the form on the tablet or phone. You can enter data in the Phone and Tablet views just like you can in the Desktop view to test your form. This is very helpful when designing forms for mobile devices.
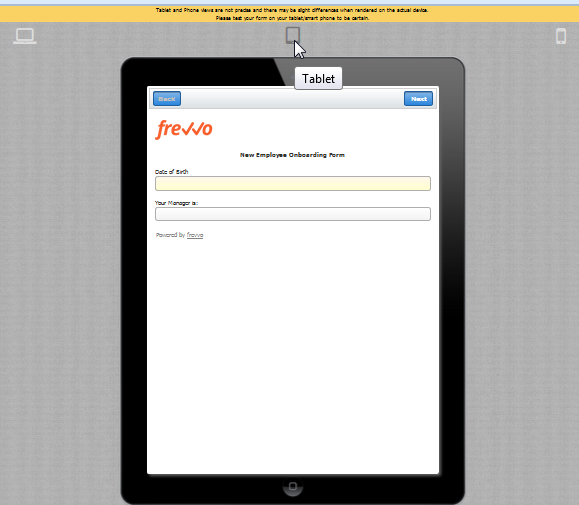
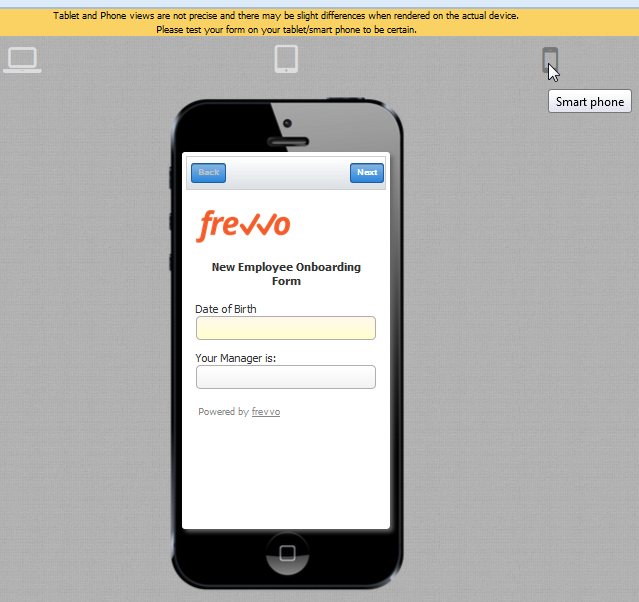
Tablet and Phone views are not precise and there may be slight differences when rendered on the actual device. It is highly recommended that you test the form on the actual device to be certain.
Testing Your Form
Before you share your new form or flow with users you'll want to test it to make sure it looks and works the way you want. You will want to test that the form is properly validating data entered into each control, that all your rules are correctly causing the behaviors such as show/hide and calculations that you want.
Each time you supply a value in a control, sends an asynchronous request to the server to validate the data. This means users will get immediate feedback while they are using your form. They do not have to wait until they click the form's submit button for example to discover that a zip code is missing a digit or that they neglected to fill in a required phone number field. Try to type letters in a number control, for example, and you’ll immediately see an error message.You'll want to test your form to make sure that you are using the correct control based on the validation you want. For example if you used a Text control for a phone number field, you'll won't see the correct error occur if you enter an incorrect phone number. Go back and edit your form to change the control type for that field from Text to Phone.
Your form cannot be submitted until valid data is entered into all required fields and if data is entered into an optional field that data also must be valid. You will want to test your form to verify that all the fields that you want to require the user to fill are indeed set to required in the form. If the user does not enter data into all your form's required fields or enters invalid data into an optional field, the invalid fields will be highlighted with an orange background color when the Submit button is clicked. For example, enter abcde into a Money control. An error will appear to alert the user that the entered data is invalid. And even if all required form fields are filled the form cannot be submitted until the error is corrected. For example, replace abcde with 89.25,click Submit and the form will be submitted.
The designer can also display a message instructing the user what to do. This method is very helpful to users when trying to determine why a form does not submit. Refer to this topic for the details.

Sometimes you'll test your form and see that the form will not submit even when all required fields appear to be filled with valid data. The cause is always a hidden required field with no data or a hidden field with invalid data. Since the field is hidden your users won't be able to enter a value into that required field nor to correct an invalid value in that field and will therefore never be able to submit your form. In a simple form it won't be hard for you to open it in the form designer, find the hidden required field and fix the problem. In a large form or one that has dynamic business logic that makes fields hidden/visible or required/optional or sets values in business rules, you'll need to debug this problem while testing the form.
The first step to solving this issue is to understand which control(s) are causing this issue.There are two ways to find the invalid controls:
Method 1
- Install the Firebug tool, http://getfirebug.com in the Firefox browser. This tool is a great way to find hidden controls which are invalid or required and empty.
- Test your form and enable the firebug tool.
- Open firebug's HTML tab and search for all instances of s-invalid using the search box in the tool's top-right corner. This will take you to the HTML of each control in the invalid state. The control's name can be found in that HTML.
- Now you can edit your form in the designer, find that control and fix the issue.
If a required control is inside a hidden section, then that section will also be invalid and you will also see s-invalid in the section control's HTML. This s-invalid is not the root cause of your bug. You will have to continue searching with firebug further to get to the actual control inside the section control that is the root cause.
Method 2
- Install the Firebug tool, http://getfirebug.com in the Firefox browser.
- Test your form and enable the firebug tool.
- Click on the Console tab.
- Execute this JavaScript function _frevvo.api.forms.controls.getControlErrors(); Calling this function returns a collection of objects that describe any invalid controls including the control id, control label and the error description. In the image, you can see the reported errors for an Email, Money and Date field that contain invalid data. The controls are inside of a hidden section and are not visible to the user who is trying to Submit/Continue the form/flow.

Test your form to verify that all your business rules are working as expected. For instance if you have a radio field "Billing address same as Shipping?" and select "no", you would expect the hidden Shipping Address section to become visible and required. Test each form field that has dynamic business rules to verify that they are working as you want. Also remember to test the negative cases, for example if you then click "yes" to the billing address question, make sure the Shipping Address section control becomes hidden and optional again. Note it's very important that hidden controls are not required as discussed above.
Test your form to verify that the final form and doc actions are working as expected. Make sure your final submissions are reaching their desired end point. For example, if your form Doc Action is configured to send an email or post to another system or to save to Google Drive or Sheets, you'll want to verify that this is working. Submissions errors have many possible causes. Maybe your forms is configured to send an email and you used a control template in the email wizard To field. If the email address control was filled with an bad email it will cause the submission to fail. Errors can also occur if you are posting to a web service and the web service fails. One way to debug submission errors is to set your Error Actions to {_frevvo_root_cause_msg}. A second way to debug submission errors is to use the submission repository. The submission repository has an error indicator on any submission that had an issue. See Submission Errors.
When you are done testing and are ready to roll out your form, mark it public or public in tenant via the  icon and make it available by sharing it.
Forms can be translated to multiple languages using the internationalization feature which enables you to easily localize your forms for target audiences that vary in culture, region and language. supports localization from the browser's locale setting.
You can test the translation files you create and upload into by clicking the
 test icon on the Internationalization screen or you can use the &locale URL parameter to initialize the form with other languages. See Multi Language Support for details on creating translations and testing locale translations .
Purging form/flow test data
Refer to this article for a quick easy way to purge your test data (tasks and submissions)
Internet Explorer Compatibility Mode
If your Forms and flows do not look or work correctly in Internet Explorer, Compatibility View may be turned on. Refer to this article for more information.