Forms and Workflows Home Page
- Megan Ellis
Check out a 5-minute Video Tour of the Forms & Workflows Home Page.
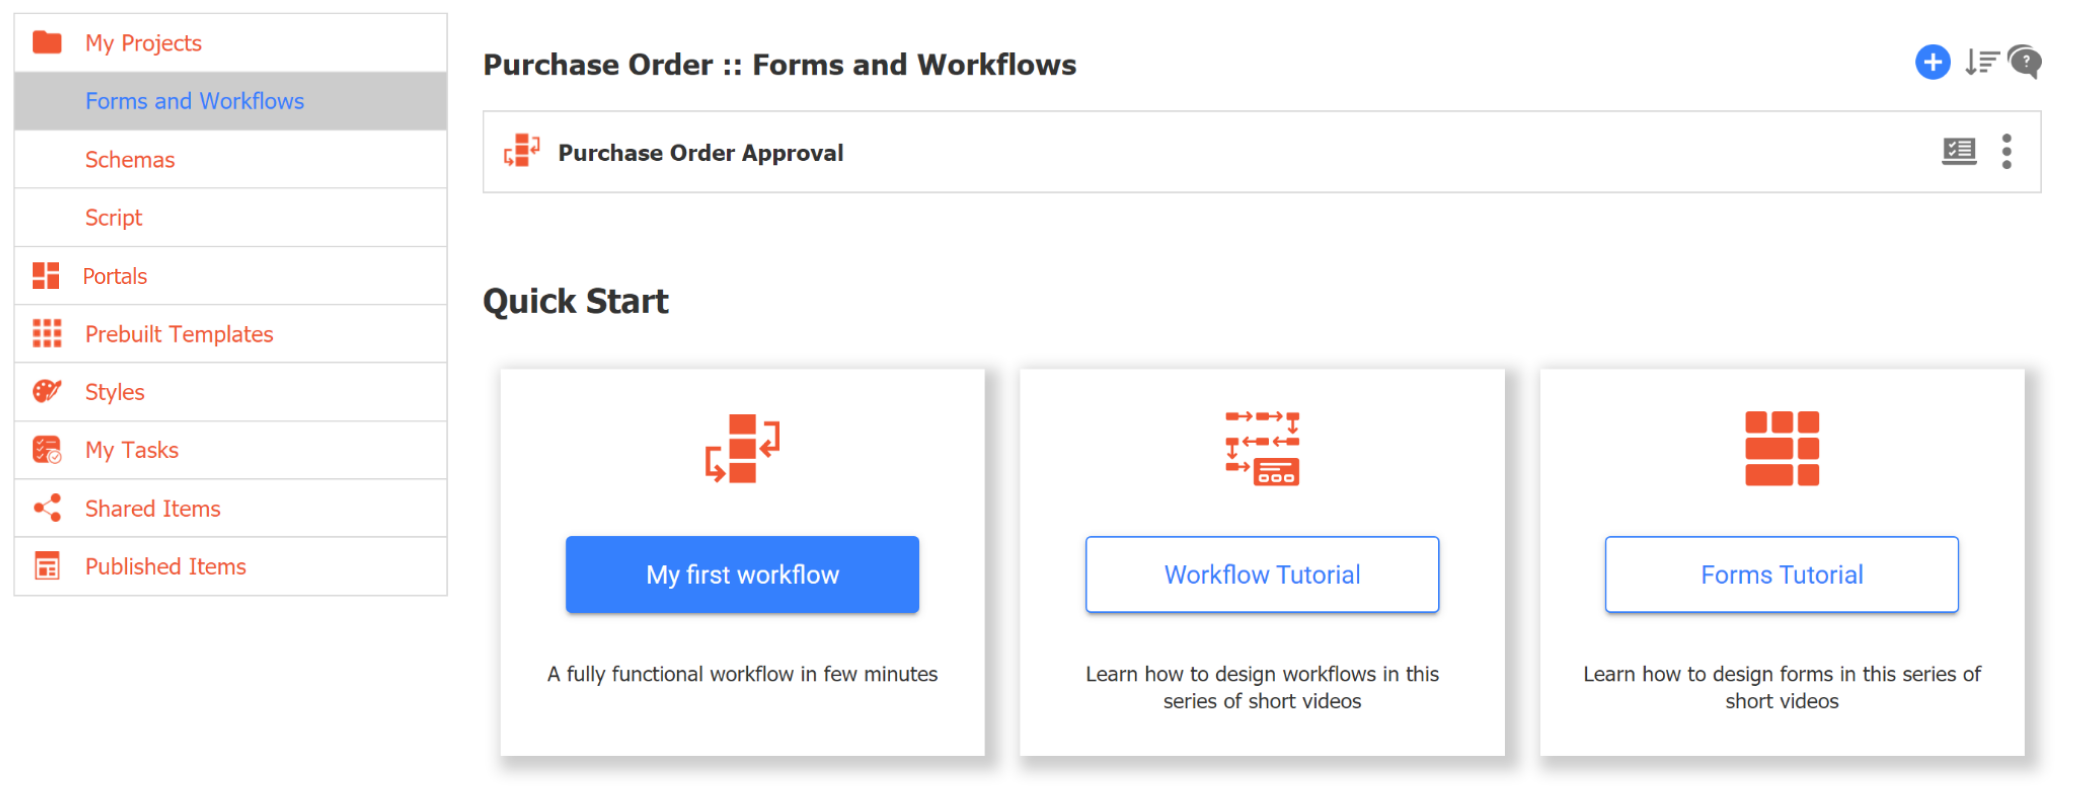
The Forms and Workflows homepage appears when you create or edit a project.
Navigating the Forms and Workflows Home Page
Use the Quick Start links to show step-by-step instructions for creating forms and workflows.
There are three icons at the top of the Forms and Workflows home page:
 Add Content: Install a prebuilt template, create a new form, create a new workflow, or upload a form/workflow. New content will be added to the forms/workflows list.
  Sort the list of forms and workflows. Content will be displayed with the last modified date on top. You can resort them by last modified date or alphabetically.
 Information about the features on the Forms and Workflows Homepage. This feature is only available for Cloud customers.
Forms and Workflows in the list can be identified by their icons:
 Form
Form Workflow
To the right of each form/workflow name there is a ![]() Test icon for quickly entering test mode, and a
Test icon for quickly entering test mode, and a![]() Form/Workflow Action Menu, which provides the following options:
Form/Workflow Action Menu, which provides the following options:
 Edit opens your form/workflow in the respective Form or Workflow Designer. You can also open your form by clicking on the form/workflow name.
 Test your form/workflow. See Testing Forms/Workflows.
 Set Permissions brings up a quick-view Access Control wizard that allows the designer to specify view and edit access for the form/workflow and its submissions. Access Control will typically be managed in the Form/Workflow Properties Wizard.
 Duplicate creates a copy of your form/workflow. The newly copied content will be independent from the original; any changes you make to the copy won’t affect the original and vice versa. Access Control permissions assigned to the original form/workflow are retained in the copy.
 Share your form/workflow. Forms/Workflows that will be shared should have the Access Control set so it can be shared with others. See Sharing Forms and Workflows.
 Deploy a form/workflow to Production state and remove the Development watermark. This toggles the icon to the
  Undeploy icon. If your license enables a limited number of Production forms/workflows you will get an error message when you hit your license production limit. When a form or workflow is deployed, it will appear with a flag icon
 beside the form/workflow name.
 Download a zipped version of the form/workflow. A single zip file will be created with the name of your form/workflow, followed by _form.zip or _flow.zip.
  Publish as Template that you can use when creating other new forms/workflows. See Templates.
 Submissions gives access to the form/workflows submissions.
  Refresh Search Fields updates previous submissions when a change is made to the Searchable Fields in your form/workflow. Refer to Refresh Searchable Fields for the details.
 Schema downloads the automatically generated schema associated with your form/workflow. This schema will contain all the controls added from the Palette. This will not contain controls added from your own schemas. See the Schemas topic for more details.
 Thumbnail attaches an icon to your form/workflow. You can select one of the icons provided by
 or you can upload your own. The icons will display when you access your forms/workflows from a
 Internationalize a form/workflow with translations in different languages.
 Delete the form/workflow. Keep in mind there is no Undo feature so this action is permanent. Deleting a form/workflow also deletes all associated form submissions and any saved in-process form/workflow instances. See deleting forms/workflows and replacing forms/workflows below.
Refresh Searchable Fields
Searchable Fields are fields in your form/workflow that can be used to search submissions and tasks. The designer designates which controls should be set up as Searchable fields.
Adding or deleting Searchable Fields at any time will immediately take effect for future submissions, but not for past submissions. Designers, tenant or superuser administrators or any user given the permission to edit can initiate a Refresh Searchable Fields process for a particular form/workflow to reflect the changes made to the Searchable Fields in previous submissions.
For example, let's say you have an Invoice form with the First Name and Last Name fields set up as searchable fields. You can search existing submissions or tasks by setting up a filter using the data in these fields.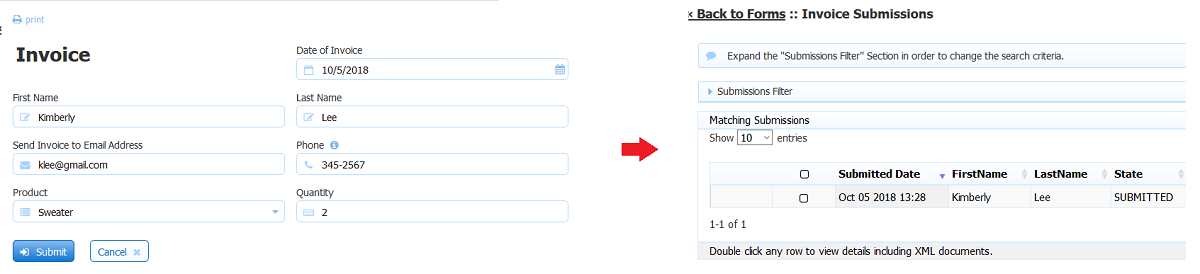
Your users have requested the ability to search submissions and tasks by product name in addition to the First and Last name of the customer. You must add the Product Name field to the list of Searchable Fields in your form.
- Login as a designer user or your production account if the form is deployed.
- Edit the Project where your form is located.
- Edit your form. Click on the toolbar to display the form properties.
Add the Product Name control in your form to the Searchable Fields list using the Setup Searchable Fields wizard.
Let's consider a Job Application workflow with the following requirements:
- The workflow is going to be performed by anonymous users. Anonymous users do not sign in to frevvo.
- The anonymous user receives an email that includes a link to the workflow.
- The workflow must collect a lot of information from the applicant: Contact Information, Education and Employment history, References and more. You can create one long form or design a screenflow with an Anonymous Task step and subsequent steps as separate screens to collect the information.
- The user must have the option to compete the screenflow in multiple sessions. Clicking on the email link takes the user back to the last step in the screenflow where the Continue button was clicked.
- The user must be able to navigate back to previous steps to review or update information that was previously entered.
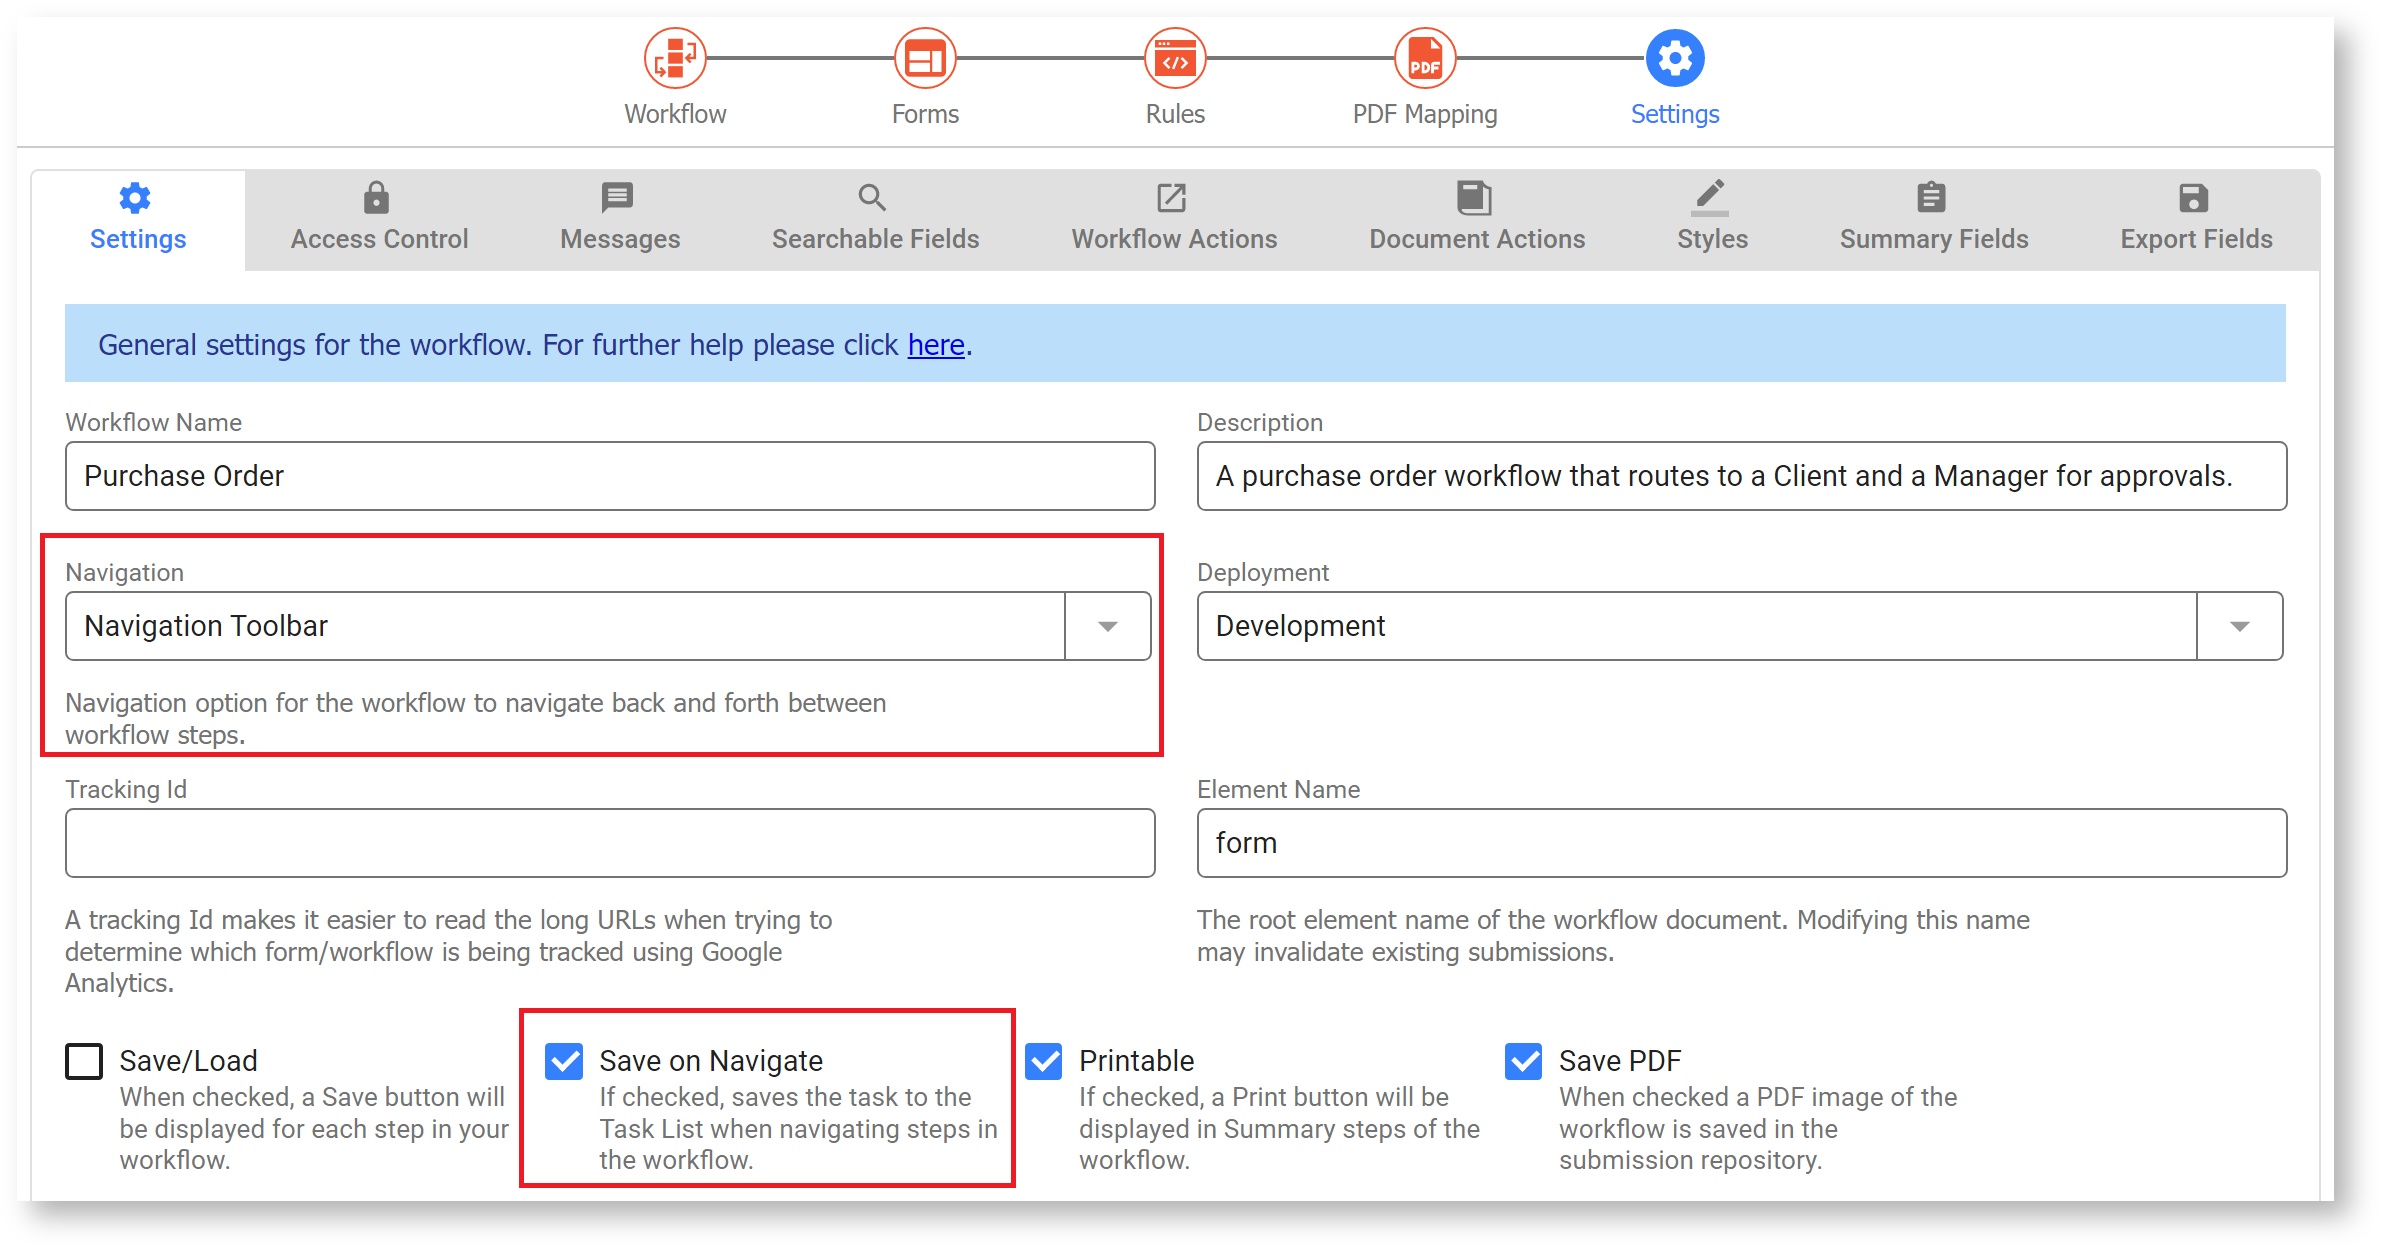
Workflow Designer
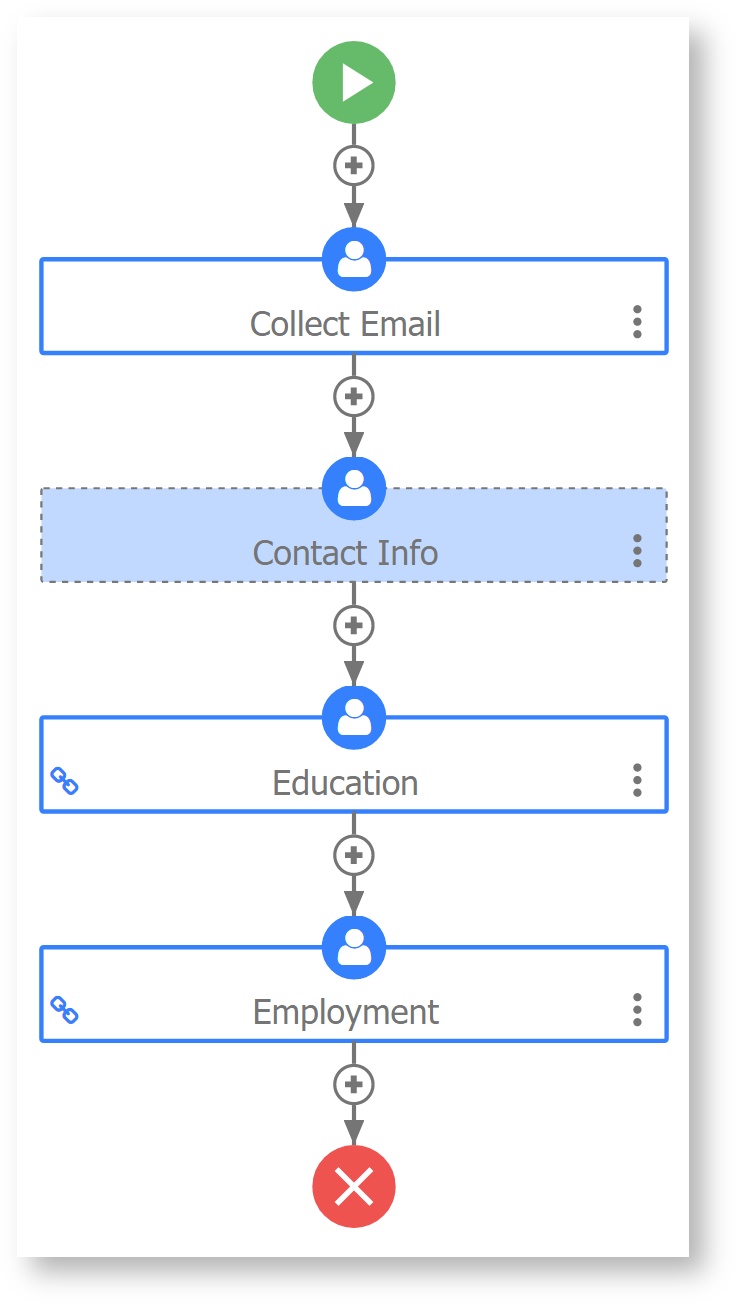
- Step 1 of the screenflow has a field named EmailAddress that collects the applicant's email address.
- Step 2 is assigned to an email address. This is the first step that is performed by the anonymous user.
- All remaining steps in the screenflow are designed to collect the applicant's information: Contact Info, Education and Employment history, references etc. Remember, the anonymous user does not login to perform these steps so they cannot have a role, dynamic role or user property assigned to them.
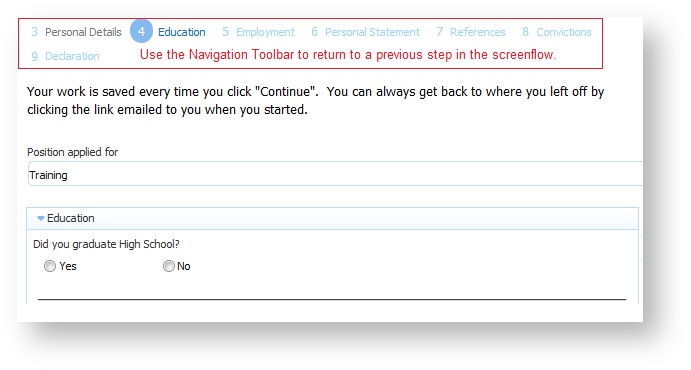
- The Save on Navigate checkbox is checked and the Navigation Toolbar is configured.
The image shows an example of a possible screenflow design:
Use Mode
Anonymous screenflow users return to a previous step by clicking on the Navigation Toolbar..
Follow these steps to run the Refresh Searchable Fields process.
Run the Refresh Searchable Fields Process
- Select Refresh Search Fields from the form/workflow Action Menu for the form/workflow you want to update.

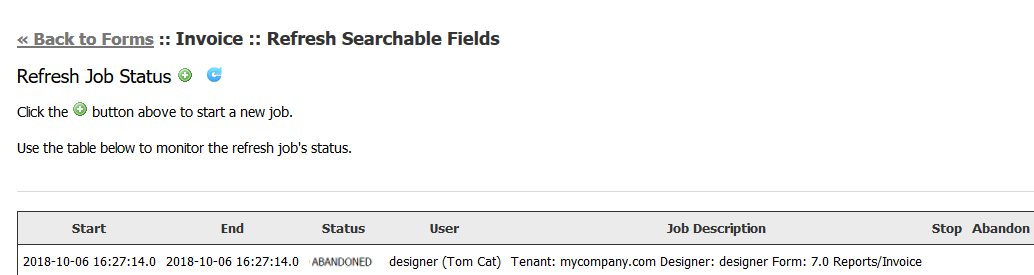
- Information about previously run Refresh processes for the form/workflow display in a table.
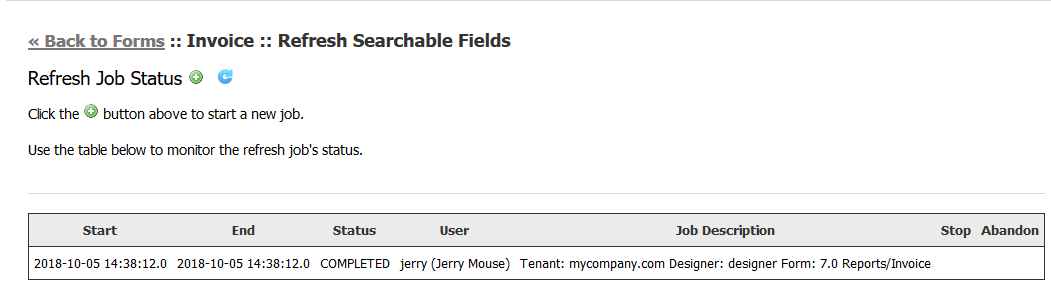
- Starting and Ending date/Time of the process
- Status of the process - completed/failed/stopped
- The user id and name of the process initiator
- A description providing the Project/Form Name
- Click the
 icon to start the Refresh Process.
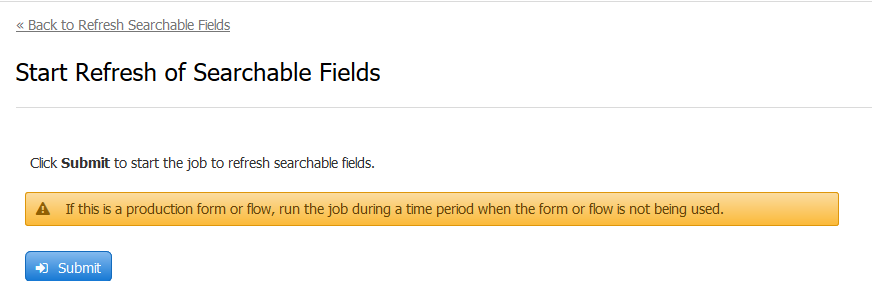
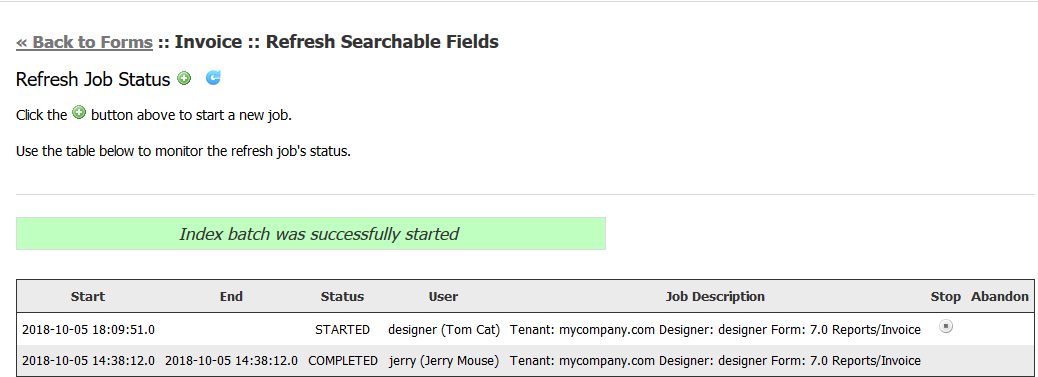
- Click Submit.
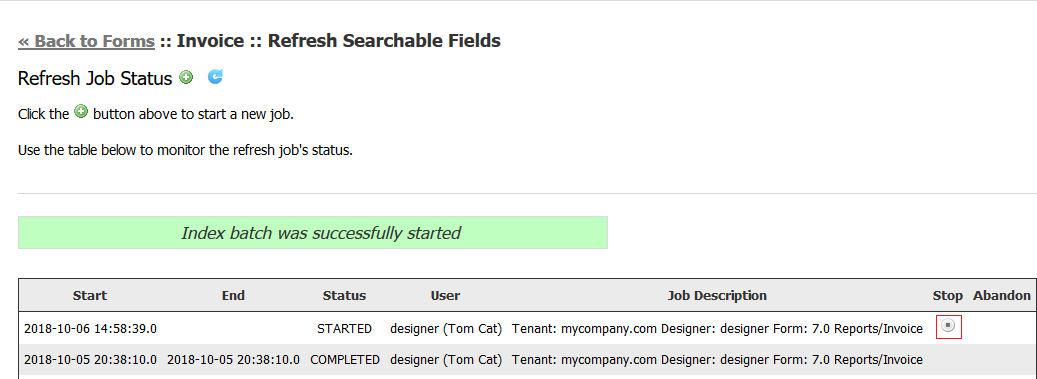
- The message "Index batch was successfully started" displays and the submitted process shows in the Refresh Process list table.
- Click the
 Refresh icon to update the table with the most recent information.
- Click the Back to Forms and Workflows link to return to the Forms and Workflows Home Page.
- Select
Once the Refresh Searchable Fields process for the form is completed, the Product control and the associated data displays as a column in the Submissions Table.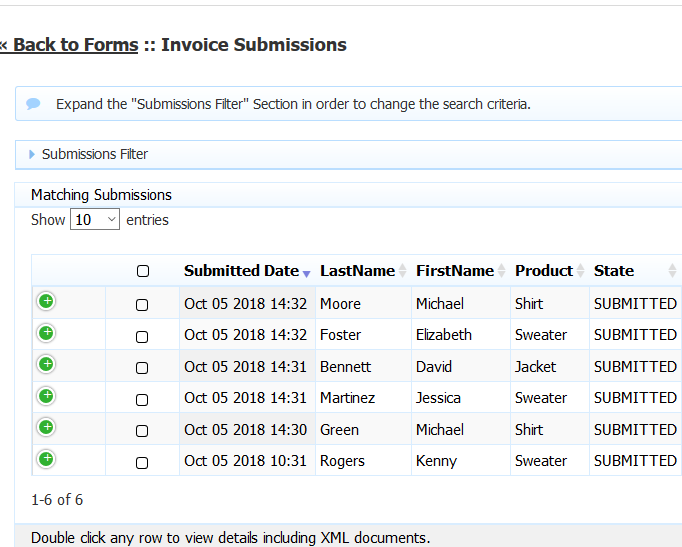
The Refresh Process can be stopped or abandoned once started.
Stopping the Refresh Searchable Fields Process
Once you have initiated the Refresh Searchable Fields process, the frevvo UI allows for the job to be stopped or aborted. The process can be stopped if it is in the STARTING or STARTED state.
You will notice a Stop column in the row in the table for the process that was started. To stop the job:
- Click the Stop icon
 .
.
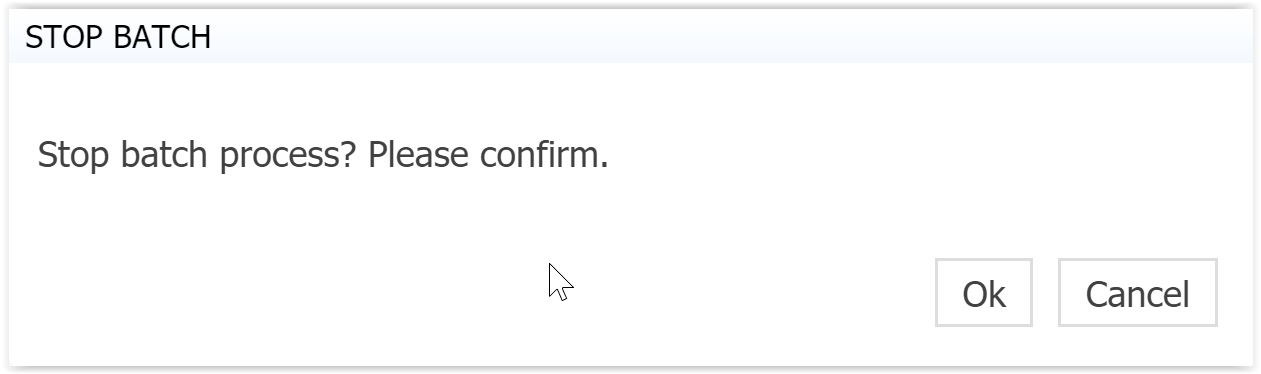
- Click Ok to confirm.
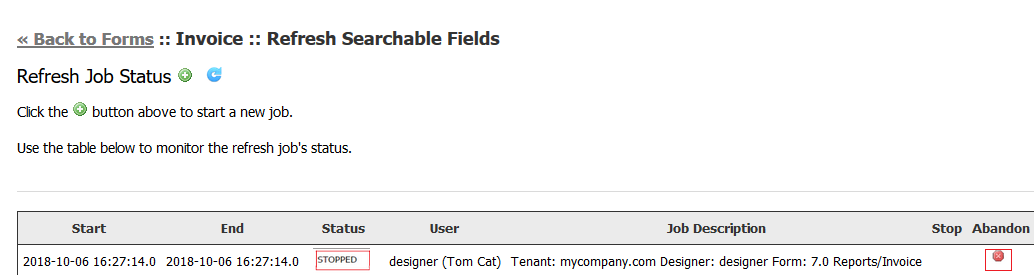
- When the process is stopped, the status column will update.
Restarting a Stopped Refresh Searchable Fields Process
When the Refresh process runs, tables that store the state of the process are created in the frevvo database. By default, if a process were to fail or be stopped, starting it again would restart the failed/stopped job from where it failed/stopped.
To restart a Stopped/Failed refresh process, simply start the batch job again with same tenant and it will resume the last stopped job.
To prevent the last stopped job from restarting, change the status to Abandoned.
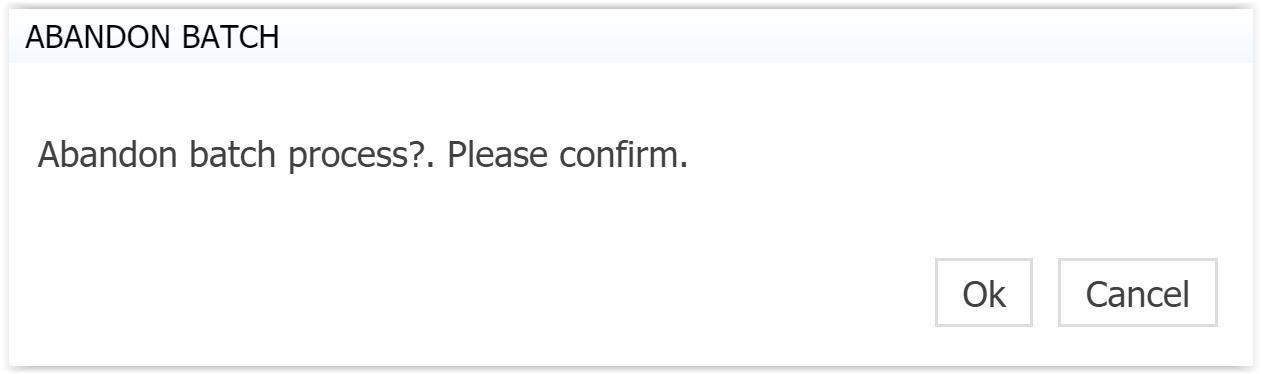
Abandoning the Refresh Searchable Fields Process
The Refresh Searchable Fields process must be stopped to mark it as abandoned. This prevents it from being restarted. You may want to abandon a batch job if it failed and restarting it would result in another failure. Abandoning the batch job allows you to start over again with a new process. The process cannot be abandoned if it is in the STARTING or STARTED state.
When you stop a Refresh process, you will notice Stop and Abandon columns in the row in the table for the process that was started. To abandon the job:
- Stop the Refresh Searchable Fields Process
- Click the
 Abandon icon in the row in the Abandon column for the process you want to prevent from restarting.
 - Click Ok to confirm.
- The Refresh Job Status screen will update.
Assigning a Thumbnail Icon to a Form/Workflow
You can attach a thumbnail icon to a form/workflow by clicking the ![]() Thumbnail icon in Form/Workflow Action Menu. Select one of the icons provided by frevvo or upload your own. The icons will display when you access your forms/workflows from a frevvo portal on mobile devices (iPhone and iPad) mobile devices. See below. If you do not specify an icon for your form/workflow, frevvo will display a default thumbnail where required.
Thumbnail icon in Form/Workflow Action Menu. Select one of the icons provided by frevvo or upload your own. The icons will display when you access your forms/workflows from a frevvo portal on mobile devices (iPhone and iPad) mobile devices. See below. If you do not specify an icon for your form/workflow, frevvo will display a default thumbnail where required.
In the Thumbnail feature you will see a list of icons provided by frevvo.
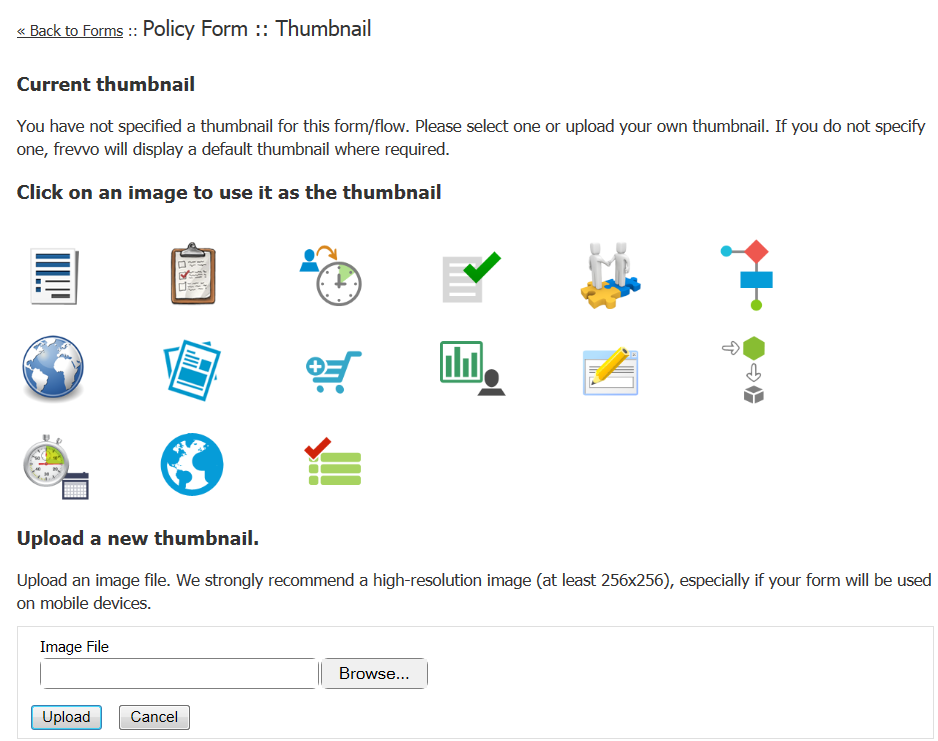
If the form/workflow does not have an icon assigned the Current thumbnail section of the screen will display the message "You have not specified a thumbnail for this form/workflow. Please select one or upload your own thumbnail. If you do not specify one, frevvo will display a default thumbnail where required." Once you select or upload a thumbnail, the Current thumbnail section will update with that icon. You will not be able to delete the current thumbnail once it has been assigned but if you update the form/workflow icon by selecting another one from the list or by uploading an image file, the updated icon will be reflected in the Current thumbnail section.
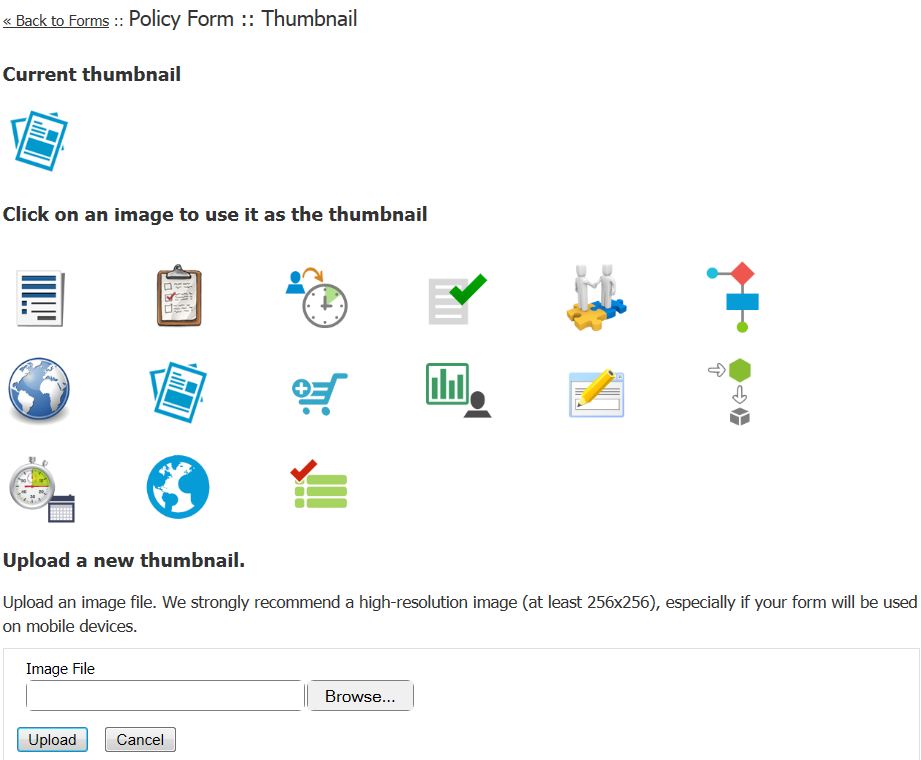
If thumbnail changes are not reflected immediately, refresh the screen.
Production Forms/Workflows
Forms in the Development state have a watermark. Change them to Production to remove the watermark. The ![]() Deploy/
Deploy/![]() Undeploy icon on each form/workflow toggles this state. Your license key controls the number of forms that can be set to Production. Deployed forms and workflows appear in the list with a
Undeploy icon on each form/workflow toggles this state. Your license key controls the number of forms that can be set to Production. Deployed forms and workflows appear in the list with a![]() flag icon beside their name.
flag icon beside their name.
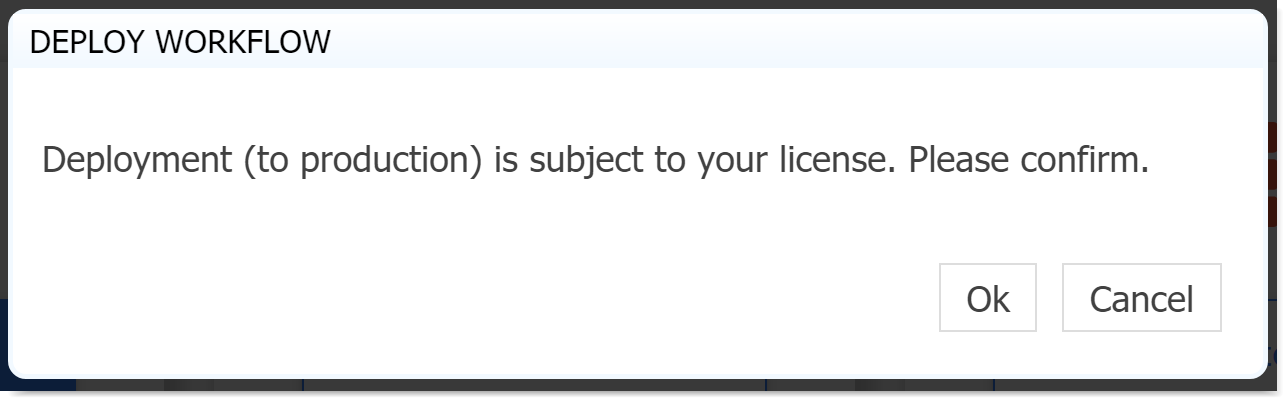
You will see this message when you click Deploy.
The deployment state defaults to Development irrespective of the default deployment state set by your license key and by your tenant admin for the following scenarios:
- When a form/workflow is uploaded into your project
- When you make a copy of your form/workflow
- When you create a new form/workflow from a form template other than the default template
To manage production forms/workflows go to your My Account: Manage Production forms page. See managing production forms for more information.
Trial Accounts
Deployment to production is not available for trial accounts. Trial account designers who click Deploy will see this message:
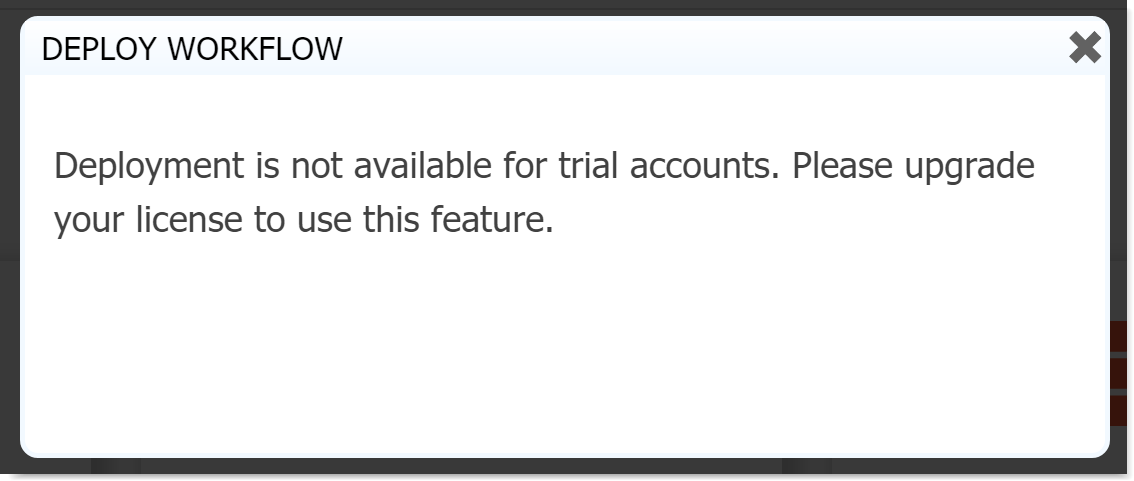
Contact to upgrade your account.
Development Watermark
Undeployed forms/workflow (in development) display a watermark to help users understand the status and to prevent misuse of undeployed forms/workflows.

Deleting Forms/Workflows
When you delete a form/workflow by clicking the ![]() Delete icon the form/workflow is permanently removed and cannot be restored. The delete operation also deletes all submissions from frevvo's submission repository and any saved in-process form/workflow instances.
Delete icon the form/workflow is permanently removed and cannot be restored. The delete operation also deletes all submissions from frevvo's submission repository and any saved in-process form/workflow instances.
Before deleting you may wish to download a copy of the form/workflow by clicking the ![]() Download icon. See this topic for information on deleting projects.
Download icon. See this topic for information on deleting projects.
Downloading the Form/Workflow .zip File
You can download your form/workflow .zip files for archiving, for sharing with another designer, moving it to a development/production project, or to send it to our support team for help troubleshooting. To do so, log in as the designer/owner of the form/workflow. Then,
- Click the three-dot action menu beside your form/workflow name.
- Select
 Download a zipped version of the form/workflow. A single zip file will be created with the name of your form/workflow, followed by _form.zip or _flow.zip.
 - Now, you can maintain the .zip in an archive directory, email it to another user to upload to their project, or send it to frevvo support.
Submissions are not included in a form/workflow (nor project) .zip file. For example, when you download a workflow.zip and upload to another project for testing, the uploaded workflow will not contain any submissions. The submissions are retained on the original production workflow. See below (Uploading/Replacing Forms/Workflows) for details on retaining submissions when updating a production workflow. Refer to these Admin Best Practices for Updating a Workflow in Production.
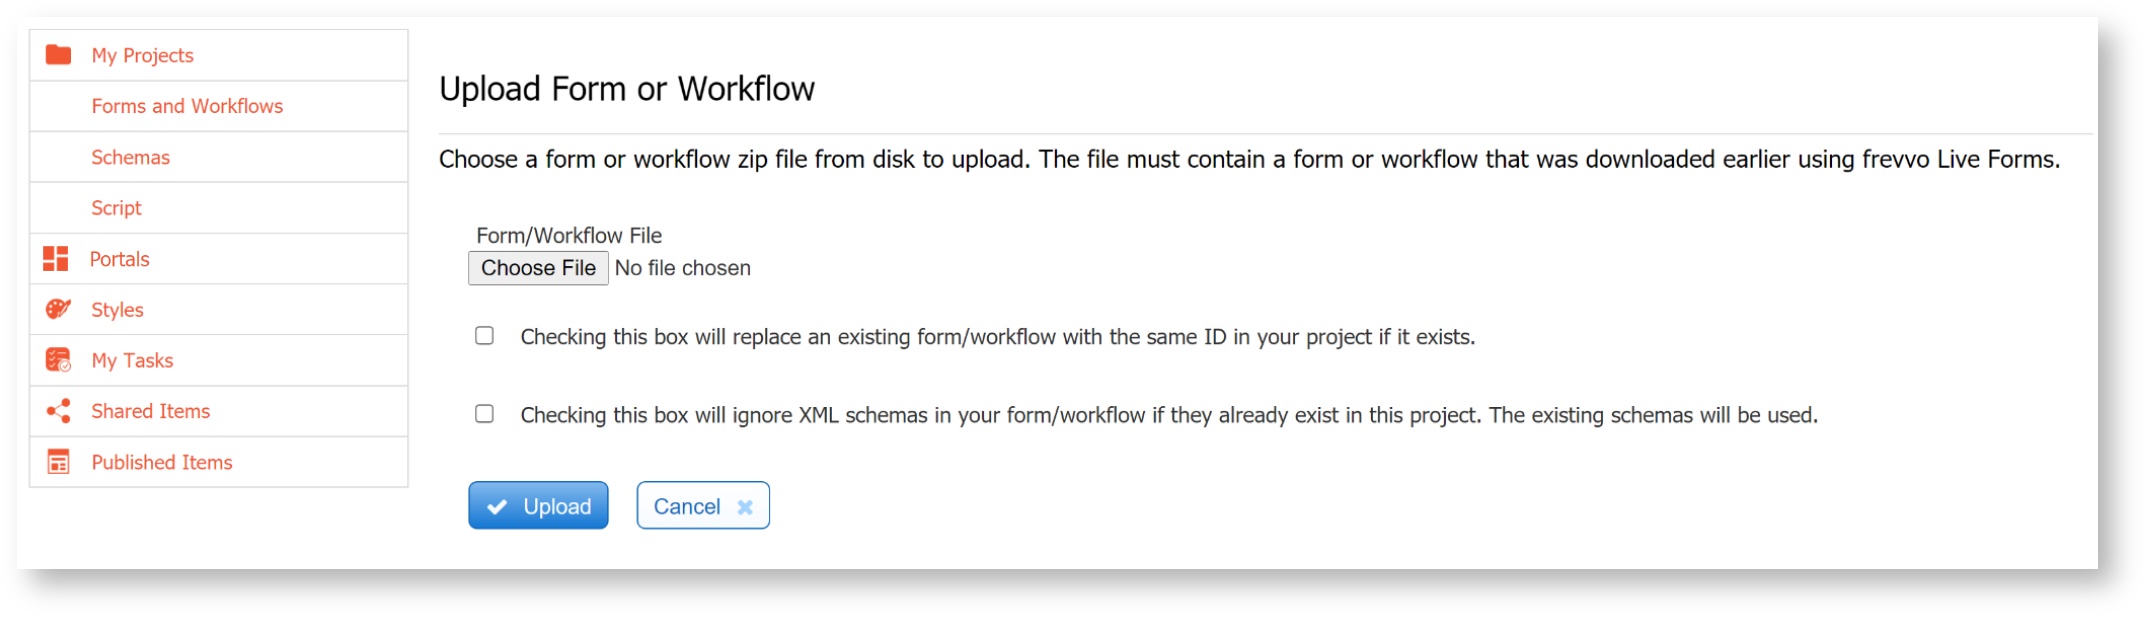
Uploading/Replacing Forms/Workflows
If your goal is to update your form/workflow to a new version that you had previously downloaded or to revert to an older version previously downloaded, do not first delete the form/workflow since this removes all associated saved/submitted/pending form/workflow instances. Instead, leave the original as it is and upload the version from the disk by clicking the![]() Add Content icon and selecting
Add Content icon and selecting![]() Upload a Form or Workflow. A dialog will display that lets you:
Upload a Form or Workflow. A dialog will display that lets you:
- Browse to the form/workflow zip file on disk
- Select the option of replacing the current form/workflow with this new version
- Ignore XML schemas in the form being uploaded if those schemas already exist in the project and you intend for the existing schemas to be used.
Error Messages
- When uploading a form/workflow with the same ID as an existing form without checking Replace, a copy will be created and the designer will see an error message: "The form/workflow that was uploaded matches the id of one that already existed so a copy was made. If you intended to replace the existing form/workflow, delete the form you just uploaded and upload it again but check off the ‘Replace’ option."
- When uploading a form with Replace checked that is currently being edited by another user, the designer will see this error message: "This form is currently being edited by <user@tenant>. Please try again later."
- Uploading forms/workflows from prior versions is supported up to two major versions back. For example, you can upload a workflow from v7.4 into your v10.0 installation. However, you cannot upload a workflow from v7.3 into v10.0, and will see the error: message "Invalid workflow file version: Version 7.0. Make sure you are uploading a zip file that was downloaded from a version of frevvo frevvo that is between version 7.4 and 10.0." In this case, you will need to first upload your workflow to a v7.4 or v9.0 installation to upgrade them, then download from that installation and upload to your v10.0 installation. See our End of Life Policy chart for a list of major release versions.
- You cannot upload a form or workflow downloaded from a later major version. However, you may still upload/replace versions safely between patches in the same major version (i.e. 10.0.14 → 10.0.13).