Workflow Design Wizard
- Megan Ellis
The Workflow Design Wizard lets designers quickly designate their workflow pattern and routing by providing default controls, rules and assignments that can give you a functional workflow in moments. Here's how it works:
Log in as a designer user. Create a New Workflow from the Projects Home page or from the Forms & Workflows Home page within a project.
Watch the Video
Create a New Workflow from Projects Homepage
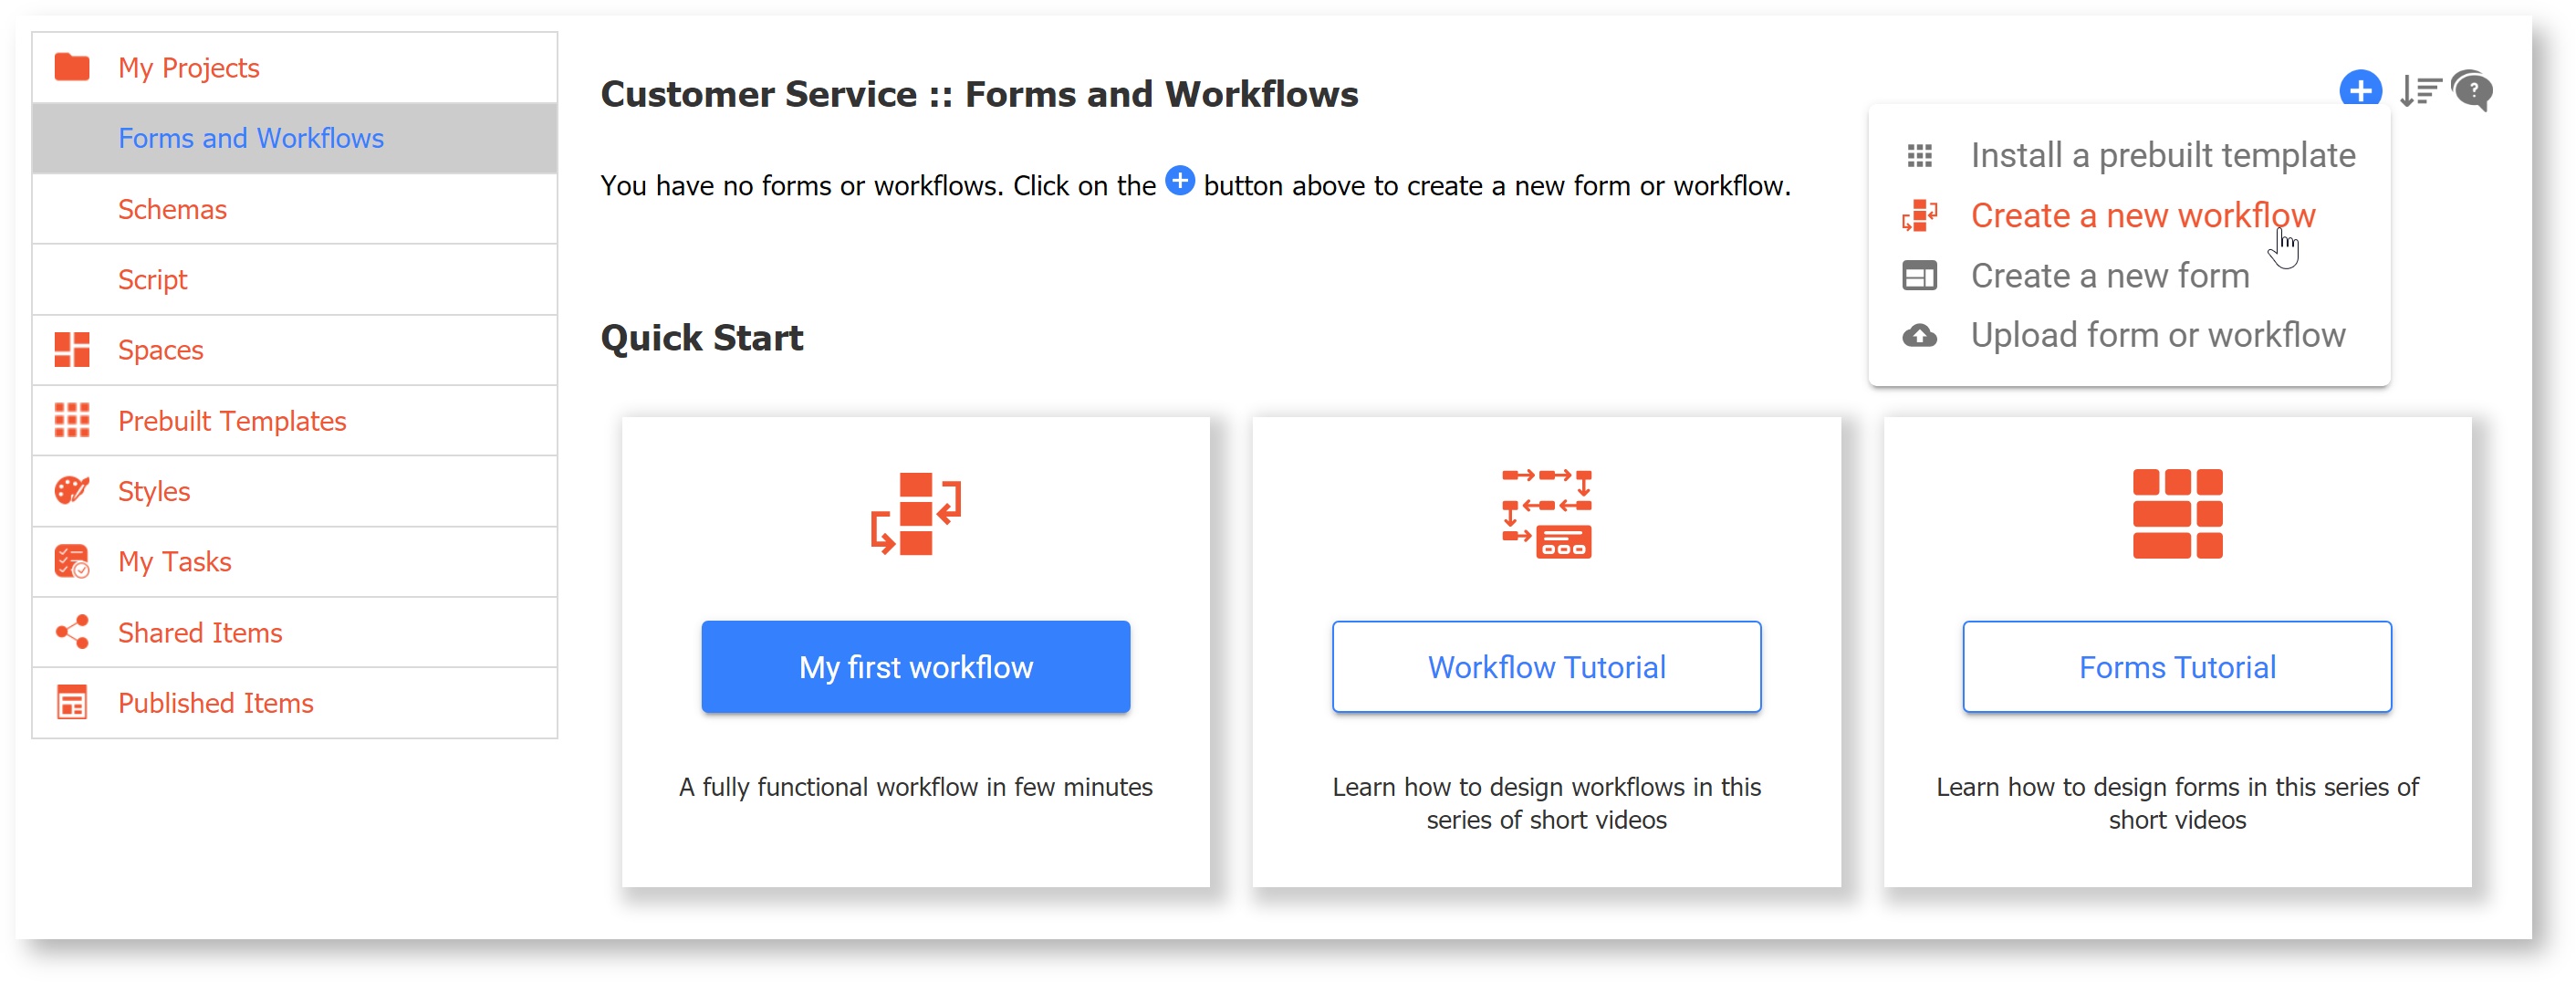
- Select Create a New Workflow from the
 Add Content menu.
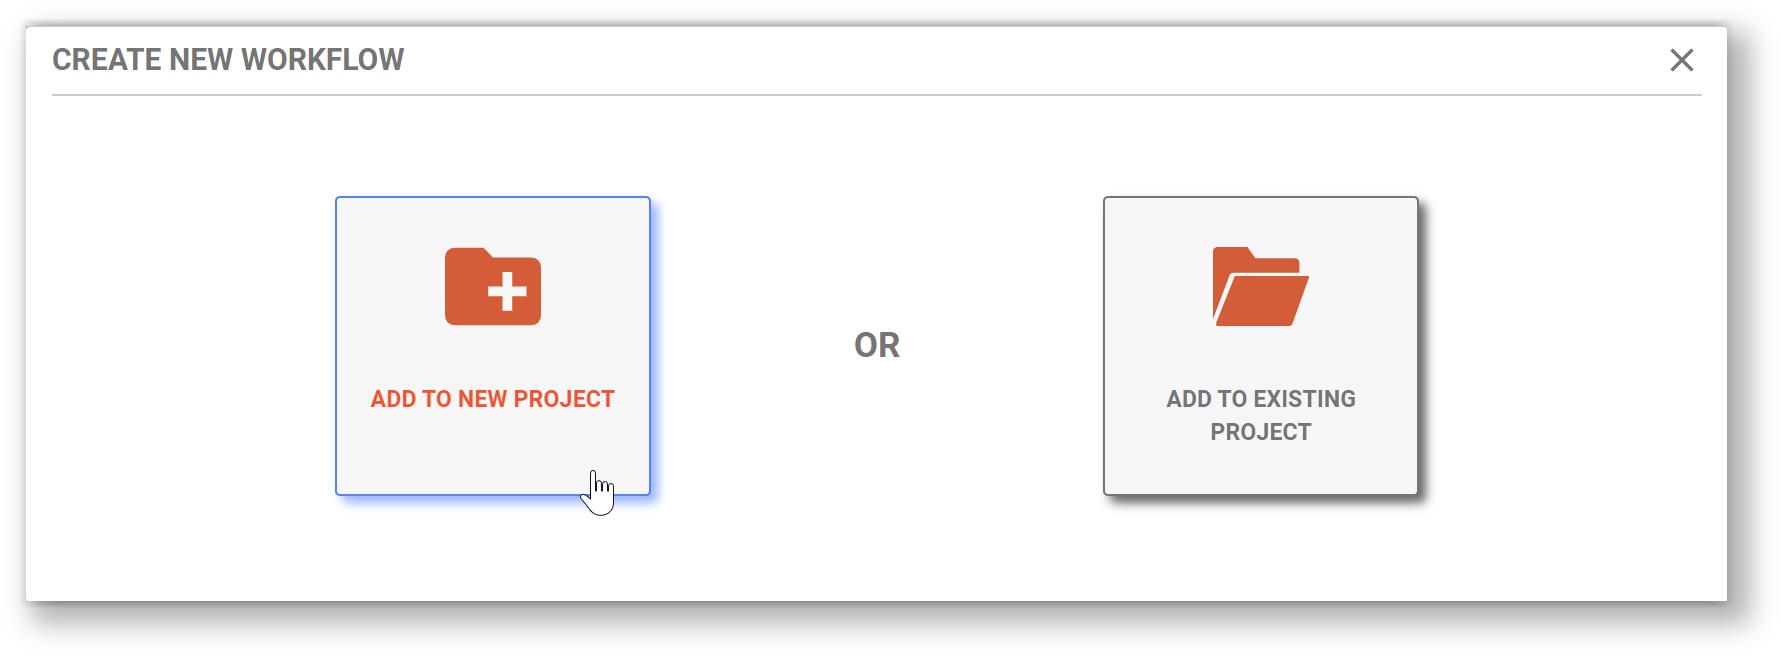
- Choose to Add to a New Project or Add to Existing Project. Follow prompts to name or select the project.
Create a New Workflow from within a Project
Select Create a New Workflow from the ![]() Add Content menu.
Add Content menu.
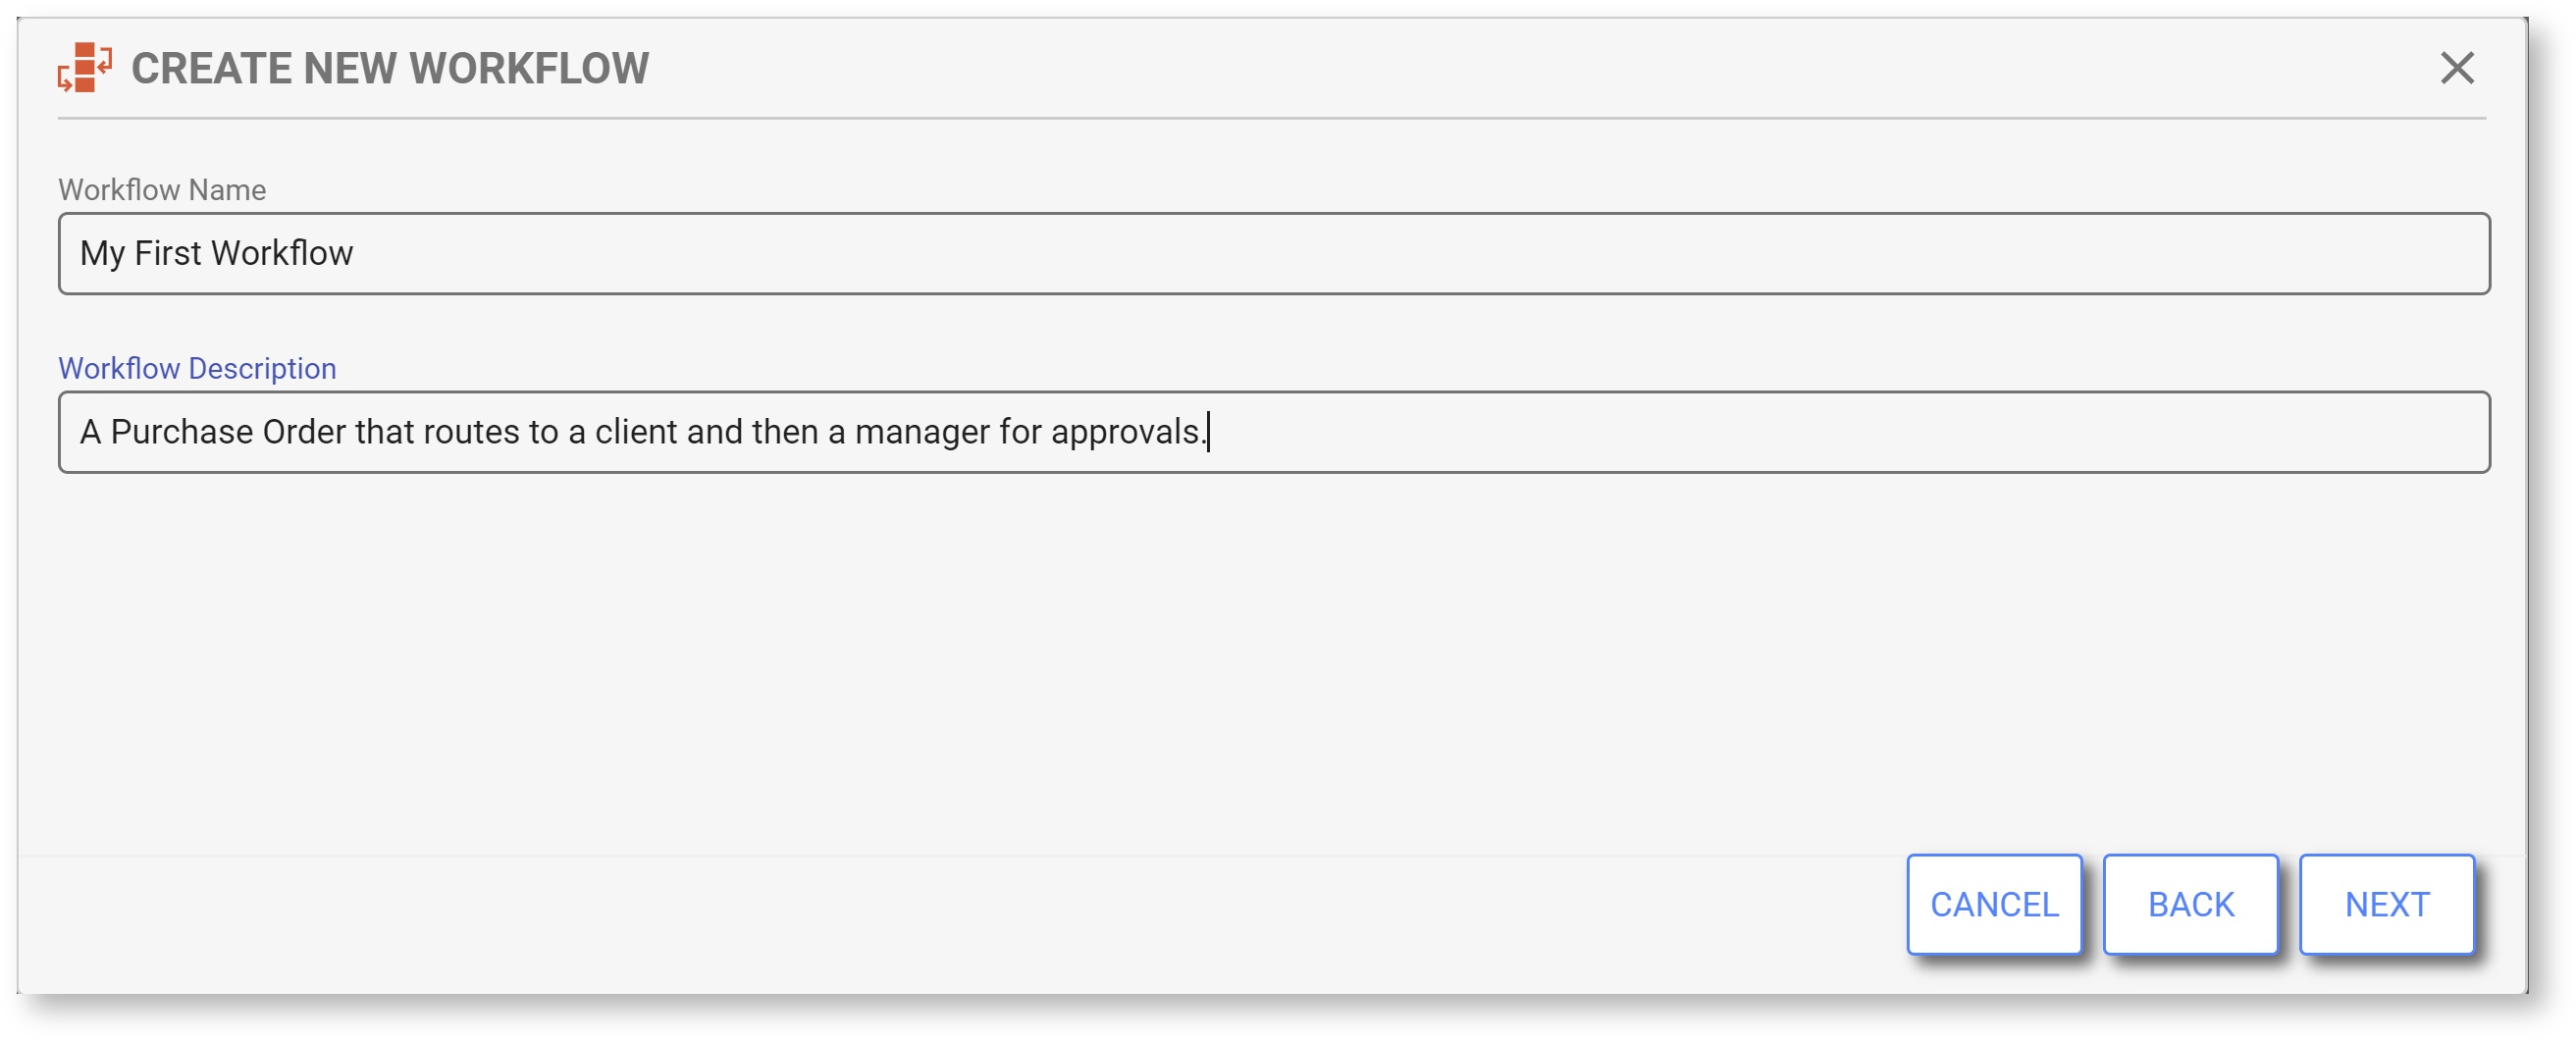
Name your Workflow
Give you workflow a meaningful name and description. Remember that the Search feature will find results in names and descriptions, so using keywords here can help you find this workflow later. Then click Next.
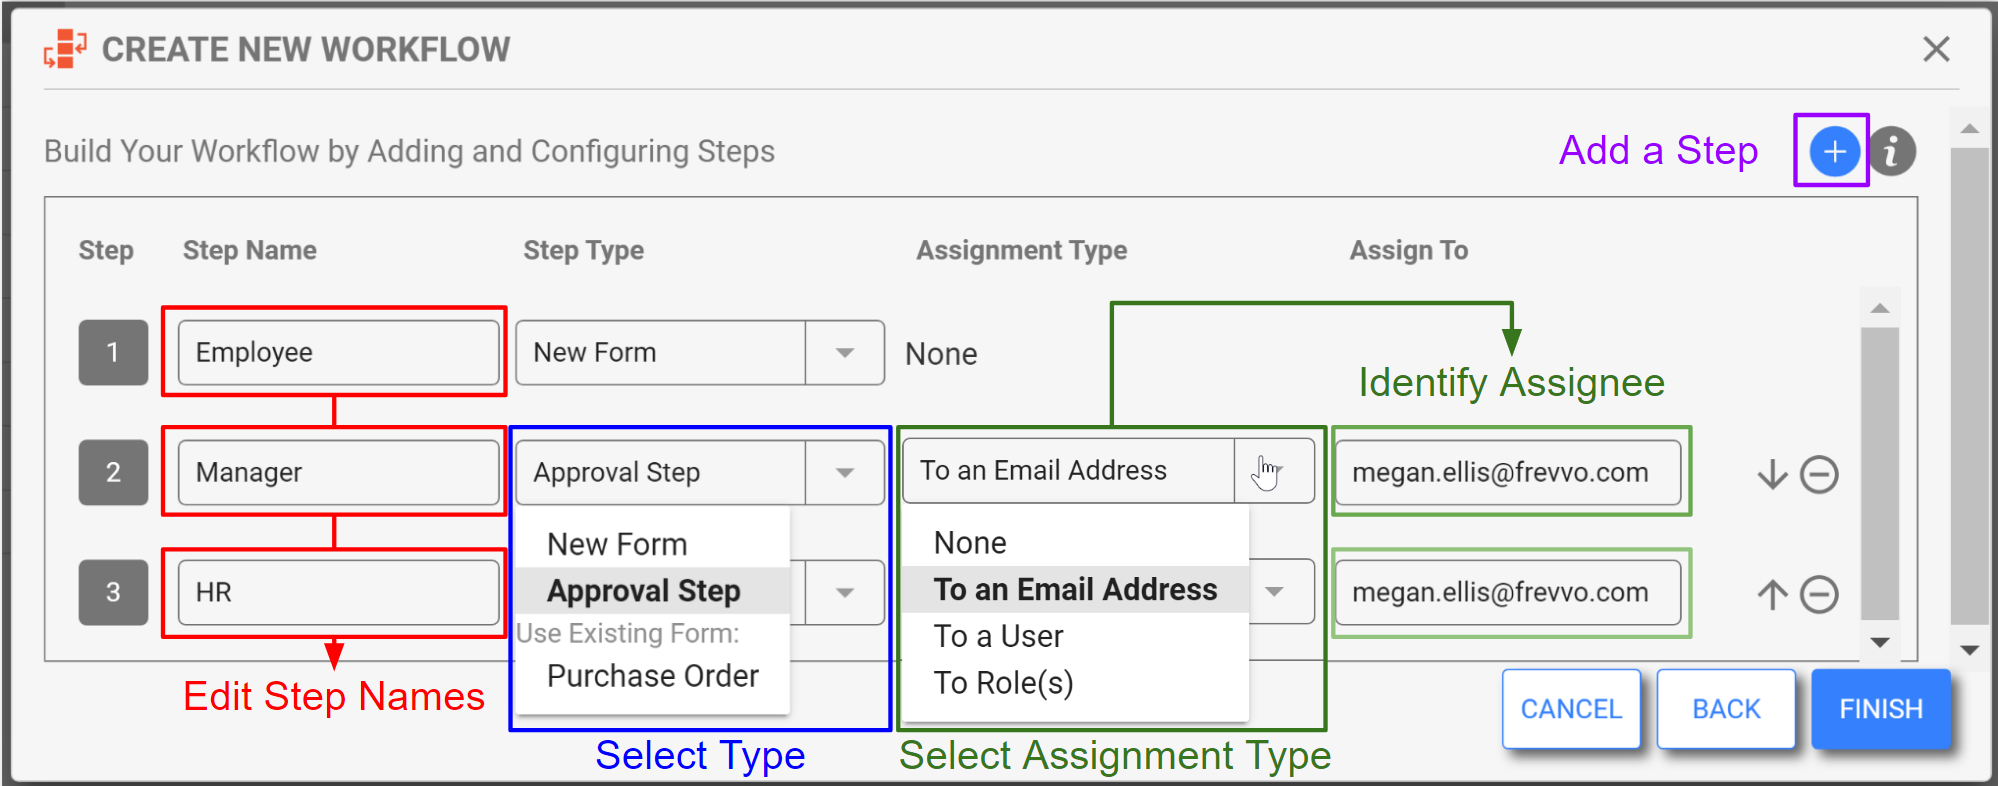
Build Your Workflow by Adding and Configuring Steps
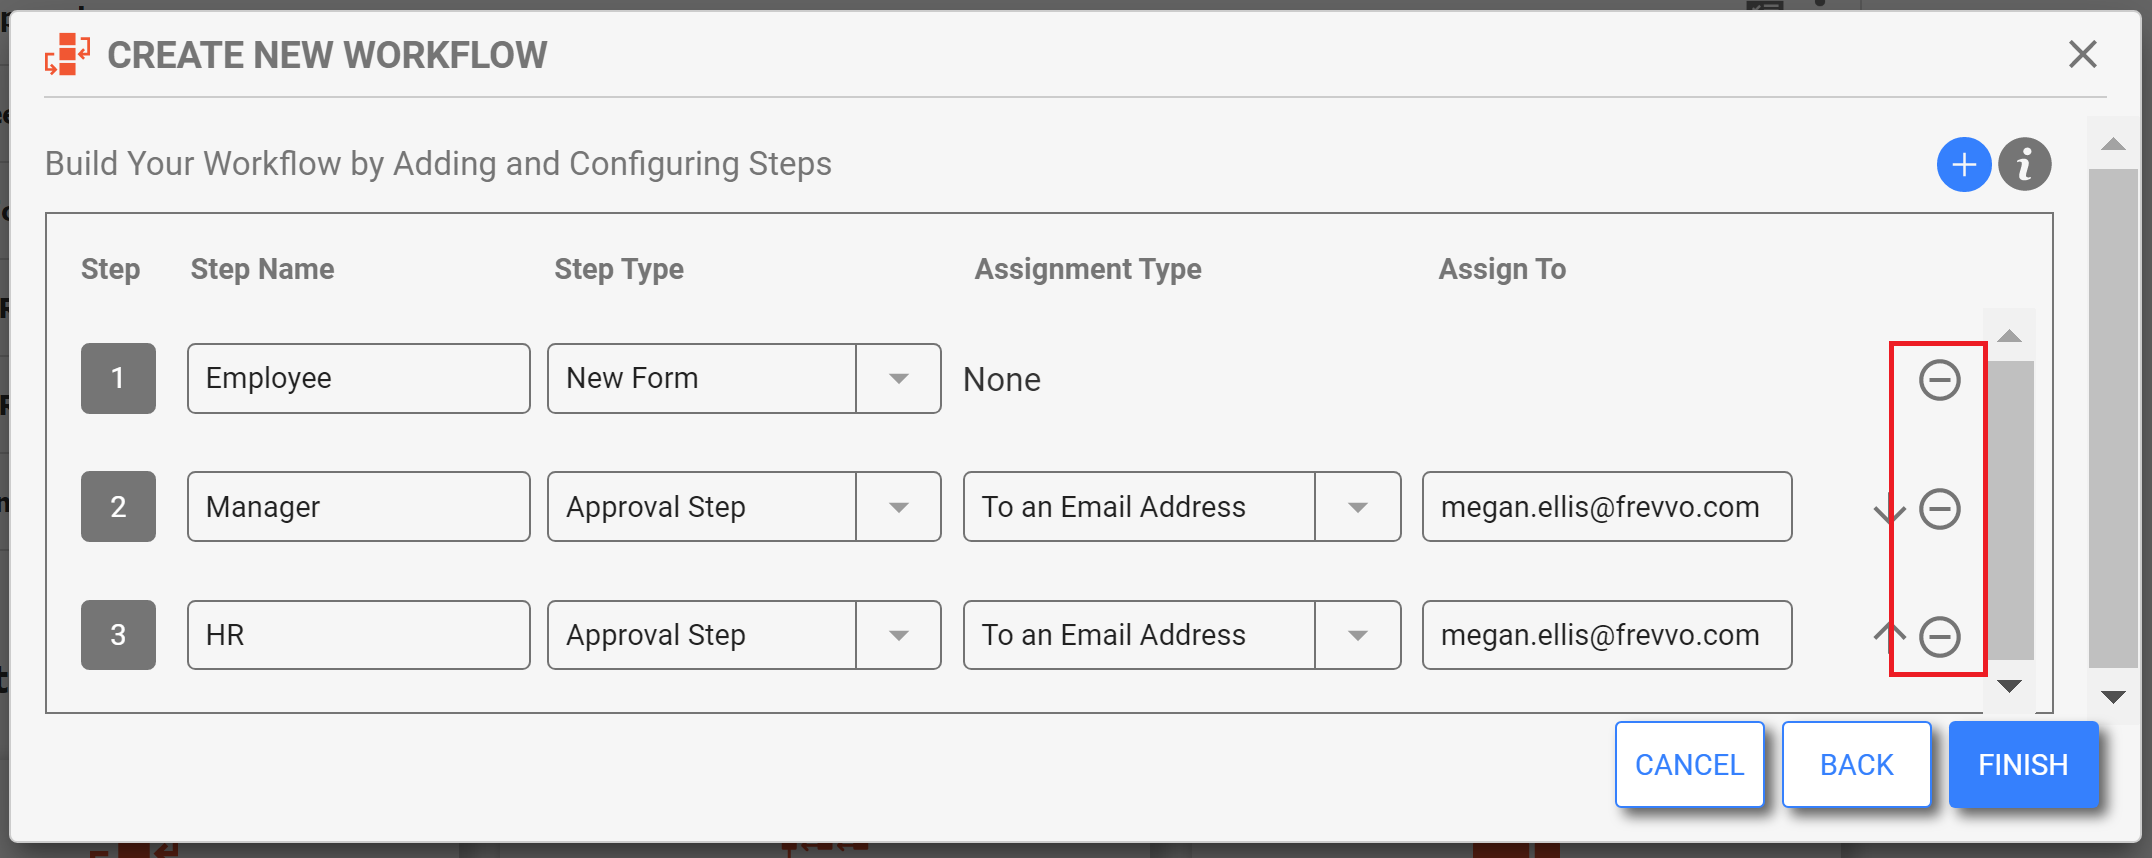
Initially, frevvo creates a 3-Step approval workflow. Give each step a name, e.g. Employee, Manager, etc.
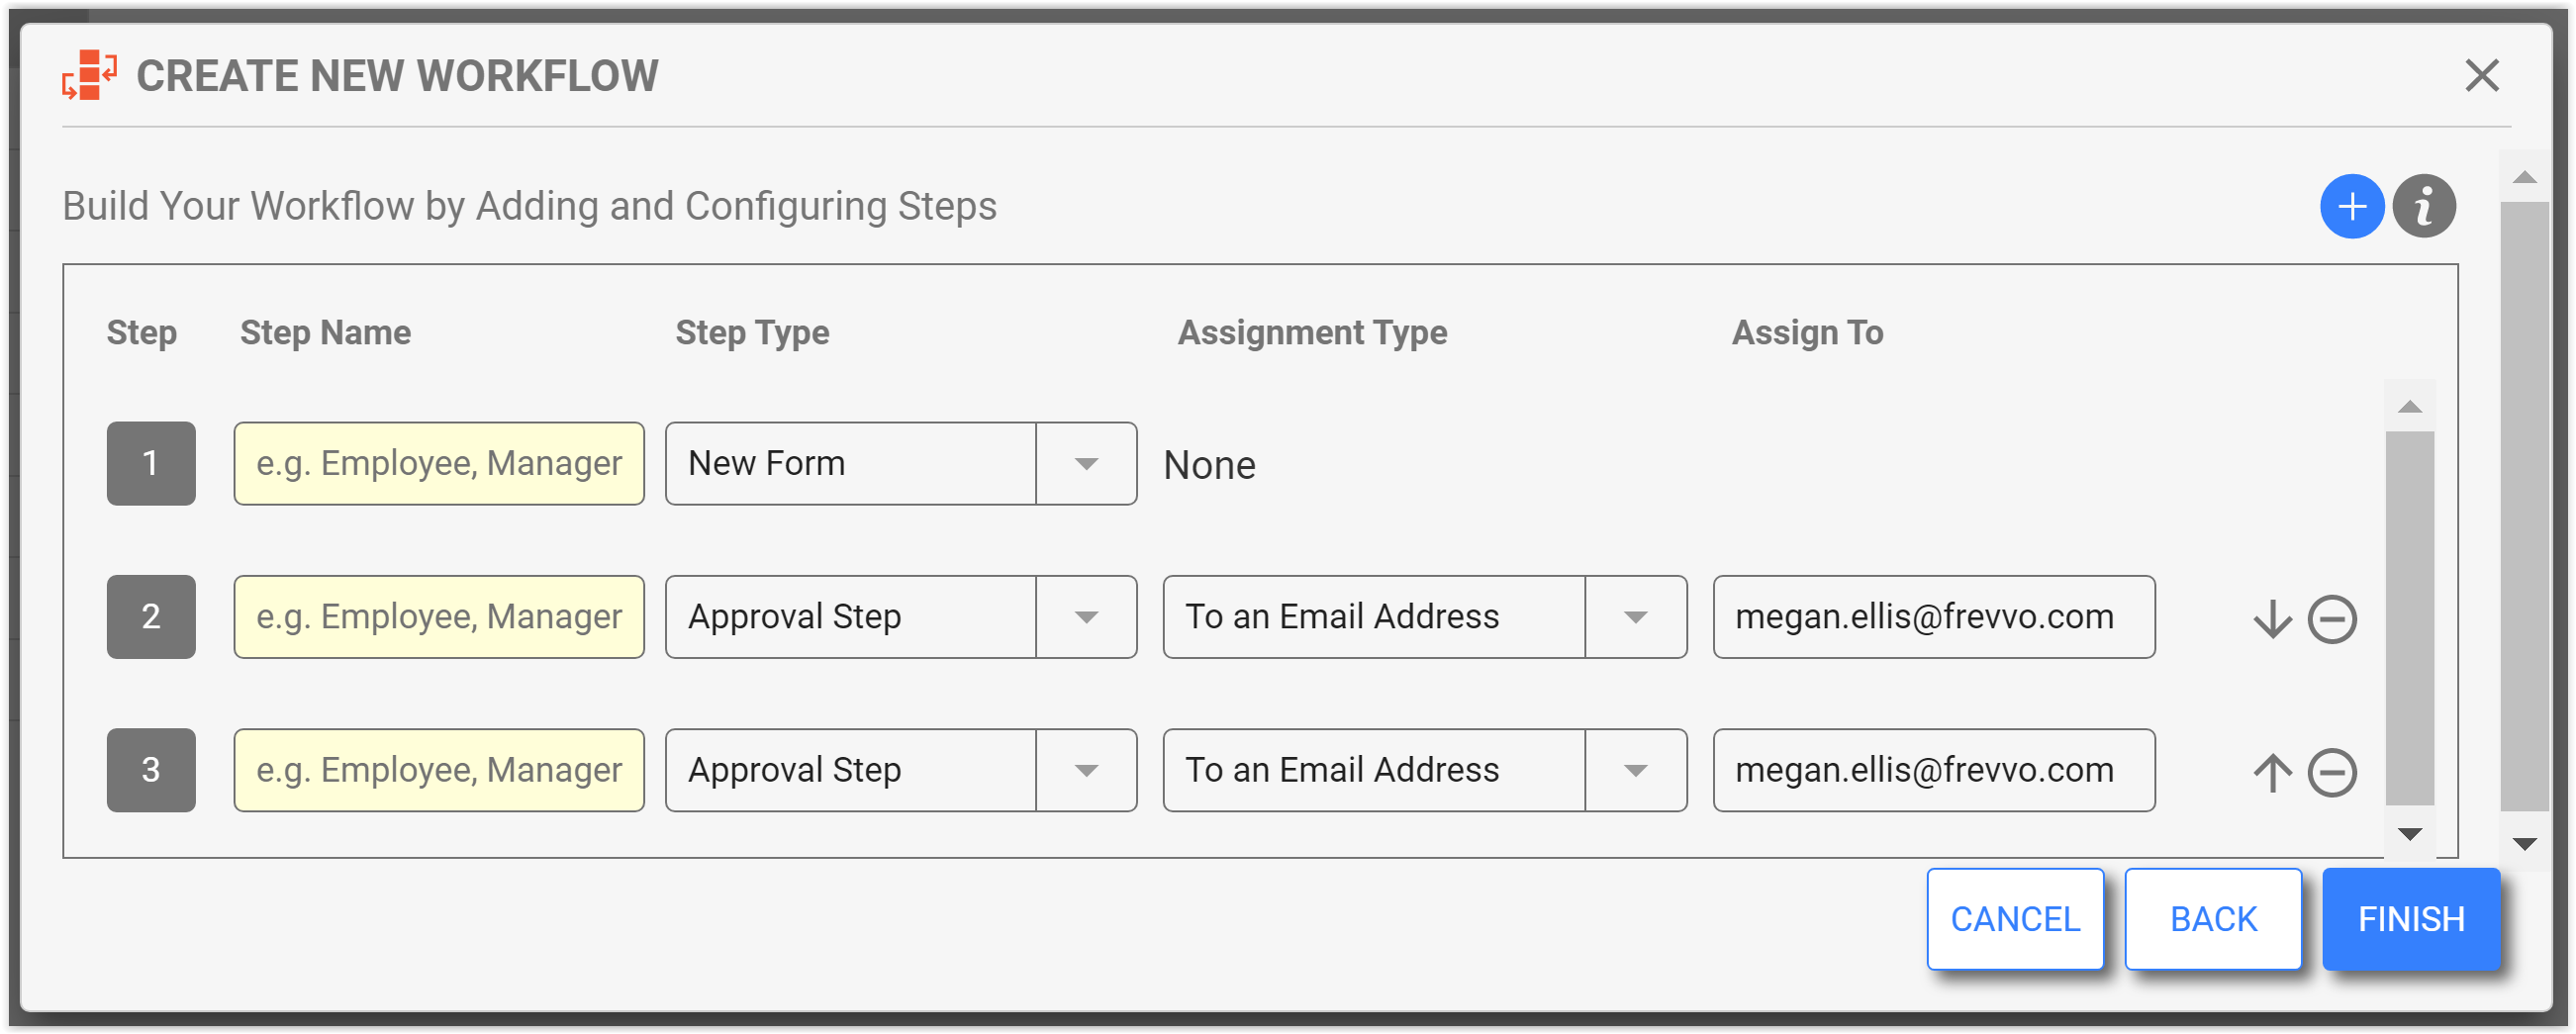
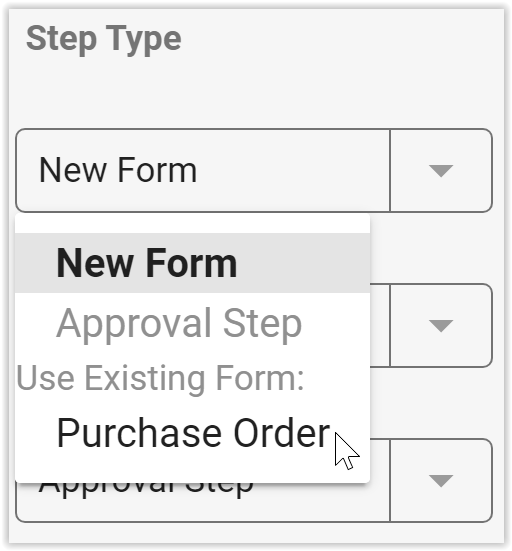
The first step is "New Form", meaning a new form with a few controls will be created for you. Use the dropdown to choose an existing form in your project instead if desired. The first step is fixed and cannot be deleted nor moved up or down (it is always first).
The next two steps are set as approval steps, assigned "To an Email Address", with the designer user's email address as the default assignee. Use the dropdowns to change the Step Type and Assignment Type as desired. You may also change the email (or user/role) in the Assign To field.
- If you are planning to use an assignment on the first step, you can configure this later.
- If you are an experienced designer and prefer to build within the Workflow Designer, enter step names and select Finish at this time to enter the Workflow Designer. You may choose to delete the step(s), the default controls within the form, and/or the default business rules and create your own, or keep them and modify for your business requirements.
Click ![]() Add Step to configure additional steps. Give each step a meaningful name. Additional steps will default to Step Type "Approval Step," Assignment Type "To an Email Address", and Assign To the current user's email address. You can edit these defaults right from the wizard.
Add Step to configure additional steps. Give each step a meaningful name. Additional steps will default to Step Type "Approval Step," Assignment Type "To an Email Address", and Assign To the current user's email address. You can edit these defaults right from the wizard.
Use the Move Step Icons ![]()
![]() to reorder steps, and the Delete Step icon
to reorder steps, and the Delete Step icon ![]() to remove a step.
to remove a step.

- You may add up to 75 steps using the Workflow Design Wizard. If you require more than 75 steps you can add them in the Workflow Designer.
- If you prefer not to use the wizard step creation, see Create an Empty Workflow below (this is not common.)
Step Type
The Workflow Wizard allows selection of three types of steps.
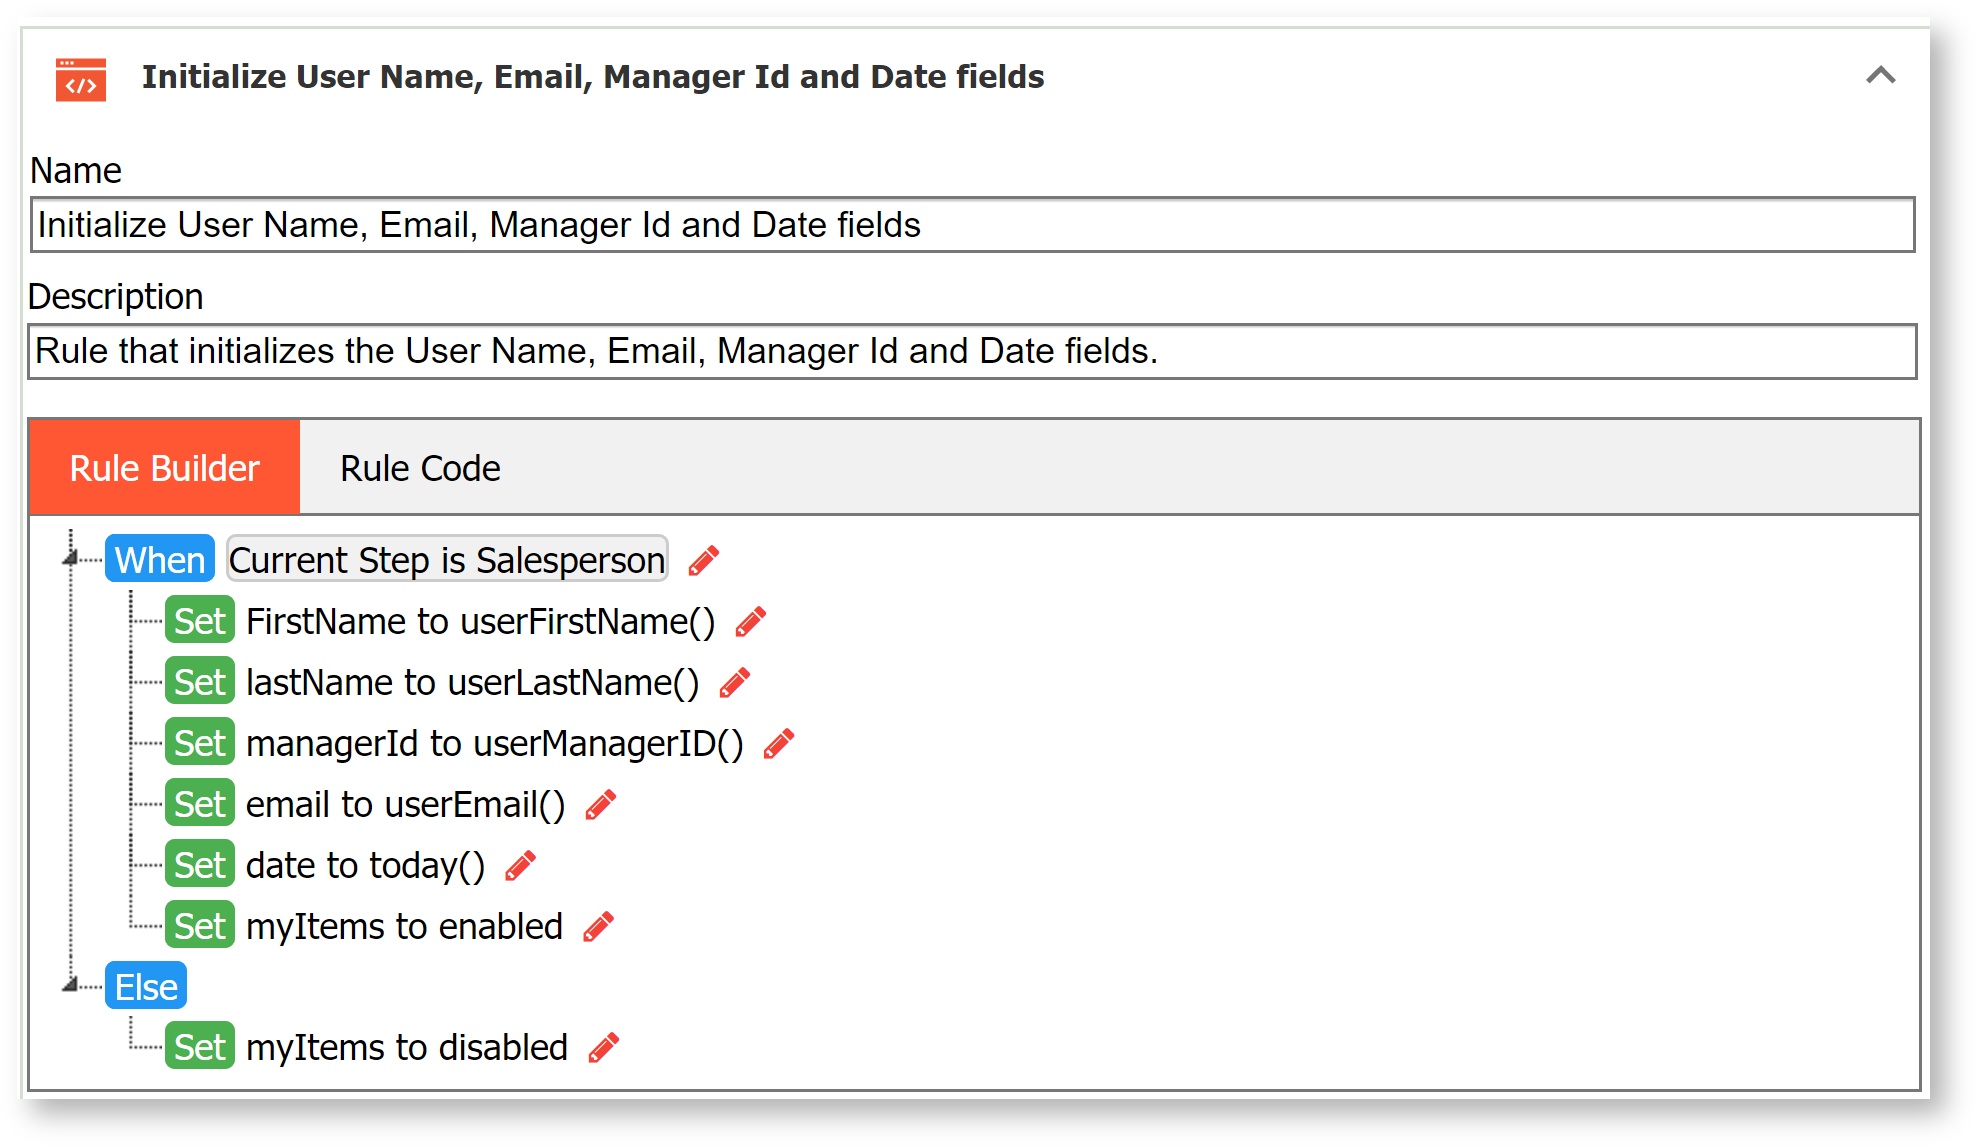
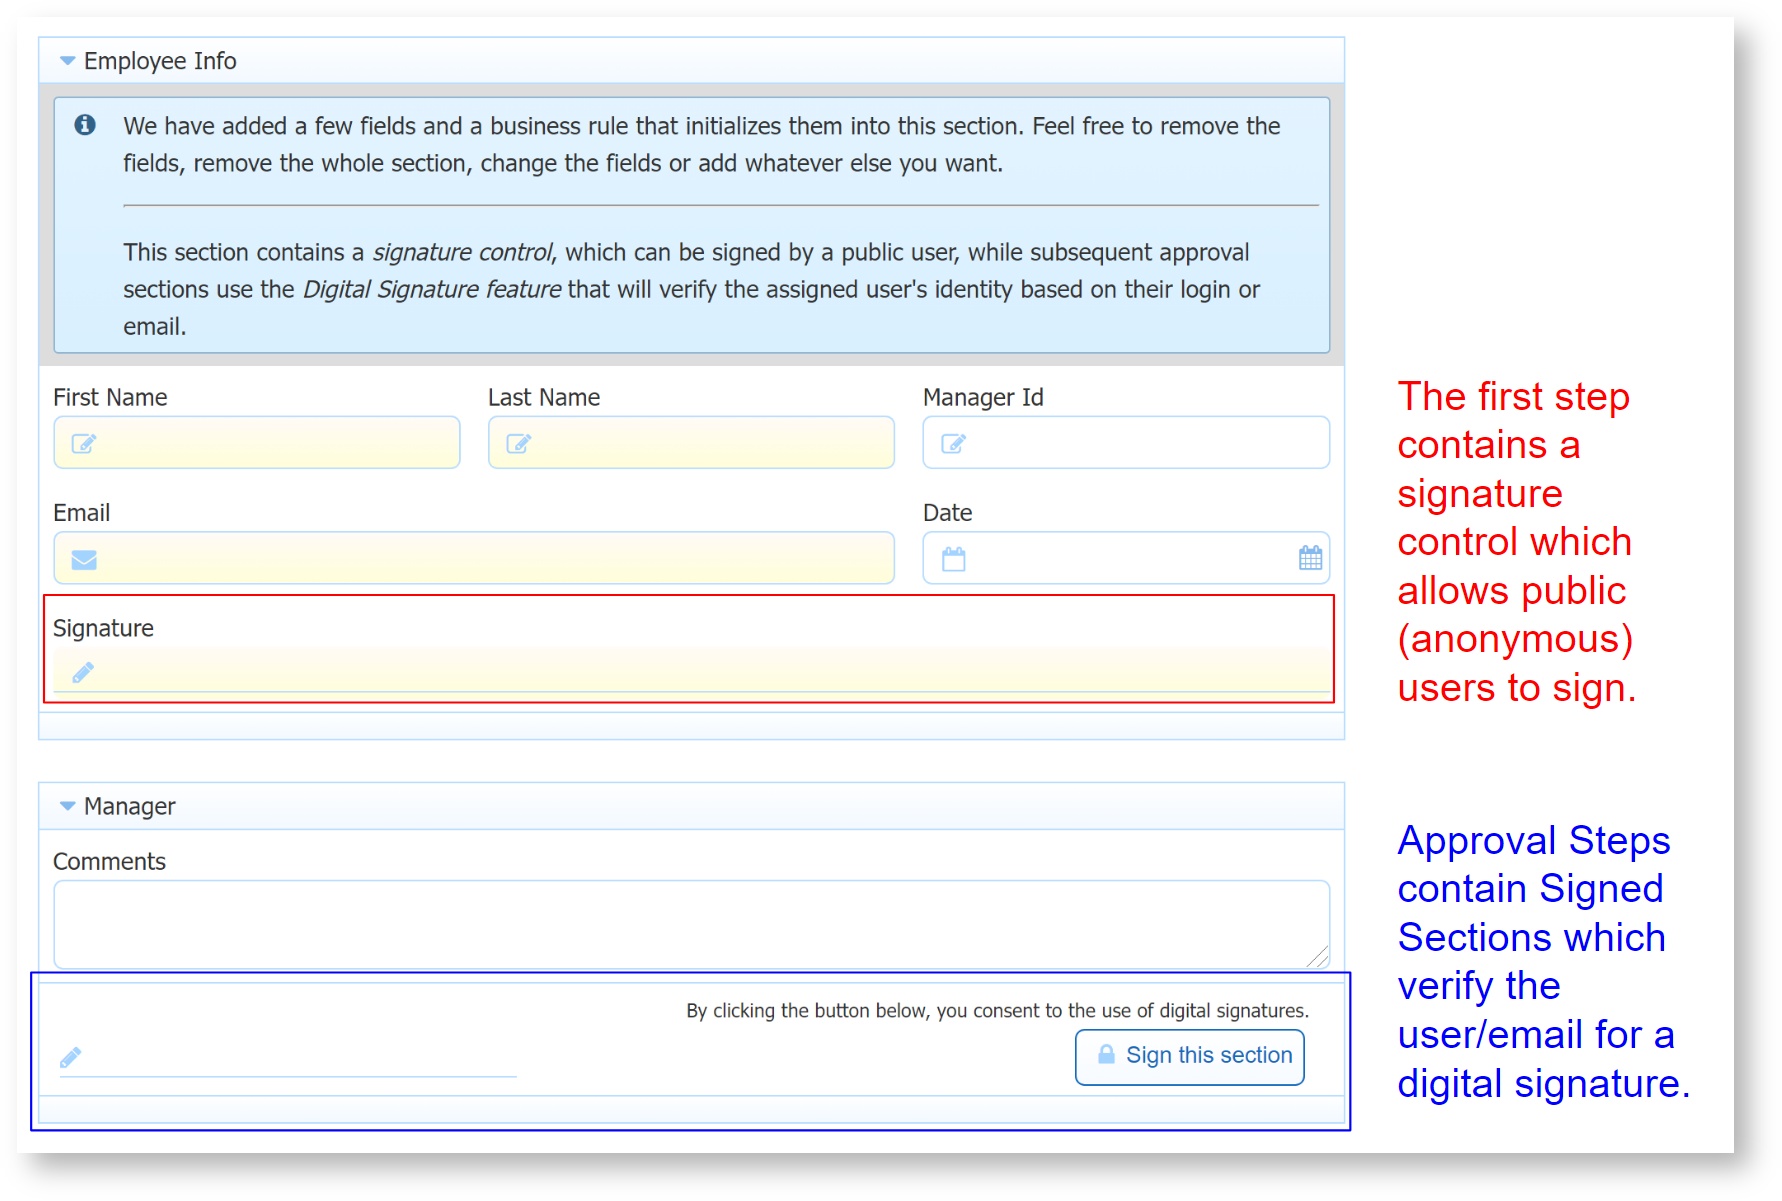
- New Form will add a new form with some default controls and a business rule that populates those controls with the logged-in user's information. The controls are Employee Info section, First Name, Last Name, Manager Id, email, Date (today) and Signature. You will also see a Message control in the Employee Info section that explains the purpose of these preset controls, "We have added a few fields and a business rule that initializes them into this section. Feel free to remove the fields, remove the whole section, change the fields or add whatever else you want."
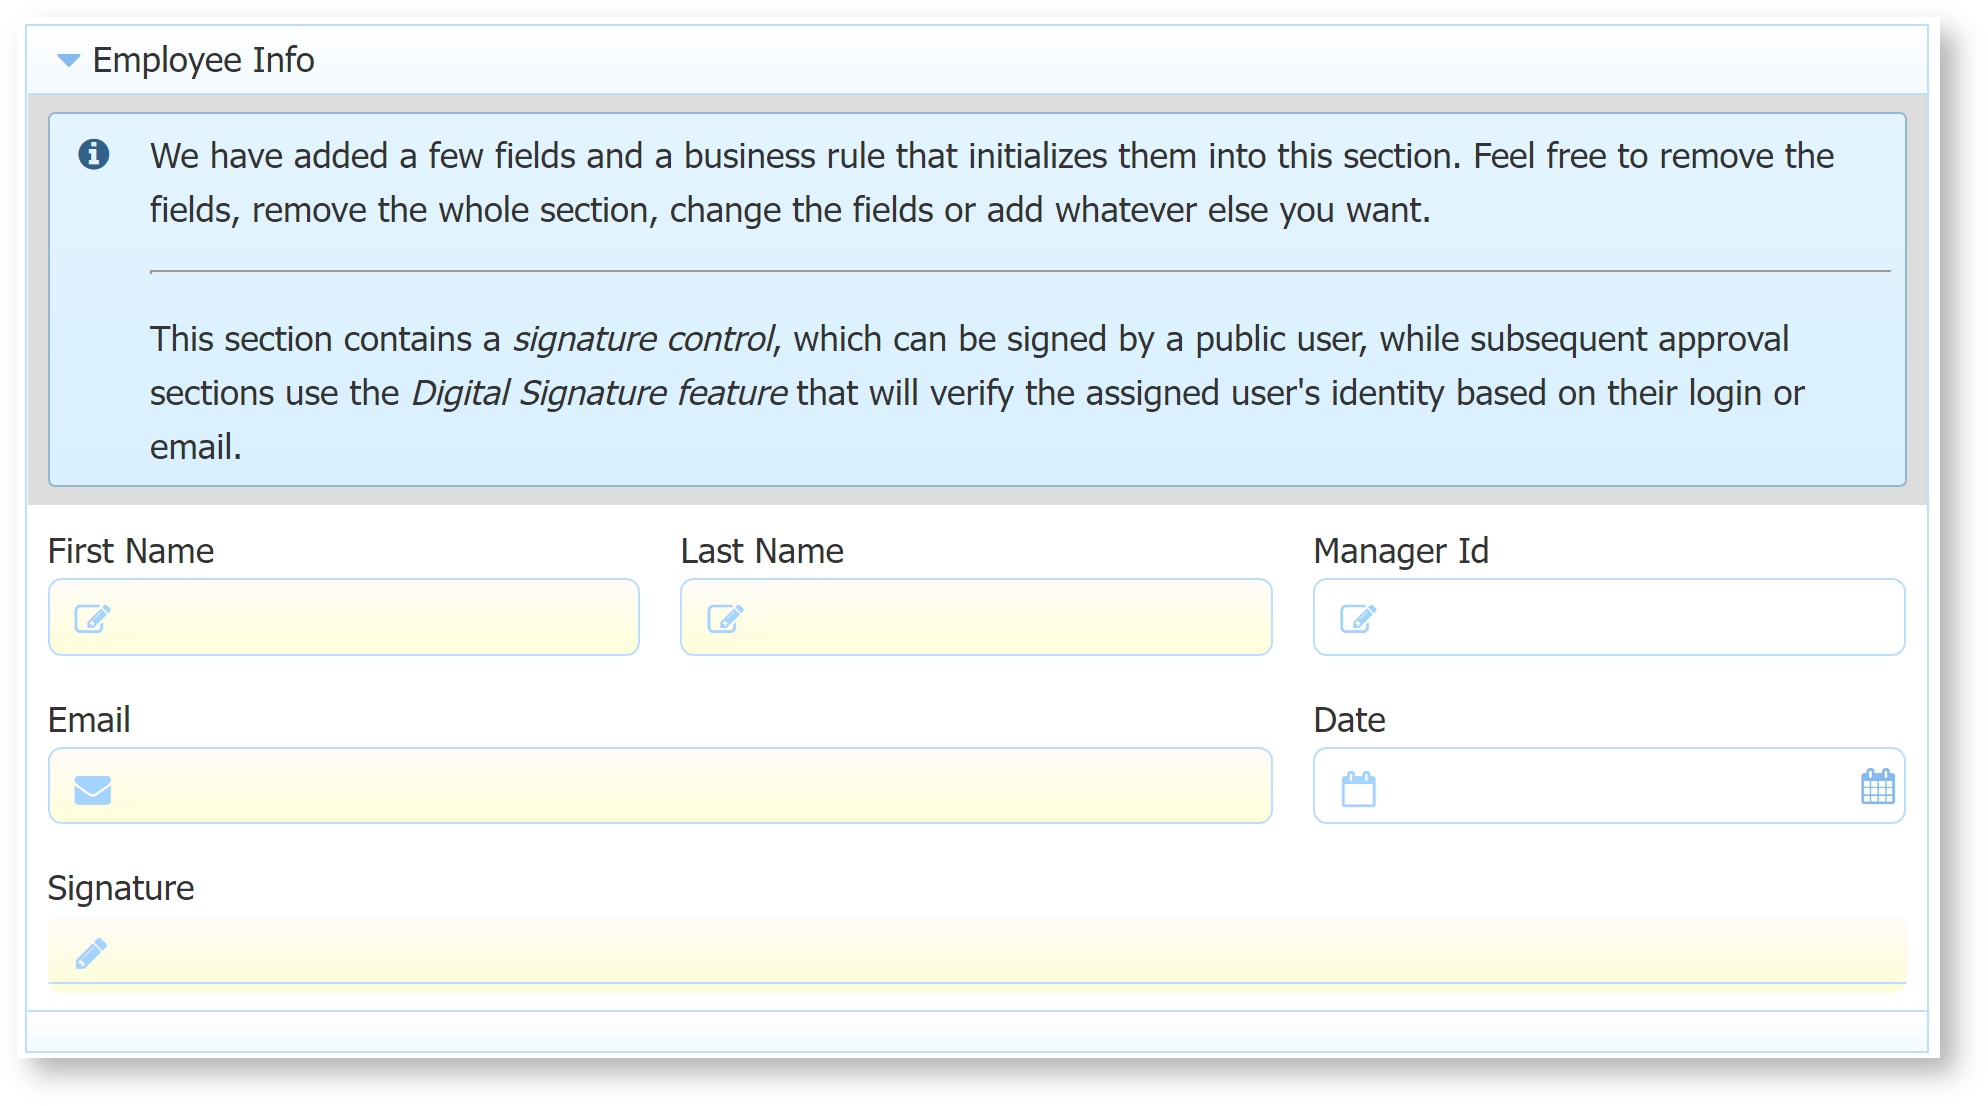
Note that the Employee Info section contains a signature control. This allows the workflow to be initiated and signed by a public (anonymous) user. All subsequent approval steps (including those assigned to an email) will have a Signed Section control that uses the a Digital Signature. Please visit the Electronic Signatures documentation for more details. - Approval Steps will add a linked step to nearest preceding form step, and will also add an approval section to the form. The Approval Section label is set to the step name, and it contains a TextArea Comments control. It will be configured as a signed section with Text/Signature Image.
A business rule will be added for each approval step to make it expanded/required/enabled on the step, collapse/optional/disabled otherwise, and to set it as visible/printable on or after the step, hidden/not printable before the step.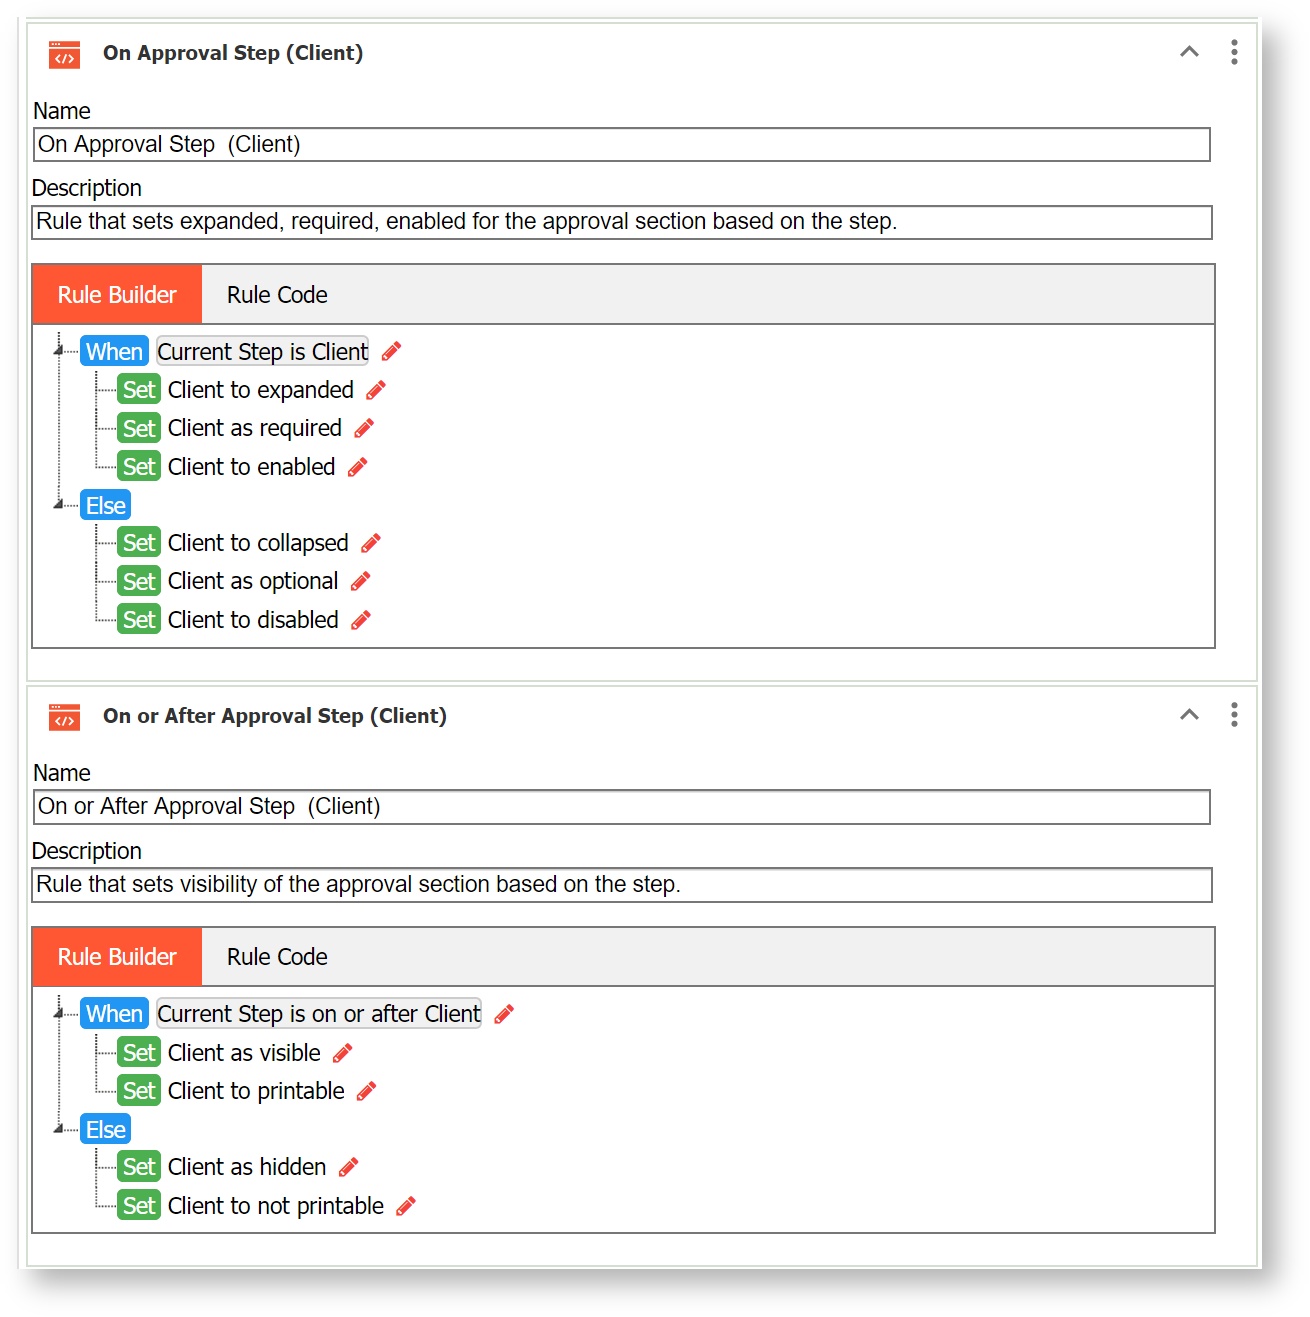
- Use Existing Form offers a list of forms previously created in the project you are working within. Select an existing form name to add it to your workflow. It will not be populated with the default controls like a New Form, but if you add Approval Steps after it, Approval Sections will be added to the bottom of the form as described above.
Assignment Type
Any step (after the first step) can be assigned to one of three options.
To an Email Address provides a text field for you to enter an email. It will default to the current user's email, and you can change it if you wish.
To a User provides a typeahead search of users in your tenant. Select a user to add to the Assign To field. You can only select one user.
- To Role(s) provides a typeahead search of roles in your tenant. Select one or more roles to add to the Assign To field.
If you want to assign a step dynamically using a control in your form, you can do this later in the Workflow Designer. For now, choose one of the above options.
Complete the Wizard
Simply click Finish when you are done adding and configuring your steps. You will be redirected to the Workflow Designer where you can further customize your workflow and steps.
Custom Messages
The Workflow Design Wizard will also automatically customize the Task Information, History, and Pending messages and Task Notification based on the type of step and assignment you chose.

Task Information
The Task Information message is set to “{flow.name} from {firstName} {lastName} requires approval.
History Message
The History Message is set to
- “{flow.name} processed by {subject.first.name} {subject.last.name}” for non-approval steps
- "{flow.name} approved" for approval steps assigned to email
- "{flow.name} approved by {subject.first.name} {subject.last.name}" for approval steps assigned to user/role(s).
Pending Message
The Pending Message is only set if the following step is assigned. It is set to “The {flow.name} was sent for approval/further processing. An email notification has been sent. Check your email to continue the workflow.”
Task Notification Email
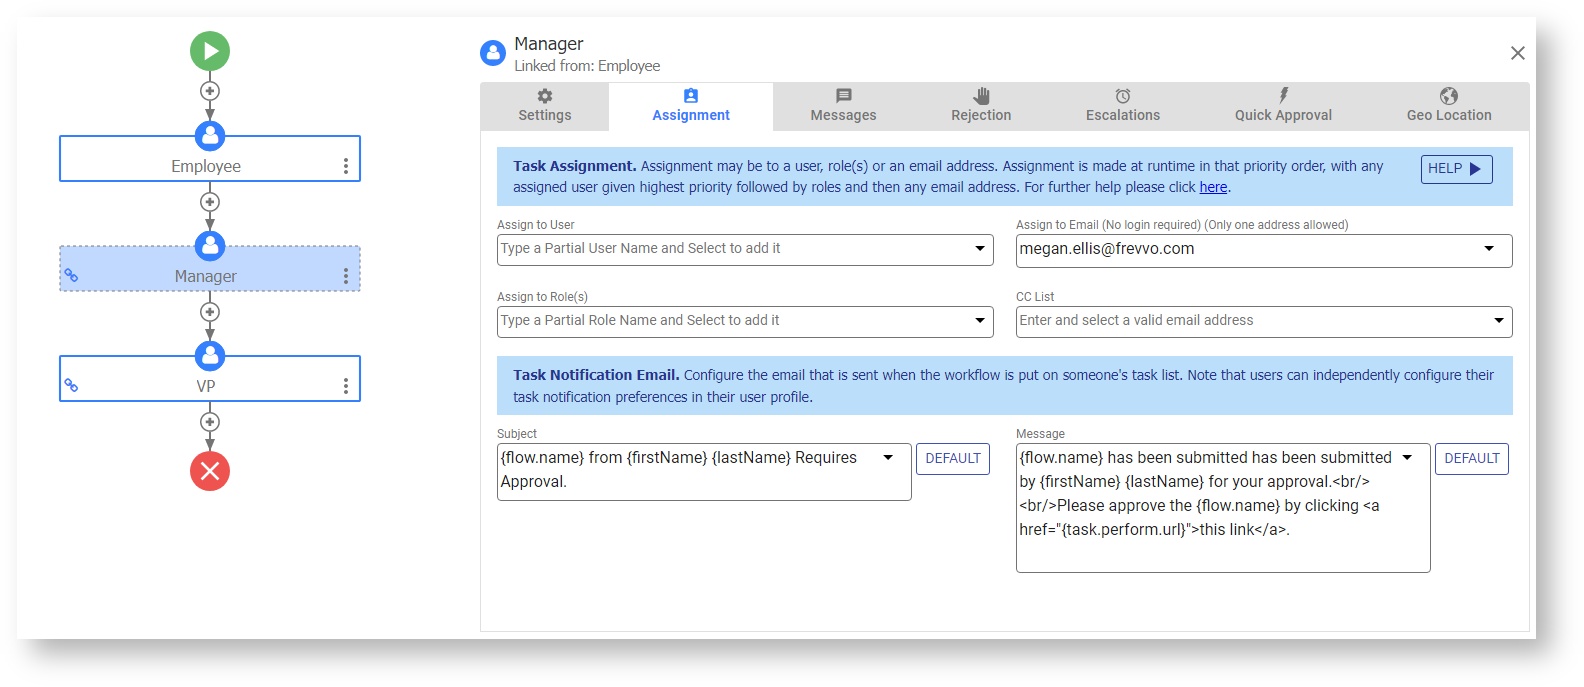
The Task Notification Email Subject is set to either “{flow.name} from {firstName} {lastName} Requires Approval/Further Processing” depending on if an approval step or non-approval step. The Task Notification email message is set to “{flow.name} has been submitted has been submitted by {firstName} {lastName} for your approval/further processing.<br/><br/>Please approve the {flow.name} by clicking <a href="{task.perform.url}">this link</a>.”
Rejection Settings
Each assigned step in the workflow will include default "Reject To" and "Reject From" settings, as well as default Reject Email settings. These include some special templates such as {flow.activity.name} which indicates the step of the workflow and {flow.activity.reject.reason} which resolves to the reason given by the user at runtime. 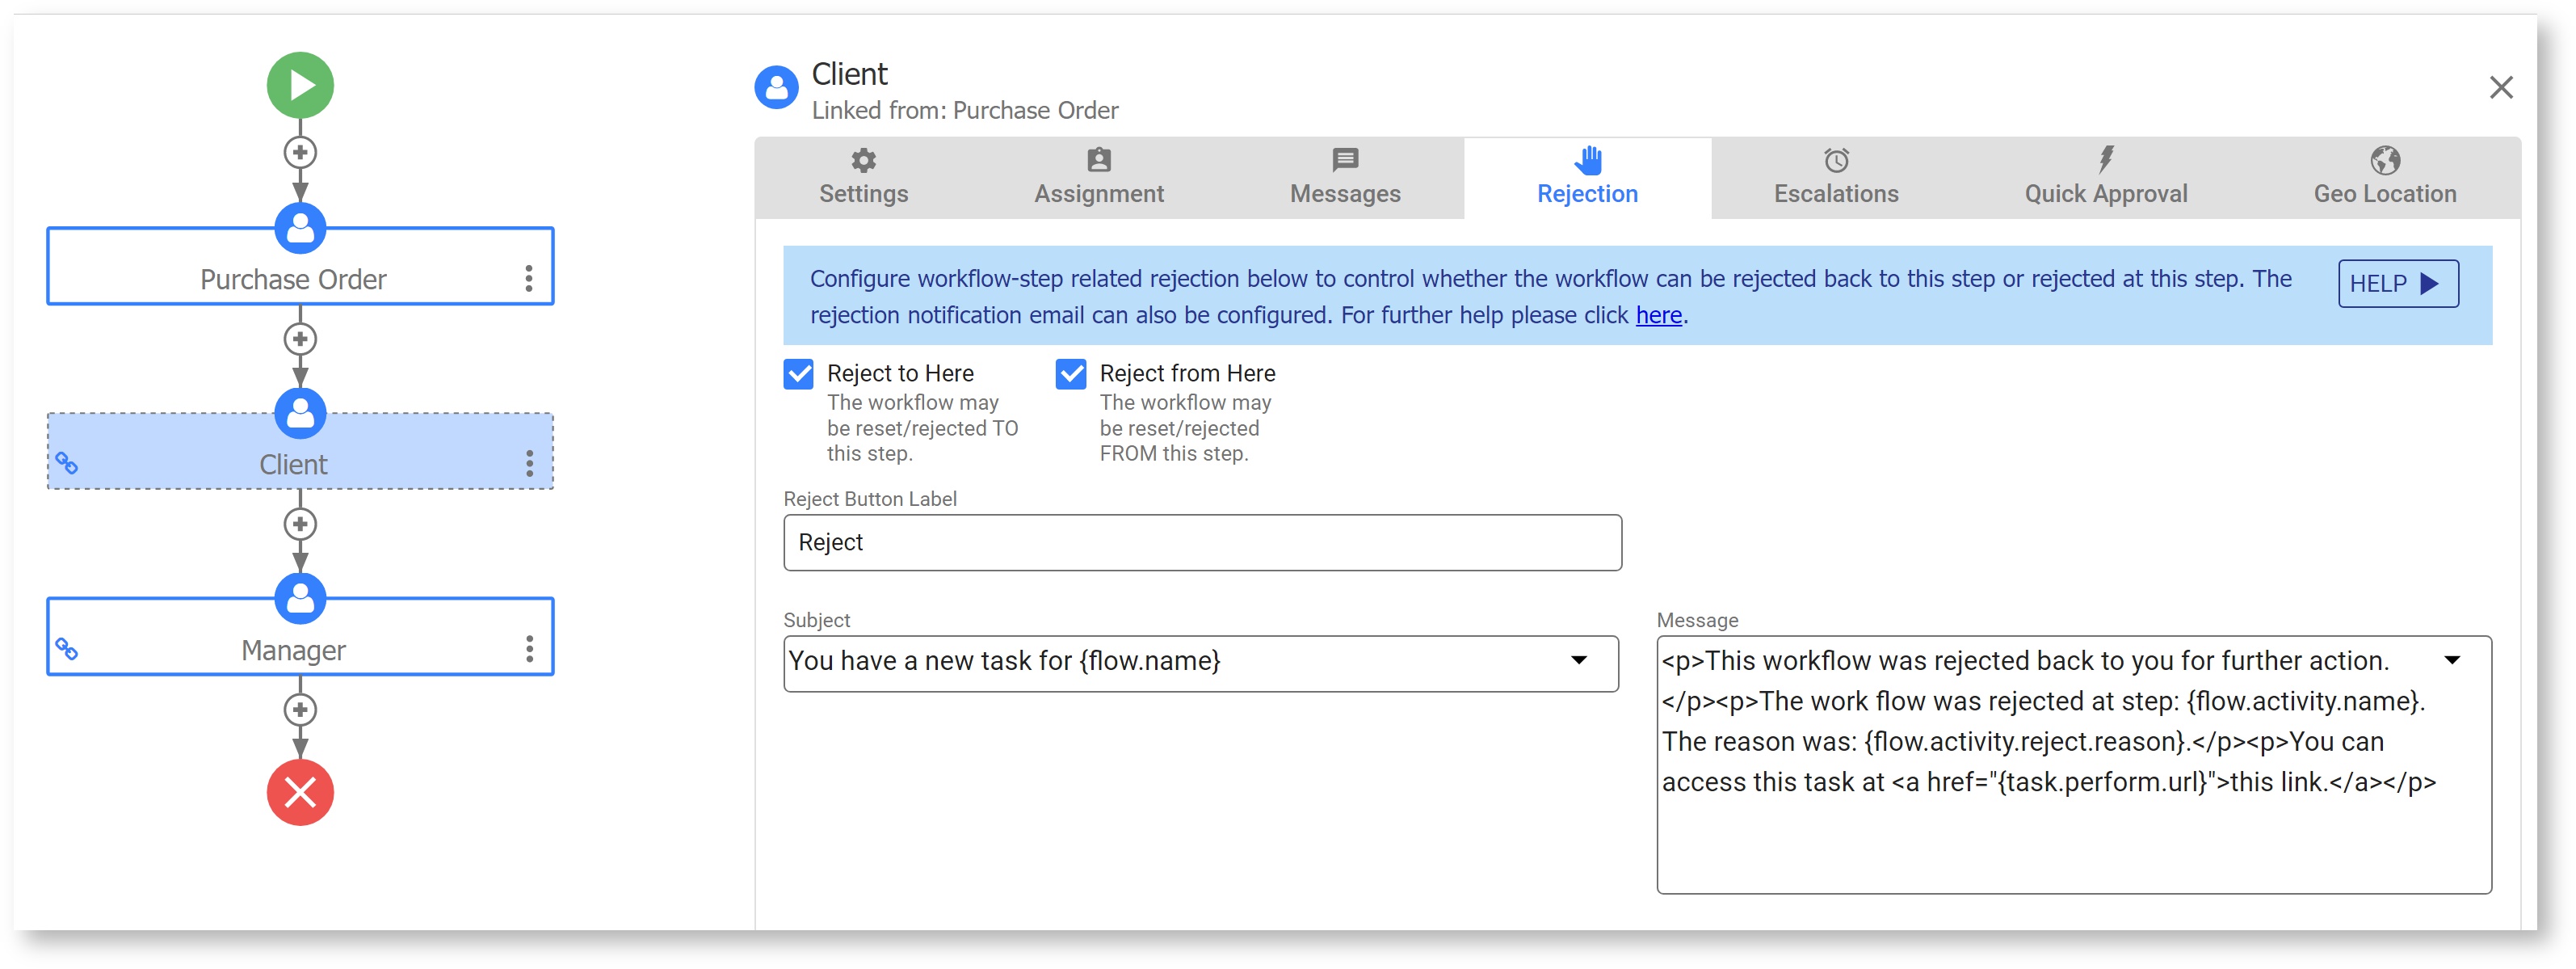
Doc Action
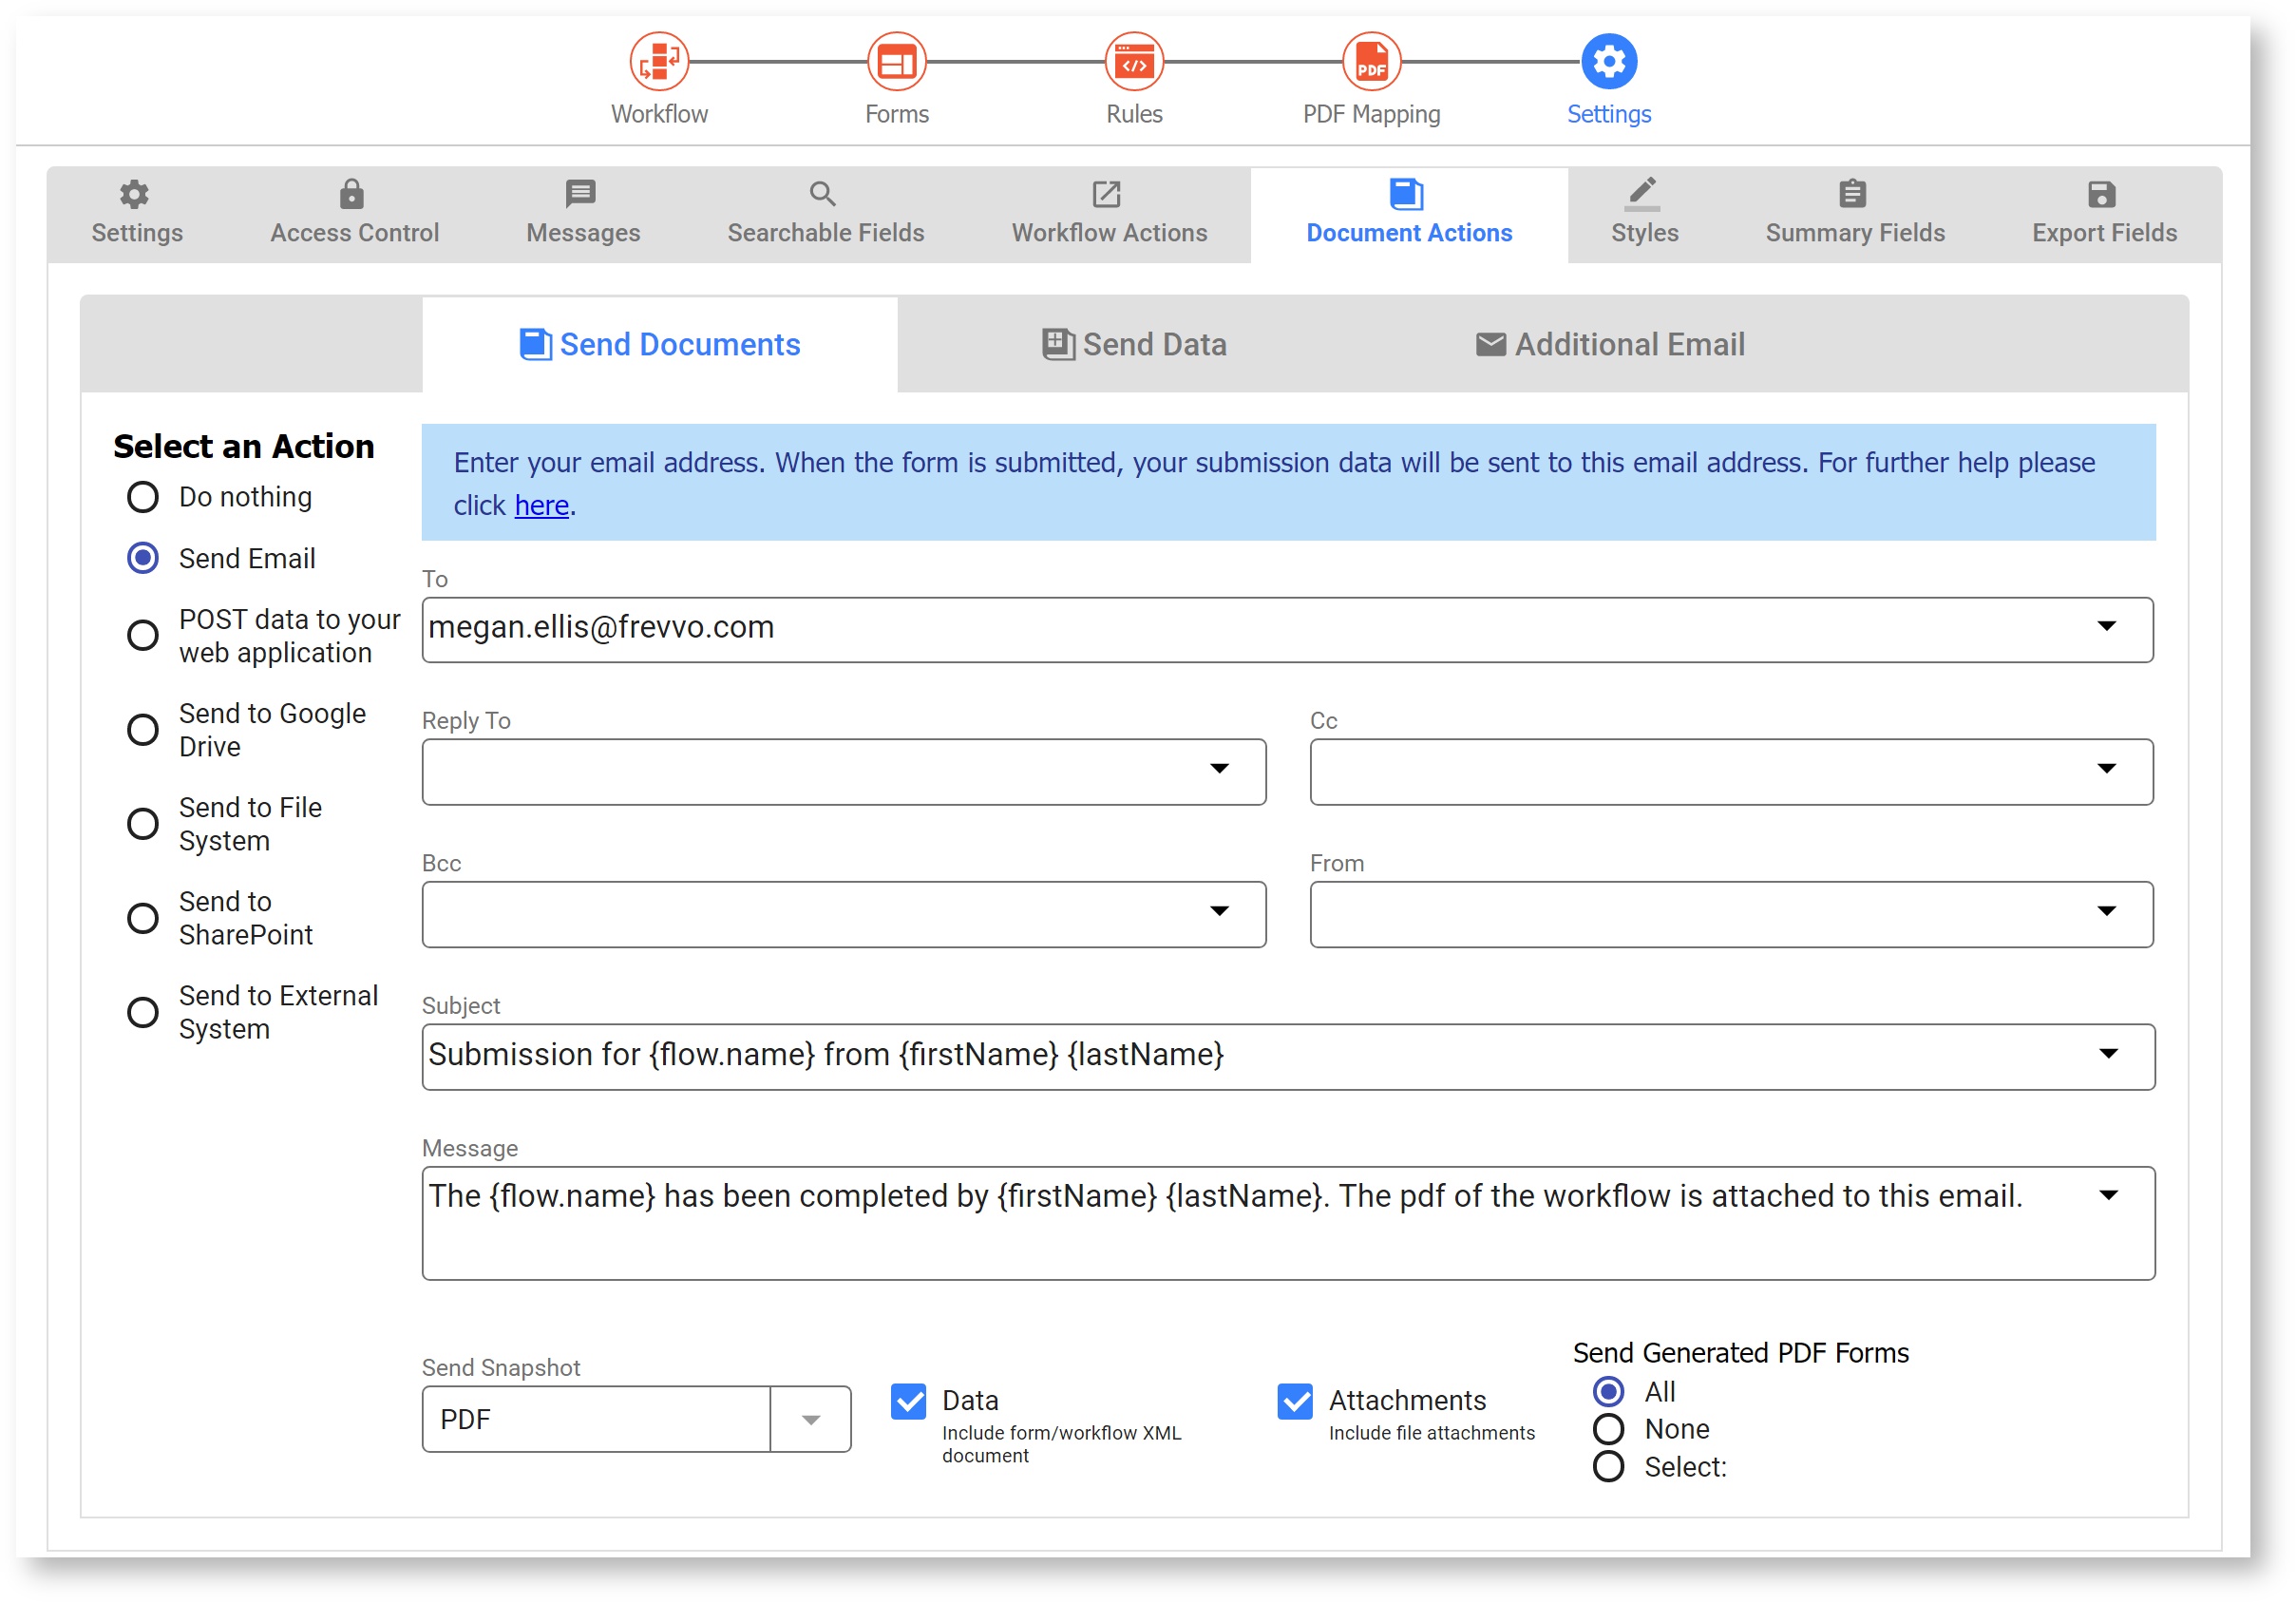
The Workflow Design Wizard automatically created an Document Action: Send Email to send an email to the workflow designer upon submission. You can find this in Settings Editing Mode, in the Document Actions: Send Document tab. Notice that the To Email is set to the workflow designer's email, the Subject and Message are customized, and a PDF snapshot of the workflow will be attached. You may further customize any of these fields or choose another Document Action if desired.
Error Message
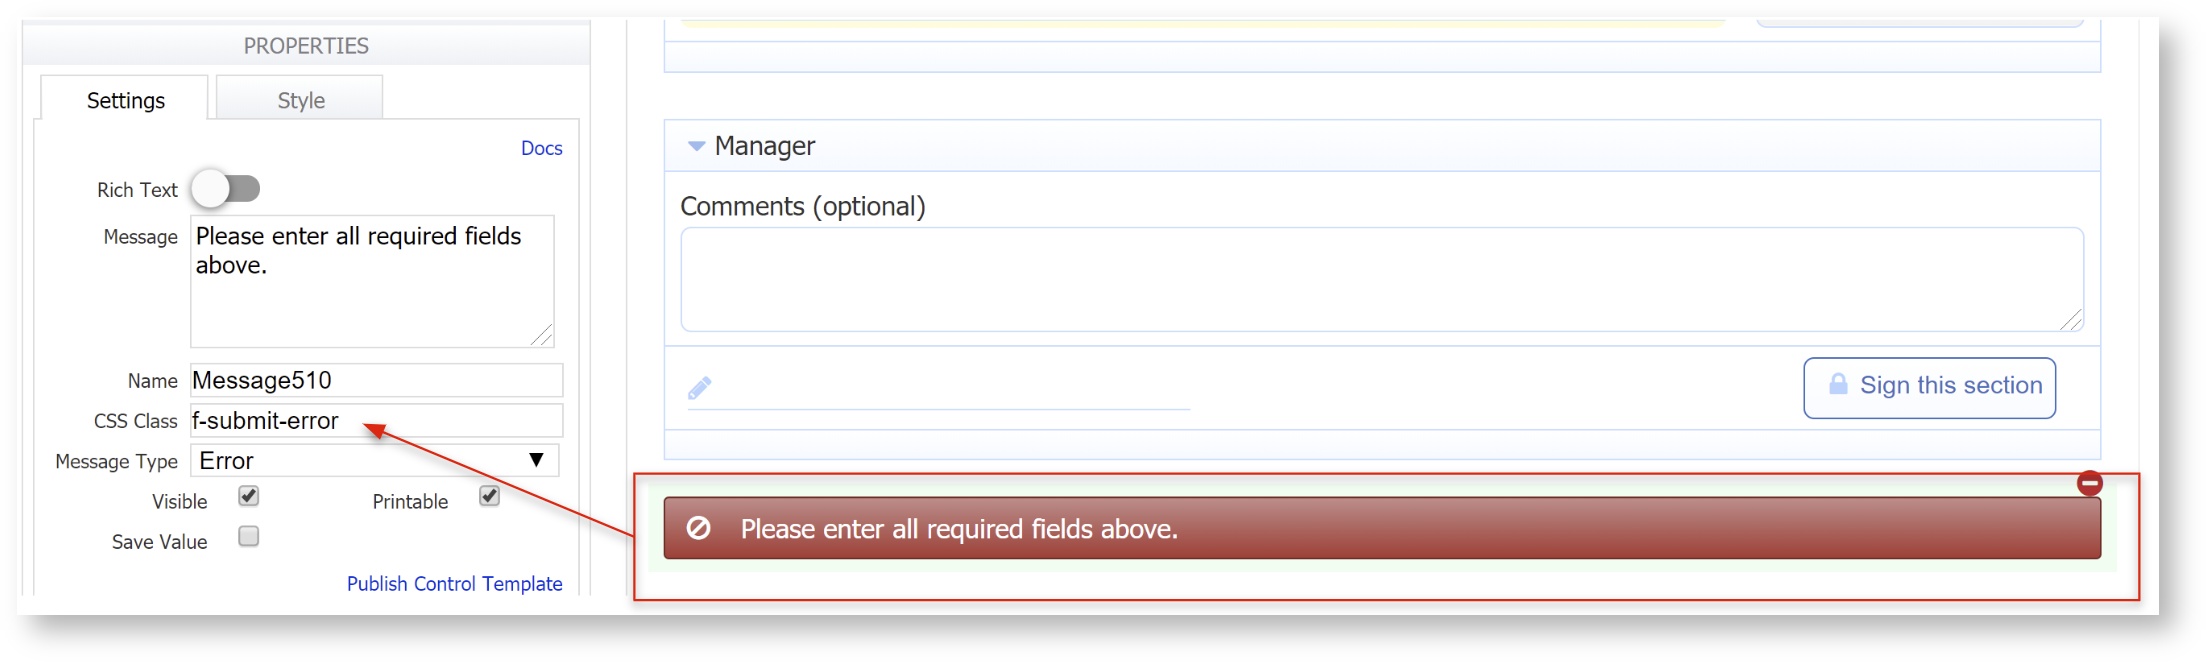
The Workflow Design Wizard will also place a default error message with the CSS Class f-submit-error on any new form it creates. This will automatically appear if the user attempts to submit the form with validation errors, and will disappear as soon as those errors are corrected.
Create an Empty Workflow
Perhaps you are a power user who wants to create a workflow from scratch instead of using the wizard, or you want to set up a workflow but not create the extra controls, rules and document actions that come with the wizard. No problem! At the step configuration screen, simply delete all of the steps, then click FINISH. This creates an empty workflow. Then you can follow the Working with Steps documentation to add and configure steps as desired.
![]()
![]()