Installation Tasks
- Megan Ellis
frevvo configuration properties are configured in the frevvo-config.properties file in the <frevvo-home>\tomcat\conf directory. The frevvo-config.properties is a standard java properties file. Any valid context parameter can be configured as a property in this file. This file contains properties that define global customizations that apply to the <frevvo home>\tomcat\webapps\frevvo directory and the frevvo connector warfiles (Database Connector, Filesystem, SharePoint). For example, you can provide the client secret information for the Google Connector with a property in this file.
The properties that can be added to the frevvo-config.properties file are discussed below. The configuration properties in the frevvo-config.properties file will override the properties configured in <frevvo-home>\tomcat\conf\server.xml file. Parameters, previously configured in the web.xml file included in the frevvo.war must be added to the frevvo-config.properties file as well.
frevvo only supports/certifies frevvo running in the tomcat container. Refer to our Supported Platforms for the list of Application Servers supported/certified by frevvo.
Converting Context Parameters to Properties
The configuration properties follow a simple property name=value syntax. Let's say you had context parameters to default the tenant login and customize the placeholder on the login screen in the frevvo.xml file of your previous installation.
The context parameters in frevvo.xml would look like this:
<Parameter name="frevvo.default.login.tenant.id" value="your_tenant_id" override="false"/>
<Parameter name="frevvo.login.username.placeholder" value="user@<your_tenant_name>" override="false"/>
The configuration properties follow a simple property name=value syntax. Follow these steps to convert configuration parameters from previous releases to properties in the frevvo-config.properties file.
- Navigate to <frevvo-home>/tomcat/conf directory.
Edit the frevvo-config.properties file.
- The Parameter name becomes the property name.
- Add an equal sign
- Add the value after the equal sign
- Repeat this for all custom parameters
- Save the file
#Custom Tenant Id and Placeholder
frevvo.default.login.tenant.id=<your_tenant_id>
frevvo.login.username.placeholder=<@<your tenant name>
Here is an example of a frevvo-config.properties file that provides the URL for the Filesystem connector, a property to turn on/off the Insight Server and a property to turn on DEBUG level logging for the frevvo.log and any frevvo connector logfiles.
frevvo.filesystem.connector.url=http(s)://<your server>:port/filesystem
insight.enabled=true insight.service.url=http(s)://<your server>:port/insight
frevvo.sharepoint.connector.url=http(s)://<your server>:port/sharepoint
logging.level.root=DEBUG
Updating the frevvo-config.properties requires server restart. You do not have to restart the Insight server.
frevvo tomcat bundle
In the frevvo tomcat bundle, the frevvo-config.properties file is located in the <frevvo-home>\tomcat\conf directory. The path to the frevvo-config.properties file is specified in the <frevvo-home>\tomcat\bin\sentenv.bat.sh files
set CATALINA_OPTS=%CATALINA_OPTS% -Dspring.config.location="file:///%CATALINA_HOME%/conf/,file:///%CATALINA_HOME%/conf/frevvo-config.properties"
On this page:
Changing the admin password
- Login to your frevvo server as user admin@d, password admin.
- On the page that is displayed, click the Manage Tenants link.
- Click the
 icon to manage tenant named d (Default tenant)
 - Click Manage Users
- Click the
 edit admin user icon for the admin user. This displays a profile form.
 - Change the password as desired and submit the form.
Email configuration
The forgot password functionality and form submissions sent via email both require proper configuration of frevvo' smtp component.
- Edit <frevvo-home>\tomcat\conf\server.xml
- Configure the Mail Resource
- Save the file
Here is a sample mail/frevvoDS resource configuration:
<!--
        Mail Resource
-->
<Resource name="mail/sharedfrevvoDS" auth="Container" type="javax.mail.Session"

 mail.smtp.host="{your.smtp.host}"
 mail.smtp.port="{your.smtp.port}"
 mail.smtp.auth="false" - If your SMTP server does not require a user/password for out bound emails, it may require that all emails are sent as a user with an account in your corporate domain. Set mail.smtp.auth="false" in this case
 mail.smtp.starttls.enable="true" - If your email server does not use TLS connection security, change mail.smtp.starttls.enable from true to false.
 mail.smtp.user="{your.smtp.user}"
 password="{your.smtp.password}"
 mail.debug="false" /> - Turning on this property sends more debugging info to the tomcat log files
Additional Email Properties
The additional email properties found in the <frevvo-home>\tomcat\conf\frevvo-config.properties file are shown below. Edit this file and add the # to comment out the properties that you do not want. Properties configured in this file take precedence over the server.xml settings.
- frevvo.mail.from.email - Although this property can be used to set up a from email address, it is recommended that you use the frevvo UI to set up the from email and display name
- frevvo.mail.bounce.email - Sets an address to receive emails that cannot be delivered to the to email recipients
- frevvo.mail.debug - Turning on this property sends more debugging info to the tomcat log files
frevvo.actions.debug - This property controls whether or not additional info log messages are included when form actions, DOC URIs and doc actions are performed.
frevvo.rule.debug - Turning on this property sends more debugging info about rules to the tomcat log files
# SMTP Settings
frevvo.mail.from.email= .
frevvo.mail.bounce.email={email address for bounced emails}
frevvo.mail.debug=false
frevvo.actions.debug=true
frevvo.rule.debug=true
Email log entries
If you are using tomcat, emails sent are tracked in the <frevvo-home>\tomcat\logs\frevvo.log file when the Installation Tasks#Debugginglogfilelevels log level is enabled. Look for an entry like "Sending email to <email address> with subject <the subject of your email>. If an error occurs when sending, the message "Could not send email to <email address> with subject <the subject of your email> including the actual exception that caused the problem will be logged.
Email over SSL
If the SMTP server requires traffic to be sent over SSL, add the following properties in the mail resource configuration, and then specify values for them:
mail.smtp.socketFactory.port="465"
mail.smtp.socketFactory.class="javax.net.ssl.SSLSocketFactory"
mail.smtp.socketFactory.fallback="false"
PDF Snapshot Generator - Install Chrome/Chromium
A stable version of chrome or chromium browser needs to be installed on same server where frevvo is installed. Use one of the following links to install Chrome or a Chromium browser.
The snapshot generator looks for chrome browser at following paths. If found, it launches the browser.
/usr/bin/chromium
/usr/bin/chromium-browser
/usr/bin/google-chrome-stable
/usr/bin/google-chrome
/Applications/Chromium.app/Contents/MacOS/Chromium
/Applications/Google Chrome.app/Contents/MacOS/Google Chrome
/Applications/Google Chrome Canary.app/Contents/MacOS/Google Chrome Canary
C:/Program Files (x86)/Google/Chrome/Application/chrome.exe
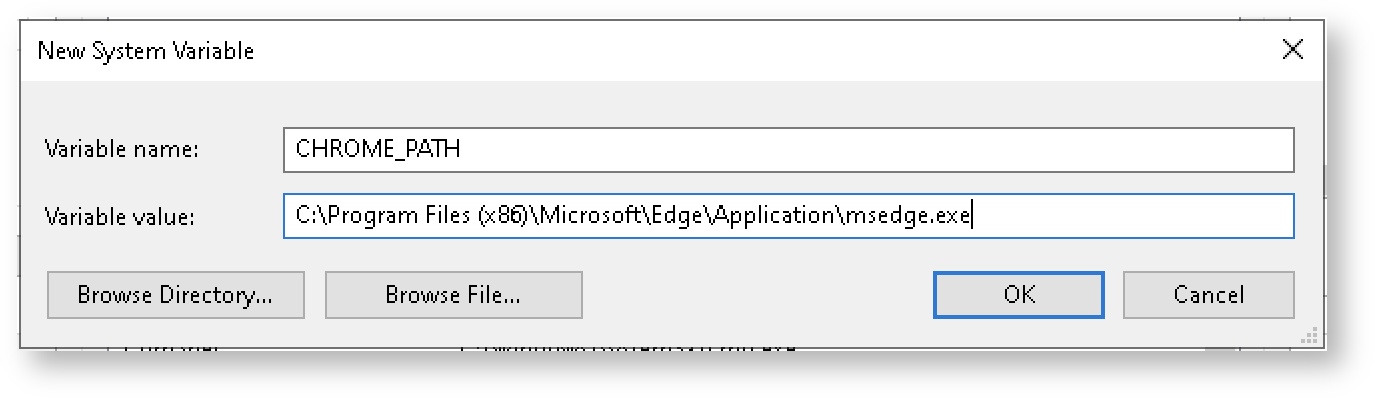
If the browser is not installed at any of these paths then set the CHROME_PATH environment variable to point to the correct path of the browser binary or set frevvo.chrome.path property in frevvo-config.properties file.
Windows Os:
Open the Start Search, type in “env”, and choose “Edit the system environment variables”
Click the “Environment Variables…” button
Click the "New..." button in the "System Variables" section
Set the variable name to "CHROME_PATH" and the value to <path to chromium browser exe>
MacOs/Linux
Set the CHROME_PATH environment variable in system profile files (/etc/profile, ~/.bash_profile, ~/.bashrc)
export CHROME_PATH=/opt/bin/chromium
Browser Automatic Updates
We recommend turning browser automatic updates OFF on the frevvo server. frevvo relies on the chromium browser for PDF Snapshot generation, and we are unable to test each browser update with frevvo. It is possible that a future update could cause an issue with your PDF snapshot generation. When a browser update is released, please manually update during off-hours and test the update with frevvo. Be sure to take a backup that you can roll back to if necessary.
PDF Snapshot Generator Timeout
By default, the PDF Snapshot Generator timeout is set to 10 seconds. If you are regularly generating large PDFs that may take longer, you can adjust this setting in the frevvo-config.properties file.
- Stop frevvo if it is running.
- Navigate to the <frevvo-home>\tomcat\conf directory
- Open the frevvo-config.properties file with a text editor.
Add the frevvo.snapshot.generator.timeout property to the <frevvo-home>\tomcat\conf\frevvo-config.properties file and set the value to the number of seconds before timeout.
frevvo-config.propertiesfrevvo.snapshot.generator.timeout=<Number of Seconds> //example frevvo.snapshot.generator.timeout=20
- Save the file
- Restart frevvo.
Chrome Options
Chrome provides a variety of switches that can be used with the Google Chrome browser. Some change behavior of features and others are for debugging or experimenting. This page lists the available switches including their conditions and descriptions. The frevvo-config.properties file supports the following property if you need to add a switch in order to troubleshoot Google Chrome PDF Snapshot generation.
frevvo.chrome.options.{switch-name}={switch-value}
This may be necessary if a future Chrome upgrade impacts your PDF Snapshot generation. We recommend turning off automatic Chrome upgrades and testing any upgrade before releasing it in your production environment.
Default the Tenant Login
frevvo is a multi-tenant application. See the administration section on Manage Tenants. However, it is possible that all you need is a single tenant. If this is your case, it simplifies the frevvo server login if you default the @<tenantname> so the user only needs to enter their username to login. Customers who default the tenant login normally would also Installation Tasks#Customizingtheplaceholderontheloginscreen. Please read that topic for details.
- Stop frevvo if it is running.
- Navigate to the <frevvo-home>\tomcat\conf directory
- Open the frevvo-config.properties file with a text editor.
Add the frevvo.default.login.tenant.id property to the <frevvo-home>\tomcat\conf\frevvo-config.properties file and set the param-value to the name of your one tenant.
frevvo-config.propertiesfrevvo.default.login.tenant.id=<your_tenant_id>
- Save the file
- Restart frevvo.
In-house customers, logging in as the frevvo' server superuser admin, must still login with username admin@d.
Customizing the placeholder on the login screen
You may want to customize the user@tenant placeholder on the login screen to reflect the name of your frevvo tenant to minimize confusion for your users or to remove the @tenant from the placeholder if you have defaulted the tenant login.![]()
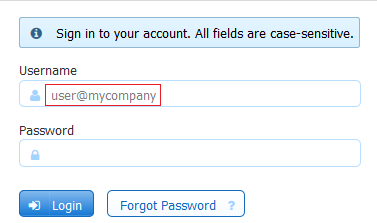
In-house customers can change the default placeholder on the login screen by modifying the values for the frevvo.login.username.placeholder property.
Follow these steps to change the placeholder:
- Stop frevvo if it is running.
- Navigate to <frevvo-home>\tomcat\conf
- Open the frevvo-config.properties file with a text editor.
Add the property shown below with your modified value then save the file.
frevvo-config.propertiesfrevvo.login.username.placeholder=user@mycompany
- Restart frevvo.
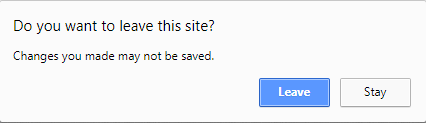
Turn on the Unsaved Changes Warning
You may want to to turn on the browser specific warning that displays if your users close their browser/tab before saving or submitting a formflow. A description of the feature can be found here. Here is an example for the Chrome browser:
Add the frevvo.unsaved.warning property to the <frevvo-home>\tomcat\conf\frevvo-config.properties file in the tomcat bundle. The default value is false.
- Stop frevvo if it is running.
- Navigate to <frevvo-home>\tomcat\conf
- Open the frevvo-config.properties file with a text editor.
Add the the frevvo.unsaved.warning property with a value of true then save the file.
- Restart frevvo
frevvo.unsaved.warning=true
Configure the Insight Server
Configuration properties for the Insight Server are located in the <frevvo-home>\tomcat\conf\frevvo-config.properties file.
The properties in the frevvo-config.properties file are:
# Insight settings
insight.enabled=true
insight.server-url=http://localhost:8983/solr
The "Insight.enabled" property with a value of true enables Insight Server by default.
The Insight Server MUST be enabled for submissions, the Task List and Report features to work. Do NOT disable it if you are using any of these features.
- The "Insight.server-url" property points to the location of the Insight Server. The Insignt Server is included in the tomcat bundIe. In the unlikely scenario where the Insight Server (Solr) is in a different location than frevvo, the <server:<port>> in this property can be changed to point to the location of the Insight Server (Solr) software.
Refresh Searchable Fields Configuration Parameters
If you are using the frevvo tomcat bundle, the Refresh Searchable Fields process is already configured. The insight.war web app is located in the <frevvo-home>\tomcat\webapps\frevvo.war. Insight.war is a web app that contains a batch process that extracts all the latest submissions from frevvo and creates Solr Documents for them. The indexed submission data from the batch is stored in <frevvo-home>\data\solr directory and is used by the frevvo Reports feature. The batch job is automatically run when you upgrade frevvo but it can also be run manually if necessary.
If it is determined that the Refresh Searchable Fields process needs to be run for the entire tenant
- Cloud customers must contact frevvo to request the batch process for your tenant.
- In-house customers can use the Refresh Searchable Fields function to manually run the batch process.
There are some properties that can be added to the frevvo-config.properties file to override default values. Although, it is recommended to leave these properties with the default values, these properties can be added with different values if requested by frevvo support to troubleshoot an issue.
index.submission.batch.size=100 - this property specifies the number of rows read into memory during the batch process. The default value is 100.
index.submission.thread.pool.size=10 - this property specifies the maximum number of threads. In a multi-tenant installations, the batch process uses one thread per tenant
index.submission.start.date=<start date> - this property can be set to a date in the YYYY-MM-DD format. The batch will then exclude any submissions before this date.
Submission View configuration
Configuration properties that affect the frevvo Submission view are discussed below. You can hide the Delete submission button, hide the Edit Submissions link and configure the maximum number of Searchable fields allowed per form/flow.
Follow these steps:
- Stop frevvo if it is running.
- Navigate to <frevvo-home>\tomcat\conf
- Open the frevvo-config.properties file with a text editor.
Add the properties with your modified values then save the file.
- Restart frevvo
Set a Maximum Number for Searchable Fields
Add this property with the value of the maximum number of searchable fields you want to allow per form or flow to the <frevvo-home>\tomcat\conf\frevvo-config.properties file. The default value is 20.
frevvo.max.searchable.fields=<maximum number of searchable fields per form/flow>
Designers see a message when an attempt is made to add a searchable field that would exceed this max number.
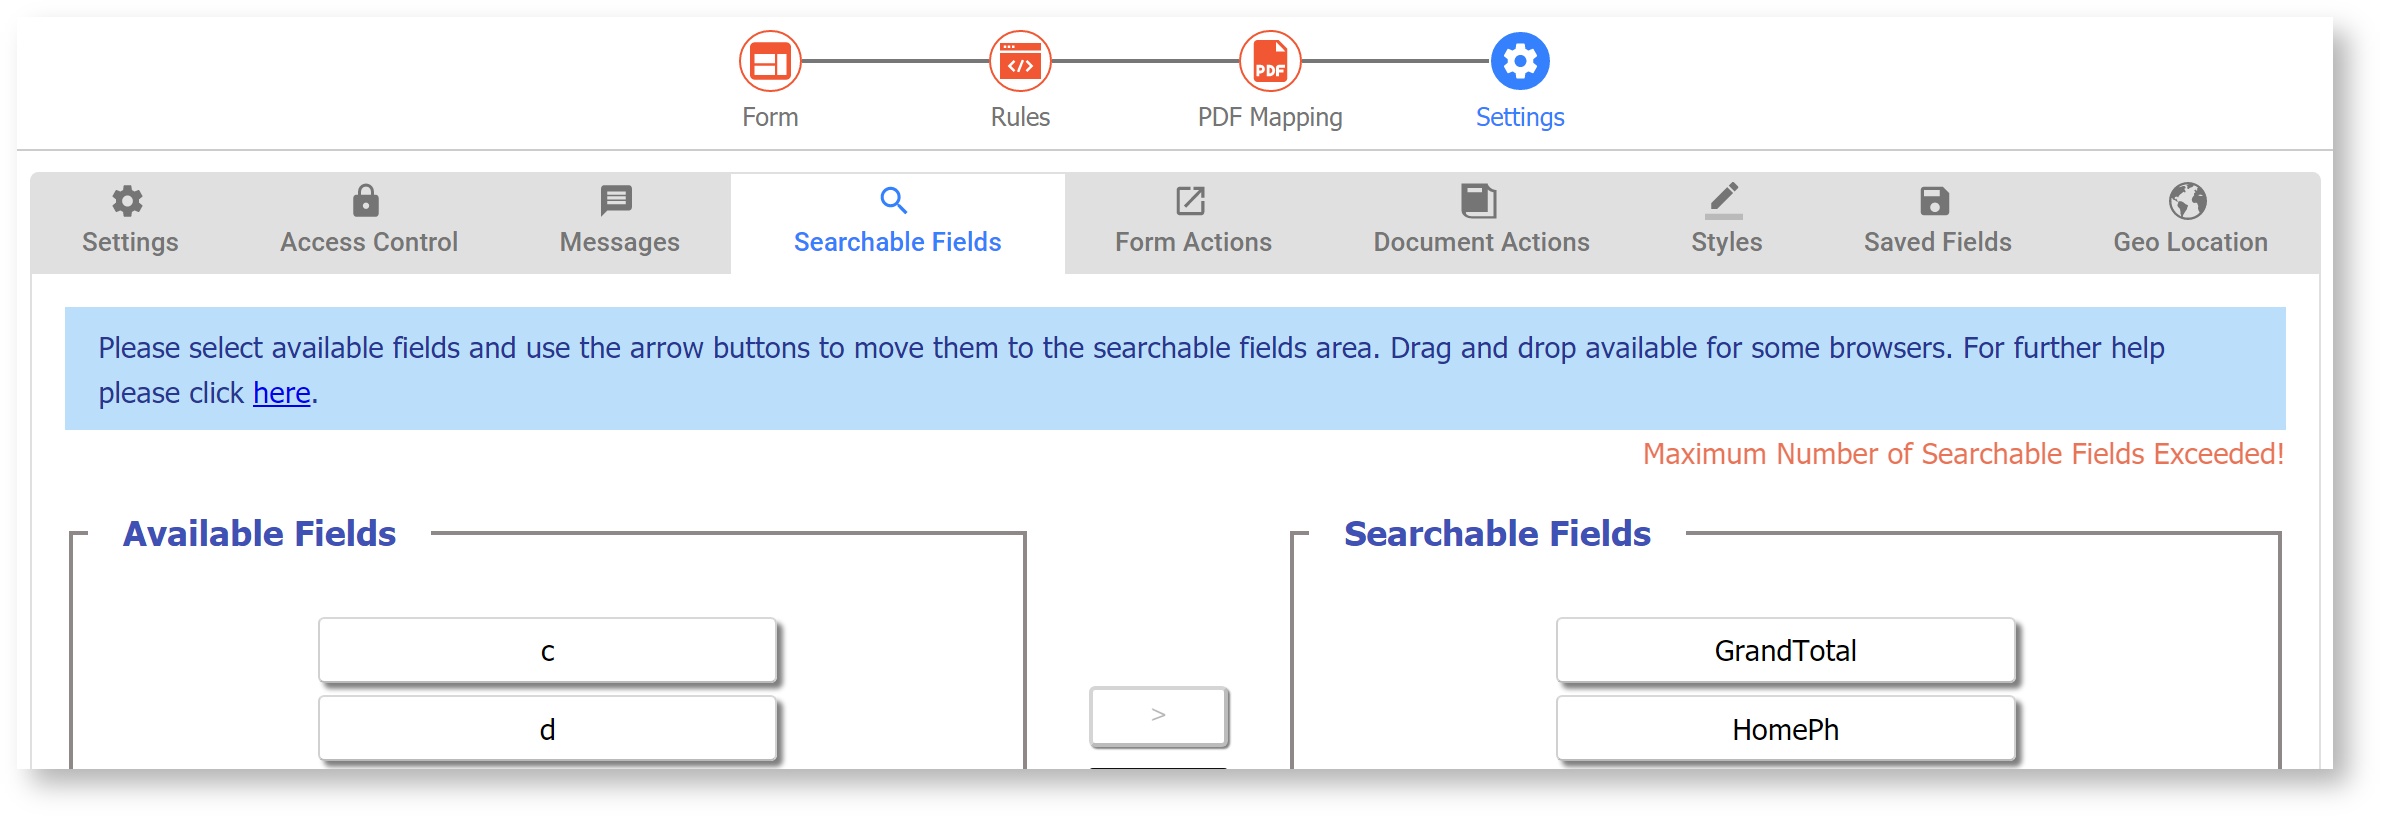
The message appears on the lower right of the screen and disappears after a short time. Any fields in excess of the max configured will not be allowed.
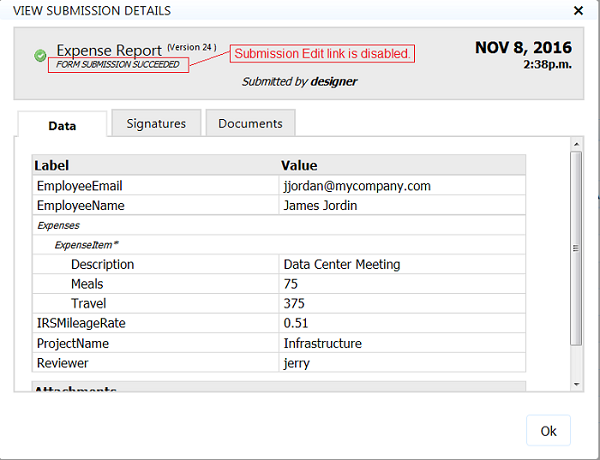
Disable the Submission Edit Link
Add this property with a value of false to the <frevvo-home>\tomcat\conf\frevvo-config.properties file to disable the Submission Edit link in the on the submission details popup everywhere it is displayed. The default value is true.
frevvo.submission.edit.link value=<true or false>
Administration of reCAPTCHA Keys
frevvo provides a default reCAPTCHA key. No other configuration steps are required for on-premise customers that choose to use the default key. This default reCAPTCHA key is:
- NOT configured to a particular host/domain server
- NOT configured for Google to perform any host/domain name checking on the challenge step. However, frevvo will perform a host/domain verification on the verification step so that any attempts at site key spoofing are blocked.
- Considered secure.
In-house customers who want the maximum possible protection from form spamming, will need to create their own reCAPTCHA key and configure to their domain (example.com).
Follow these steps:
- You will need a google account.
- Follow the instructions on this Google site to register your domain and create the site and secret keys.
- You can also choose "Domain Name Validation" on this key to have Google check the domain on the challenge step.
- Copy the site and secret keys from the Registration page for your site
Add the frevvo.reCAPTCHA.sitekey and the frevvo.reCAPTCHA.secretkey properties to the <frevvo-home>\tomcat\conf\frevvo-config.properties file.
frevvo.recaptcha.sitekey=<your custom site key here>
frevvo.recaptcha.secretkey=<your custom secret key here>
frevvo.recaptcha.hostcheck=<true or false>
The frevvo.recaptcha.hostcheck property controls the domain/host verification on the verification step that is done by frevvo. The values for this property can be set to true or false. If you use a custom key with Domain Name Validation configured, add this property to the frevvo-config.properties file with a value of false. Otherwise, add it to frevvo-config.properties with a value of true.
Proxy Server configuration
If your company uses a proxy server for internet traffic please see proxy configuration. This is often the cause of the following error message:
- Unable to contact license server
- Unable to renew license. Your license will expire in <n> day(s)
External URLs
The External URL should always be set up when frevvo tomcat is running behind a proxy. Setting the correct external URL is necessary when frevvo either redirects to an external system that is sensitive to the originating address e.g. SAML Identity Provider, OAuth server, etc. or generates a URL for external use e.g. a share URL.
Tomcat is already configured to accept the standard x-forwarded headers. If the proxy is providing these in the request then nothing needs to be done. If the headers are custom, then frevvo can be configured to do the translation. If these headers are not being provided, then you need to configure the tomcat connector proxy attributes.
Proxy with X-Forwarded headers configured
This is the most flexible setup. You do not need to make any changes in frevvo to use this as tomcat is already configured to handle the standard x-forwarded headers which are as follows:
- X-Forwarded-Proto: the protocol of the incoming request (http or https).
- X-Forwarded-Host: the host name of the incoming request
- X-Forwarded-Port: the port of the incoming request
In the event you use non-standard header names, you will have to configure the frevvo's <frevvohome>\tomcat\conf\frevvo-config.properties file to handle the translation.
Configure a Tomcat Proxy
Proxy attributes are set up on the tomcat connector that the proxy is forwarding requests to, which could be the HTTPS or the HTTP connector of the <frevvo-home>\tomcat\conf\server.xml file. For example, if SSL is being terminated in the proxy then it forwards to the HTTP connector (as shown below). Add the properties proxyName, proxyPort, scheme and secure.
<Connector port="8082" protocol="org.apache.coyote.http11.Http11NioProtocol"
connectionTimeout="40000"
maxHttpHeaderSize="32768"
useBodyEncodingForURI="true"
proxyName="<myexternalhost>"
proxyPort="<myexternalport>"
scheme="https"
secure="true" /> <!-- makes sure that uri parameter are decoded as utf-8 -->
frevvo will always redirect to this server. Captcha requests will use the same protocol (HTTP or HTTPS) as the external URL.
Default Internal Port
frevvo uses a connector on port 8081 for internal requests. As indicated in the server.xml, changing the frevvo internal connector 8081 settings in the server.xml file can cause unexpected changes, and is not advised.
The connector with port 8081 is configured in the server.xml file. Please ensure this port is available for frevvo to use.
<!-- A "Connector" used for internal frevvo calls: DO NOT MODIFY IT! -->
    <Connector address="127.0.0.1" port="8081" protocol="org.apache.coyote.http11.Http11NioProtocol"
               connectionTimeout="40000"
               maxHttpHeaderSize="32768"
               useBodyEncodingForURI="true" /> <!-- makes sure that uri parameter are decoded as utf-8 -->
If you need to change the internal port, follow these instructions. The only case where frevvo.internal.port may need to be changed is if port 8081 is already in use by another application.
In the server.xml, replace port 8081 in all locations with the port number of your choice. Make sure the new port is open and available for frevvo's use.
<Connector address="127.0.0.1" port="<port>" protocol="org.apache.coyote.http11.Http11NioProtocol"
               connectionTimeout="40000"
               maxHttpHeaderSize="32768"
               useBodyEncodingForURI="true" />
In the frevvo-config.properties file, add the frevvo.internal.port property and set it to the same port number used in step 1.
frevvo.internal.port=<port>
Default External Port
frevvo uses a connector on port 8082 for external requests. By default the frevvo tomcat bundle is configured to bind to port 8082. Please ensure this port is available for frevvo to use. You can change the port by:
- Editing the <frevvo-home>/tomcat/conf/server.xml file.
Search for this line in the file:
<Connector port="8082" protocol="org.apache.coyote.http11.Http11NioProtocol"
- Change the Connector port.
You can also change the default https connector port.
<Connector port="8443" protocol="org.apache.coyote.http11.Http11NioProtocol" SSLEnabled="true"
           scheme="https" secure="true"
Browser Support
frevvo does not support BETA versions of browsers and there is often a delay so that we can test newly released browser versions before they are supported. In previous releases, frevvo was configured to use a list of supported browsers. An error message and a link to override the error would display if the system was accessed using an unsupported browser. If you want to warn users if they access frevvo using an uncertified browser, configure a list of allowed browsers using the the frevvo.supported.browsers parameter in the <frevvo-home>\tomcat\conf\frevvo-config.properties file
- Stop frevvo if it is running.
- Navigate to <frevvo-home>\tomcat\conf
- Open the frevvo-config.properties file with a text editor.
Add the properties with your modified values then save the file.
- Restart frevvo
Add the user agent for the browsers you want to support '''in lower case only'''. For example, to allow all versions of Firefox, add the string 'firefox' (without the quotes) to the property value. It will match all versions of the Firefox browser. Separate the values with a comma.
frevvo.supported.browsers=firefox
Tomcat Manager
The tomcat manager is accessible in the bundle at http://<server-name>:8082/manager/html. The default Tomcat Manager user name/password are preset to frevvo/frevvo. If you wish to change the password, you may do so by editing the file <frevvo-home>\tomcat\conf\tomcat-users.xml.
Tomcat SSL
frevvo can be configured to handle HTTPS connections from users. The frevvo tomcat bundle you downloaded from www.frevvo.com is pre-configured with a self-signed certificate for development and testing. This self-signed certificate enables frevvo to handle HTTPS connections out of the box. However before deploying your forms to production you may want to replace this with your own certificate.
The HTTPS connector on port 8443 is enabled by default in the <frevvo-home>/tomcat/conf/server.xml.
<!-- HTTPS Connector
-->
<Connector port="8443" protocol="org.apache.coyote.http11.Http11NioProtocol" SSLEnabled="true"
        maxThreads="150" scheme="https" secure="true" clientAuth="false"
        sslProtocol="TLS" keystoreFile="${catalina.home}/conf/keystore" keystorePass="password"
        connectionTimeout="20000" maxHttpHeaderSize="32768"
        useBodyEncodingForURI="true" />
frevvo recommends reviewing your Certificate Authority's documentation for detailed steps to configure your certificate in Apache Tomcat. Additional info on how to use SSL on tomcat can be found on the Apache/Tomcat website.
There are multiple ways of configuring certificates depending on their format. For example, a PKCS#12 (pfx or p12) certificate doesn't have to be imported into the keystore. It can be configured directly as:
<Connector port="8443" protocol="org.apache.coyote.http11.Http11NioProtocol" SSLEnabled="true"
       scheme="https" secure="true"
       clientAuth="false" sslProtocol="TLS" sslEnabledProtocols="TLSv1+TLSv1.1+TLSv1.2"
       keystoreFile=C:\CERTDIRECTORY\CERT.pfx" keystorePass="YourPassword" keystoreType="PKCS12"
       connectionTimeout="40000" maxHttpHeaderSize="32768" useBodyEncodingForURI="true"/>
However, PKCS#7 or P7B formats require importing the certificate chain into the keystore. The Certificate Authority needs to provide all the intermediate certificates to be imported.
Currently, you must not disable frevvo's HTTP port. In a future release this will be allowed. Disabling frevvo's HTTP port will cause your form server to malfunction as frevvo requires this port. For most cases, it is sufficient to share the HTTPS version of your form/workflow's URL and leave HTTP open. However, if you want to force all form usage to be over HTTPS and feel it is not enough to simply share the HTTPS form URLs (as a user can switch to HTTP as long as that port is open), we recommend that you deploy frevvo behind an Apache or IIS server. Close the HTTP port on Apache or IIS but leave tomcat's HTTP port open so that frevvo can POST back to itself when needed over HTTP but no one outside can access it.
External Access -> Proxy (Apache/IIS...) -> frevvo (tomcat)
sameSiteCookies Attribute
Recent browser versions (especially Chrome v80+), by default, allow cookies to be sent only with top-level navigation and GET request initiated by third party websites. When you need to expose cookies to a third party site, such as using the SAML security manager or embedding in an iframe, you need to use https (Chrome only) and explicitly set the samesite attribute of the cookie to "none". frevvo v9.0.10+ includes a tomcat upgrade that allows configuring the cookie processor with this attribute. This documentation provides more information and details across browsers.
The sameSite value "none" is not supported prior to iOS 13 (macOS before version 10.15). Setting sameSite to "none" in tomcat may require iPhone/iPad to be upgraded.
For third party access, you must use https and update the provided tomcat/conf/context.xml CookieProcessor element to add the sameSiteCookies attribute.
<CookieProcessor className="org.apache.tomcat.util.http.LegacyCookieProcessor" allowEqualsInValue="true" sameSiteCookies="none"/>
On premise customers who do not want to make these updates need to turn on the legacy behavior in the chrome browser. Please see this Chrome documentation for details.
Tomcat Logfiles
By default, the frevvo server writes useful logging information to a daily logging file located here: <frevvo-home>/tomcat/logs. You will see the logfiles listed below in <frevvo-home>/tomcat/logs. The current date appends to the logfile names.
- catalina.YYYY-MM-DD.log - this log captures the stderr and stdout of the tomcat process including startup/shutdown messages. This is usually a small file.
- frevvo_YYYY-MM-DD.log - all frevvo messages are logged to this file. A new log with the current date appended to it is created daily.
- localhost.YYYY.MM.DD.log - this tomcat logfile should be empty.
localhost_access_log.YYYY - MM - DD.txt - is used to log all HTTP accesses to Tomcat. It is enabled by the following entry in <frevvo-home>/tomcat/conf/server.xml. Comment out the statement below to turn off logging to this file if it is not needed.
<Valve className="org.apache.catalina.valves.AccessLogValve" directory="logs" prefix="localhost_access_log" suffix=".txt" pattern="%h %l %u %{begin:dd/MM/yy:H:m:s.S}t "%r" %s %b "%{Referer}r" "%{User-Agent}r" [%I %{JSESSIONID}c %{X-Correlation-Id}o %{Location}o]" />- host-manager.MM-DD-YYYY.log - this logfile is part of the tomcat distribution and is empty by default. It is a log file for the host-manager web application that is used to manage virtual hosts in tomcat. The host manager web-app is typically not needed because frevvo is preconfigured. Messages are written to this log only if the host-manager web application is being used.
- manager.MM-DD.YYYY.log - this logfile is part of the tomcat distribution and is empty by default - this is the log file for the tomcat manager web application which is used to check the status of web apps, memory usage etc. Messages are written to this log only if the manager web app is being used.
The Database, Google, Filesystem, and SharePoint connectors will generate their own logs in the <frevvo-home>/tomcat/logs directory when configured. The connector logs capture entries for the respective connectors making troubleshooting issues easier.
- database.connector.YYYY-MM-DD.log
- google-connector.YYYY-MM-DD.log
- file-connector.YYYY-MM-DD.log
- sharepoint-connector.YYYY-MM-DD.log
- There will be three additional logfiles when running Tomcat as a Windows service:
- frevvoforms - stderr.YYYYMMDD and frevvoforms - stdout.YYYYMMDD for standard error messages and standard output stream, respectively. This is the default Tomcat behavior.
- commons-daemon.YYYY-MM-DD.log for Windows Service errors
- The Insight server no longer creates a log since the insight.war is integrated into frevvo.war. The messages formerly in the insight logs are now found in the in the <frevvo-home>/tomcat/frevvo_YYYY-MM-DD.log
Refer to the topics below for information about turning on DEBUG level logging.
Loglevels
Loglevels are : TRACE, DEBUG, INFO, WARN, ERROR, OFF, ALL. They are case sensitive so be sure to type them in upper case. The logging level is cumulative as shown below. Refer to this stackoverflow website for a description of the loglevels and some guidelines for using them.
- OFF = turns all logging off
- ERROR = ERROR
- WARN = WARN + ERROR,
- INFO = INFO + WARN + ERROR,
- DEBUG = DEBUG + INFO + WARN + ERROR,
- TRACE = DEBUG + INFO + WARN + ERROR
- ALL= turns all logging on
Configuring the logging level for catalina.log, localhost.log, host-manager.log, manager.log and local_access.log is done in <frevvo-home>/tomcat/conf/logging.properties
Loglevels for Security Managers
These properties should be used to get DEBUG level logs for specific security managers:
SAML & Azure SAML
logging.level.com.frevvo.security.saml=DEBUG
LDAP
logging.level.org.springframework.ldap=DEBUG
Loglevel for User Updates
This property is used to get DEBUG level logs when user information is updated.
logging.level.com.frevvo.lf.security.user.repository.JdbcUserInfoDao=DEBUG
You will see log messages when ever a user update starts and finishes. If roles are updated you will see an additional log message as well as a warning if the roles are going to be removed.
Log Messages in the frevvo log
frevvo Cloud log messages show session information and the names of the Log Message properties include an _ (underscore).
Session Information
Messages in the frevvo Cloud log the tenant.id, subject.id, correlation.id, session.id, owner.id, application.id, and type.id (formtype or flowtype) for all log messages.
This additional information can be extremely helpful when troubleshooting errors particularly in the frevvo cloud environment. The example shows an INFO message that specifies the tenant, mycompany and the userid, max associated with the entry:
22:05:12.471 |-INFO [http-nio-8082-exec-1] [ c.f.u.HttpClientHolder] [mycompany max] [f7ec10f5-bd0e-4a3d-b848-9192e646a62d 61E88E450BC436C4087C136DB94F0DC2] [ ] - Installing HTTPClient credential for user maryann and scope BASIC 'frevvo Trac'@dev.frevvo.com
Log Message Property Names
Log Message property names that include a . (period) make it difficult to filter these messages using cloud watch filters. Properties have been renamed to include the _ (underscore) instead of the . (period) i.e. tenant.id = tenant_id.
Debugging log file levels
By default frevvo log levels are set to INFO. Loglevels are changed by adding properties to the <frevvo-home>\tomcat\conf\frevvo-config.properties file. Changing the loglevel to DEBUG provides more information when troubleshooting.
If you want to delete the logs, stop frevvo then delete the logfiles. They will be recreated on start up.
Changing the logging level for frevvo log files
Add the three properties shown below with a value of DEBUG to the <frevvo-home>\tomcat\conf\frevvo-config.properties file to change the loglevel to DEBUG.
- Create/Edit the frevvo-config.properties file in <frevvo-home>\tomcat\conf
- Add the properties shown below to the file.
- Save the file
- Restart frevvo.
logging.level.root=DEBUG
logging.level.com.frevvo=DEBUG
logging.level.com.gauss=DEBUG
logging.level.root=WARN
Turn on DEBUG for the Database Connector log
It is possible to turn on DEBUG level logging only for the Database Connector. Refer to the Database Connector Logfiles topic for the details.
Create a Thread Dump
If you experience a performance problem, you may be asked to provide the frevvo Support Team with a thread dump of the application. There are many ways to do this but here are two simple methods.
Using Java tools
- Open a (shell or PowerShell) console
Find the PID for the Bootstrap Java process (PID here is 17045)
$ jps

8449 BootLanguagServerBootApp
19944 BootLanguagServerBootApp
8554 BootLanguagServerBootApp
7659 org.eclipse.equinox.launcher_1.5.700.v20200207-2156.jar
7756 org.eclipse.equinox.launcher_1.5.700.v20200207-2156.jar
8495 BootLanguagServerBootApp
7921 org.eclipse.equinox.launcher_1.5.700.v20200207-2156.jar
26515 Jps
17045 Bootstrap
29464 org.eclipse.equinox.launcher_1.5.700.v20200207-2156.jar
19869 org.eclipse.equinox.launcher_1.5.700.v20200207-2156.jar
27518
3263 3.141.59-server.jar
Generate a Thread dump (PID here is 17045) and save it to a file.
jstack -l 17045 > jstack.txt
Using *nix tools (Linux/Unix only)
Open console.
Find the Tomcat process PID.
Send kill -3 signal to to PID.
$ kill -3 PID
- The thread dump will be sent to the STDERR of Tomcat (usually catalina.log our the service.*.log in case it is running as a service).
Please see this Baeldung tutorial for more details on how to create a thread dump.
Viewing the number of logged in users
Tenant, superuser or additional admin(s) can manage user session via the frevvo UI. Refer to the Manage Logged in User Sessions topic for the details.
JMX Monitoring Enabled
JMX (Java Management Extensions) is enabled by default in the tomcat bundle. The following JMX options were added to the <frevvo-home>\tomcat\bin\setenv.bat,sh files. The <server>:<port> values default to localhost:7091.
Dcom.sun.management.jmxremote.local.only=false
Dcom.sun.management.jmxremote.authenticate=false
Dcom.sun.management.jmxremote.port=7091
Dcom.sun.management.jmxremote.rmi.port=7091
Dcom.sun.management.jmxremote.ssl=false
Djava.rmi.server.hostname=localhost
Information can be accessed with jConsole, or a similar tool.
Session Timeout
frevvo's default web browser session timeout is 30 minutes. If a user is logged into the frevvo server to design forms, or to view their task list, or is using a frevvo form and filling in values but has not yet submitted the form, the session will expire after 30 minutes of inactivity. When the session expires the designer will have to re-login to frevvo to continue designing forms and form users will have to get a new instance of the form and re-enter the values.
If the maximum number of concurrent users are logged in simultaneously, and any of them are idle for more than 30 minutes, the next person who tries to log in will be able to do so successfully.
The default frevvo server session timeout can be overridden for each tenant. The tenant admin can edit the tenant and make the changes there.
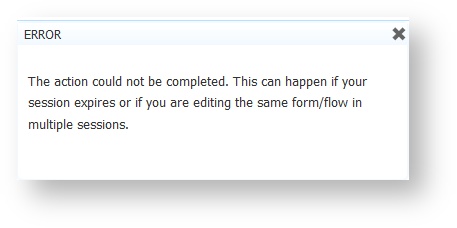
When a person is using a form/flow then pauses for longer than the configured <session-timeout>, they will see the frevvo login screen.
When a person is using a form/flow and then pauses for longer than the configured <session-timeout>, they will see the following error the next time they enter a value into the form or try to submit a form from a timed out session.
frevvo as a windows service
You will have to edit frevvo/tomcat/bin/service.bat line 123 to increase the Java Heap and Permgen spaces. Here is an example of the line you need to edit in that file:
"%EXECUTABLE%" //US//%SERVICE_NAME% ++JvmOptions "-XX:MaxPermSize=128m
-Djava.io.tmpdir=%CATALINA_BASE%\temp;
-Djava.util.logging.manager=org.apache.juli.ClassLoaderLogManager;
-Djava.util.logging.config.file=%CATALINA_BASE%\conf\logging.properties"
--JvmMs 128 --JvmMx 512
See the documentation on Tomcat Windows Service for more details.
TIFF Image Generator
All frevvo connector wizards allow you to select the form image attached to submission to be in TIFF image format. If the TIFF option doesn't appear in the wizard's Send Snapshot dropdown, follow these steps to install the necessary files:
- Stop frevvo
- Download the jai-imageio-core-1.3.1.jar here.
- Add it to frevvo classpath i.e. tomcat/lib folder
- Make sure your Connector(s) is installed.
- Restart the frevvo server. You will now see the TIFF option in the connector wizards Send Snapshot dropdown.
Signature Date/Time
Digital Signatures require no configuration. However you can control the format of the date stamp that appears when forms are signed.
- Stop frevvo if it is running.
- Navigate to <frevvo-home>\tomcat\conf
- Open the frevvo-config.properties file with a text editor.
Add the frevvo.signature.date.format property with your modified value then save the file.
- Restart frevvo
This property will change the date format for text signatures to day,month, year
frevvo.signature.date.format=d MMM yyyy
Timezones
frevvo concanocolizes all form submission data to UTC. In other words no matter which timezone you are in when you submit a form with a date, date/time, or time control, the form server will convert and store those values in UTC. If your form submission data is not correctly converted and stored in UTC then you likely have to update the timezones in your installed JDK. Oracle provides a timezone update tool. Run the TZUpdater tool with the following command: java -jar tzupdate.jar -u
See Oracle's Timezone Updater Tool for full details.
Enabling Strong Passwords
Policy strength and effective date are configurable properties in the <frevvo-home>\tomcat\conf\frevvo-config.properties using following properties.
frevvo.password.policy.strength=3
frevvo.password.policy.effective.on=2019-05-07
To turn off the strong passwords feature, delete the line frevvo.password.policy.strength=<1-4>. To keep the feature but turn off only strength meter set frevvo.password.policy.strength=0.
Batch User Uploads
Uploading a CSV file to add or edit users normally runs quickly. However, if uploading a file in which the notifyIfNewUser property is TRUE for a large number of rows, this process may slow down on some email servers. Tenant Admins can configure frevvo to run CSV-file user uploads in batches to improve upload time if needed. To adjust batch load size, configure the following property in <frevvo-home>\tomcat\conf\frevvo-config.properties.
frevvo.userloader.batchSize=25
Using frevvo with reverse-proxies/SSL-accelerators
If your goal is to use frevvo behind a reverse-proxy/load-balancer/SSL-accelerator you need to modify configuration settings to frevvo/tomcat to make sure frevvo generate correct external urls.
When using a reverse-proxy, the external host, IP and/or port visible to browsers may be different than the host, IP and/or port seen by Tomcat. This causes a problem since frevvo will generate urls in pages and forms that are either completely invalid, which is an easy case to spot since forms will not render at all, or valid by bypassing the reverse-proxy altogether, which are harder to identify except for side effects such as forms not resizing properly, or blocked by browser security restrictions.
frevvo no longer supports the web.xml parameters for frevvo.xforwarded.protocol.header, frevvo.xforwarded.host.header, and frevvo.xforwarded.port.headers. The general recommendation is to rely on the Servlet Container for handling dynamic proxies. A better approach is to use tomcat's RemoteIp Valve instead. Please see this documentation on the Apache Tomcat website for information about the RemoteIp valve functionality. This tomcat valve has been incorporated into our frevvo tomcat bundle.
 <Valve className="org.apache.catalina.valves.RemoteIpValve"
            internalProxies=".*"
            remoteIpHeader="x-forwarded-for"
            proxiesHeader ="x-forwarded-by"
            protocolHeader="x-forwarded-proto" />
Moving users to a different tenant
This section describes how to move a user to a different tenant. In the steps below, we will move the user john from a source tenant (will use tenant d) to a target tenant (will use mytenant as the target name).
- If the target tenant does not exist, create it by following these steps. For the sake of this document, the target tenant id is mytenant.
- Login to the target tenant as an admin and create a user with the same id as the user in the original tenant. In this example, the user id is john in the tenant mytenant.
- Transfer the applications to the new user account in the target tenant
- Login to the source tenant as a tenant admin, for instance admin@d.
- Navigate to Manage > Manage Users.
- Login as the user you want to move.
- Navigate to the user's applications page.
- Download each application for that user and save to a folder in your file system.
- Logout
- Login as the user in the new tenant: john@mytenannt.
- Upload the applications you've downloaded in the previous steps.
- Move the submissions in the submissions repository. You need to run these steps in the database where you persist the frevvo submissions. Please back up your database before moving forward.
- Replace the word john with the id of the user you are migrating.
- Replace the tenant id d with the id of the source tenant. The default tenant in frevvo is called d.
- Replace the word mytenant with the name of your target tenant
- Login to your database.
- Edit the script shown below to:
- Run the script shown below in your frevvo submissions database.
update formsubmission
set tenantid='mytenant'
where id in (
select fs.id from formsubmission fs, formsubmissiontype fst
where
fs.formsubmissiontype_formtype_id = fst.id
and fst.ownerid='john'
and fs.tenantid='d'
)update formsubmissiontype
set tenantid='mytenant'
where ownerid='john'
and tenantid='d'
Verification:
- Login as the user in the new tenant.
- Verify that the submissions are properly being loaded for all forms. In the submissions repository page make sure to adjust the initial and end dates to a window of time that you know have submissions for that specific form.
- Update references to the forms. After going trough the steps above, the URL to the forms owned by the user will be different than what they were originally. You need to update all references to the forms in published links and pages where the form should be embedded.
Show/Hide Share Dialog Options
You can customize the options that appear in the Share dialog by adding the frevvo.share.options property with the options that you want to show. Remove any option after the equal sign to hide it from the share dialog.
- Stop frevvo if it is running.
- Navigate to <frevvo-home>\tomcat\conf
- Open the frevvo-config.properties file with a text editor.
Add the frevvo.share.options property with your modified values separated by commas then save the file.
- Restart frevvo
frevvo.share.options=embed-script,embed-link,link,page,raw-iframe,raw-link
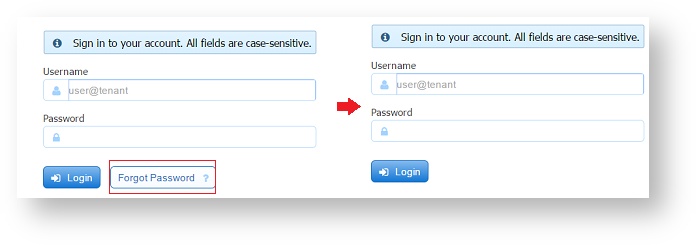
Hide the "forgot password" button on the login screen
frevvo in-house customers that wish to hide the "forgot password" field on the login screen can do so by adding the frevvo.login.forgot.password.enabled property to the frevvo-config.properties file with a value of false. This is only relevant to tenants using the frevvo Default Security manager and could be helpful if you are using LDAP without SSO. To hide the field:
- Stop frevvo if it is running.
- Navigate to <frevvo-home>\tomcat\conf
- Open the frevvo-config.properties file with a text editor.
Add the frevvo.login.forgot.password.enabled property with a value of false then save the file.
- Restart frevvo
frevvo.login.forgot.password.enabled=false
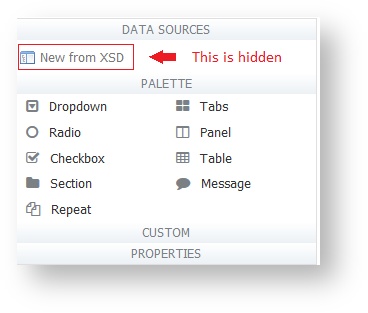
Show/Hide the "New from XSD" Button
You can show/hide the "New from XSD" button form designer Data Sources tab via the frevvo.data.sources.add propery. The default is true. Set it to false to hide "New from XSD" button.
- Stop frevvo if it is running.
- Navigate to <frevvo-home>\tomcat\conf
- Open the frevvo-config.properties file with a text editor.
Add the frevvo.data.sources.add property with a value of false then save the file.
- Restart frevvo
frevvo.data.sources.add=false
Configure Palette Controls in the designer
The frevvo.palette.controls property allows you to configure the palette to display only the controls that you need or change the position of the controls in the palette. The Strings must match the control name exactly but they can be in any order. Remove the name of any controls that you don't want. In all cases, half of the configured amount of controls will display on the left side of the palette and the remaining controls on the right, based on the order in which they are listed in the property.
- Stop frevvo if it is running.
- Navigate to <frevvo-home>\tomcat\conf
- Open the frevvo-config.properties file with a text editor.
Add the frevvo.palette.controls property with the Control Names after the equal sign, separated by commas then save the file.
- Restart frevvo
Here is an example of the property configured to show all the Palette controls.
frevvo.palette.controls=Dropdown,Radio,Checkbox,Section,Repeat,Tabs,Panel,Table,Message,Link,Trigger,Upload,Signature,LinkedFormViewer,Text,TextArea,Date,EMail,Money,Phone,Quantity,Number,BooleanCheckbox,Image,Video,Submit,PageBreak,ComboBox
Here is an example showing a designer palette configured with only ten controls;
frevvo.palette.controls=Dropdown,Radio,Checkbox,Section,Repeat,Tabs,Panel,Table,Message
This image shows the Data Sources section moved to the top, the "New from XSD" button hidden and the palette configured for only nine controls.
Modifying Content Types for the Upload Control
The content types supported by frevvo are configured with the frevvo.upload.file.types properties. The default file types are shown below. On-premise customers can override the defaults by adding properties to the frevvo-config.properties file
frevvo.upload.file.types=pdf,MS Word,MS Excel,MS PowerPoint,MS Access,gif,jpeg,png,tiff,rtf,tar,zip,gzip,xml,bmp
To modify, add the frevvo.upload.file.types property with the allowed file types after the equal sign
frevvo.upload.file.types=Allowed mimes for this type (comma separated)
Follow these steps:
- Stop frevvo if it is running.
- Navigate to <frevvo-home>\tomcat\conf
- Open the frevvo-config.properties file with a text editor.
Add the frevvo.upload.file.types with the allowed mime types after the equal sign, separated by commas then save the file.
- Restart frevvo
The Upload control provides a list of file type/extensions the designer can use to restrict the type of files uploaded. To add a new file type to this list, add it to the frevvo.upload.file.types values. In addition, there are properties for each supported mime type that corresponds to each context type. For example, the property that has the mime types corresponding to MS Word is: frevvo.upload.file.type.ms_word.mimes. Note the naming convention for the Mime type names part of the property - lower case and spaces replaced with _
frevvo.upload.file.type.ms_word.mimes=application/msword
Let's say you wanted to restrict the uploaded files to SWF files only. To add the SWF (Small Web Format Adobe Flash files) extension to the Restricted Content Types list in the designer, add the frevvo.upload.file.types property with swf specified in the content types then add the frevvo.upload.file.type.swf.mimes property with the correct mime type in the frevvo-config.properties file.
frevvo.upload.file.types=pdf,MS Word,MS Excel,MS PowerPoint,MS Access,gif,jpeg,png,tiff,rtf,tar,zip,gzip,xml,bmp,swf
frevvo.upload.file.type.swf.mimes=application/x-shockwave-flash
This will add the swf extension to the Restricted Content Types list in the designer.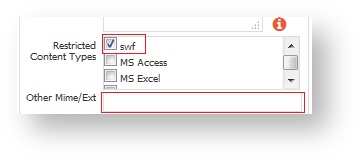
An easier and preferable alternative, is to type the additional mime type into the Other Mime/Ex field on the Upload control property pane. Refer to Upload control for more information.
Rule Validation Timeout
Rule validation is executed in a thread pool with a timeout. You can change the rule validation timeout value by adding the with the frevvo.rule.validation.timeout property to the frevvo-config.properties file. The default value is 2000 milliseconds.
- Stop frevvo if it is running.
- Navigate to <frevvo-home>\tomcat\conf
- Open the frevvo-config.properties file with a text editor.
Add the frevvo.rule.validation.timeout property with the timeout value in milliseconds after the equal sign then save the file
- Restart frevvo
frevvo.rule.validation.timeout=1000
If validation javascript execution exceeds this timeout value, the Rule Validator will show :
Form or Rule Level Validation Issue: Validation Failed Rule validation timed out, possibly due to unparseable rule JavaScript.
The Rule evaluation timeout property is frevvo.rule.timeout with a default value of 30000 milliseconds. This is the amount of time frevvo will attempt to run the rule before you see a timeout error in the debug console. Adding this property to the frevvo-config.properties file with a value of 2000 ms will show this error in the Rule debug console - ** Rule execution timed out after (timeout=20000 milliseconds).
HTTP Connection Max Idle Time (API)
The frevvo API uses an http connection pool which implies that connections are reused for a given route. In some cases, an API call (such as a rule or doc action) may fail intermittently due to a connection reset or a socket read timeout. Setting the property http.connection.maxidletime in the frevvo-config.properties file may resolve this issue. This property sets the idle time in milliseconds beyond which the connection will be closed by the monitor. By default, it is not set and hence there is no monitor running. Once it is configured with a positive value e.g. 30000, the monitor runs every 1 second looking for expired idle connections and closes them.
http.connection.maxidletime=30000
Save on Navigation
The Save on Navigation feature saves the latest step in a workflow to the user's task list if they accidentally close the browser when filling in a long form. When this feature is turned on, you will see an entry in the Audit Trail each time the flow navigates to a different step. It will also save the last saved step in a screenflow to the Task List. This feature can be selected for individual flows or for all flows by adding the frevvo.flows.save.on.navigation property to the frevvo-config.properties file.
To select this feature for individual flows, check the Save on Navigate property on the Flows Property panel for each one.
To configure the Save to Navigation feature for all workflows, follow these steps:
- Stop frevvo if it is running.
- Navigate to <frevvo-home>\tomcat\conf\
- Open the frevvo-config.properties file with a text editor.
- Add the frevvo.flows.save.on.navigation property. A true value turns on the Save to Navigation feature for all workflows while a false value turns it off. False is the default.
- Save the file after all your changes are made.
- Restart frevvo.
frevvo.flows.save.on.navigation=true
Disable Form Save in PDF Mapping
The prompt and save of the form prior to additional pdf mapping can be controlled by the frevvo.form.save.on.mapping property. The property defaults to true. If set to false, the designer will not be prompted to save the existing pdf form before continuing pdf mapping and the editing instance will not be saved. This parameter applies only to forms, not flows.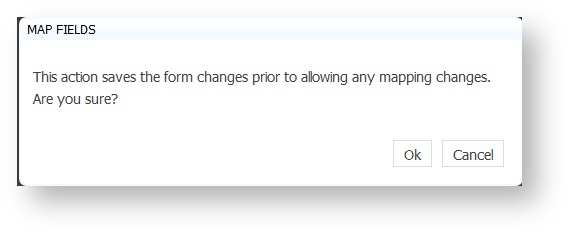
Follow the steps to hide this message:
- Stop frevvo if it is running.
- Navigate to <frevvo-home>\tomcat\conf\
- Open the frevvo-config.properties file with a text editor.
- Add the frevvo.form.save.on.mapping property. A false value does not prompt and save form before beginning/continuing PDF mapping. True is the default.
- Save the file after all your changes are made.
- Restart frevvo.
frevvo.form.save.on.mapping=false
XSS Cleaning
frevvo uses a whitelist approach to filter out XSS attacks. Only whitelisted tags will work if you are using HTML in labels, help, etc. Although the whitelist allows a full range of text and structural body HTML, it will restrict you from using some tags like the HTML comment.
You can optionally turn off XSS (cross site scripting) cleaning for frevvo by adding one or both of the below properties to frevvo-config.properties. Note: both properties default to true.
- frevvo.xss.clean=false - this parameter turns XSS cleaning off product wide
- frevvo.xss.clean.labels=false - this parameter turns XSS cleaning off for control labels only
Customers should carefully consider the ramifications of removing the XSS scrubbing. Harmful markup can potentially be used for XSS attacks.
Follow these steps:
- Stop frevvo
- Add one or both of the parameters shown below to, <frevvo-home>\tomcat\conf\frevvo-config.properties
- Save the file
- Restart frevvo
frevvo.xss.clean=false
frevvo.xss.clean.labels=false
Max Size for Attachments
There are three places to set the maximum size of attachments that can be uploaded to the Upload control in frevvo.
- You can set an upper bound limit server wide by adding the frevvo.attachment.maxsize property to the frevvo-config.properties file. If you do not add this property, then the max size for attachments will be 10 MB. This is the built-in default.
- The tenant admin can set the maximum file size per user by editing their profile
- Specify the max file size per the Max Size property of individual Upload Controls
The value of the Max size property of individual Upload controls overrides the value per user which overrides the frevvo.attachment.maxsize property in the frevvo-config.properties file. All values must be specified in bytes and cannot exceed the max attachment size configured on the server level.
To configure the max size for attachments on the server level, follow these steps:
- Stop frevvo if it is running.
- Navigate to <frevvo-home>\tomcat\conf
- Open the frevvo-config.properties file with a text editor.
- Add the frevvo.attachment.maxsize property with the max size for attachments in bytes as the value then save the file.
- Restart frevvo.
frevvo.attachment.maxsize=10485760 -> Replace the default value, 10485760 in this example, with the maximum size of the attachment that you want. The value must be entered in bytes.
When users try to upload a file that exceeds the configured attachment size, this error displays:
If you are using MySQL, and you upload a large image or you are using a workflow that contains a large pdf, frevvo, you may see this error:

The default value of the max_allowed_packet parameter in your MySQL server may not be large enough. Refer to this website for detailed information about the MySql configuration parameter. Increasing the max_allowed_packet variable setting in your MySQL Server from the default (1M) to something like 16M (16777125) fixes the issue. To fix the issue temporarily, run the following commands:
Customize the Default Reject Email
In-house customers can change the default text for the rejection email subject and body by adding the frevvo.task.reject.notification.email subject and frevvo.task.reject.notification.email.message properties with modifed values to the frevvo-config.properties file.
Follow these steps
- Stop frevvo if it is running.
- Navigate to <frevvo-home>\tomcat\conf
- Open the frevvo-config.properties file with a text editor.
Add the parameter(s) shown below with your modified values, The default subject and message are shown below
- Save the file after all your changes are made.
Restart frevvo.
frevvo.task.reject.notification.email.subject=You have a new task for {flow.name}
frevvo.task.reject.notification.email.message=<p>This workflow was rejected back to you for further action.</p><p>The work flow was rejected by {subject.first.name} {subject.last.name} at step: {flow.activity.name}. The reason was: {flow.activity.reject.reason}.</p><p>You can access this task at: {task.perform.url}</p>
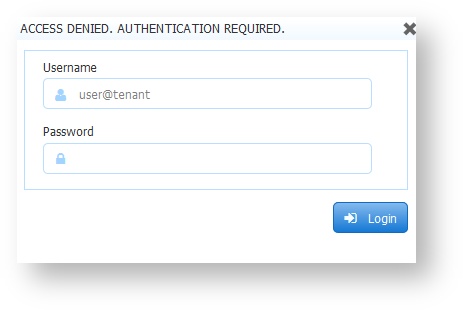
Skew error when logging into an Azure SAML tenant
Users logging into a frevvo Azure SAML tenant may encounter the error "Access Denied. Authorization Required". Examination of the frevvo.log shows the following entry:
Response issue time is either too old or with date in the future, skew 60, time 2016-06-01T05:49:25.330Z
This error is typically caused by a clock synchronization issue between the Service Provider (frevvo) and the Identity Provider (Azure) or a genuine delay in the connection. If you get this error, adding the com.frevvo.security.saml.response.skew property can be used to specify the time in seconds allowed between the frevvo request and the response from Azure to a value greater than the default value of 60 seocnds.
Follow these steps:
- Stop frevvo if it is running.
- Navigate to <frevvo-home>\tomcat\conf
- Open the frevvo-config.properties file with a text editor.
Add the parameter shown below with a value greater than the default value of 60 seconds. The example shown increases the timer to 120 seconds.
com.frevvo.security.saml.response.skew=120
Save the file.
- Restart frevvo.
- Retry the login.
Configure the max size for Images in your form/flow
In-house customers can change the maximum size for images uploaded to forms/flows using the Image control in the frevvo designers by adding the frevvo.asset.maxsize property to the frevvo-config.properties file. The default value is set to 2097152 bytes. Any uploaded file that exceeds the value in this parameter displays an error message to the designer so they can take corrective action.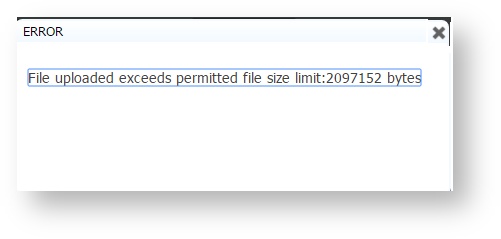
The error message will not display for video files that exceed the specified limit.
Follow these steps:
- Stop frevvo if it is running.
- Navigate to <frevvo-home>\tomcat\conf
- Open the frevvo-config.properties file with a text editor.
Add the frevvo-asset-maxsize property. Change the value to the maximum allowable image size in bytes.
frevvo.asset.maxsize=2097152
Save the file.
- Restart frevvo.
Changing the Default Task Notification Email Message
If you want to change the default subject and body of the task notification email for your frevvo server, add these properties to the frevvo-config.properties file.
frevvo.task.notification.email.subject=New task
frevvo.task.notification.email.message=You can access your task list by clicking <a href="{task.perform.url}">this link</a>
Change the value in this parameter to anything you want. The task.perform.url template {task.perform.url} is a built-in template in frevvo and it will always point to the specific task. Refer to the Task Notification Email Link topic for some other options. If you wrap the templates in an HTML <a> tag, it will generate a clickable link in the email.
If you do not want the link in your task notification emails to go there, you can remove it. The default message can include form control templates.
Non-default Database Schema
If you use a custom schema (anything other than 'dbo'), you must add the following property to the <frevvo home>/tomcat/conf/frevvo-config.properties file. This property's default value is 'dbo'.
spring.liquibase.parameters.mssql.schema=<your schema>
Secure Passwords in Tomcat
Security audits may point out that some secrets are stored in clear text in tomcat configuration files. Here is a list of (known) secrets that are currently stored in clear text by default:
Tomcat JDBC and SMTP configurations in Tomcat’s <frevvo-home>\tomcat\conf\server.xml
Database password in <frevvo-home>\tomcat\conf\dbconnector.properties
Google Connector’s Client Secret in <frevvo-home>\tomcat\conf\frevvo-config.properties
frevvo’s SAML keystore password in <frevvo-home>\tomcat\bin\setenv.bat and the service.bat files for the Windows OS or setenv.sh for UNIX/Linux OS
Tomcat, and thereby frevvo, does not support encryption out of the box. There are two main options for securing this information.
Limit access to Tomcat files
The first option is limiting access to the file so that it can only be read by the user that Tomcat process runs as and root (or the administrator on Windows). Here are two relevant articles about Tomcat passwords that provide suggestions for limiting access and masking sensitive information:
- https://cwiki.apache.org/confluence/display/TOMCAT/Password.
- https://wiki.owasp.org/index.php/Securing_tomcat#Cleartext_Passwords_in_CATALINA_HOME.2Fconf.2Fserver.xml
For the Database Connector, you can define the data source at the container (tomcat) level for some added security. Please see this documentation which explains how.
OS Environment Variables
Starting in Tomcat v9.0.34 (frevvo v9.0.15+) Tomcat introduced support for environment variables in server.xml. (See Apache Tomcat 9 (9.0.54) - Changelog for details.) This new capability is disabled by default in Tomcat but can be enabled by adding the following property to conf/catalina.properties.
org.apache.tomcat.util.digester.PROPERTY_SOURCE=org.apache.tomcat.util.digester.EnvironmentPropertySource
Please see Apache Tomcat 9 Configuration Reference (9.0.54) - System Properties for more details.
Once the above property is in place, replace the clear text passwords in conf/server.xml with, for instance, the corresponding variables: JDBC_PASSWORD and SMTP_PASSWORD:
<Resource
  auth="Container"
  type="javax.sql.DataSource"
  name="jdbc/sharedfrevvoDS"
  password="${JDBC_PASSWORD:-}"
  ... />

<Resource
  auth="Container"
  name="mail/sharedfrevvoDS"
  type="javax.mail.Session"
  name="mail/sharedfrevvoDS"
  password="${SMTP_PASSWORD:-}"
The system administrator needs to add the JDBC_PASSWORD and SMTP_PASSWORD environment variables in the frevvo Tomcat environment (Windows service, Linux init.d/systemd, command line, etc). Tomcat will pick them up automatically. Note that nothing precludes you from parameterizing any other property in the server.xml file. These OS environment variables will be read directly by Tomcat and will not leak into the command line arguments, for instance.
Database Connector’s dbconnector.properties
The same OS environment variable approach can also be used in the frevvo Database Connector out of the box since it is a SpringBoot application. Consider the following dbconnector.properties snippet concerning the BIRT JDBC connection info:
dbconnector.queryset@BIRT.resource-def.url=jdbc:derby:memory:BIRT;create=true
dbconnector.queryset@BIRT.resource-def.user=APP
dbconnector.queryset@BIRT.resource-def.password=mysecretpassword
dbconnector.queryset@BIRT.resource-def.driver=
Remove the property dbconnector.queryset@BIRT.resource-def.password from the dbconnector.properties file and add a corresponding OS environment variable named DBCONNECTOR_QUERYSET@BIRT_RESOURCE_DEF_PASSWORD=mysecretpassword (all uppercase, '.' and '-' replaced with '_'). The Database Connector will automatically pick the password up from the OS environment instead of the properties file. Note also that this approach can also be used for any other property.
If there is a single connection info for all querySets, you can also set it only once using:
dbconnector.queryset.resource-def.url=
dbconnector.queryset.resource-def.user=APP
dbconnector.queryset.resource-def.driver=
Define an OS environment variable named (no query set name) DBCONNECTOR_QUERYSET_RESOURCE_DEF_PASSWORD=mysecretpassword.
Google Connector’s Client Secrets
The Google Connector client secrets can be set using a file and the property client.secrets.file.location pointing to it. Since this file is a secret in its entirety, there is no need for anyone to have access to it except the Google connector and can be easily locked down by the system administrator. However, in case needed, it is also possible to specify this secret using an OS environment variable CLIENT_SECRETS set with the contents of the secrets file.
Please see Installing the Google Connector for additional details.
SAML Keystore Password
SAML support in frevvo also requires a keystore, which is encrypted by default, and a keystore password used by frevvo to access the keystone. The SAML keystore password is currently set in clear text as a frevvo property, but can also be set using an OS environment variable (frevvo is a SpringBoot app like the DBC). So, instead of setting the com.frevvo.security.saml.password property in frevvo.properties, you can, instead, define an OS environment variable named COM_FREVVO_SECURITY_SAML_PASSWORD=mypassword. This will make sure the frevvo.properties file is free of this secret.
Geo Location
SSL Certificate Property
When a form's doc action is configured to post to an https endpoint, you can ignore ssl security using the frevvo.certificate.signature property. Services that accept https and do not have a security certificate setup might generate an error like this:
INFO: 11:09:51,062 INFO DocumentSetUtil:539 - notifyDocumentSet_POST: POSTing document set to https://fortisapp1.som.w2k.state.me.us/FormItConnector/save.aspx 11:09:51,062 ERROR DocumentSetUtil:615 - Could not POST document set to URI: https://fortisapp1.som.w2k.state.me.us/FormItConnector/save.aspx javax.net.ssl.SSLHandshakeException: sun.security.validator.ValidatorException: PKIX path building failed: sun.security.provider.certpath.SunCertPathBuilderException: unable to find valid certification path to requested target
You can tell frevvo to ignore this error using the frevvo.certificate.signature property . This should work with services that have self-signed certificates that aren't installed in the jvm certificate file and with certificates from a security authority.
Follow these steps to add the frevvo.certificate.signature property to the <frevvo-home>\tomcat\conf\frevvo-config.properties file.
- Stop frevvo if it is running.
- Navigate to <frevvo-home>\tomcat\conf
- Open the frevvo-config.properties file with a text editor.
Add the frevvo-certificate.signature property with a value of true.
frevvo.certificate.signature=true
Save the file.
- Restart frevvo.
mysql -u root
set global max_allowed_packet=16777216
To permanently set it, choose one of the two methods listed below:
You can add the parameter - max_allowed_packet=16M to the mysqld command line or (mysqld_safe command line) as shown:
mysqld --max_allowed_packet=16M
Edit the MySql configuration file (my.ini on Windows/ my.cnf on Mac OS) and add max_allowed_packet=16777216 to the [mysqld] section.
On Mac OS, you can access the my.cnf file by typing
The location of the my.ini/my.cnf file varies by configuration.