Docuware Connector
- Megan Ellis

The frevvo Docuware Connector saves frevvo submissions to your Docuware Cloud file system. Submission form/workflow XML document(s), attachments that are added by the user and the PDF snapshot of your form/workflow can be saved in the configured submissions cabinet. Signatures are not saved as they are a different content type than attachments.
Submissions from frevvo are posted to the Filesystem Connector using the Doc Action Save to External System wizard.
Your Tenant Admin must configure the Docuware Connector in the Admin: Manage Connectors page before you can perform the following steps in the Form/Workflow Document Actions tab.
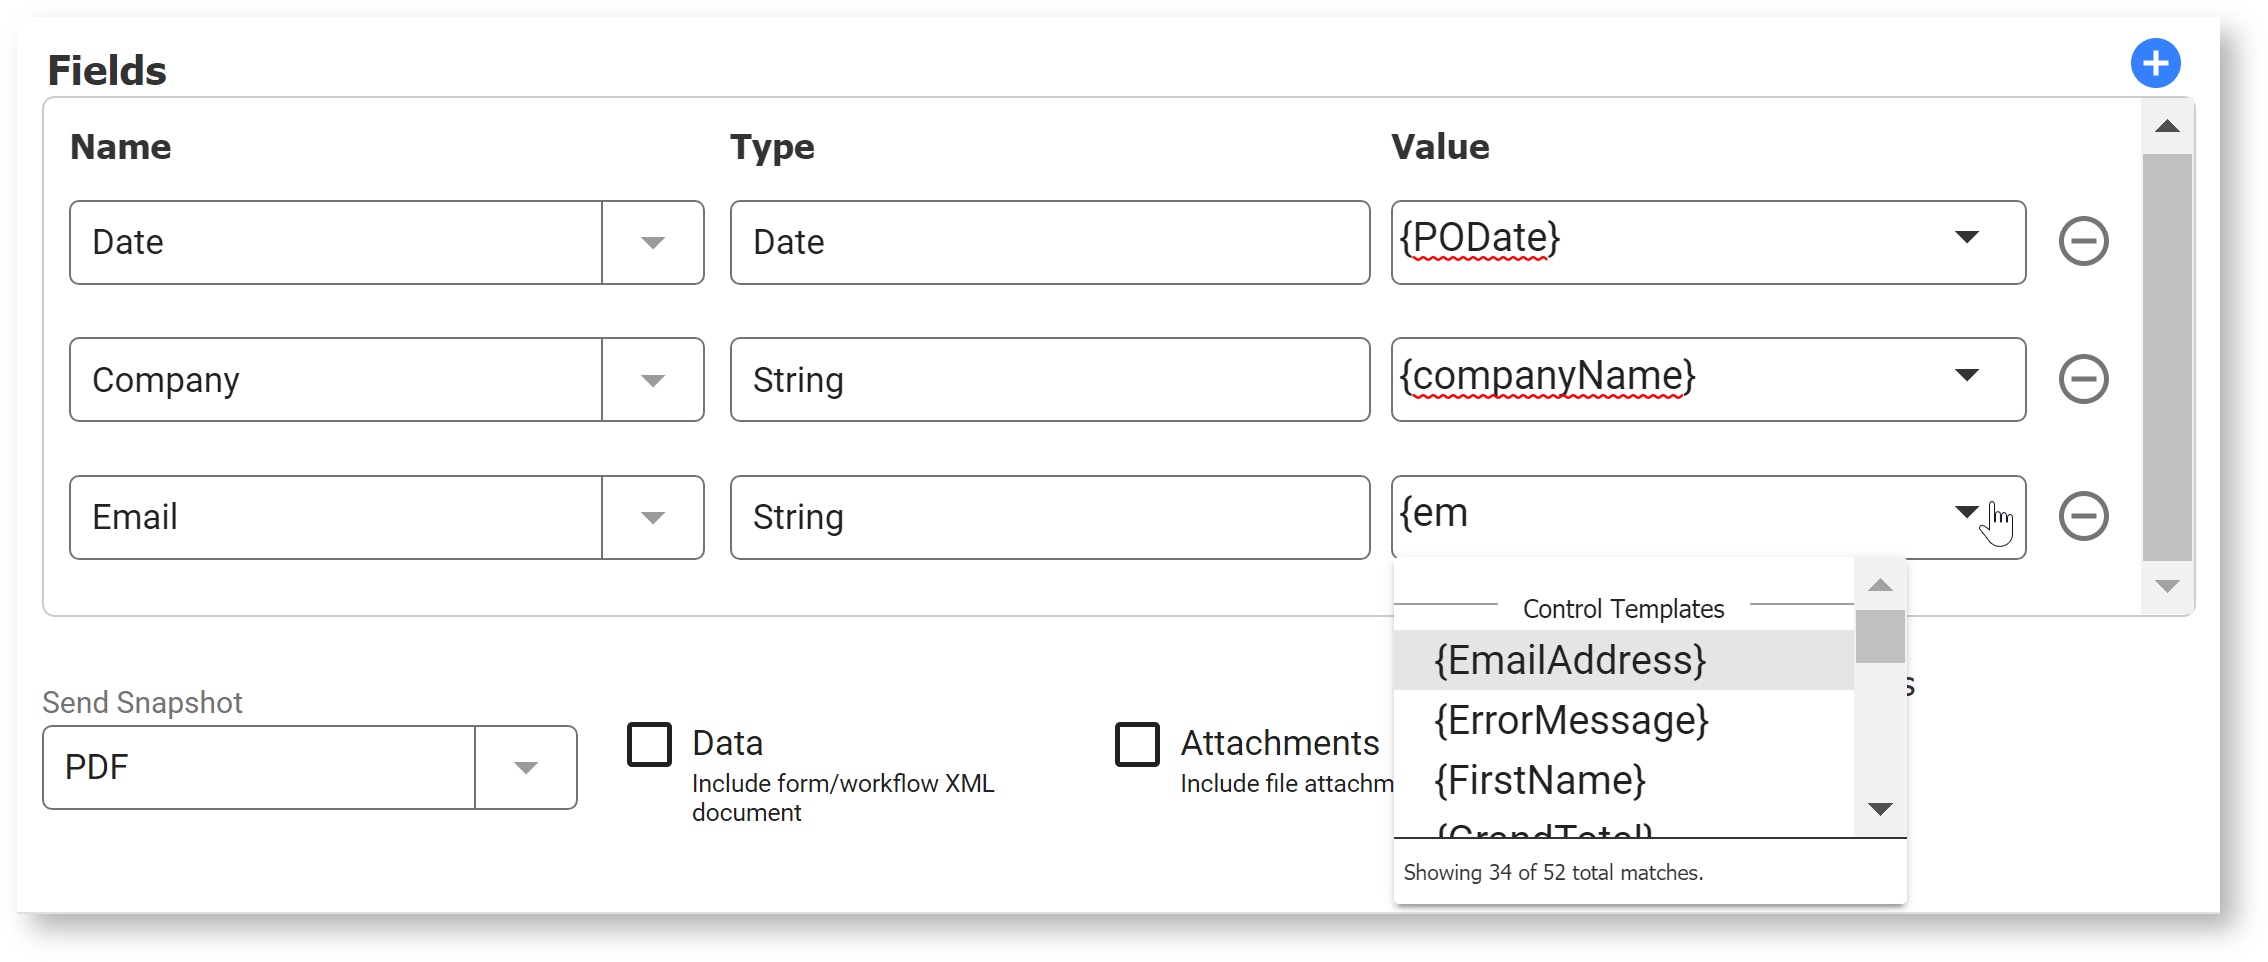
In the third column, add the value you want to send. To use a field from your form, type an open curly brace '{' following by the first few letters of the control name. Then, select the control name from the dropdown. Repeat Controls To map values from repeating controls to the Keywords field type, the value should be a template string that resolves to multiple values. The recommended approach is to create a template that results in a JSON array using the built-in separator 'json' i.e. {json|controlname}. This special separator resolves to JSON format. The same result can be accomplished by specifying the JSON format i.e. ["{","|controlname}"]. Select any attachments you would like to send, such as the PDF Snapshot (set by default), the submission xml document, any attachments uploaded by the form user, and any mapped PDFs.Connect a Form/Workflow to Docuware
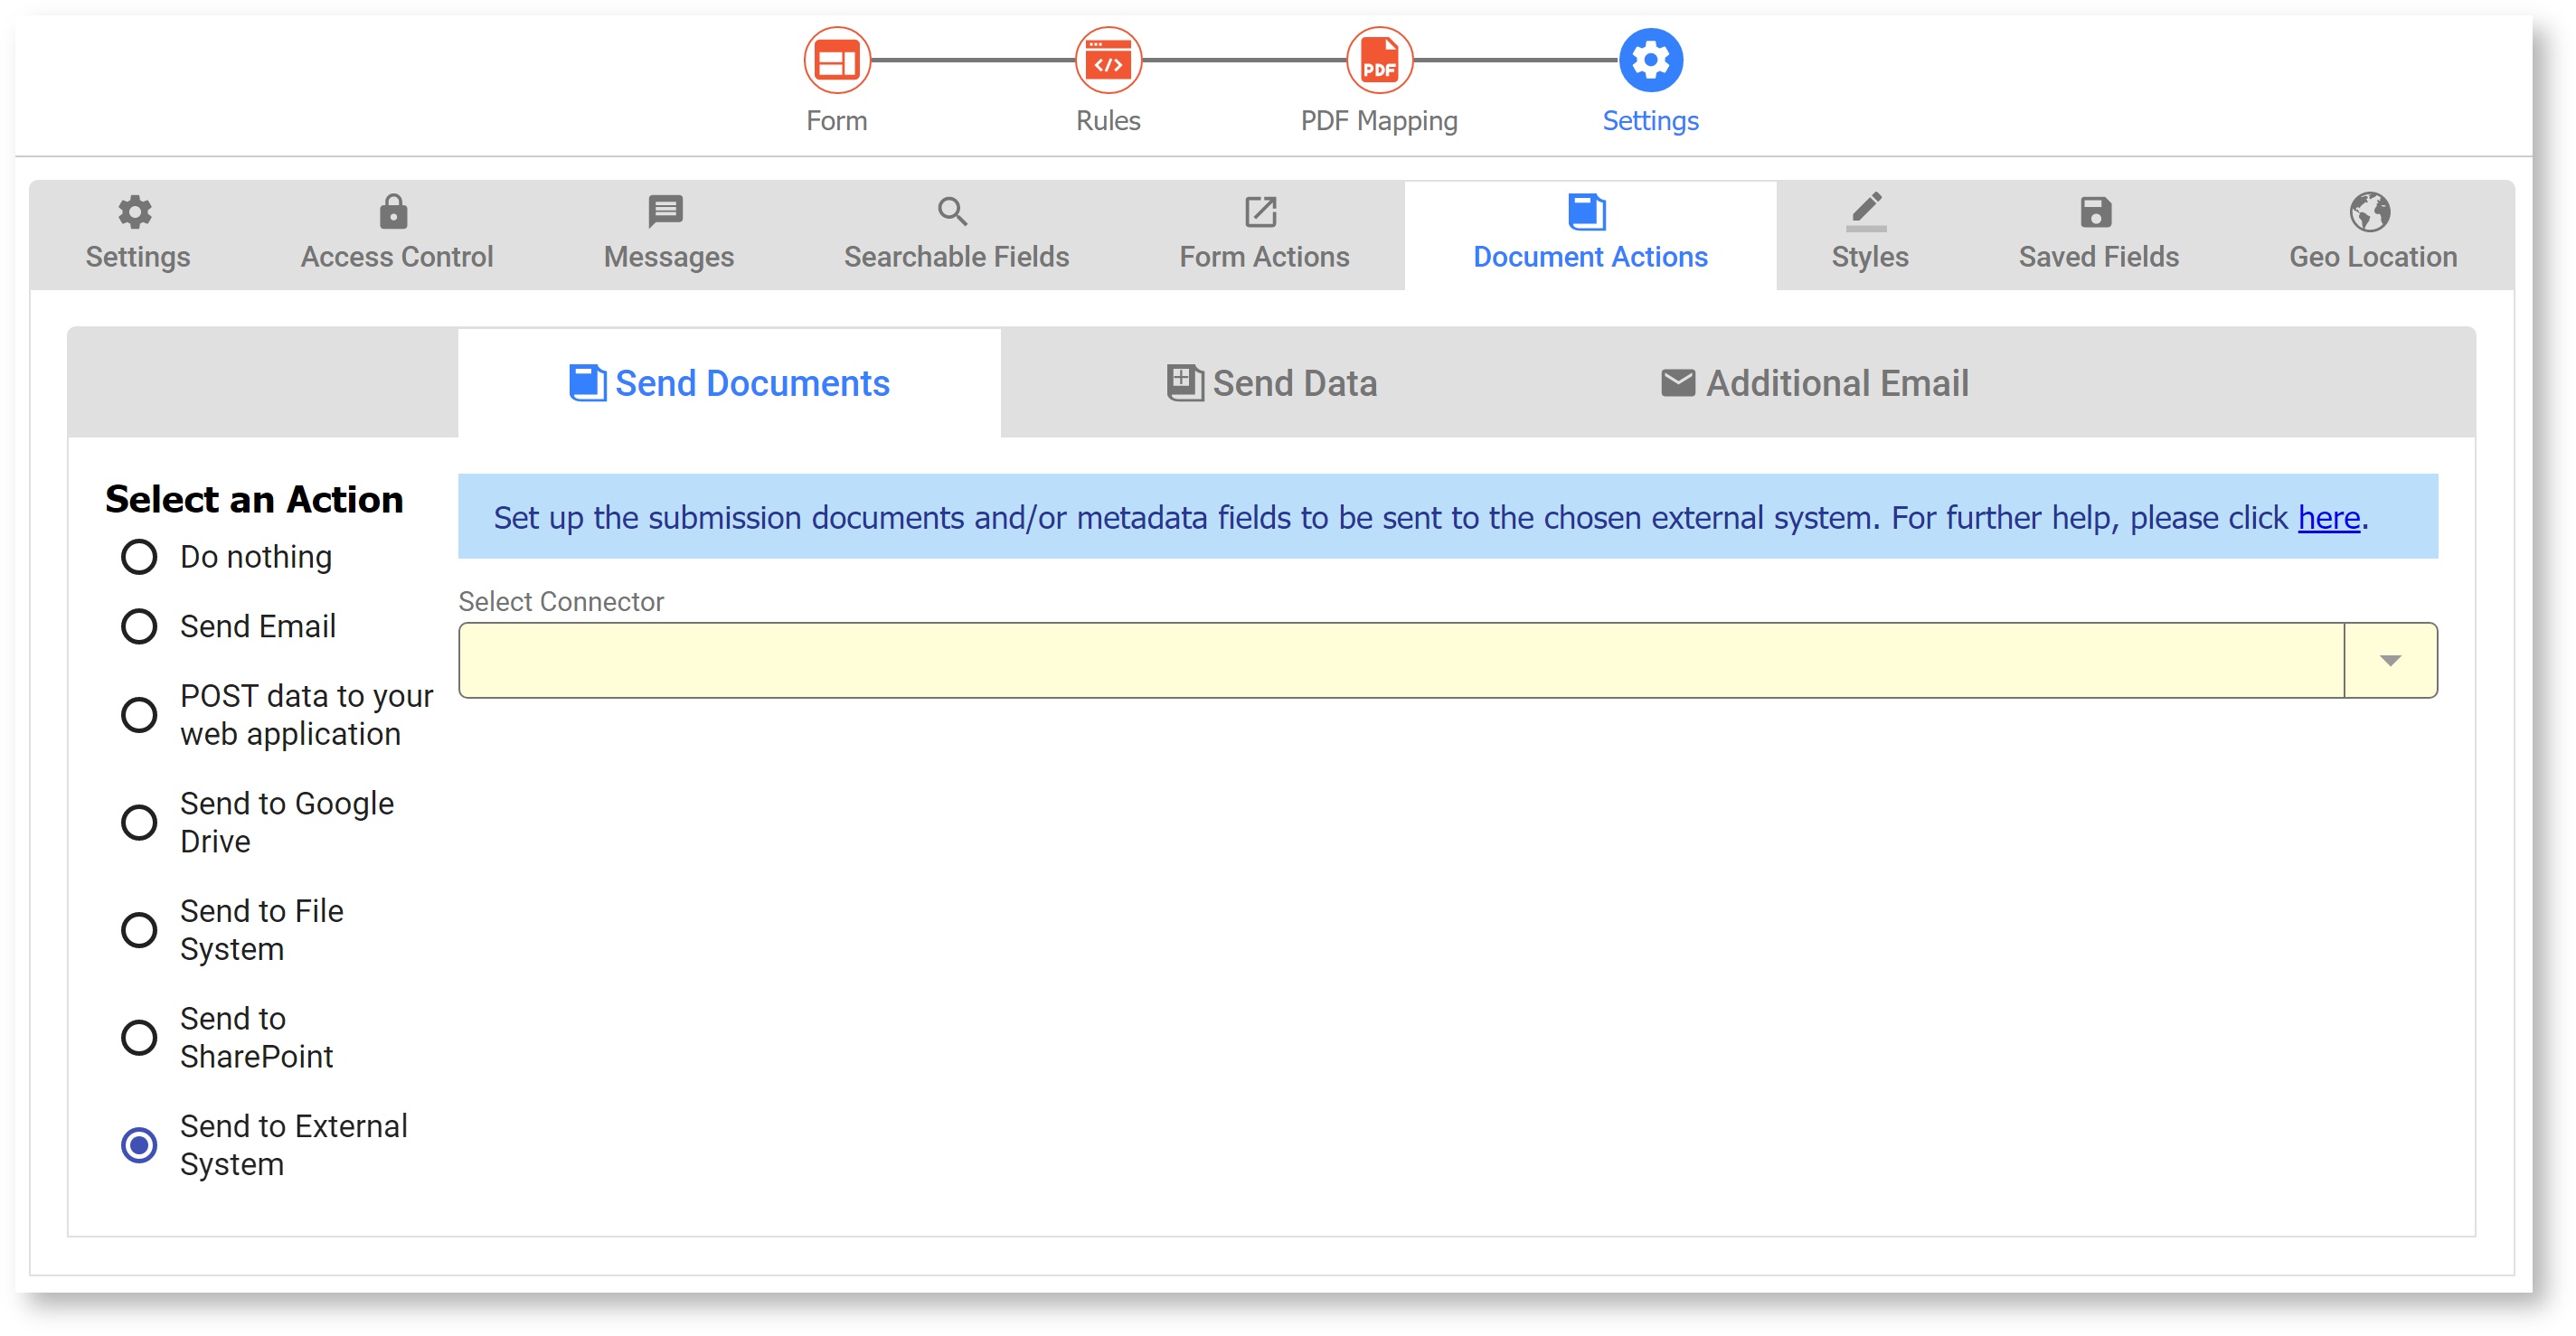
![]() Add to add rows.
Add to add rows.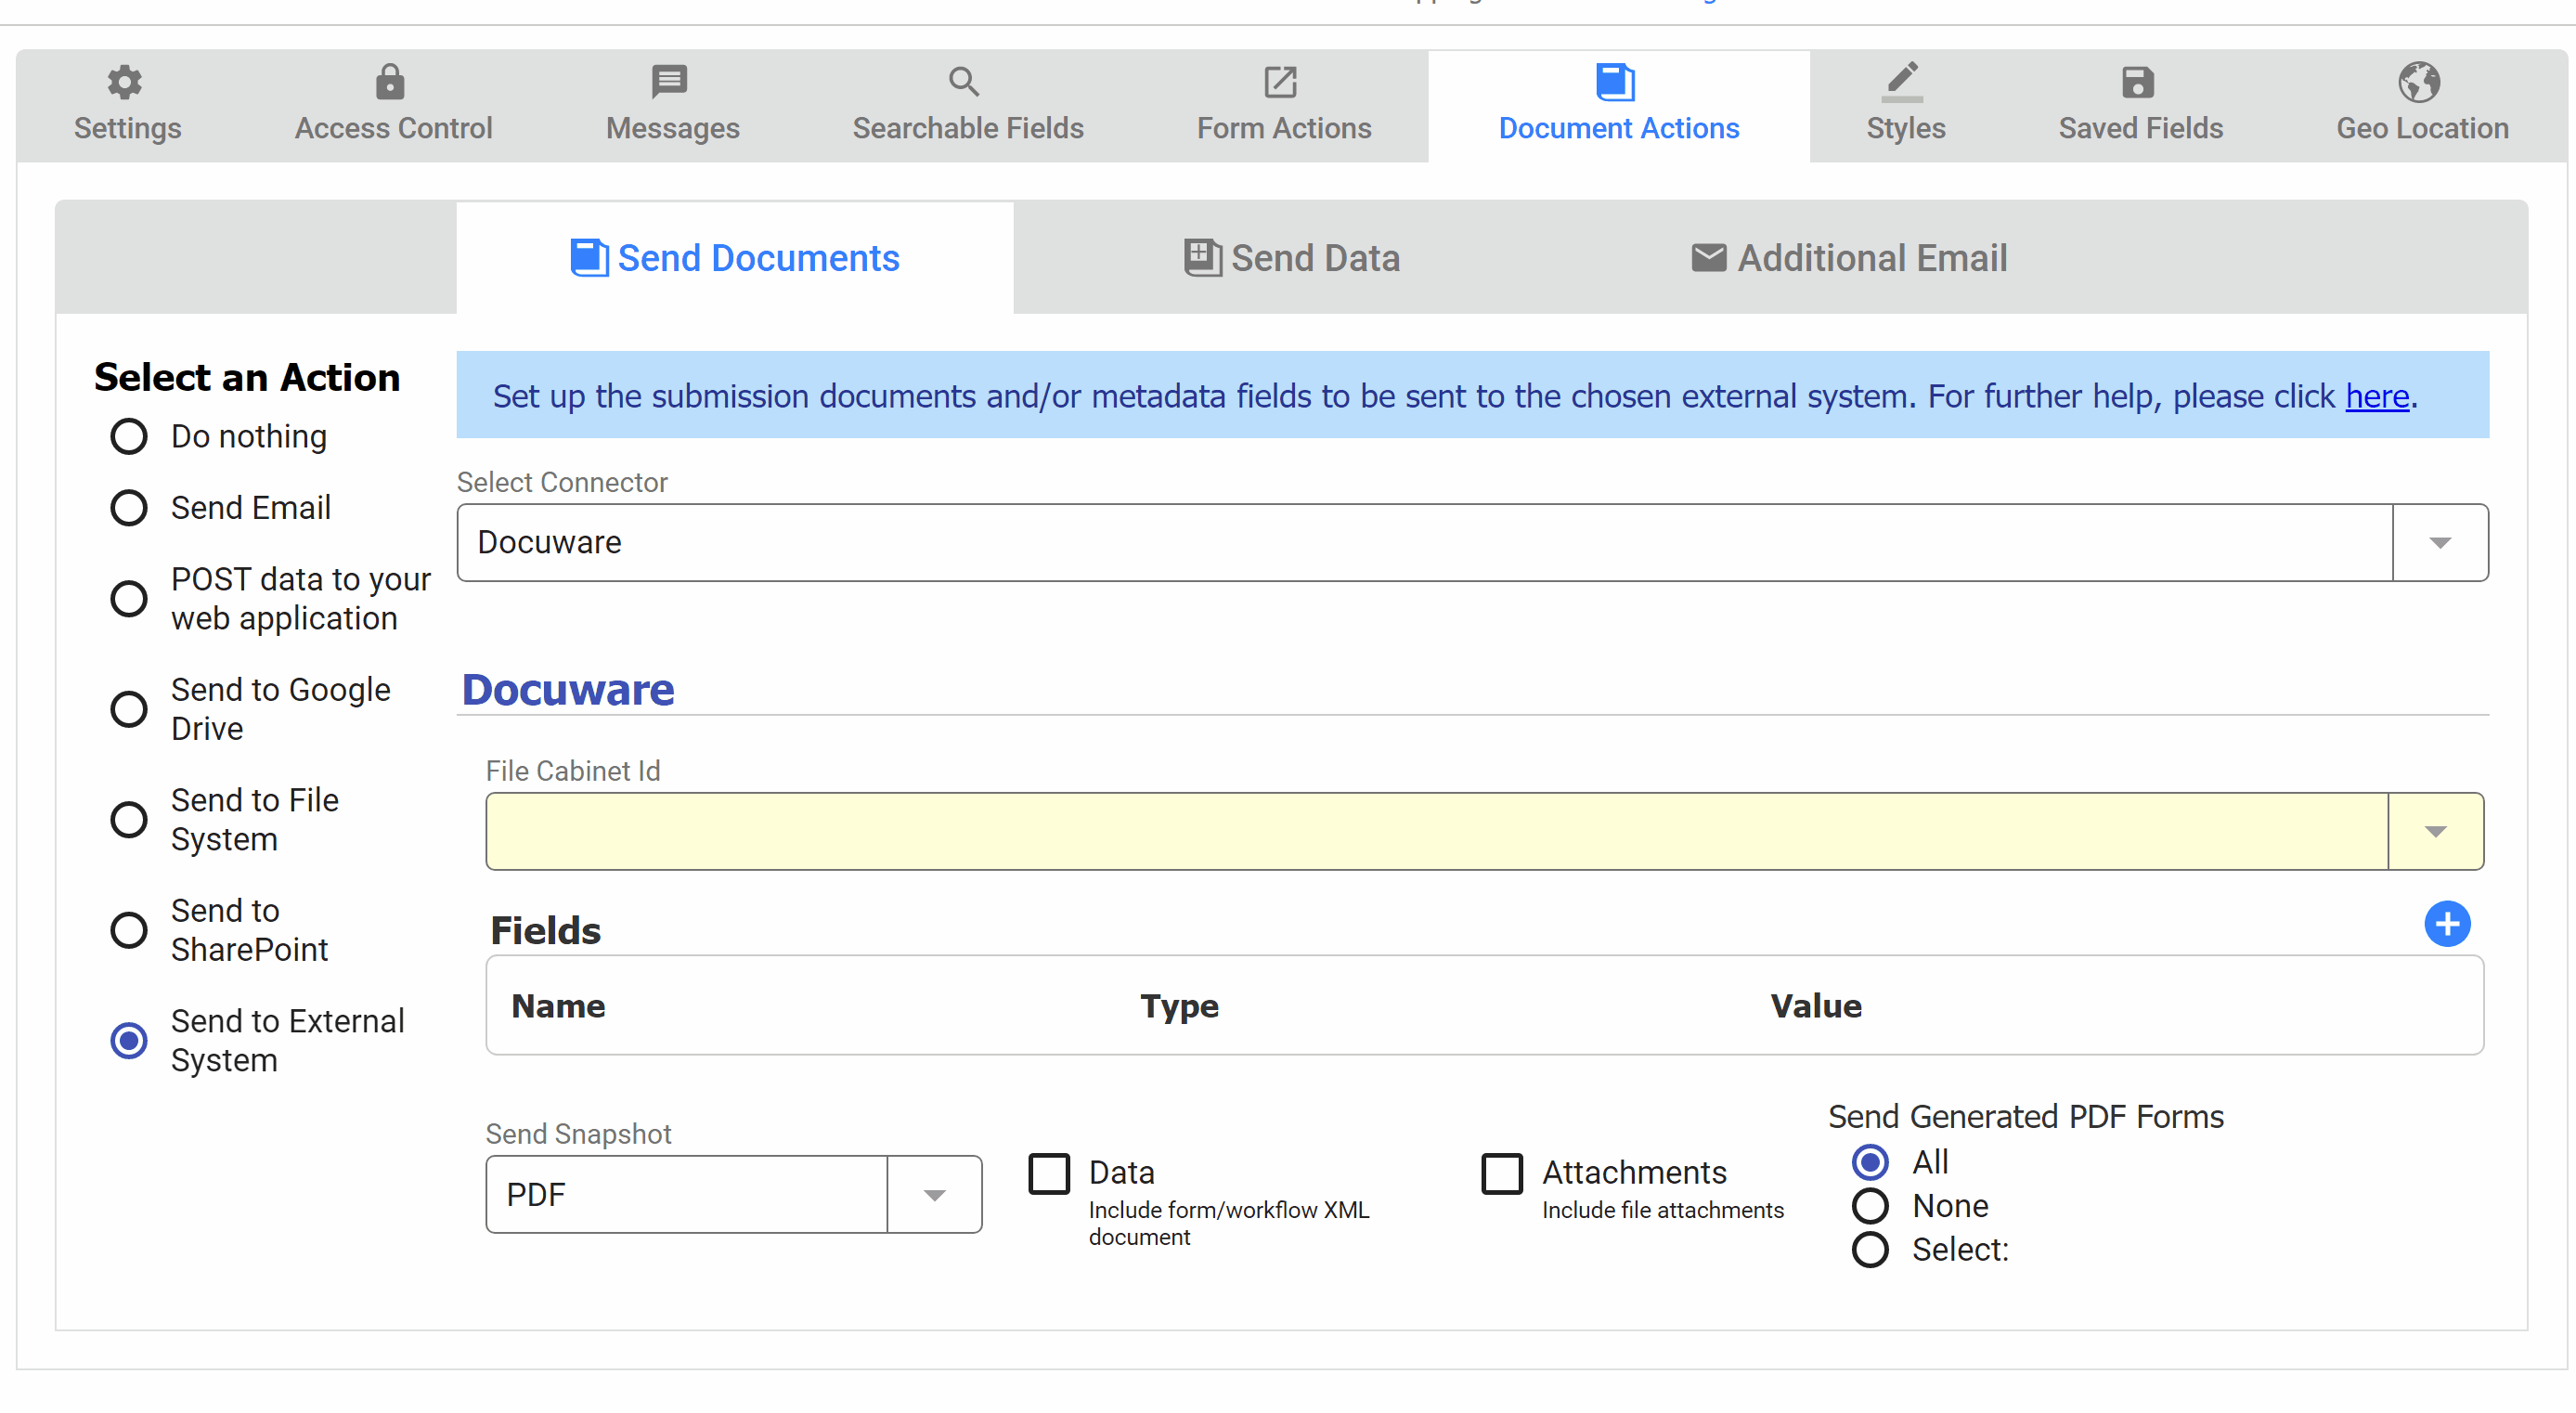

![]() Save.
Save.
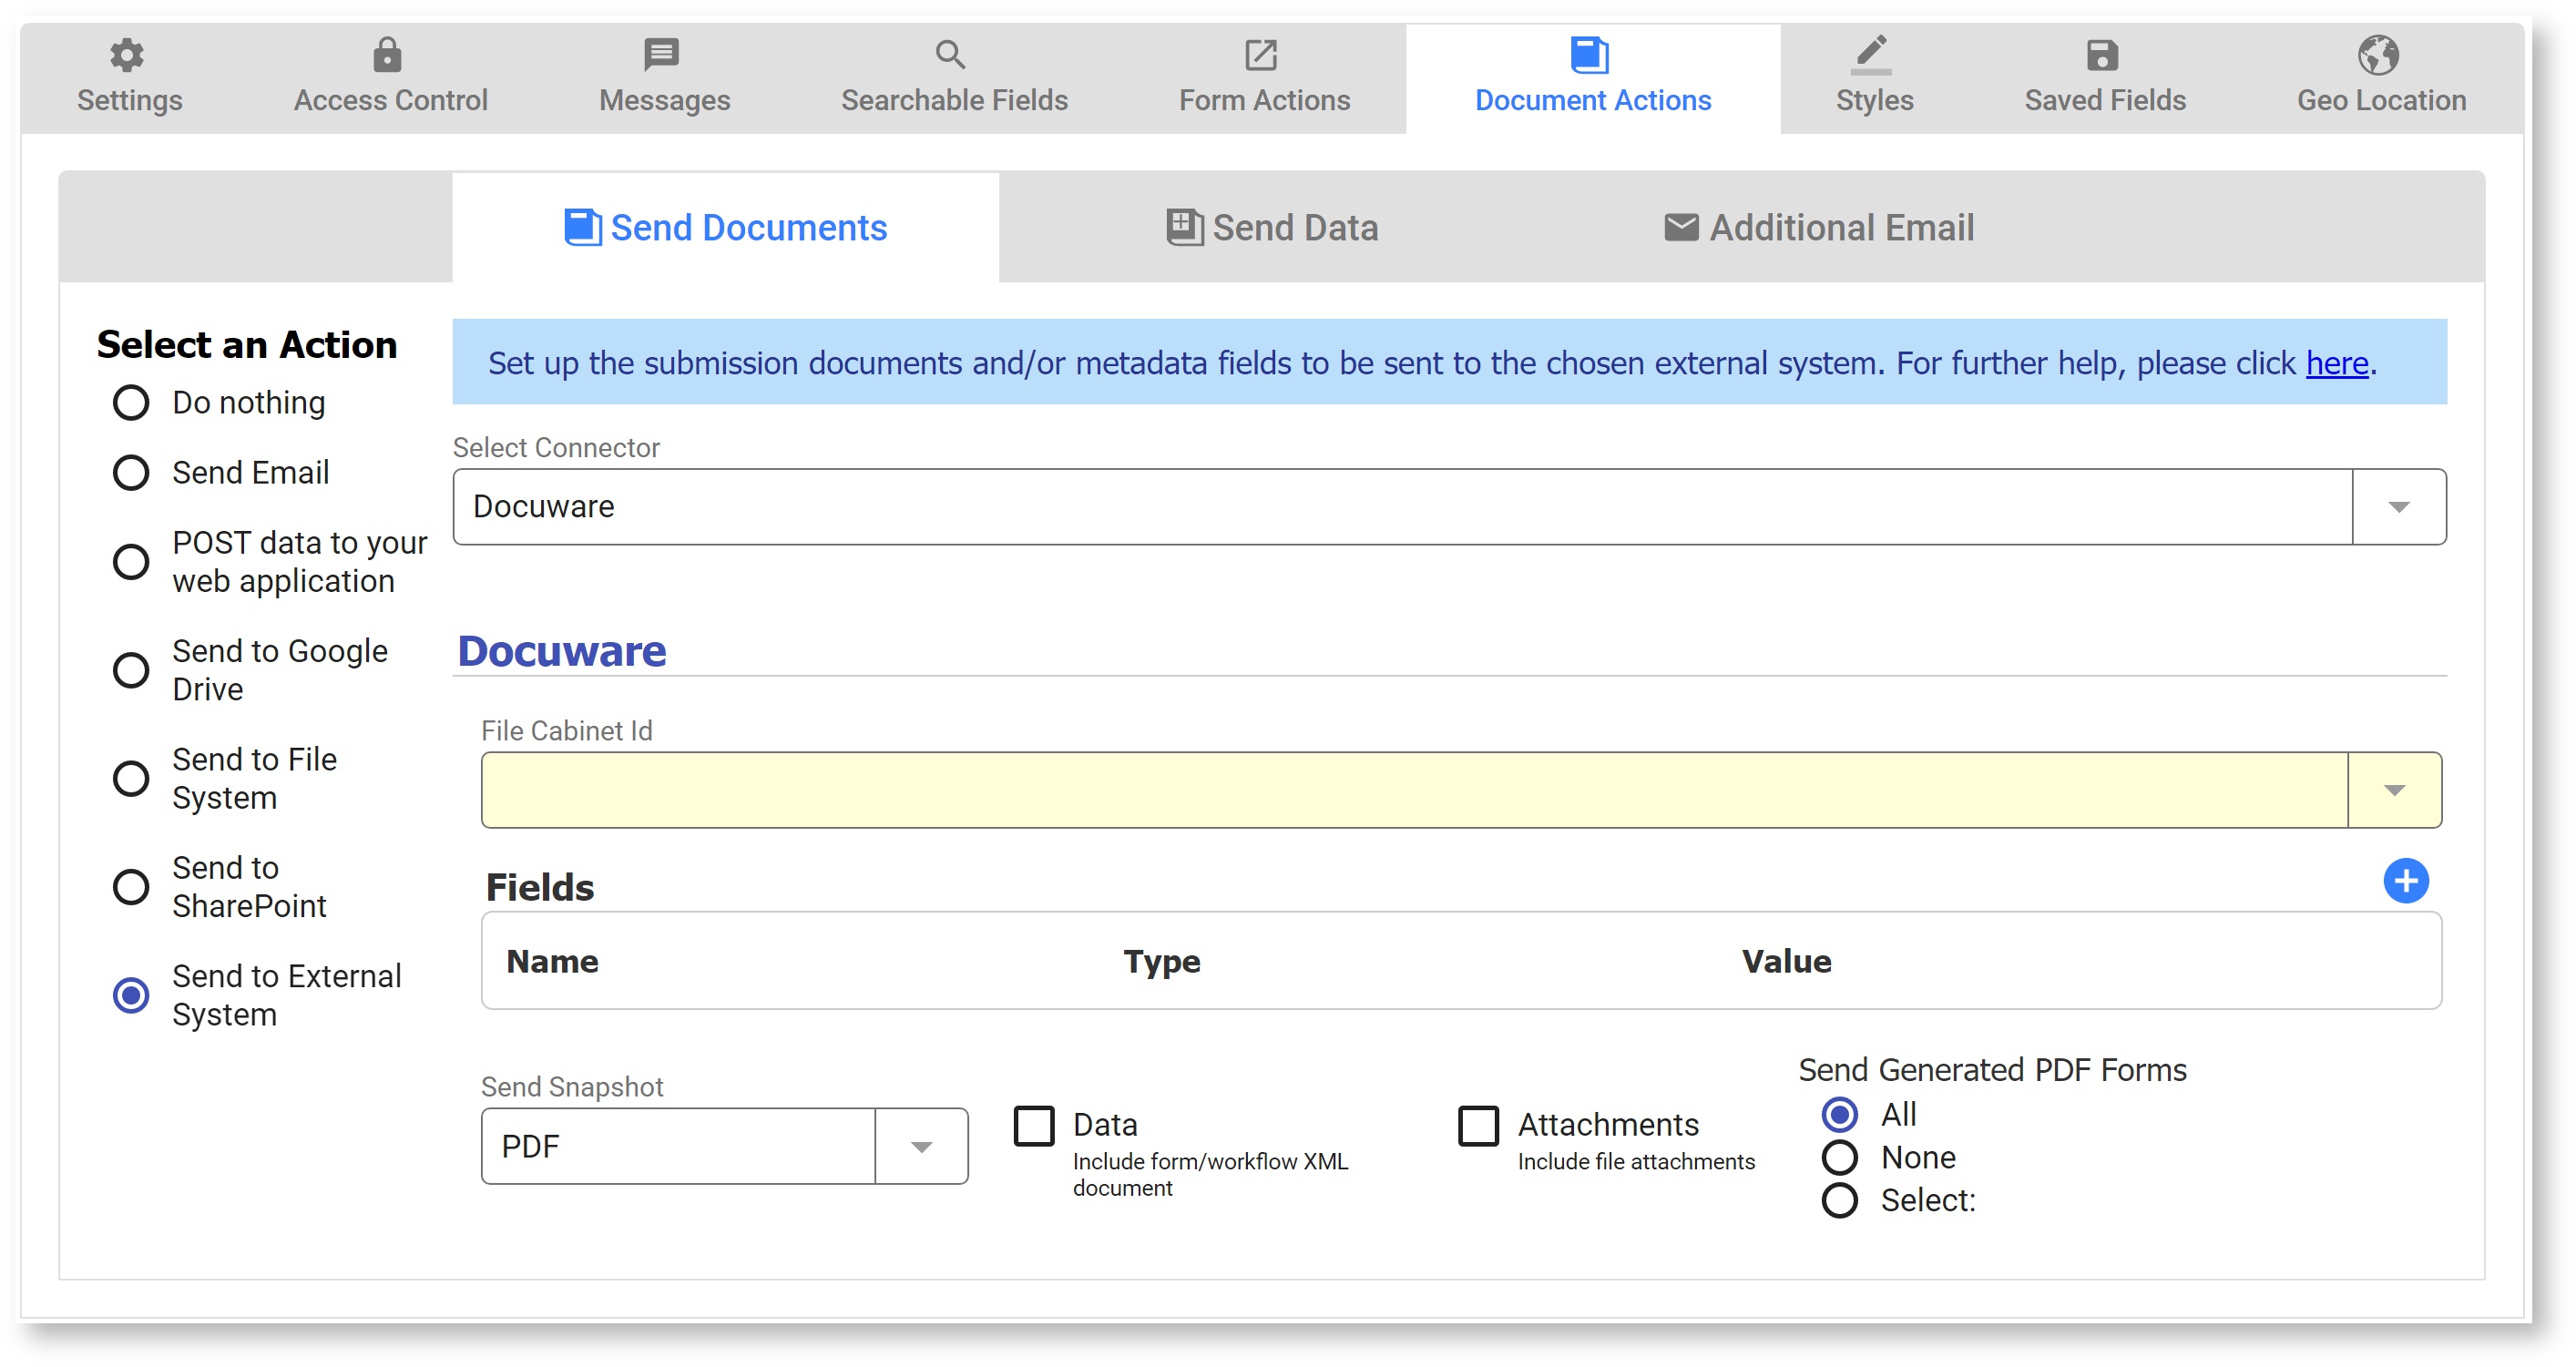
Docuware Connector Example
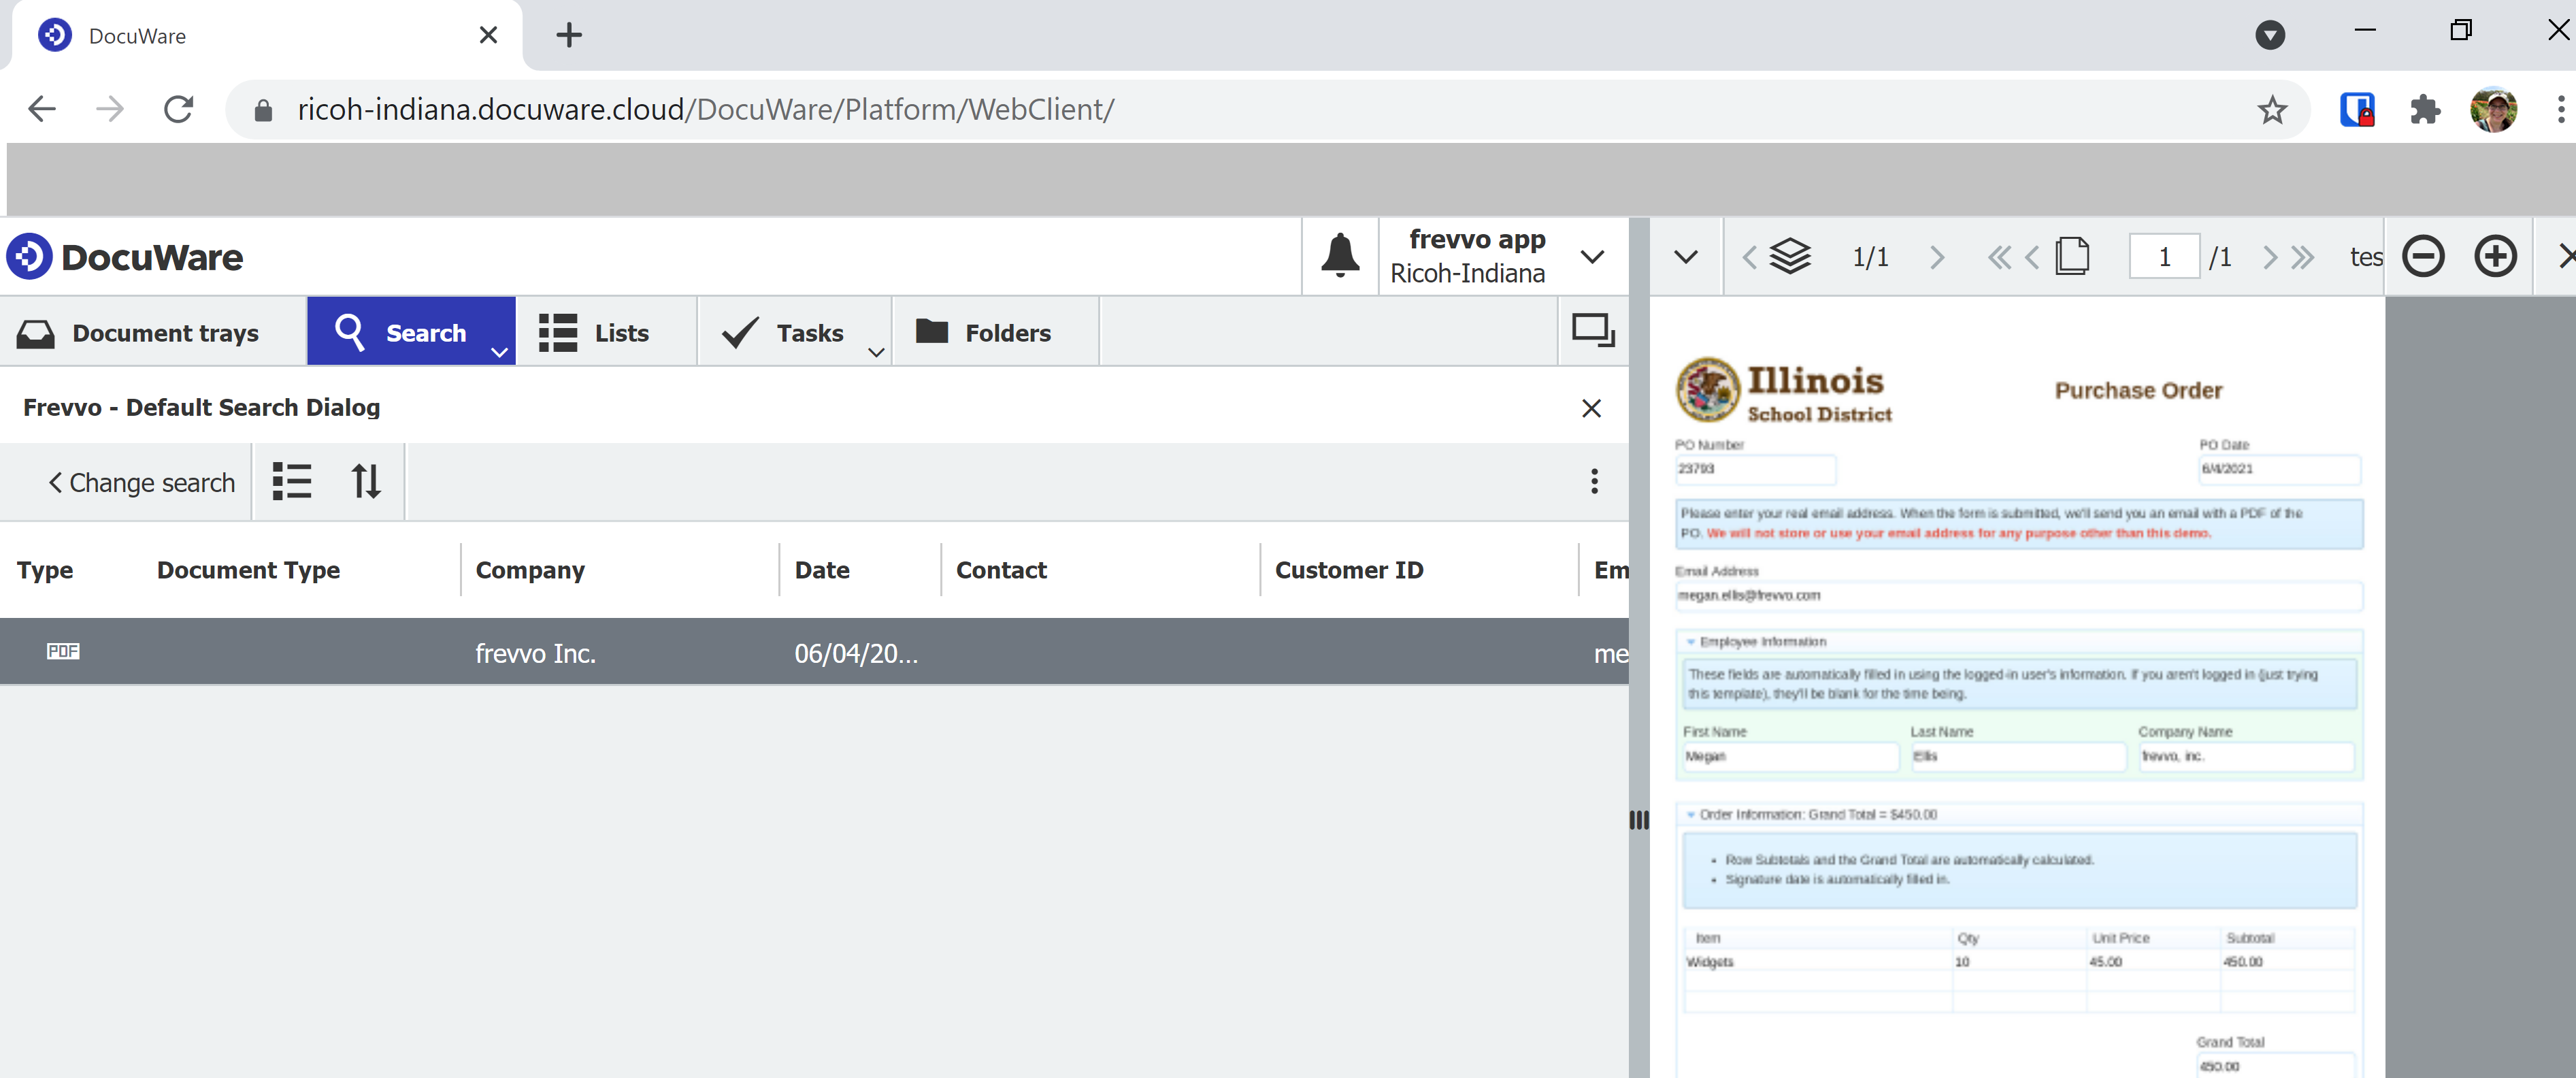
For this example, we installed the prebuilt template 'Basic Purchase Order.' Our Tenant Admin configured the Docuware Connector in the Manage Connectors page. On the Form Settings/Document Actions/Send Documents tab, we chose Send to External System.
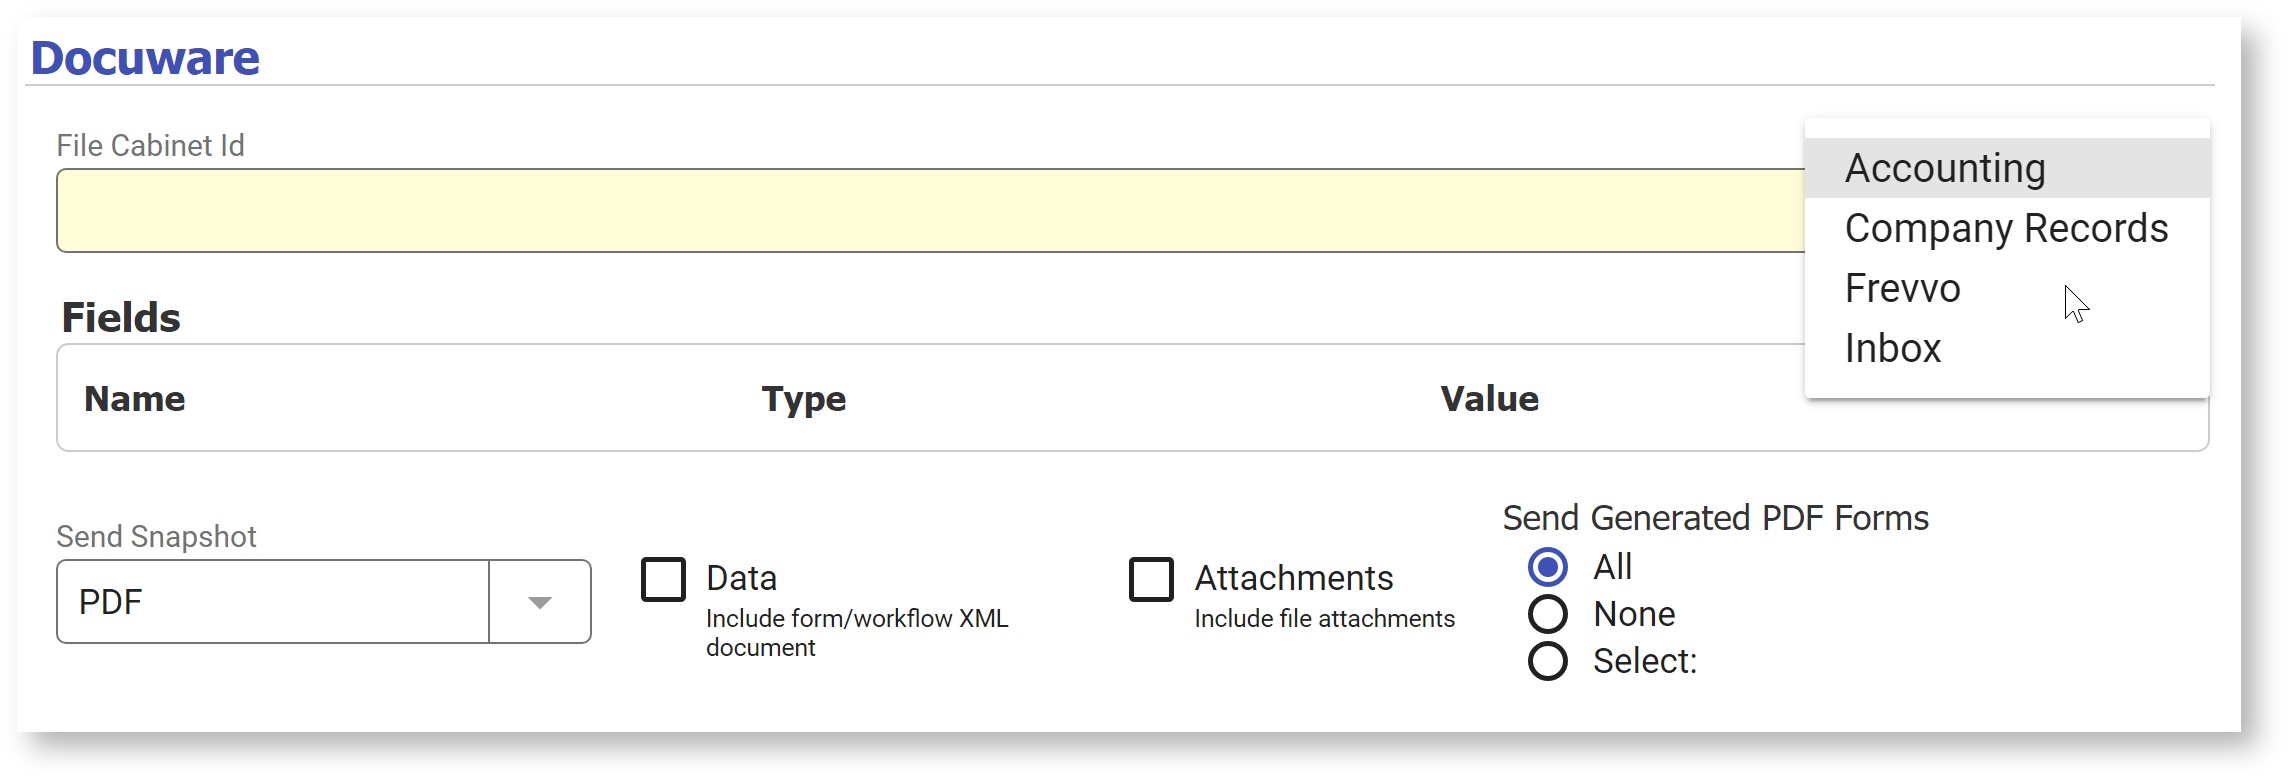
We chose the cabinet 'Frevvo' and selected three fields to map from the Basic PO form.
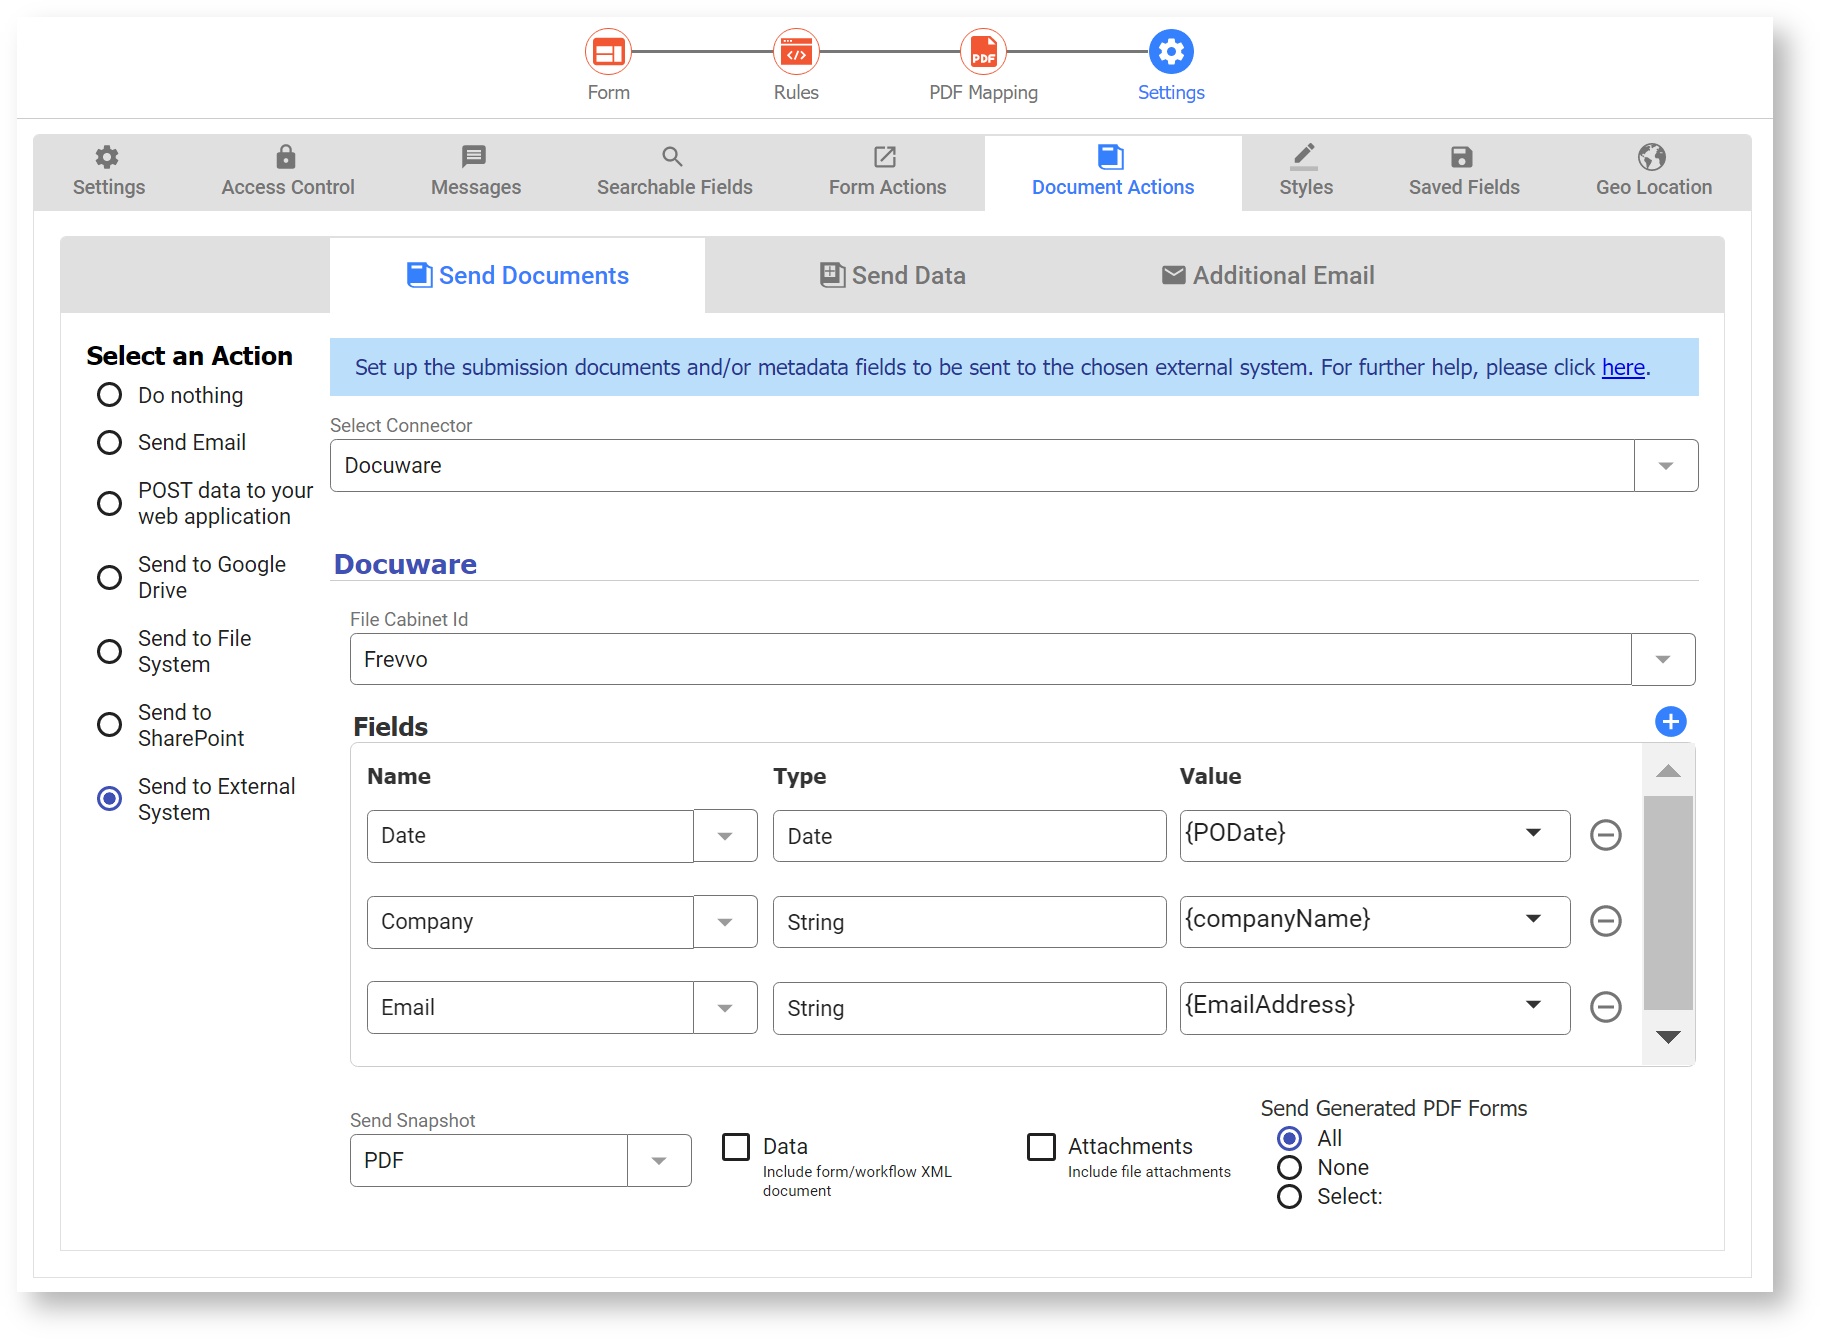
Next, click ![]() Save and Test. Fill out the form and click submit. Then, log in to Docuware to see that the file has been sent as we configured:
Save and Test. Fill out the form and click submit. Then, log in to Docuware to see that the file has been sent as we configured:
Limitations and Troubleshooting
- Quantity controls in frevvo map to the 32-bit int field type in Docuware. It is impossible to know the value of the quantity control at design time, and if it is greater than 32 bit you may see a 500 Error with the message "Value was either too large or too small for an Int32." When mapping Quantity control types, the designer should take care to restrict the valid value of the field appropriately.
- The Document Actions UI will display all cabinets, but you may only send to cabinets that the user configured in the Manage Connectors page has the correct permissions to edit. Incorrect permissions will result in a "403 Forbidden Form" error. To set up your Docuware permissions, please see this Docuware Documentation and ensure the user configured in frevvo has these permissions:
- Read and Edit permission to Cabinet
- Use permission to Document Tray