SharePoint Connector
Overview
The frevvo SharePoint Connector and Send to SharePoint document action wizard make it easy to create forms and approval workflows that validate information, route for signatures as required and save the data and documents to a secure SharePoint website. The Connector was designed to integrate with Office 365 SharePoint Online.
.svg.png?version=1&modificationDate=1661278022778&cacheVersion=1&api=v2&width=200&height=195)
To use the SharePoint Connector, customers need a valid Office 365 SharePoint account.
The SharePoint Connector wizard, allows you to Save the form/workflow data and metadata to a SharePoint destination. The destination could be a folder in a document library and/or a list item. With point and click tools, designers can select the SharePoint destination and map form/workflow control values to the SharePoint metadata columns.
The frevvo SharePoint wizard guides you through connecting your forms/workflows to SharePoint.
Choose your Configuration Scenario
First, choose which configuration scenario is best for you. Follow the links for detailed instructions.
- Cloud Customers Connecting to SharePoint Online - This configuration has been certified by frevvo. Follow these steps:
In-house Customers connecting to SharePoint Online - This configuration has been certified by frevvo. Follow these steps:
frevvo only supports/certifies the SharePoint Connector running in the Apache Tomcat container.
- Configure frevvo as a SharePoint Add-in
- Download the SharePoint Connector. Extract the .zip file to a temp directory. Open the extracted folder and copy the sharepoint.war to the <frevvo-home>\tomcat\webapps directory.
- Configure SharePoint for your frevvo tenant
- Connect your Forms/Workflows using the SharePoint wizard.
- In-house customers using SharePoint On-premise - this configuration is supported but not certified.
- Customers using SharePoint On-premise also need an Office 365 SharePoint Online account. This is necessary to obtain an authorization token. There is no data transfer from SharePoint On-premise to SharePoint Online.
- Customers are responsible for configuring the On-premise installation and the integration with SharePoint Online.
- The On-premise version of SharePoint must be version 2013+.
- Refer to this Microsoft website for information about how to use Office 365 to allow frevvo to authenticate.
- frevvo Cloud customers connecting to SharePoint On-premise - This configuration is supported but considered unlikely as it requires your On-premise SharePoint to be exposed to the Cloud.
- Customers are responsible for configuring the On-premise installation and its exposure to the Cloud.
- Customers are responsible for configuring the On-premise installation and its exposure to the Cloud.
Configuring the SharePoint Connector
Step 1 - Configure frevvo as a SharePoint App (Add-in)
We've provided the steps for configuring frevvo as a SharePoint App/Add-in. Keep in mind that the SharePoint UI may change from time to time, and modify as needed for your version. Refer to this Microsoft SharePoint article for more information about adding Apps/Add-ins.
frevvo must be added as a SharePoint provider-hosted add-in by your SharePoint Global Administrator in the Sharepoint admin center. The URL will have -admin after the domain name, e.g. https://mycompany-admin.sharepoint.com/.
Create the App
- Navigate to https://<yourSharePointSite>-admin/_layouts/15/appregnew.aspx
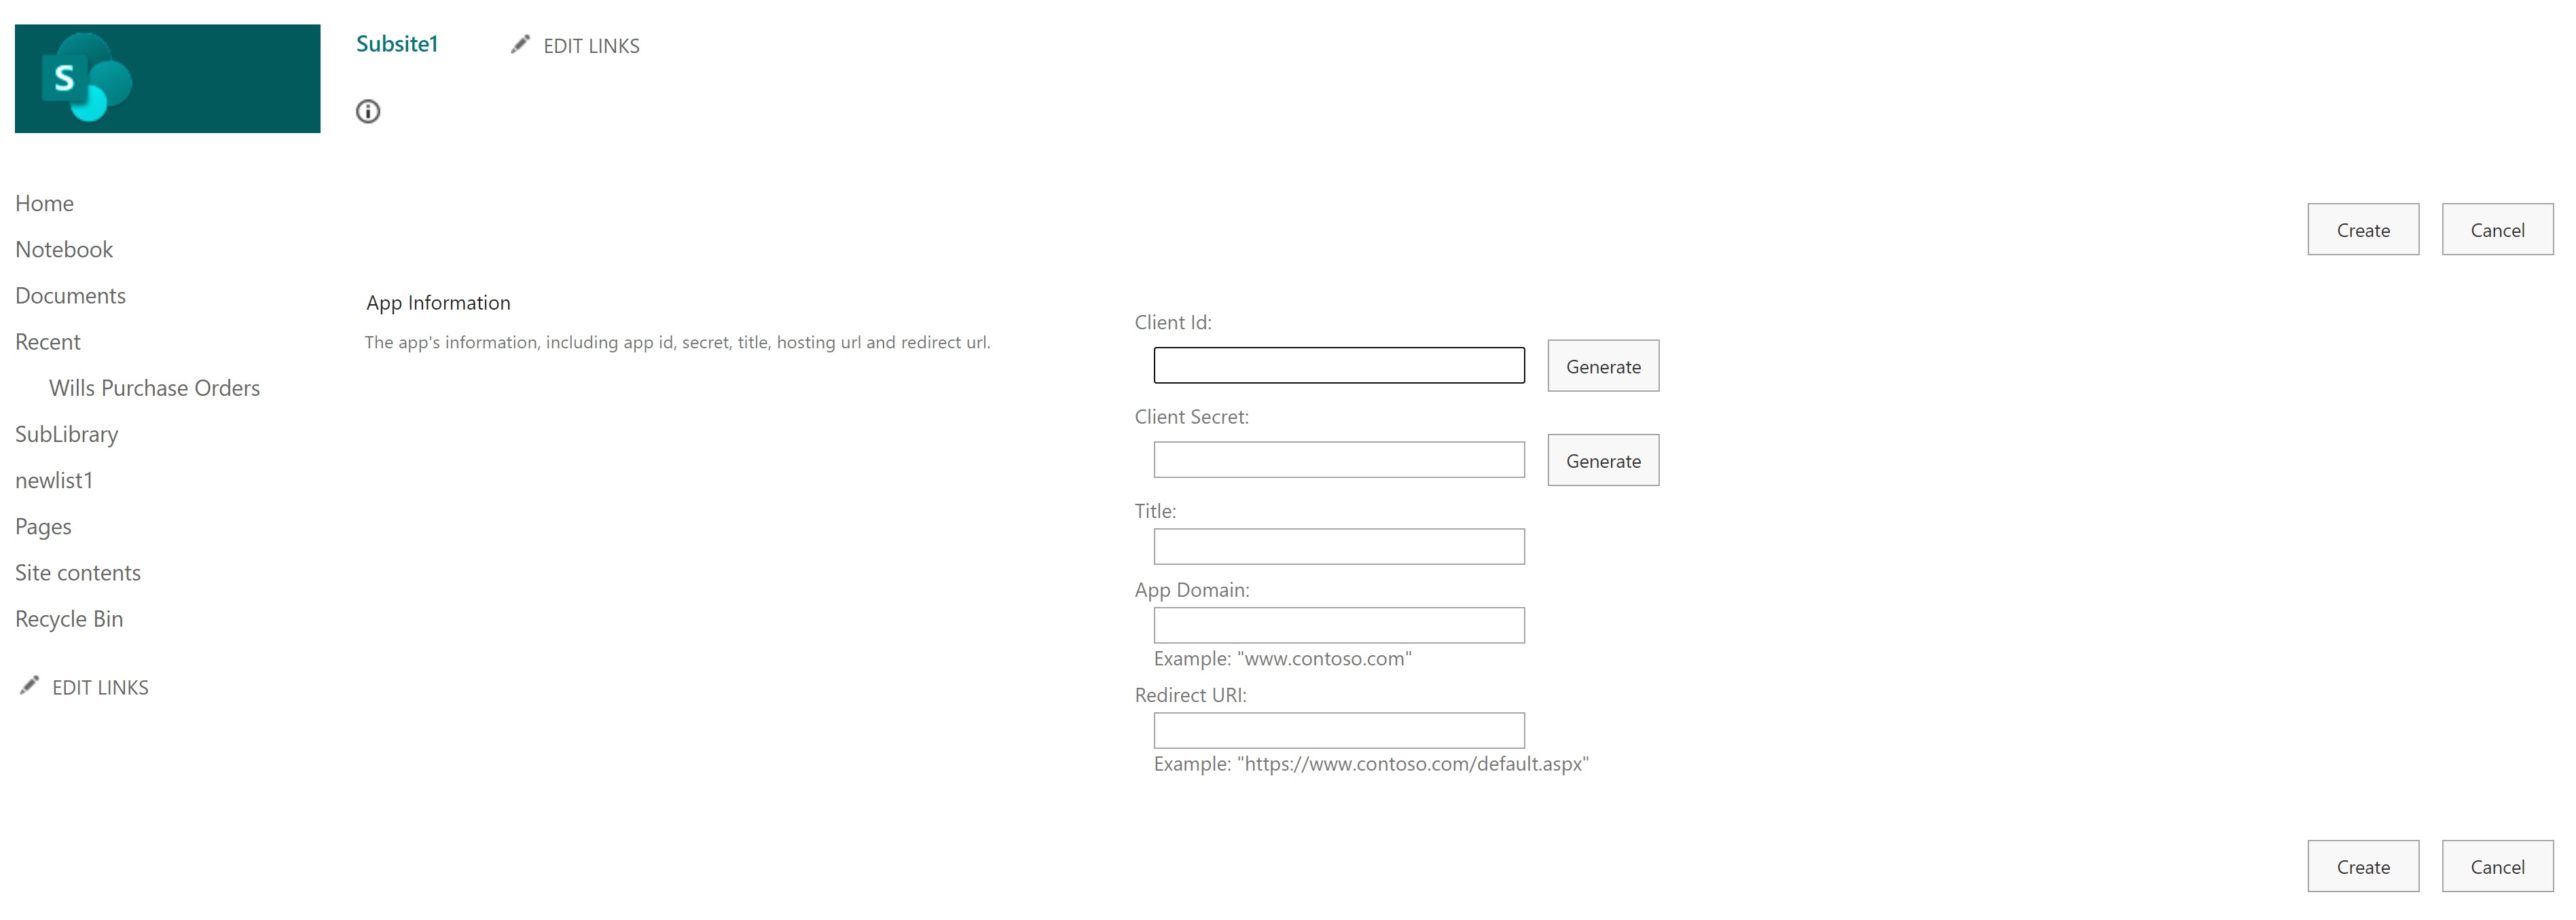
Click Generate on Client ID and Client Secret.
Copy the Client Id and client Secret and save them to a text file. You will need to add these values when configuring your tenant for SharePoint.
Enter a Title. The Title can be anything that can differentiate your frevvo SharePoint application from other applications.
- Enter the App Domain. The app domain field should be the frevvo server domain name plus the frevvo SSL port. It should be the same <server>:<port> as the redirect URL.
- Cloud customers: app.frevvo.com:443
- On Premise customers: <server>:8443 (or your <server>:<port> if not using the default)
Enter the Redirect URI. The Redirect URI for frevvo is shown below where the <server>:<port> is the same host and port in the URL used to access frevvo.
Redirect URIhttps://<server>:<port>/frevvo/web/sharepoint/token
Cloud customers: app.frevvo.com:443
- On Premise customers: <server>:8443 (or your <server>:<port> if not using the default)
- Remember SharePoint only allows https.
- Click Create. You will see a message such as "The app identifier has been successfully created." Copy the information on this screen and save it to a text file. You will need these values for the next step.
Grant the App Permissions
- Navigate to https://<yourSharePointSite>-admin/_layouts/15/appinv.aspx.
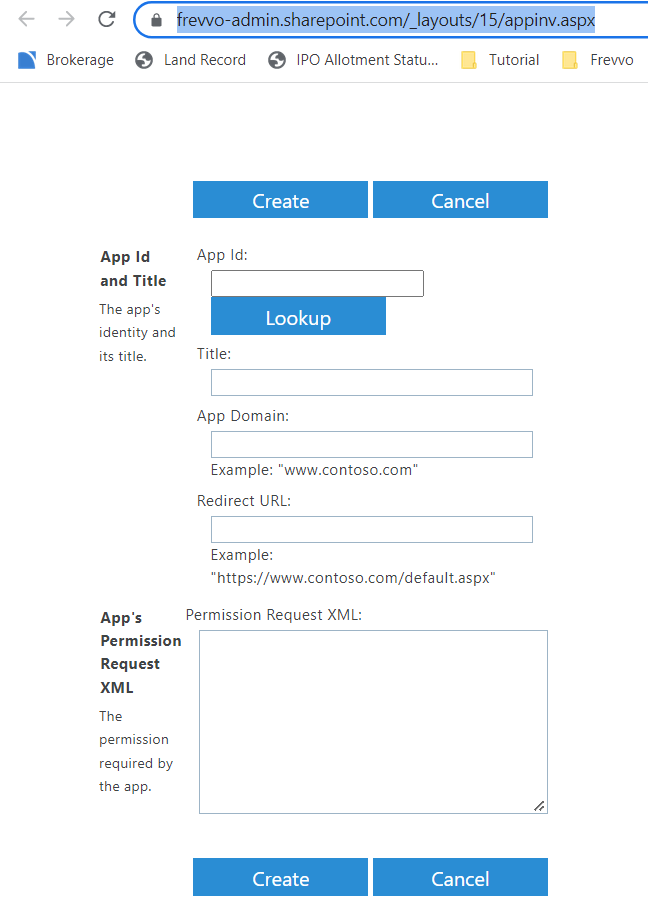
- In the App ID field, paste the Client ID you copied earlier. Click Lookup.
- The Title, App Domain, and Redirect URI fields should get filled with the information you entered in the last step.
Enter the Permission Request XML. Copy/paste this xml into the Permission Request XML box.
<AppPermissionRequests AllowAppOnlyPolicy="true">
<AppPermissionRequest Scope="http://sharepoint/content/tenant" Right="Manage" />
</AppPermissionRequests>
- Click Create. If prompted, click Trust It.
If you see an error that you do not have permission to trust this app, please make sure you are logged in as a global admin the Sharepoint admin center. The URL will have -admin after the domain name, e.g. https://mycompany-admin.sharepoint.com/.
Step 2 - Configure the frevvo Tenant for SharePoint
Cloud and On Premise customers must configure their frevvo tenant to connect to SharePoint as a client. frevvo expects that customers will only be integrating with one SharePoint instance for their organization. You will need the SharePoint Client Id and the Client Secret from Step 1.
Follow these steps:
Login to frevvo as the tenant admin.
Click the Edit Tenant link.
- Expand the SharePoint section.
The Connector URL field can usually be left blank. This field is not necessary if you are using the SharePoint Connector built-in on frevvo Cloud or you are an On Premise customer, which are the most common scenarios. This URL is only needed if you are using frevvo Cloud but installing the connector locally.
Enter the Client Id and the Client Secret that you saved in Step 1 into the respective fields.
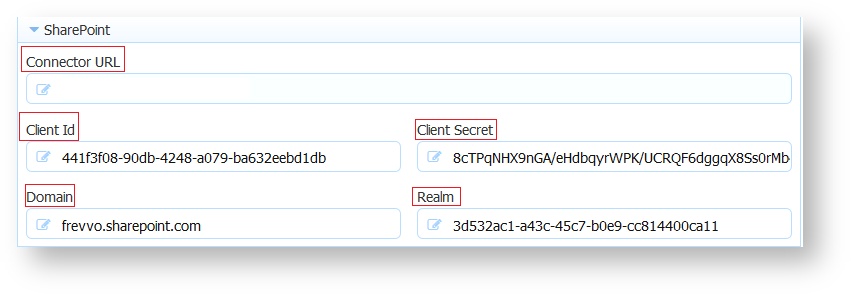
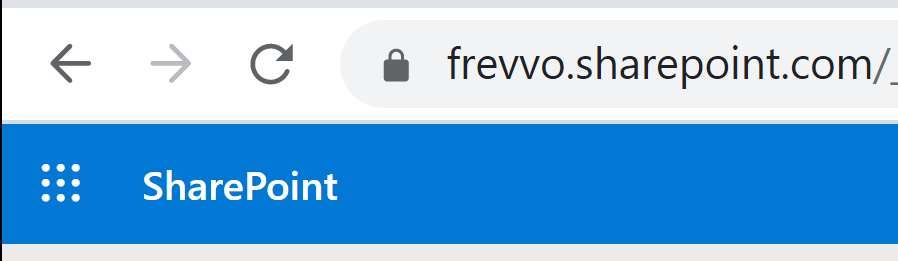
- Enter the SharePoint Domain Name e.g. <Your SharePoint domain name>.sharepoint.com. There is a dot between the SharePoint domain name and sharepoint.com. The SharePoint domain name is what you see in your SharePoint URL, i.e.:
- To determine the realm for your SharePoint site :
Navigate to https://<tenant>.sharepoint.com/_layouts/appprincipals.aspx - change the <tenant> to the name of your SharePoint tenant - e.g. https://frevvo.sharepoint.com/_layouts/appprincipals.aspx
Find your registered application in the list and look at the App Identifier column. The unique identifier after the @-sign in the App Identifier is the app realm and must be entered in the Realm field.

- Click Submit
- On Premise customers can browse http://<your server:port>/sharepoint/health (replace <your server:port> with your frevvo server:port) to check the status of the connector. If the connector is up and running, you will see { "status" : "UP" }.
- Proceed to Step 3
Step 3 - Connect Forms and Workflows with the SharePoint wizard
Login and Create Form/Workflow
Log in as a frevvo designer user. If you are On Premise frevvoconnecting to Sharepoint in the cloud, use the URL https://<server>:<SSL port>/frevvo/web/login. Example: https://localhost:8443/frevvo/web/login. Port 8443 is the default. Create your form or workflow with controls that capture the data that you want to store in the columns configured in the Lists and Libraries on your SharePoint site.
Configure Send to SharePoint Document Action
Go to Settings mode in the Guided Designer navigation bar.

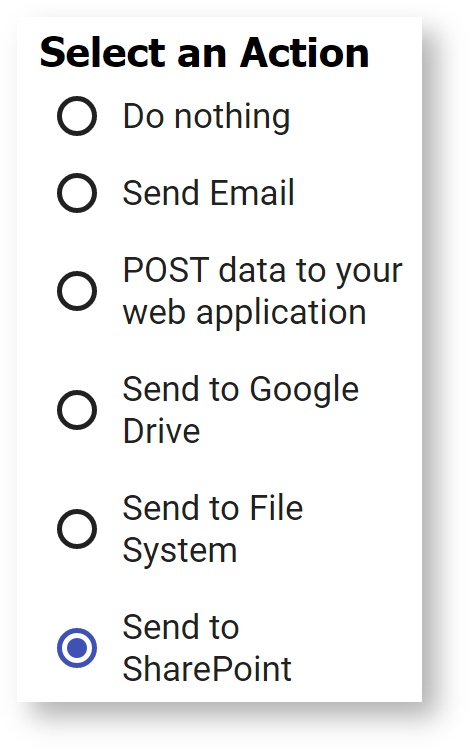
- Click the Document Actions Tab and the Send Documents sub-tab.

- Select the action Send to Sharepoint. If the tenant is not configured for SharePoint, the Send to SharePoint option will not display.
First-time SharePoint Login
You will be redirected to log in to SharePoint or Office 365 if you are logging into your account for the first time. On successful login, you will be asked to grant or deny access for your frevvo SharePoint add-in.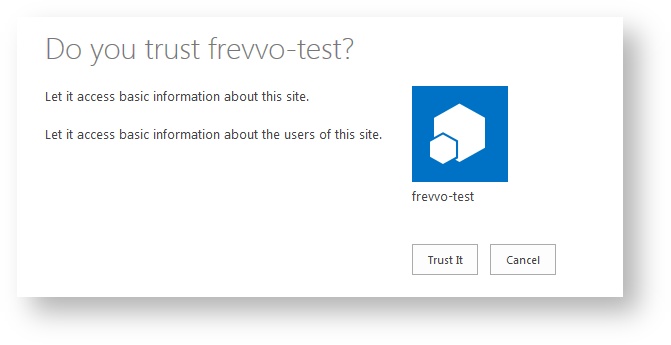
Click Trust It to authenticate and grant permission to frevvo. You will not see the trust screen on subsequent logins. The wizard will display.- We recommend that you create a separate user in SharePoint for frevvo forms connection, and use that user while configuring the Send to SharePoint wizard in frevvo forms. This frevvo-specific SharePoint user always remains active and eliminates issues if the designer user configured your forms to submit to SharePoint using their own SharePoint login and then leaves the company.
- If your tenant is configured with the Azure SAML Security Manager, at least one designer user must also be a SharePoint user with the correct privileges to provide consent when invoking the Send to SharePoint wizard
Set up Route(s)
You can set up a single Document Action to write to two places (i.e. SharePoint Library and List). Route 1 will be automatically expanded. Expand Route 2 to add a second destination if desired.
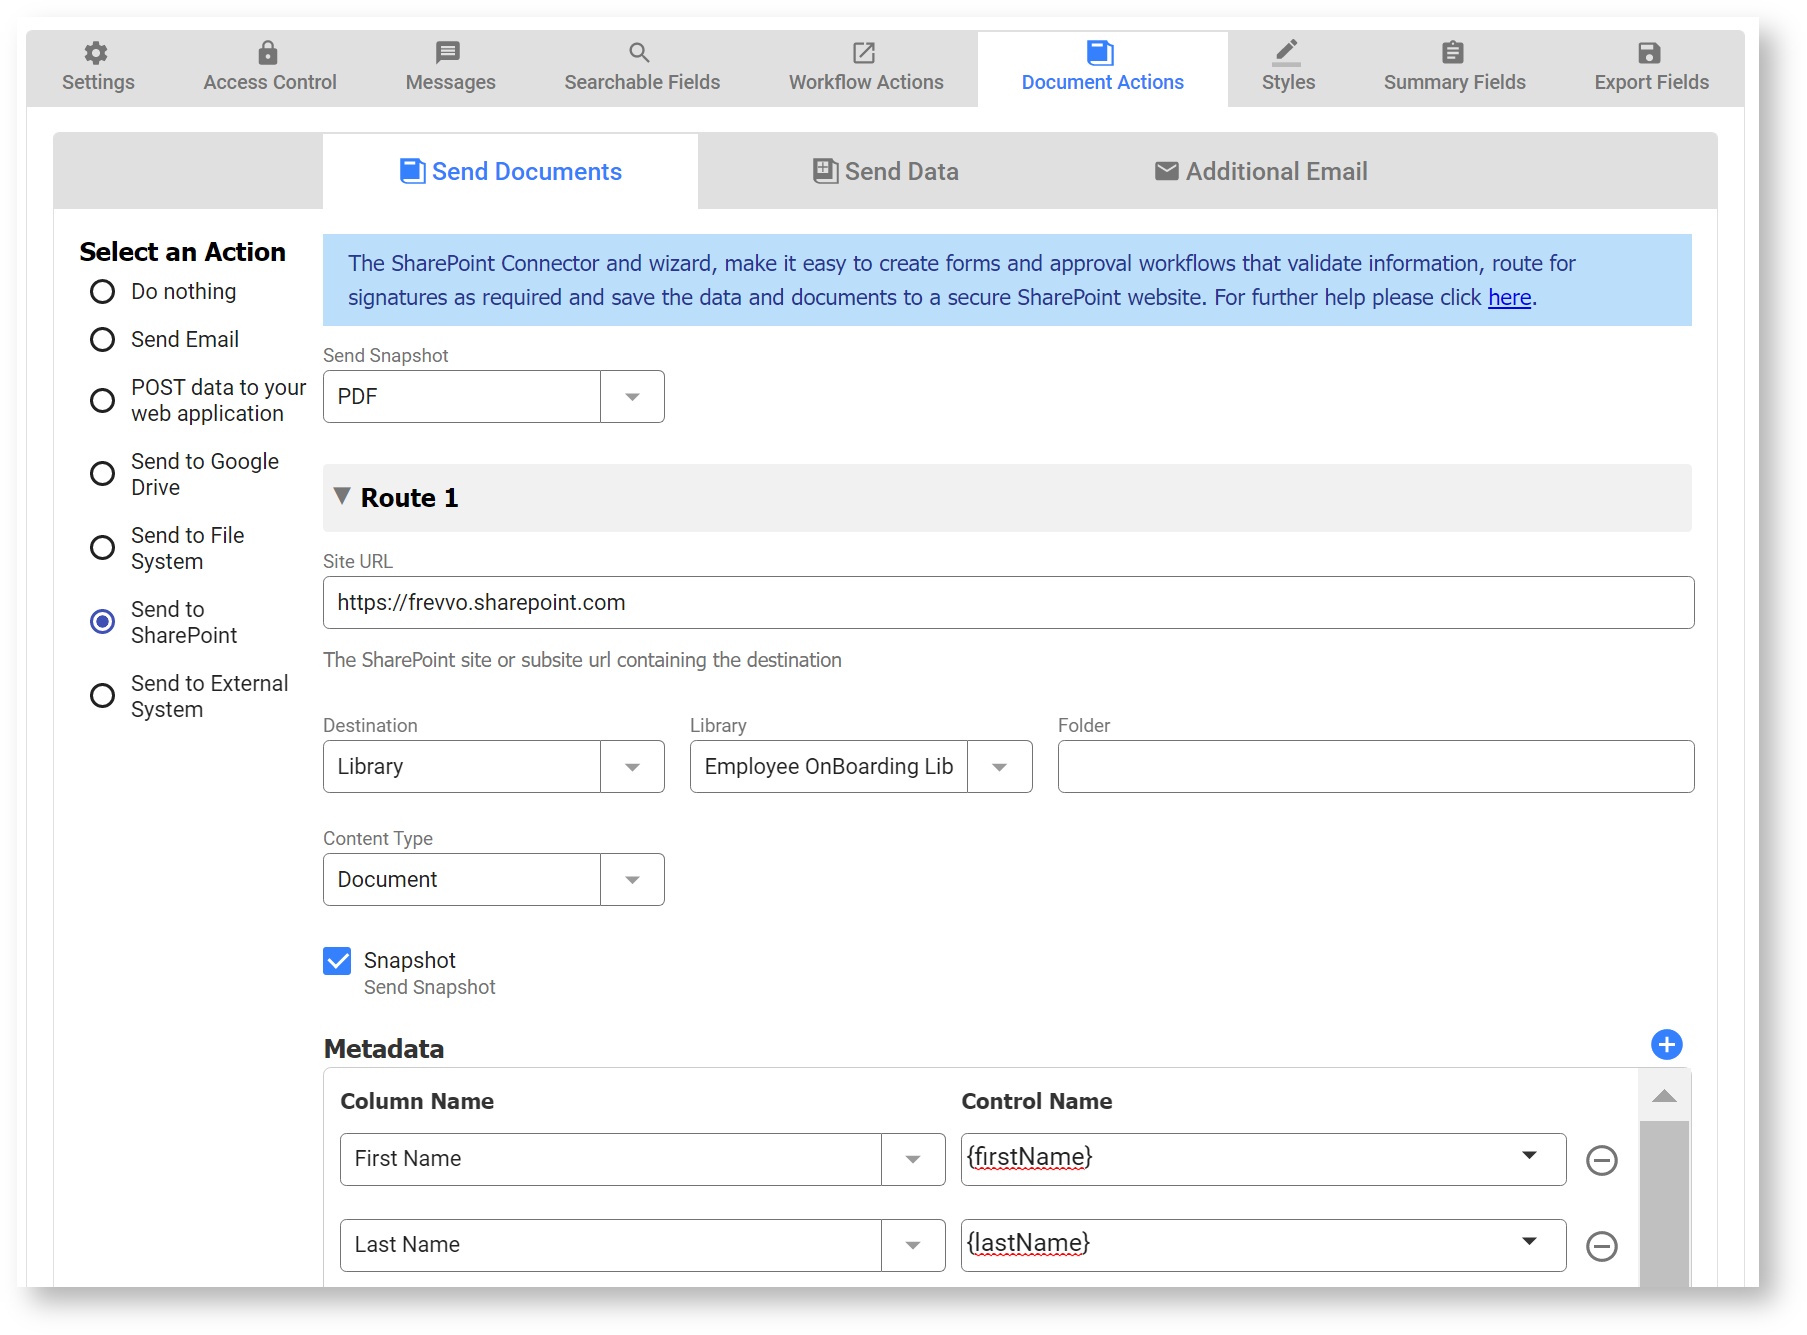
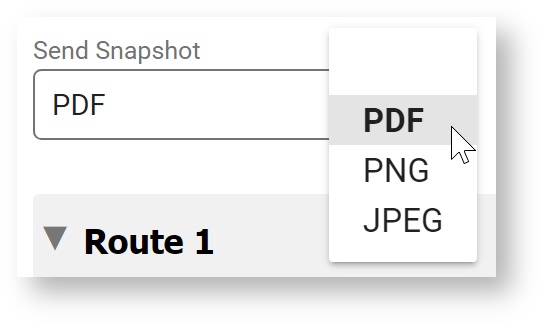
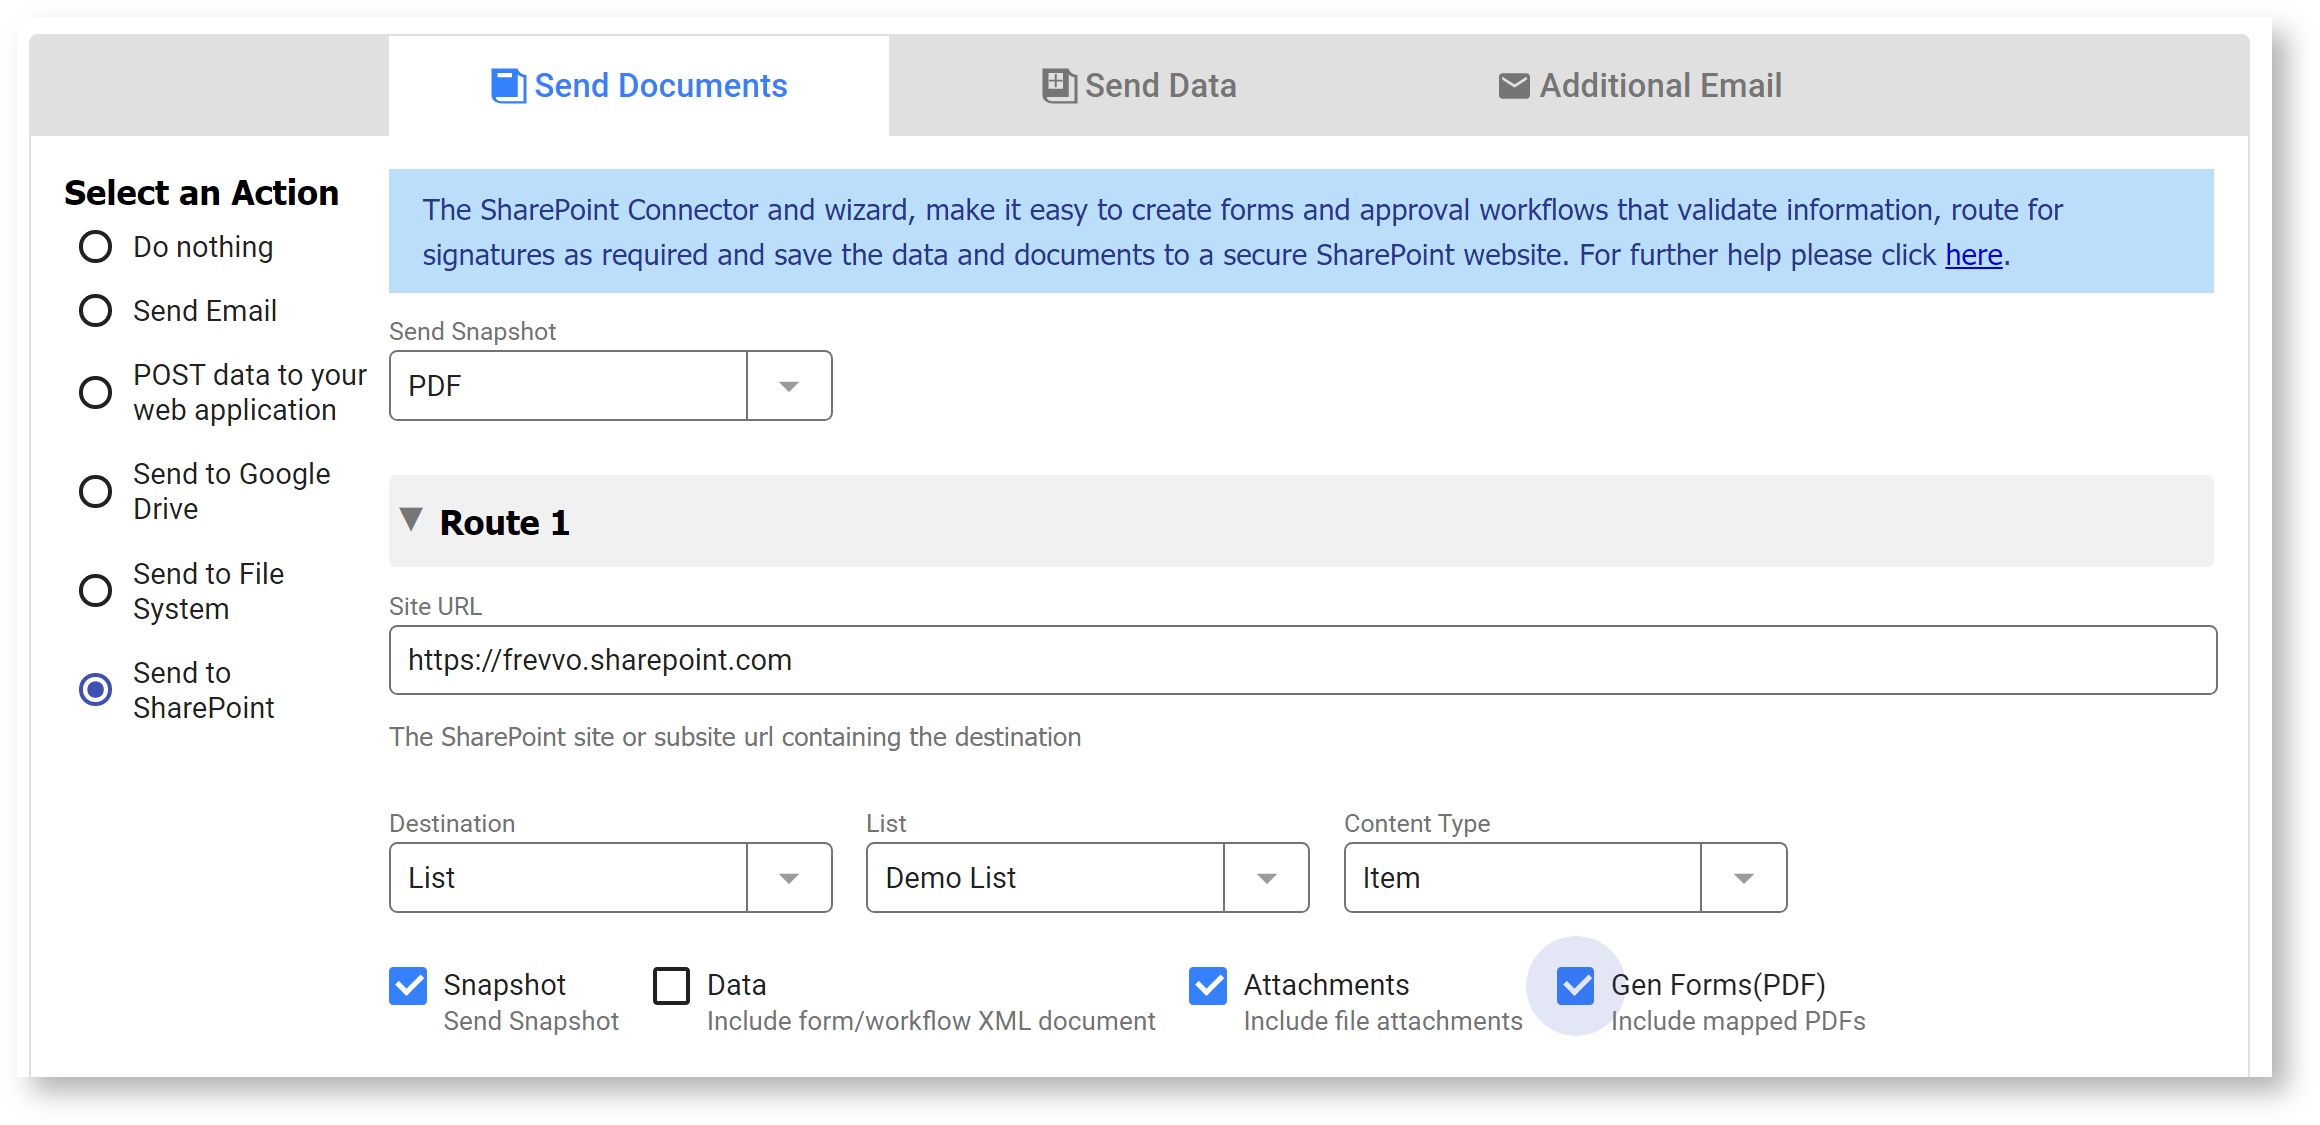
- Send Snapshot - Select a format for the Snapshot to be saved in SharePoint. The choices are: PDF, PNG or JPEG. PDF is the default. If you are sending attachments to a Sharepoint List, you must enable attachments on the List.
The Site URL is automatically prefilled from the SharePoint tenant configuration. This is the SharePoint site or subsite containing the destination e.g. https://frevvo.sharepoint.com. If you use a site and/or subsite, simply add it to the URL, e.g. https://frevvo.sharepoint.com/sites/Docs/docsub1. This URL must use the https protocol.
Pick a Destination. SharePoint destinations can be a Library (and optionally a Folder), or List. Select Library or List from the Destination Type dropdown.
- Pick a Library or List from the new dropdown that appears. This dropdown shows all the available Libraries or Lists in your SharePoint site.
If you select a Library, you will also see the Folder field. If you want to send to a subfolder, enter the server relative path of the folder within the library. For example, for folder 'test' in library 'mylib', enter /mylib/test.


The folder path may not always match exactly the visible name in the Sharepoint UI. For example, for my Library named 'Documents', the path is actually 'Shared Documents'. You can find the path in the folder's properties.
1. Go to your Sharepoint site or subsite, and click on the folder where you plan to save your frevvo documents.
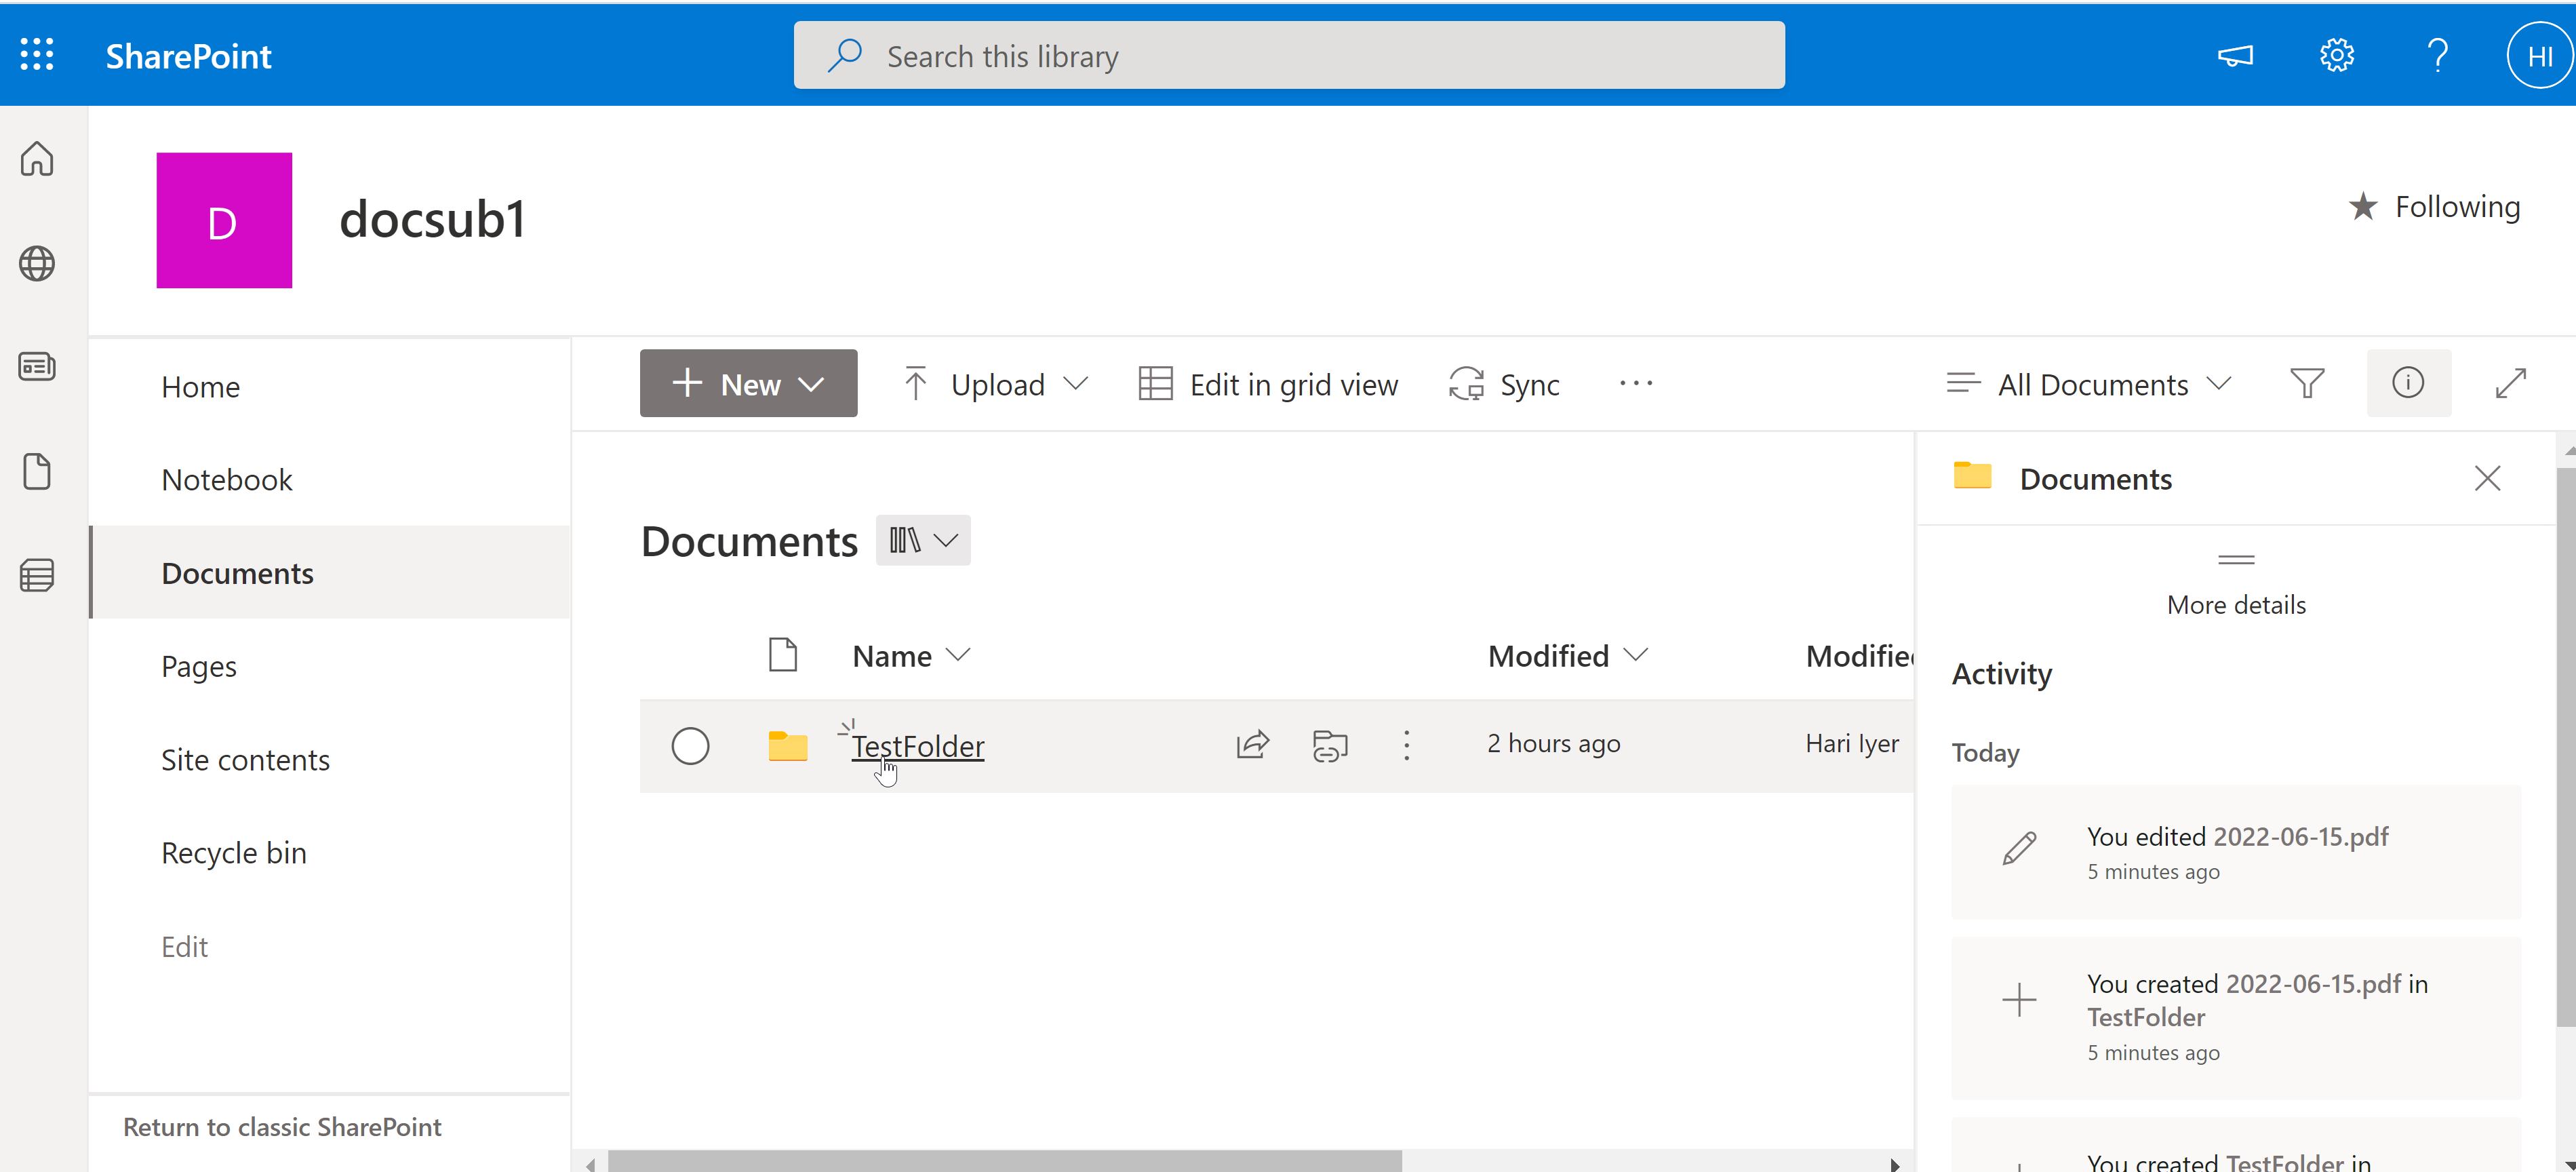
2. Click the Info icon (i) in the upper right side to open a properties panel.
3. Scroll down towards the bottom to the "Path" property. Click the copy icon.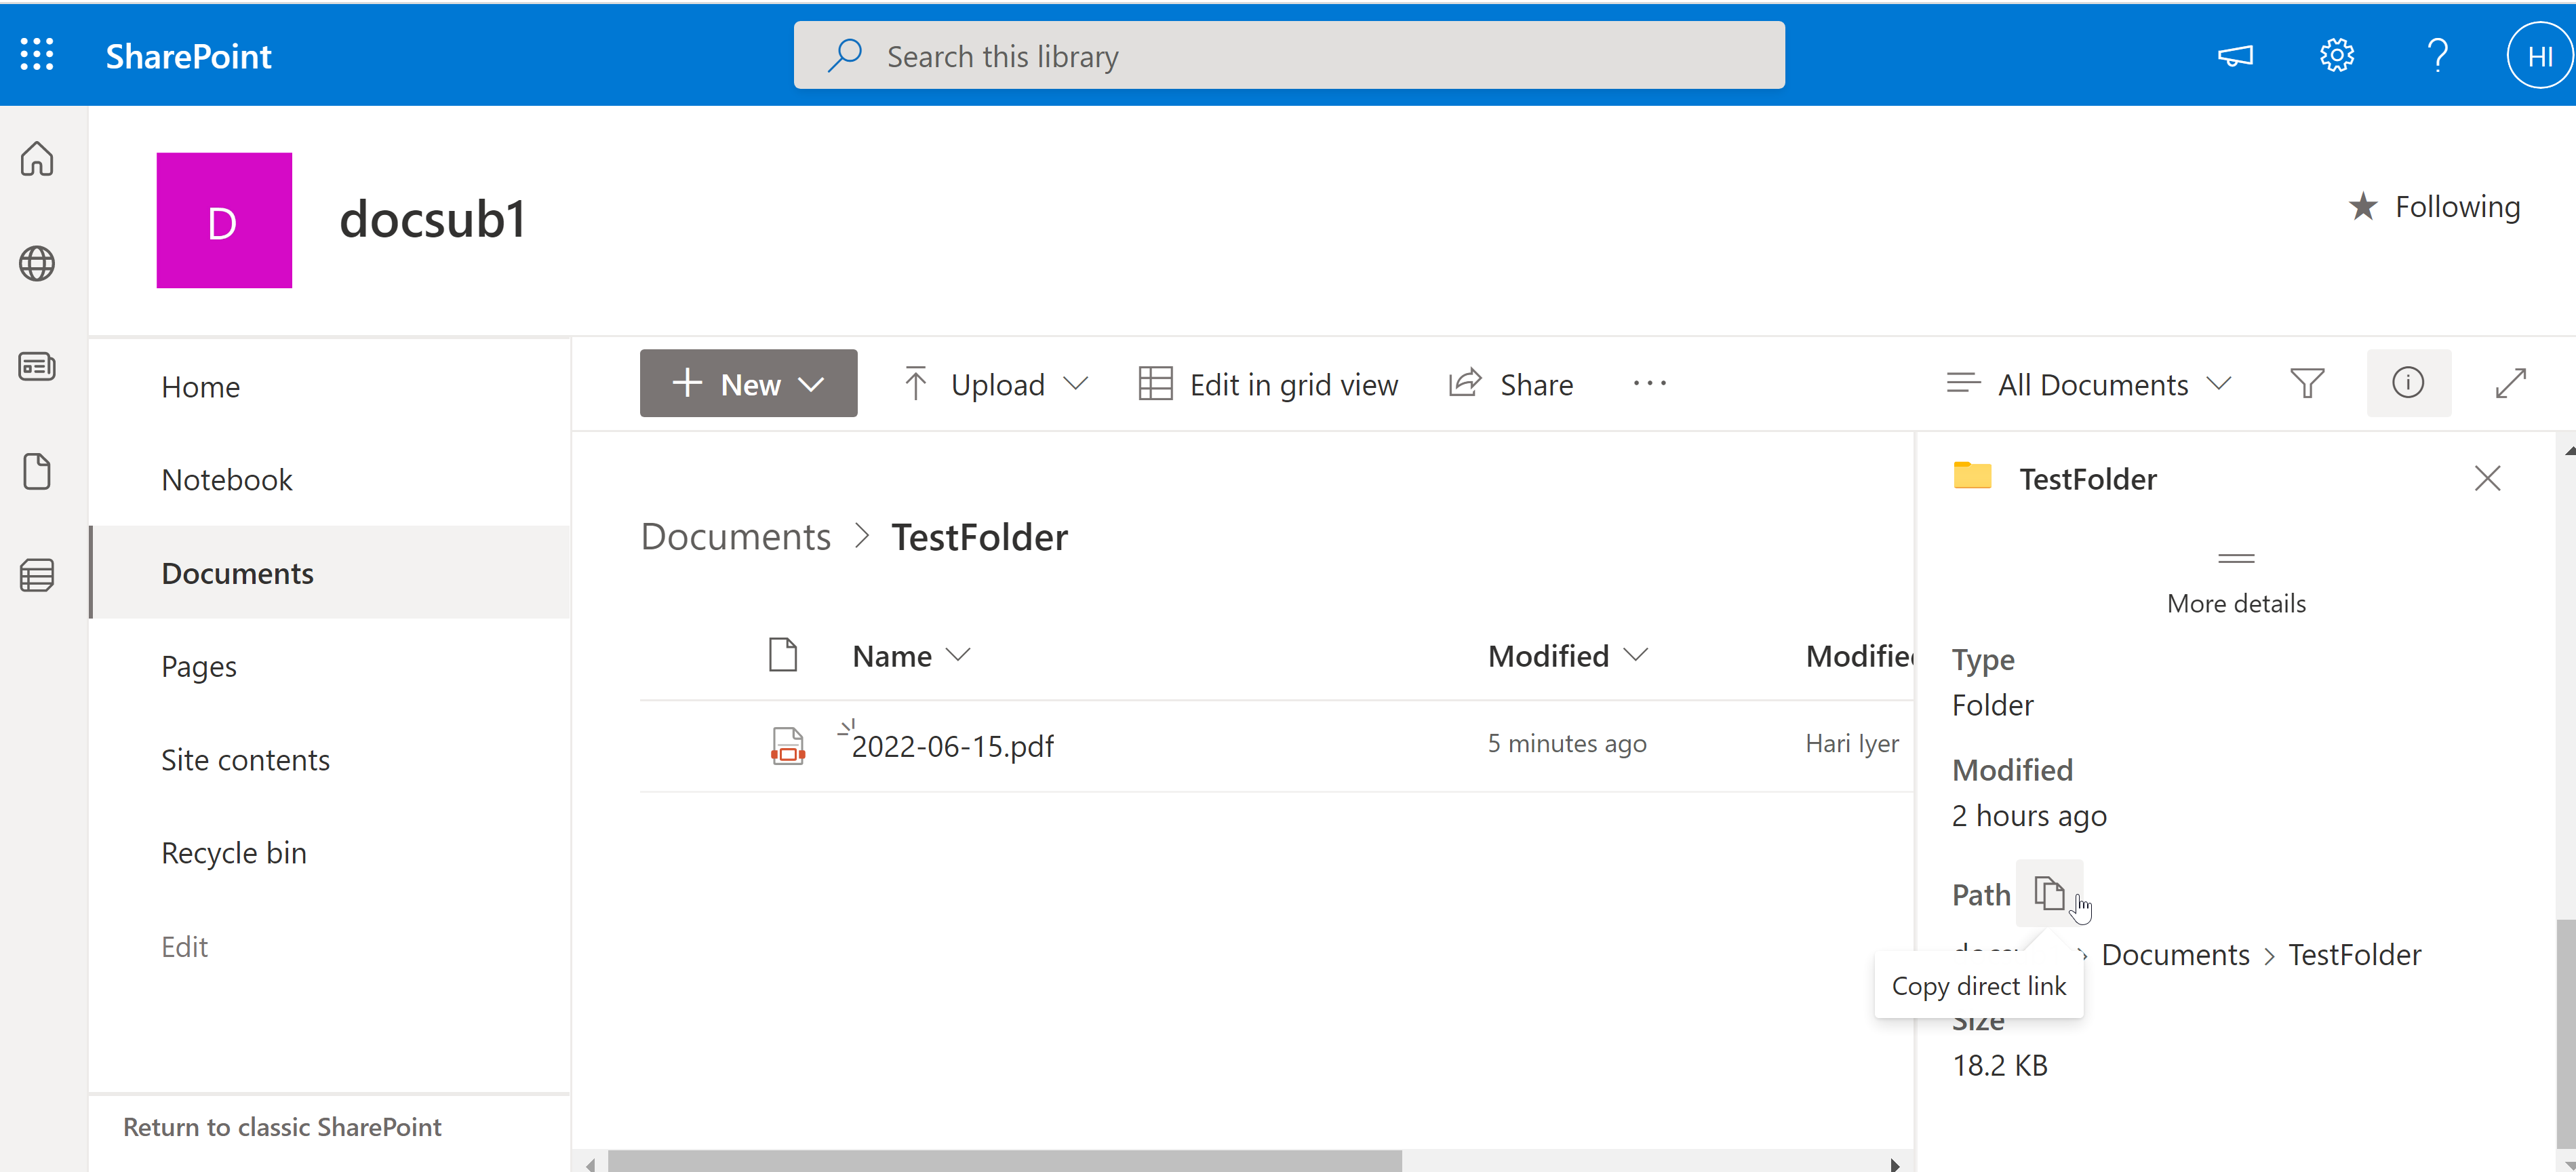
4. Paste the copied path into a text pad. Copy everything after the domain name (in my case, /sites/Docs/docsub1/Shared%20Documents/TestFolder) and replace the encrypted character(s) as needed e.g. /sites/Docs/docsub1/Shared Documents/TestFolder5. Log in to frevvo, edit your form and go to Document actions.
6. If using a subsite, make sure the Site URL includes your subsite, e.g. https://frevvo.sharepoint.com/sites/Docs/docsub1
7. Choose Library, then pick the correct Library from the dropdown. (If you don't automatically see them, try changing "Library" to "List" and back again; this reconnects the SP connector).
8. In the Folder field, enter the path you copied from Step 4.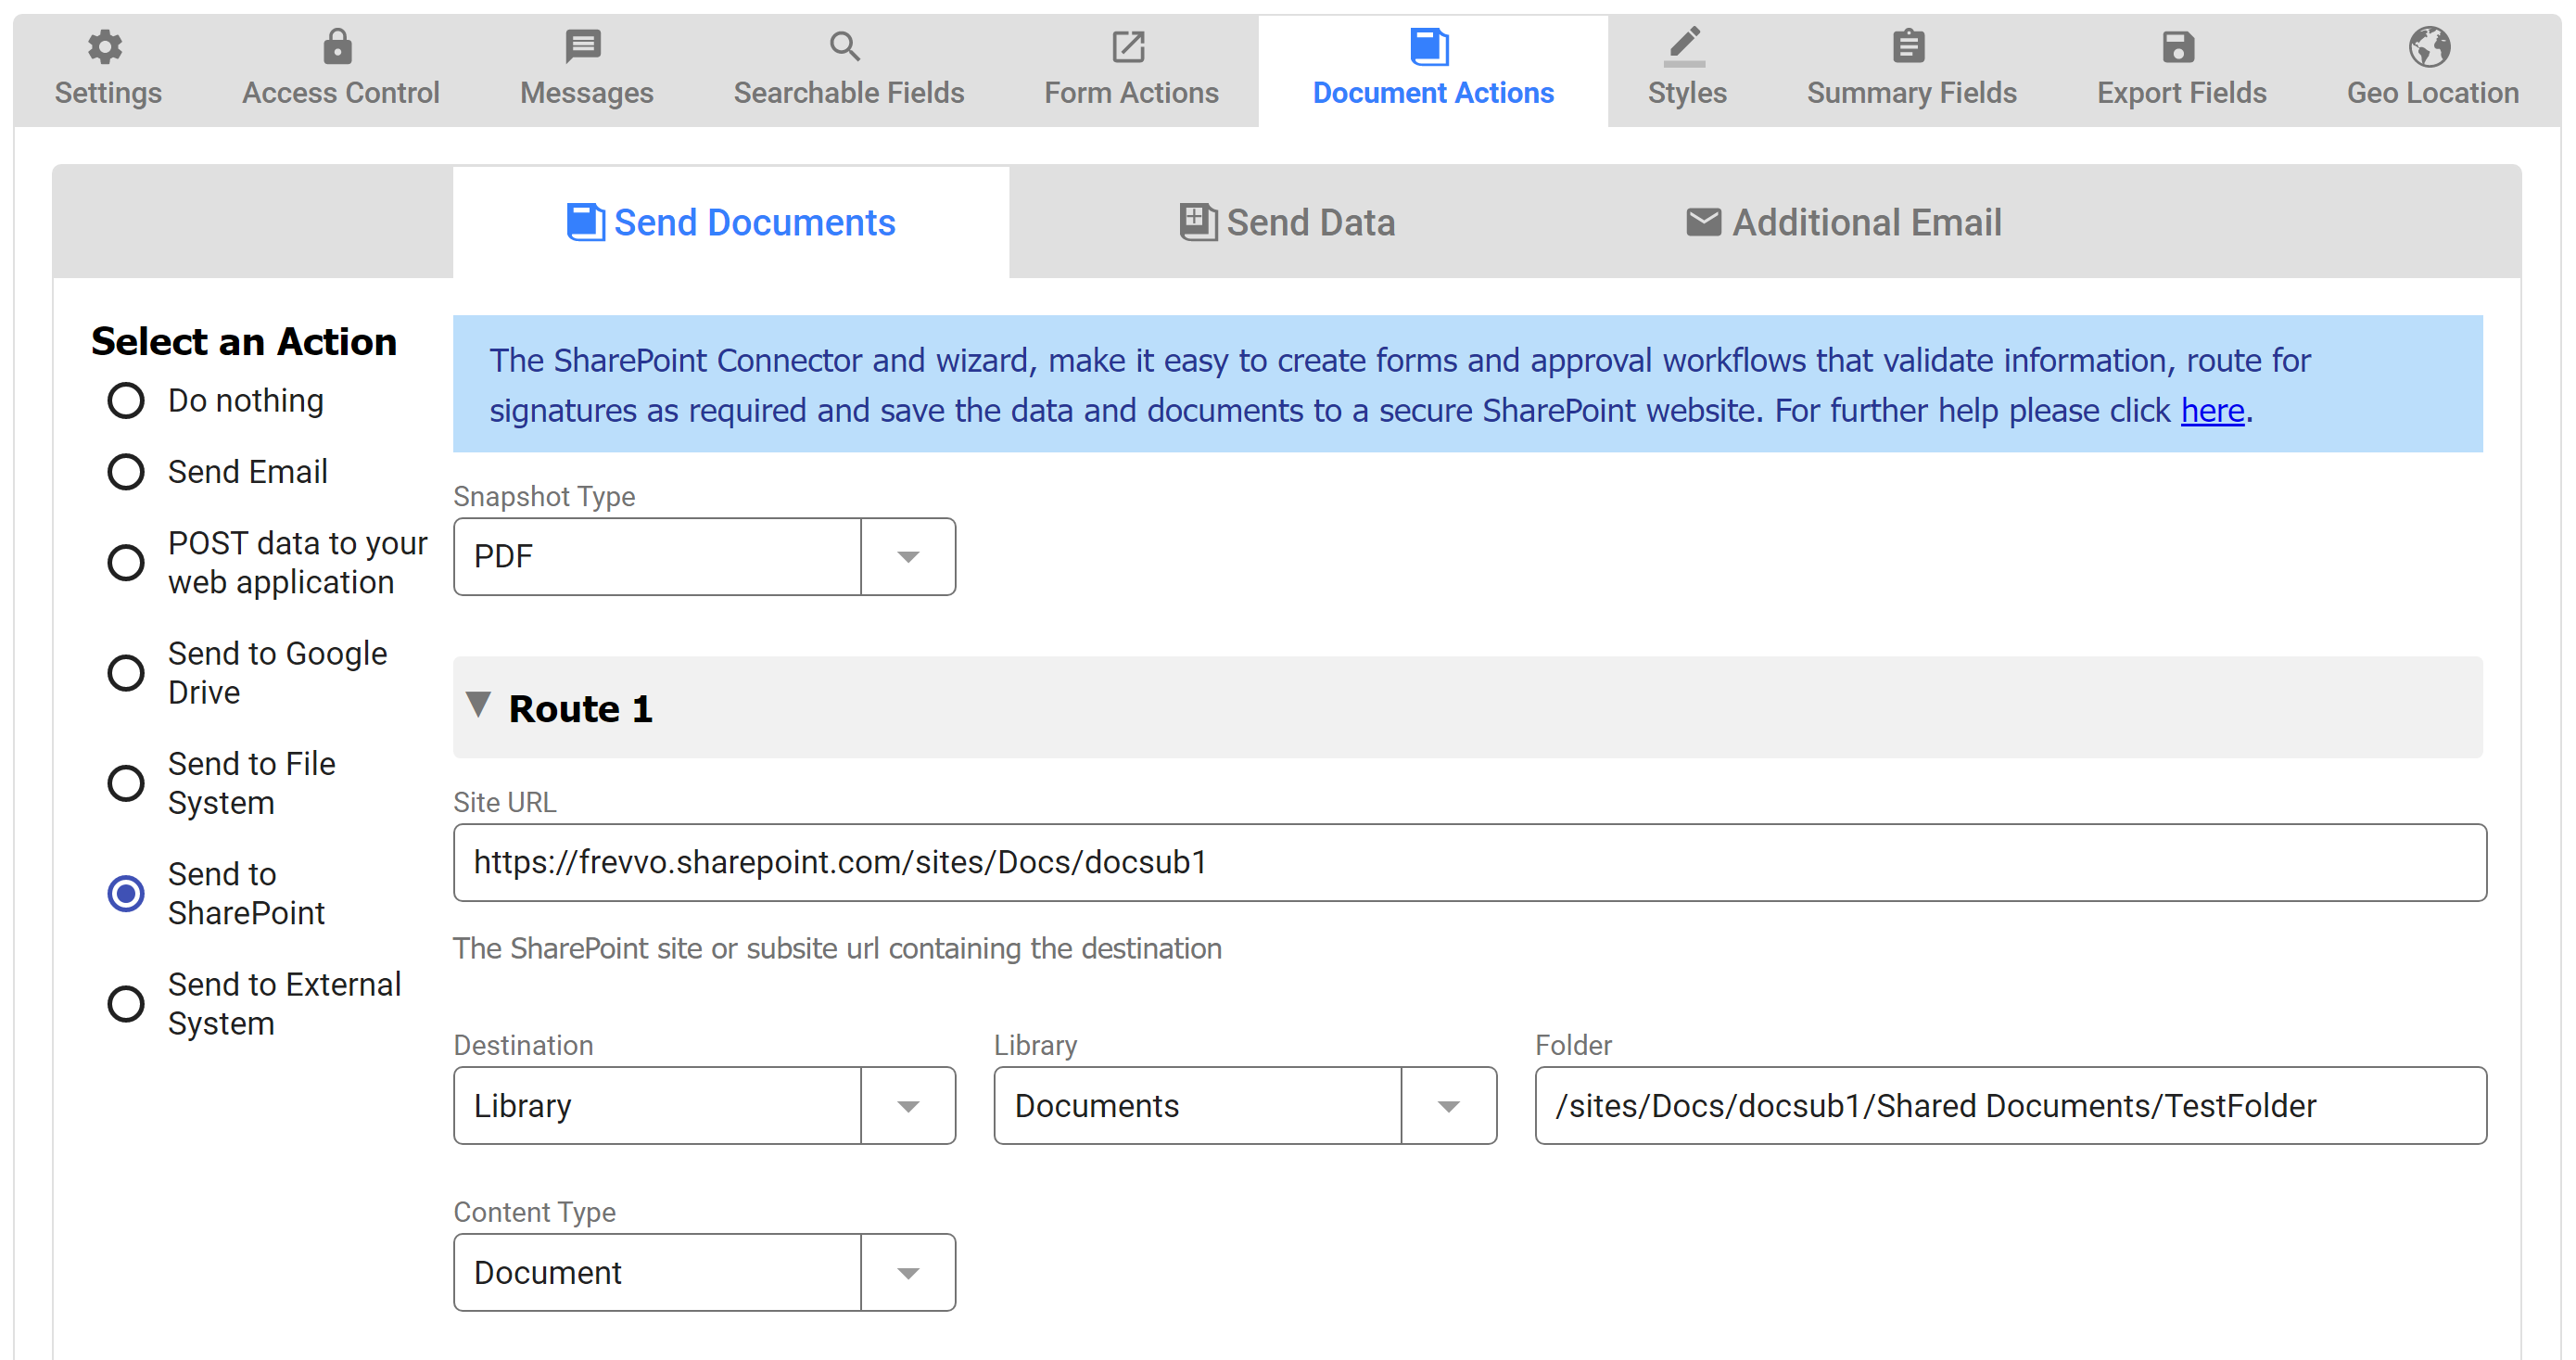
Select a Content Type from the dropdown. The wizard automatically pulls the content type choices from your SharePoint site. The Content Type determines the available metadata column names for mapping. For example, if the destination is a List you would see Item as a choice for the Content Type. This means your submission is saved as a new item on your SharePoint list. Document Libraries show Document as the Content Type.
- Check the types of files to be saved to the selected destination. The choices are:
- Snapshot - include a snapshot of your form/workflow in the format selected in the Send Snapshot field
Data - include the frevvo XML document (only available when sending to a List)
Attachments - include attachments uploaded to your forms/workflows. In Workflows, when Attachments is selected you will see a list of available upload controls and can choose which to include in your Sharepoint submission.
- Gen Forms(PDF) - this checkbox appears if you have mapped PDFs associated with your form/workflow e.g. W-4 and I-9 filled out by a new employee. In Workflows, when Gen Froms(PDF) is selected you will see a list of available PDFs and can choose which to include in your Sharepoint submission.

Workflows only:
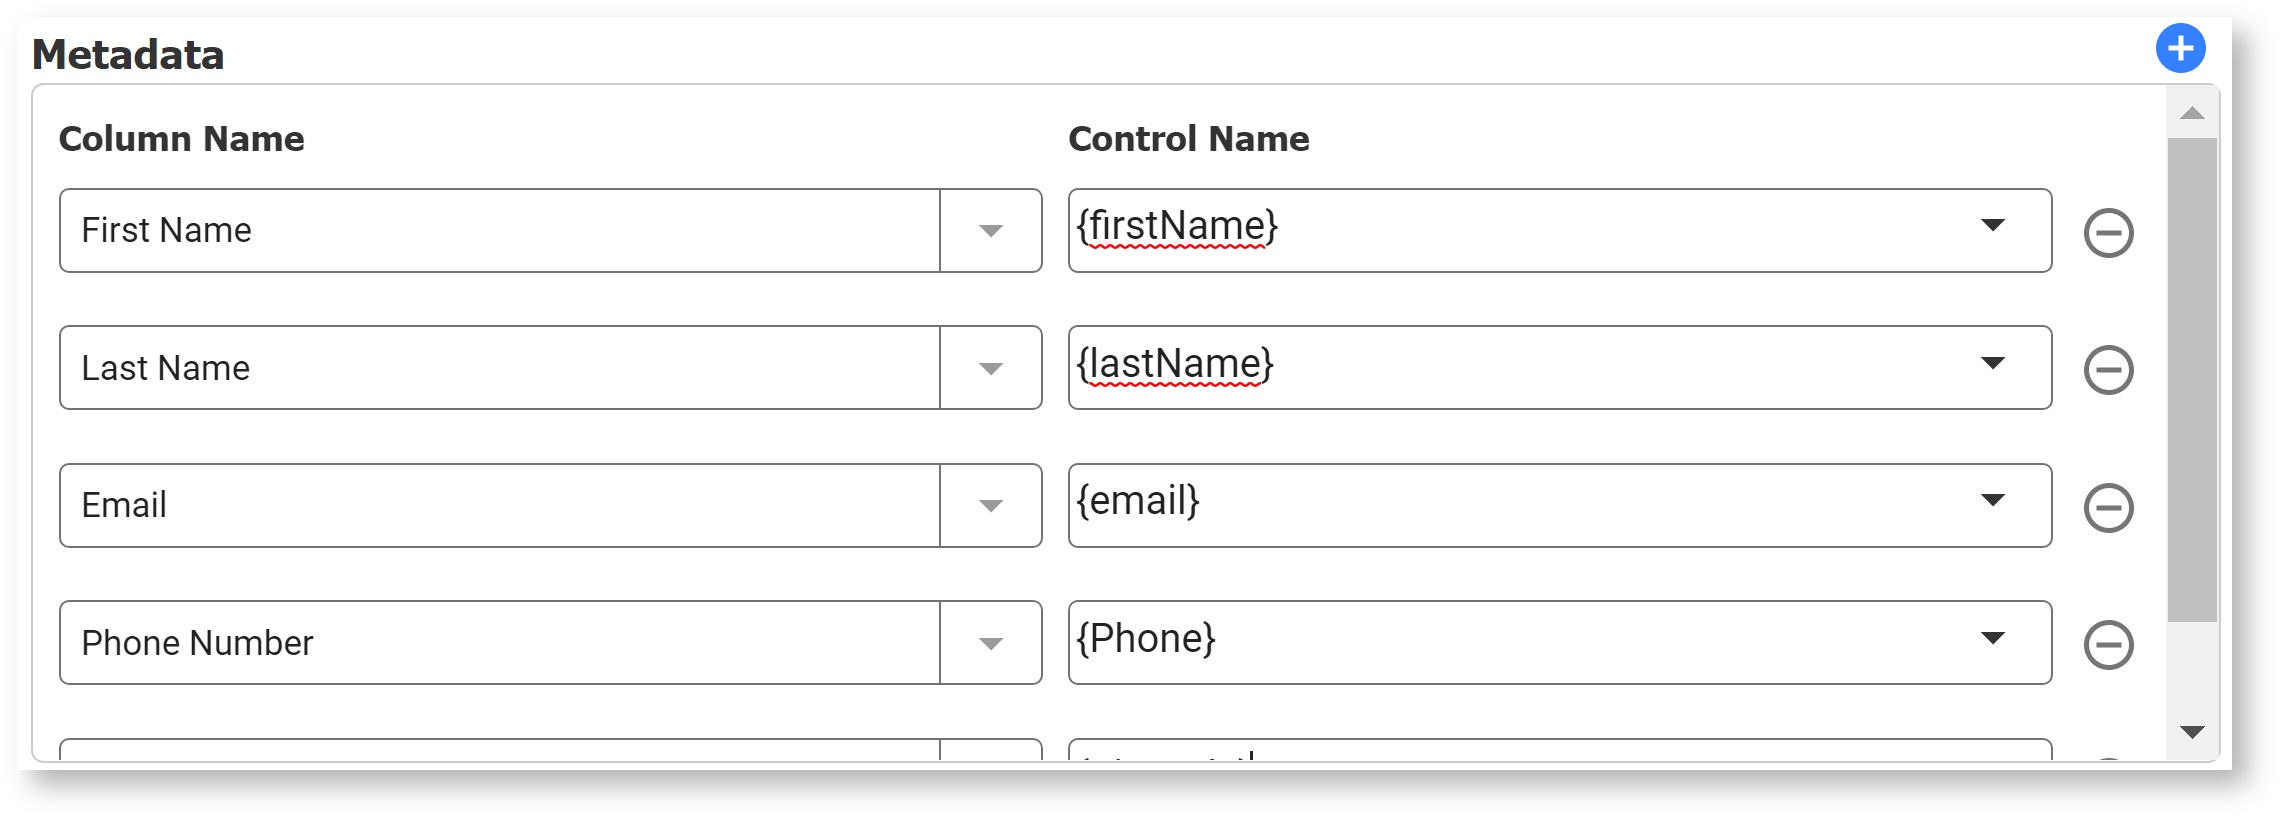
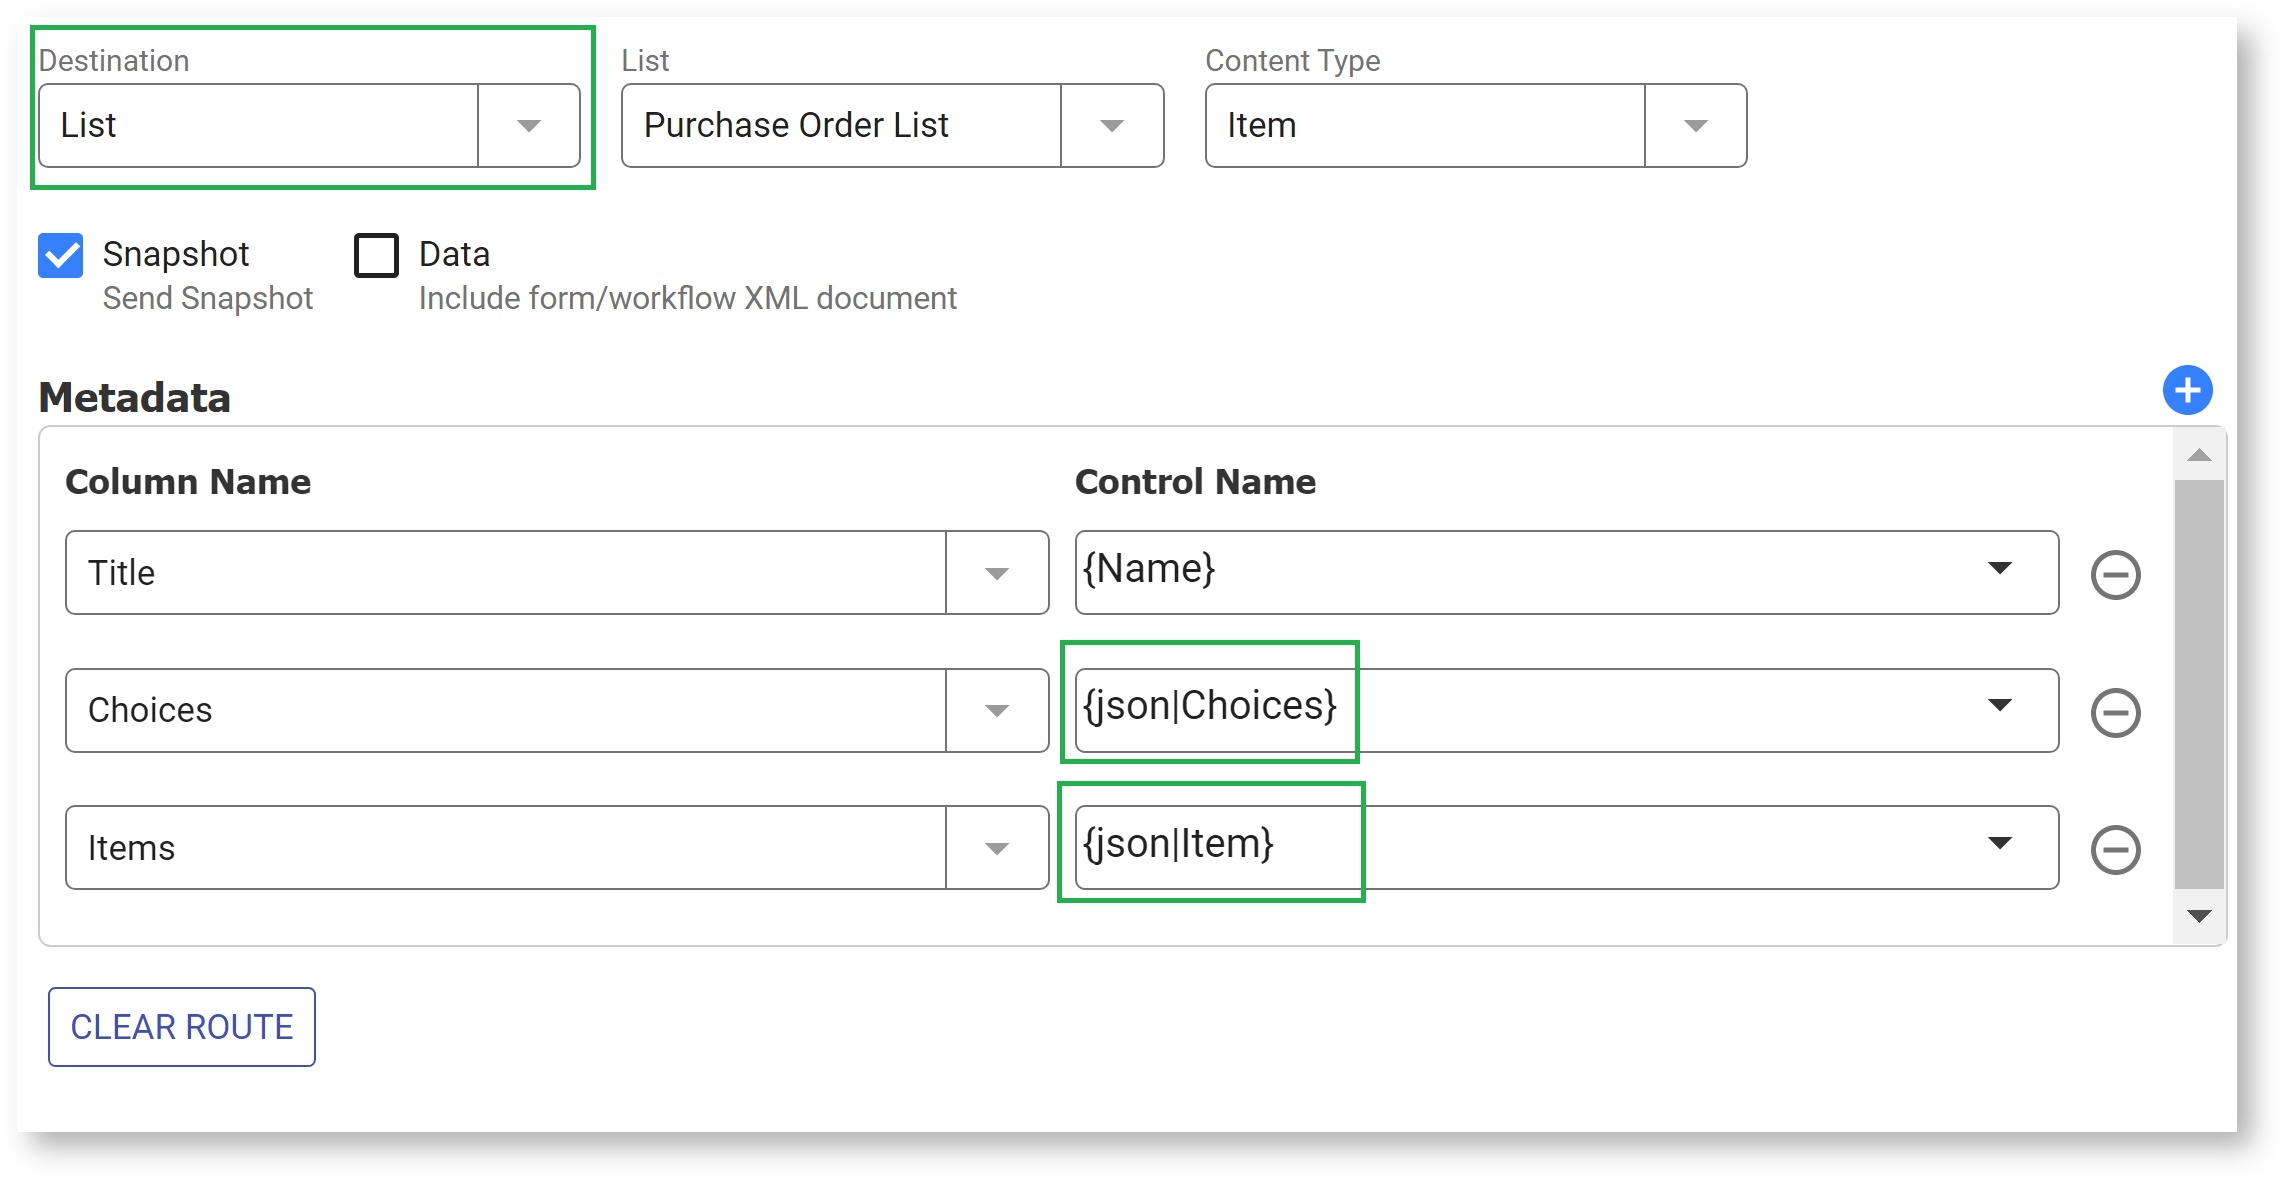
Add Metadata. Map the Control Names in your form/workflow to the column names in your SharePoint destination.
Click the
 blue add icon to add a row.
The wizard will populate the Column Name dropdown with all the columns in the destination
In the Control Name field, you can type static text (not recommended), select one or more control from your form, or a combination of control(s) and static text. To use a control from your form, type an open curly brace and the first few letters of your control name, i.e. {Fir. A list of controls in your form appears. Select the correct one.
When mapping Message controls with templates to the SharePoint Connector, the Save Value property should be checked.
Mapping Multi-Value Controls
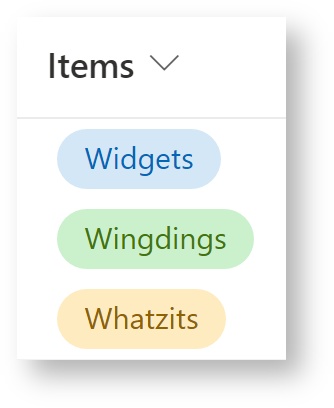
You can map multi-value controls such as controls inside repeats, table columns, and checkboxes to Sharepoint columns. To map to a single value Sharepoint column, you can use any regular separator, such as a comma, in your repeat template syntax. This results in a single, comma-separated string value in the Sharepoint target column. For example, you can map the Items column in a table to a text column named with the syntax {,|Items}. This results in a single value sent to the target Sharepoint column as a comma-separated string, e.g "Widgets, Wingdings, Whatzits".
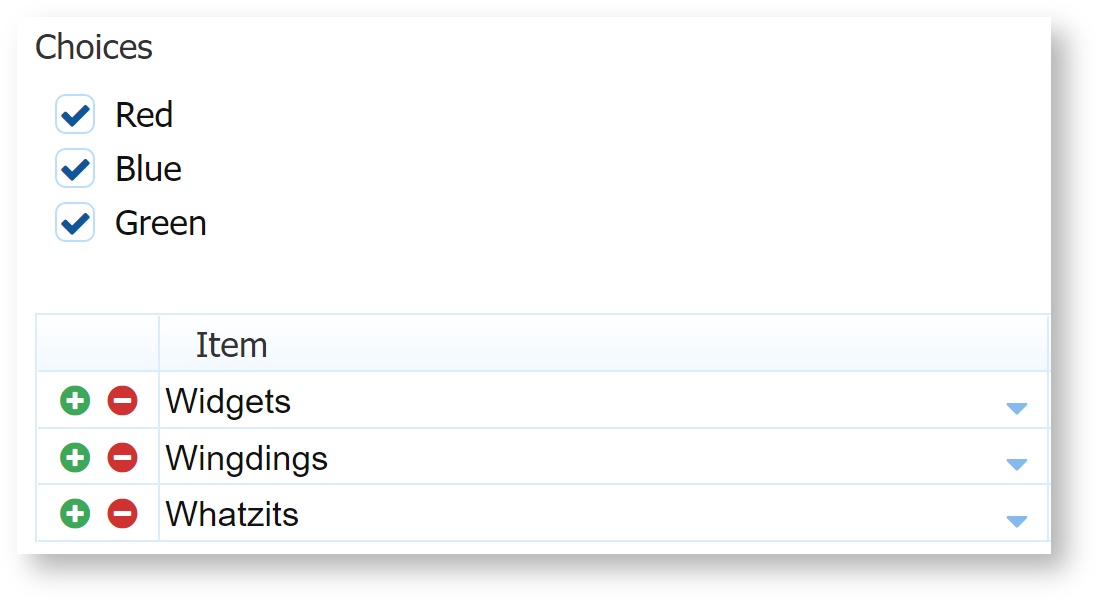
You can also map a repeat control to a multi-value (checkbox) Choice column. In this case, you must use a special syntax to send separate values that populate the Sharepoint checkboxes. For a Sharepoint list, use the repeat separator 'json'.
List: {json|Items}
For a Sharepoint library, use the repeat separator ';#'.
Library: {;#|Items}

These separators send the control values in an array, which populates the checkboxes in the target Choice column.
Clear Route
If you configure a second Route, clicking the Clear Route button removes the information for Route 2 only.![]()
Save and Test
Click the![]() save and test icon to save the form/workflow and bring up Test mode popup.
save and test icon to save the form/workflow and bring up Test mode popup.
Special Characters in Filenames
If you want to customize the name of the PDF Snapshot saved to SharePoint, make sure you have Save PDF checked. An optional field that is used to name the PDFs displays. You can use templates in this field. For example, if you have a control called EmployeeName in your form, you can type {EmployeeName} into the PDF Name field and the PDF's saved on your SharePoint site will be named {EmployeeName}.pdf.
If you leave the PDF Name property blank, frevvo uses the Form/Workflow Name as the pdf file name.
- If the Form/Workflow Name contains special characters, the PDF will not post to SharePoint generating an HTTP 403 status error. To avoid any issues, name your form/workflows using characters that are suitable for filenames and explicitly set the PDF name in the form/workflow using the same standard. Following the POSIX filename standard (A–Z a–z 0–9 . _ - ) will ensure it works.
Special characters in filenames or folder names will cause the submission to be flagged with an error in the frevvo submission table. We recommend POSIX naming standards as there are some special characters that are not supported by the connector.
< (less than)
> (greater than)
: (colon - sometimes works, but is actually NTFS Alternate Data Streams)
" (double quote)
/ (forward slash)
\ (backslash)
| (vertical bar or pipe)
? (question mark)
* (asterisk)
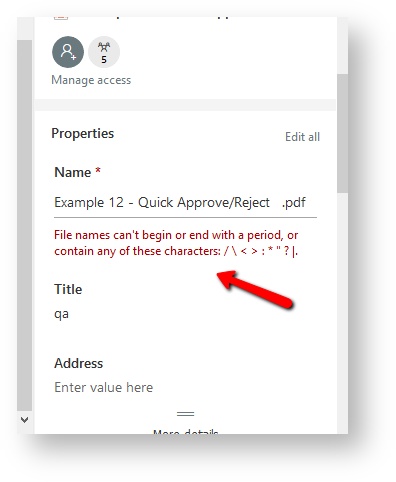
This can happen if you do not name the PDF file, and it defaults to your form/workflow name, if that name has special characters.
You cannot use templates (i.e. {EmployeeName} in SharePoint Folder names.
Check Submissions on SharePoint
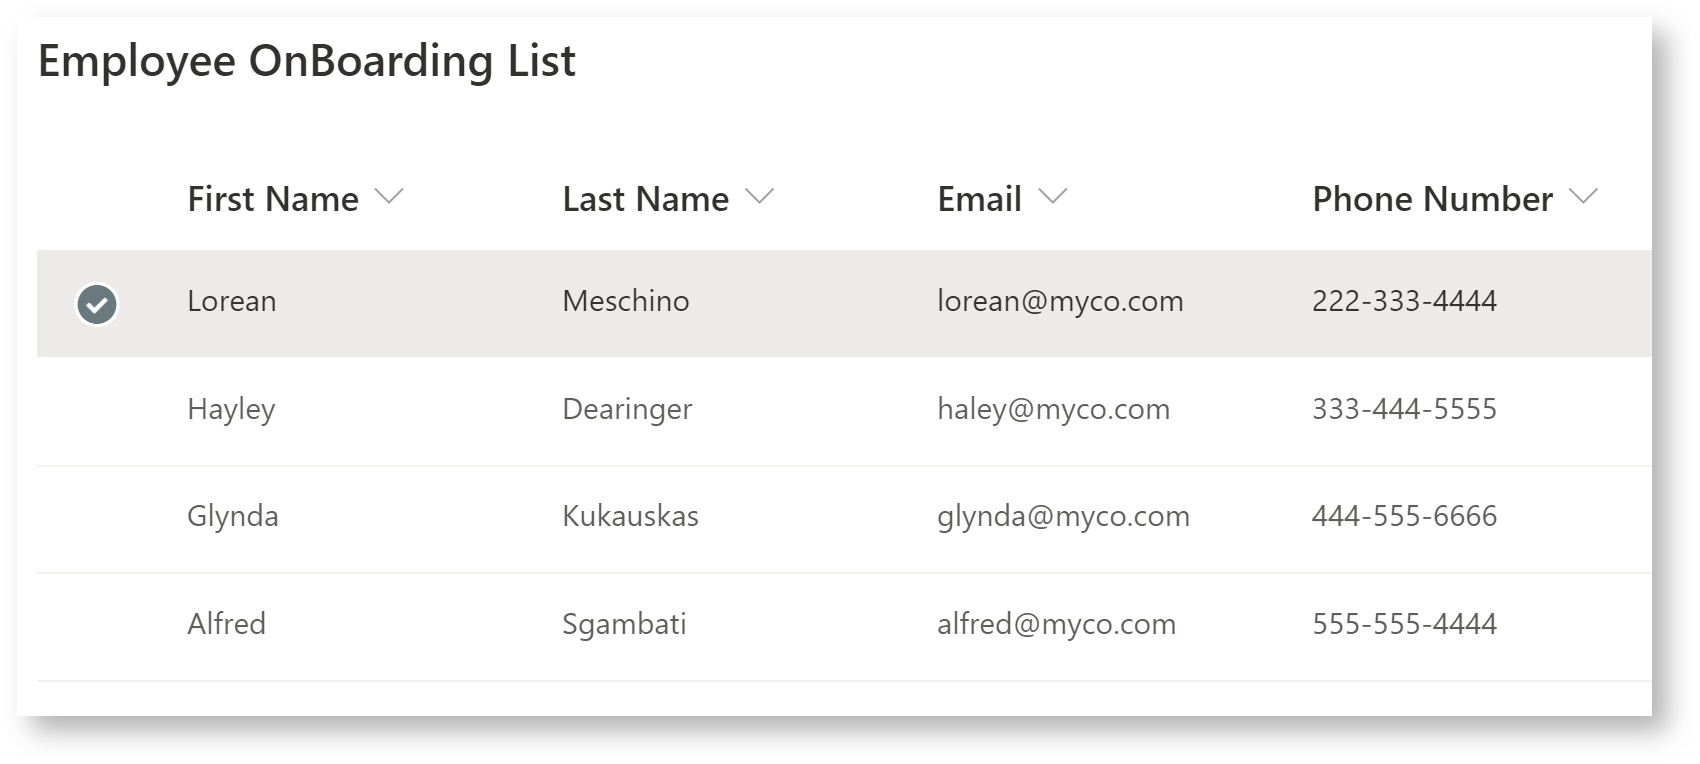
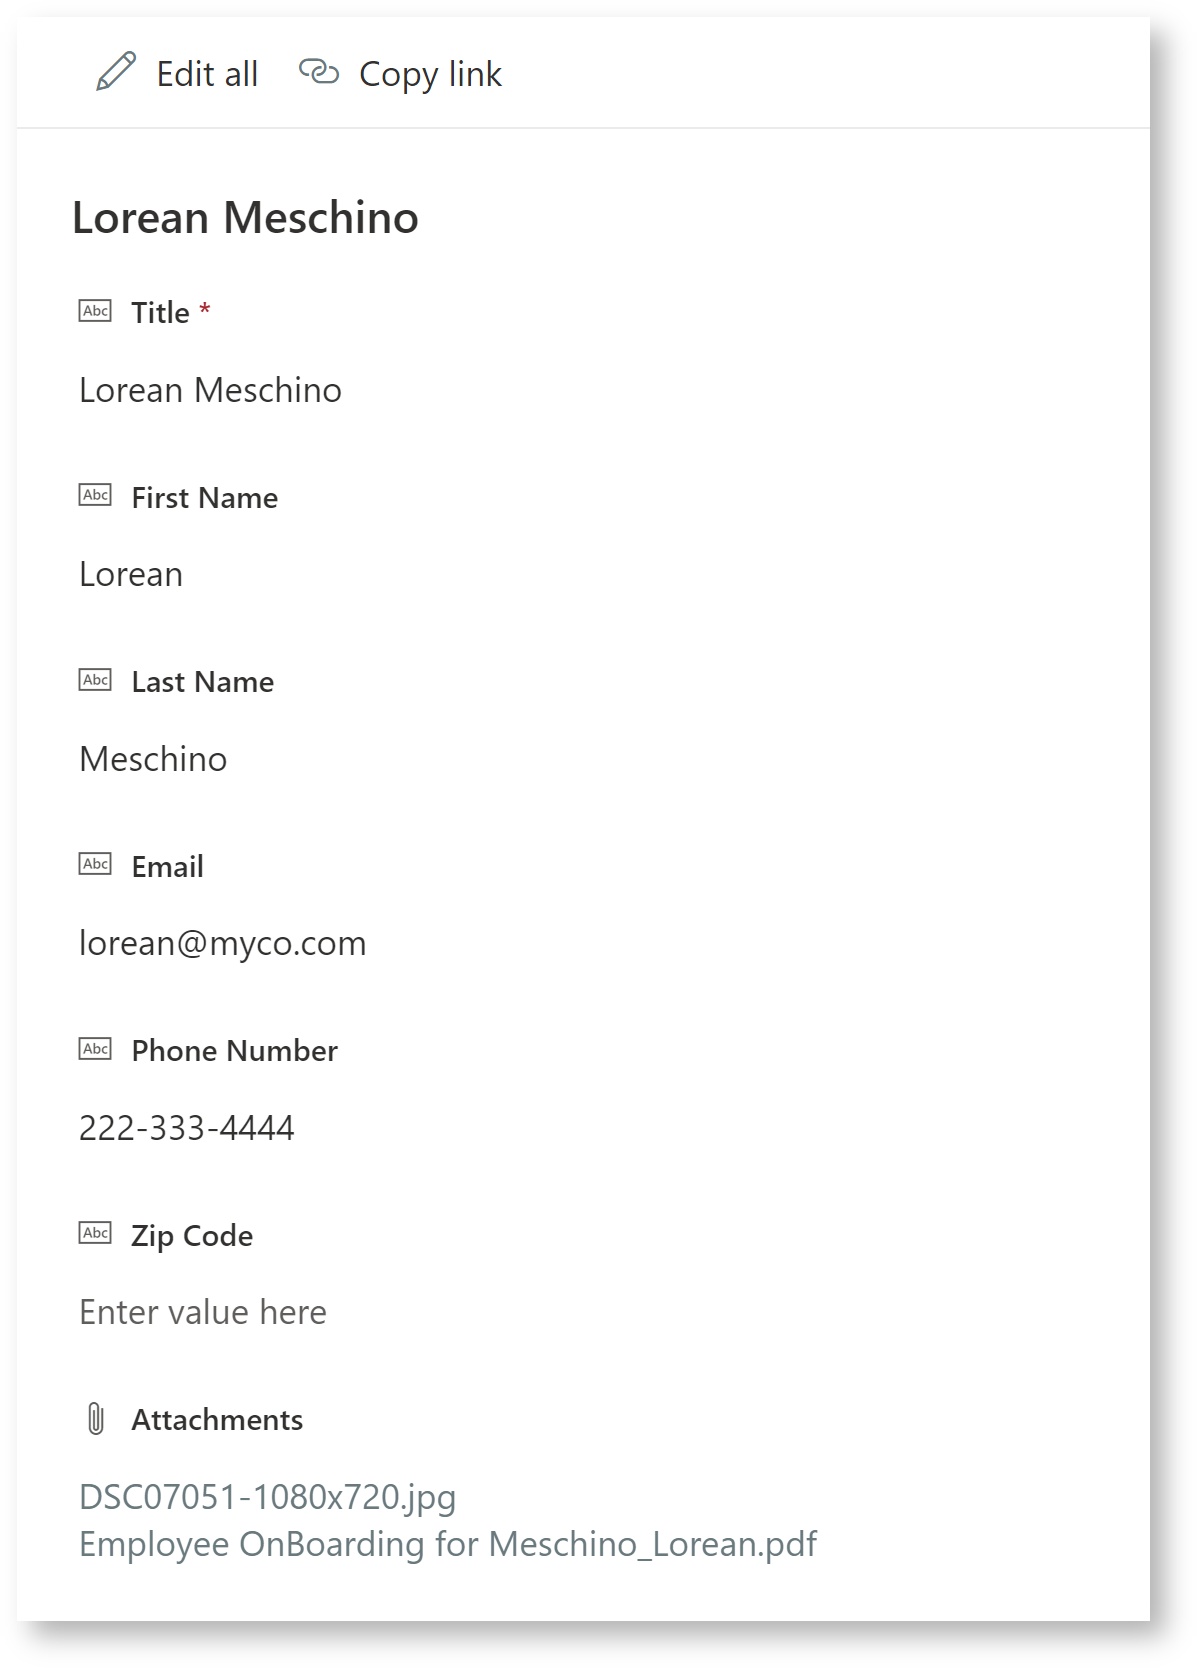
When the form is submitted or the workflow is completed, submission data, metadata, and attachments are uploaded to the specified destination in your SharePoint account. To verify your stored submissions on your SharePoint website:
- Test your form/workflow by filling in data, adding attachments, and submitting it.
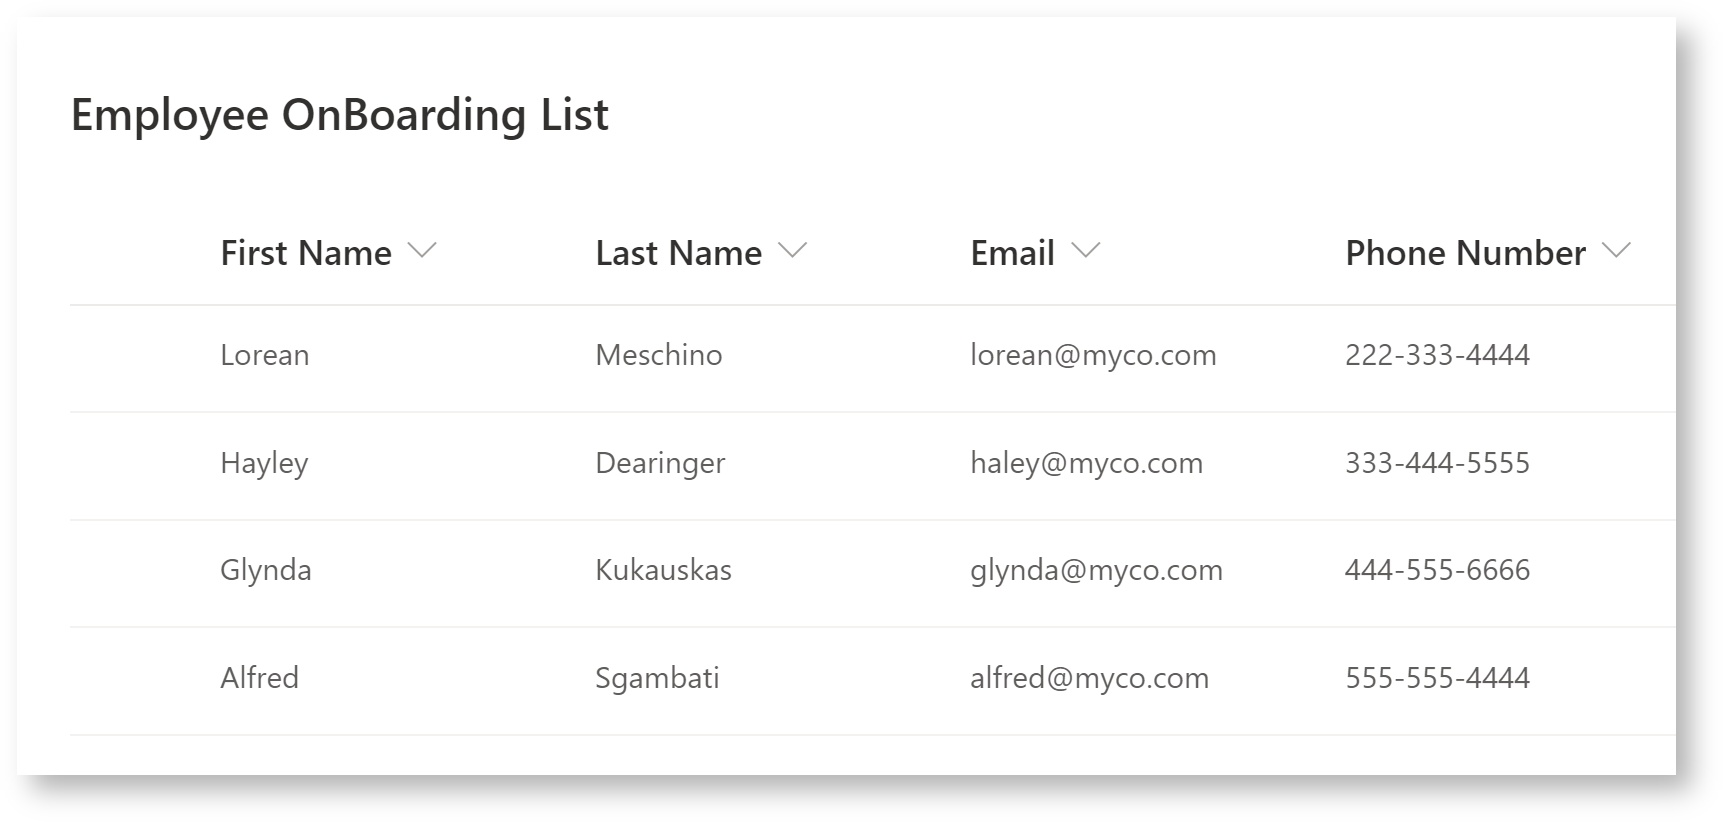
- Login to your SharePoint account and navigate to the specified destination. The images show submissions saved to a SharePoint list and individual submission data and attachments.
Using the SharePoint Connector in an Azure SAML Security Manager tenant
At least one designer user that is going to be connecting forms/workflows to SharePoint with the Azure SM must also be a SharePoint user with the correct privileges to provide consent if your tenant is configured with the Azure SAML Security Manager.
Troubleshooting
Some common issues with solutions are listed below.
Doc Post Failure
If the submission doesn't reach your SharePoint website - if frevvo does not receive a response back from SharePoint with a status code of 200, you can find information about the error from the frevvo submission table.

All tenant admin(s) in your tenant or workflow admin(s) configured for specific workflows will receive a Doc Post Failure notification email to alert them that an issue has occurred. The <server-name> will be provided in the email subject. Check for some of these common issues:
- Special characters in a file name
- Incorrect login information
- Controls used in metadata changed or removed
- SharePoint folder name or metadata column changes
An error in the logs like "Value does not fall within the expected range." suggests you have not set the Content Type. See Set Up Routes for details.
An HTTP 500 error with the error "The list item was saved, but attachments could not be saved because the attachments feature is currently unavailable for this list" in the SharePoint connector logs indicates you are trying to send attachments to a List that does not have attachments enabled. Please enable attachments on the list.
Max file size
The maximum size for all frevvo connectors is set to unlimited. Any size file can be uploaded to frevvo and posted to SharePoint.
Determine the version of the SharePoint Connector you are using:
To determine the version of the SharePoint connector you are using:
Browse http://<your server:port>/sharepoint/info - the version information is returned as shown in the image.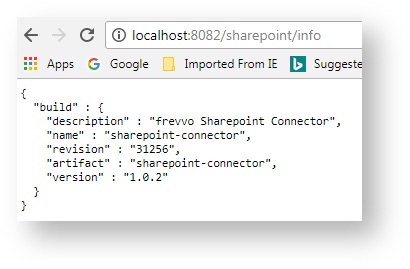
Refresh Token Expired
If your users see an error like "org.springframework.security.oauth2.client.resource.UserRedirectRequiredException: A redirect is required to get the user's approval" when accessing or trying to submit a form, the cause is that your SharePoint Token has expired. The user who owns the SharePoint Account (usually the designer) will need to log in and provide consent to refresh the token. You can learn more in this Microsoft Documentation. Currently, frevvo does not provide a way to generate a new refresh token automatically. This feature may be added in a future release. However, until then the SharePoint account user will have to provide consent for a fresh token every 6 months.