Build a Workflow
- Megan Ellis
This guide takes you through step-by-step instructions to create a Leave Approval Workflow. This tutorial uses the form you created in the Build a Form tutorial.
We strongly recommend that you jump directly to the Workflow Tutorial if you are already comfortable using the Workflow Designer. The Workflow Tutorial teaches you important workflow design patterns and increases your skills using the many workflow designer features.
A common example of a workflow is a Leave Approval workflow, where an employee requests vacation and the manager must either approve it, reject it, or send it back to the employee for corrections. Typically, the process is paper or email-based. The employee fills out a paper form and hands it to the manager for a signature. The form is then faxed or delivered to HR where it is saved in a folder or scanned into the HR or document management system.
Using frevvo, you can automate this workflow so that it is completely electronic and paperless. Further, you can integrate the workflow with Google Apps, a document management system, your database, or a custom business system so that the leave approvals are stored online.
.png?version=1&modificationDate=1582924379000&cacheVersion=1&api=v2&width=350&height=475)
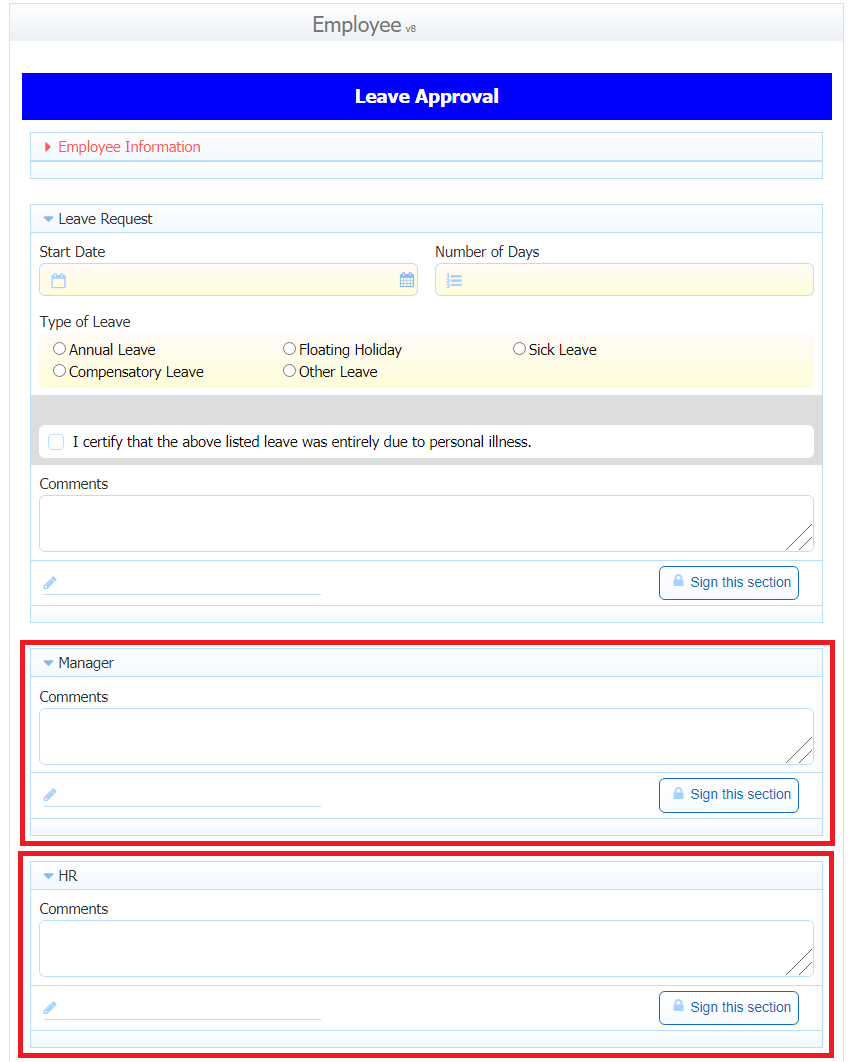
The steps for the Leave Approval workflow are as shown in the figure:
- The employee goes to a web page that embeds the workflow. frevvo makes this very easy to do.
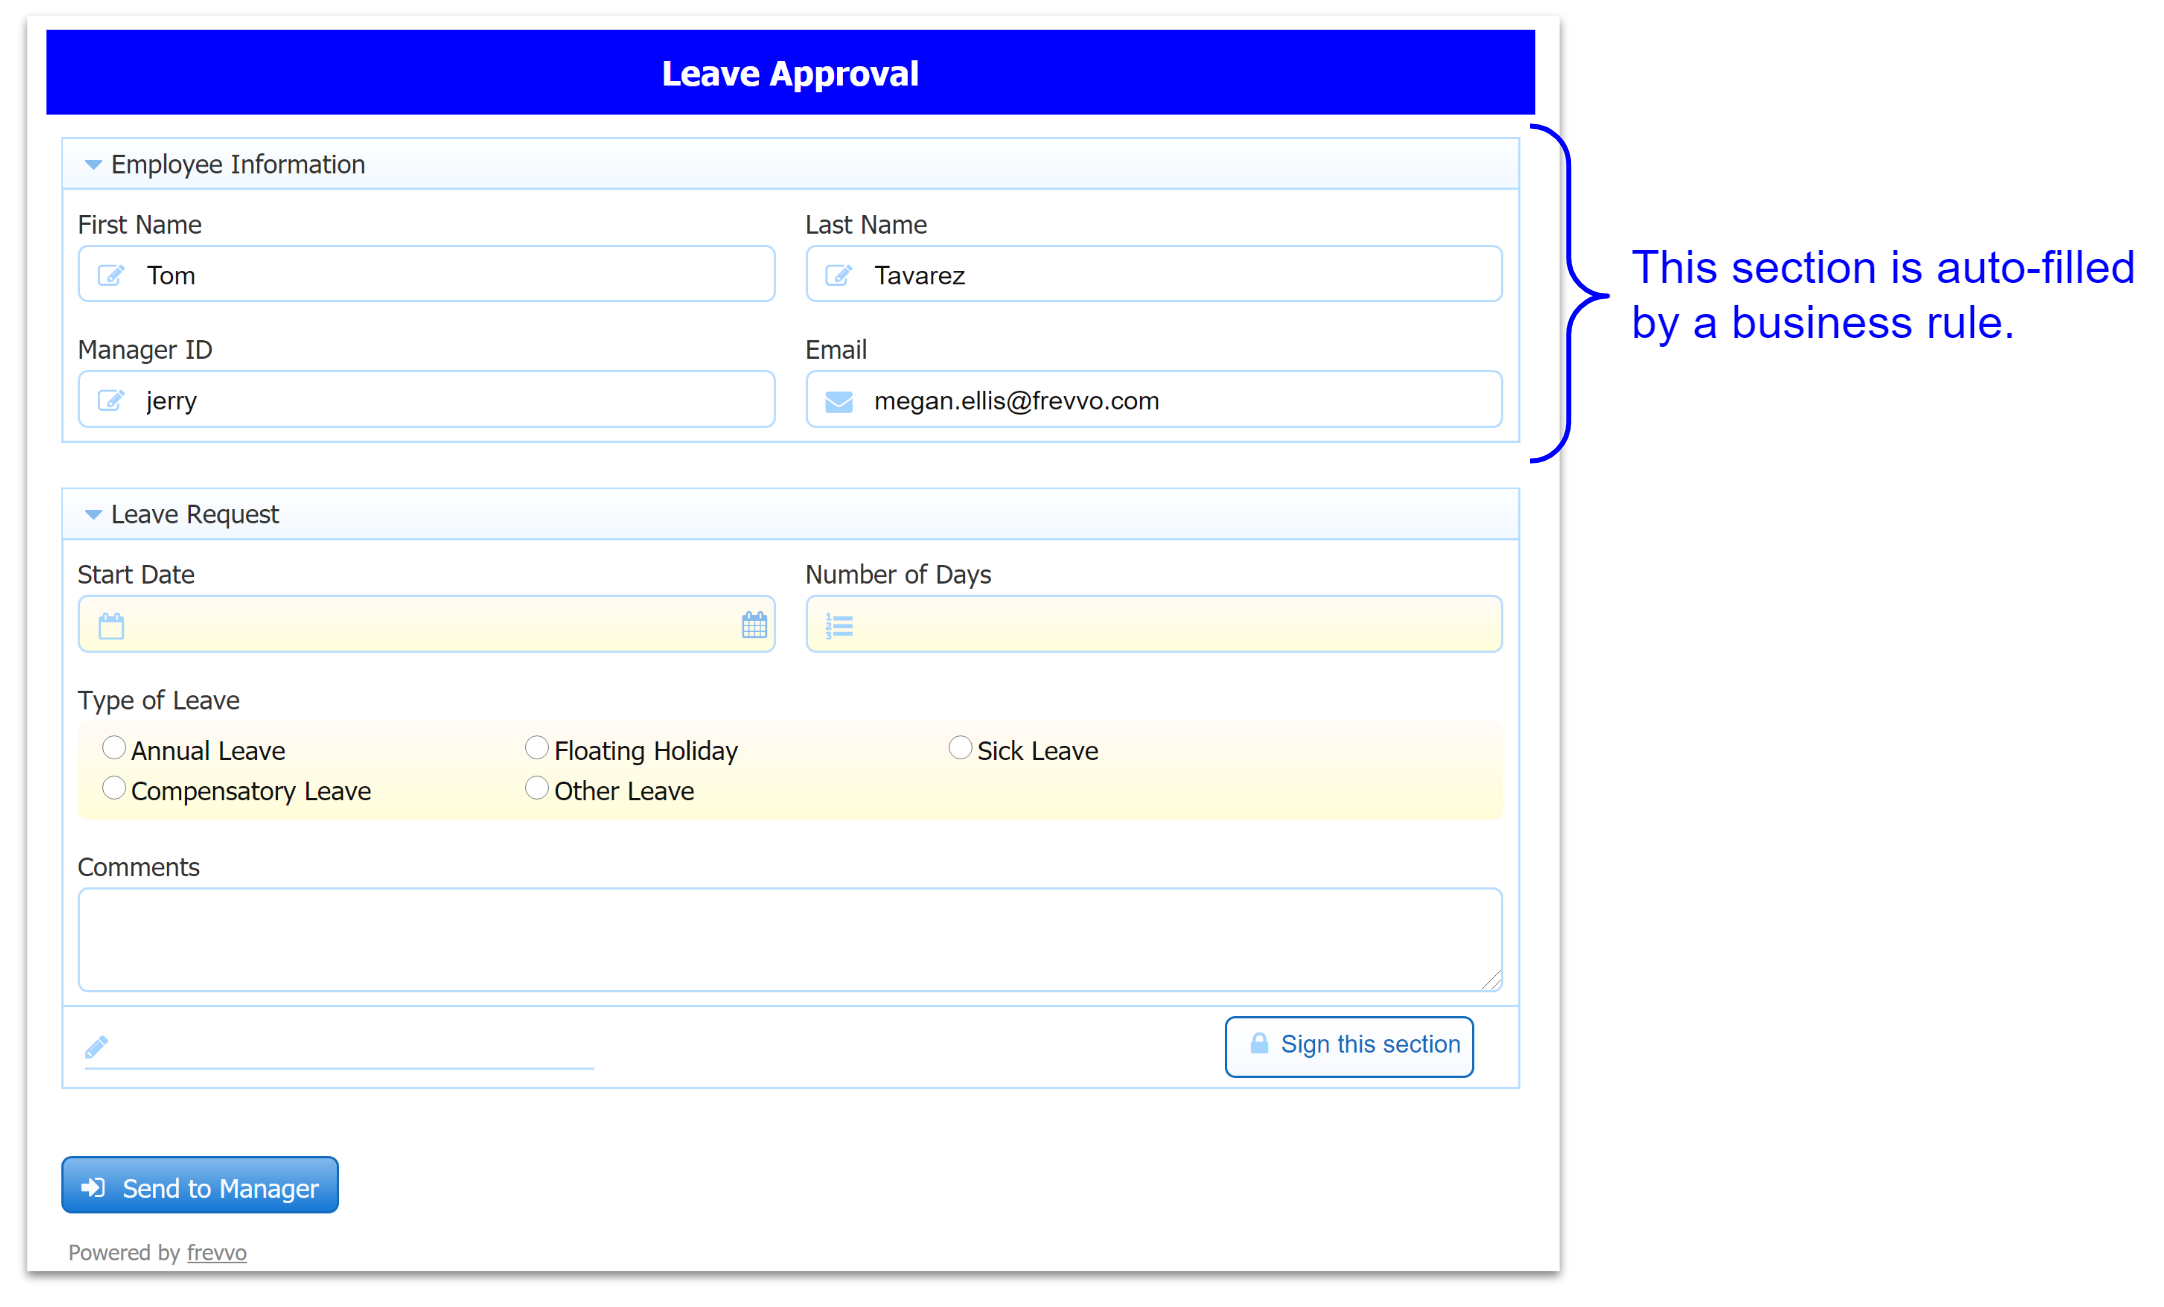
- The form is configured so that the employee only sees the relevant portion of the form, i.e. the employee does not see the Manager Approval section or the HR Review section. The employee information and manager ID are automatically populated by frevvo.
- The employee fills in the form, digitally signs it, and clicks a Submit Request button.
- frevvo puts the leave approval request on the specific manager's task list, [optionally] notifies the Manager by email, and displays a confirmation message to the employee.
- The manager logs in and visits a web page that displays an electronic task list. All pending leave approval requests will be displayed in the task list.
- The manager clicks to perform an approval. The Manager-specific portions of the form are now visible. The data entered by the employee is automatically populated for the manager to review.
- If the manager requires corrections, the form can be sent back to the employee to make changes.
- Once approved, the manager digitally signs the form and clicks Submit Request.
- In the final step, the workflow is sent to the HR department to update records and/or make comments.
frevvo On Premise Only
If you are using frevvo On Premise software installed locally on your own machine, then the 1st step is to log in as the admin user and create your 1st tenant. Follow the steps below:
- Log in as admin@d and type in the default password: admin.
Click Manage Tenants.

- Click the
 icon to create a new tenant
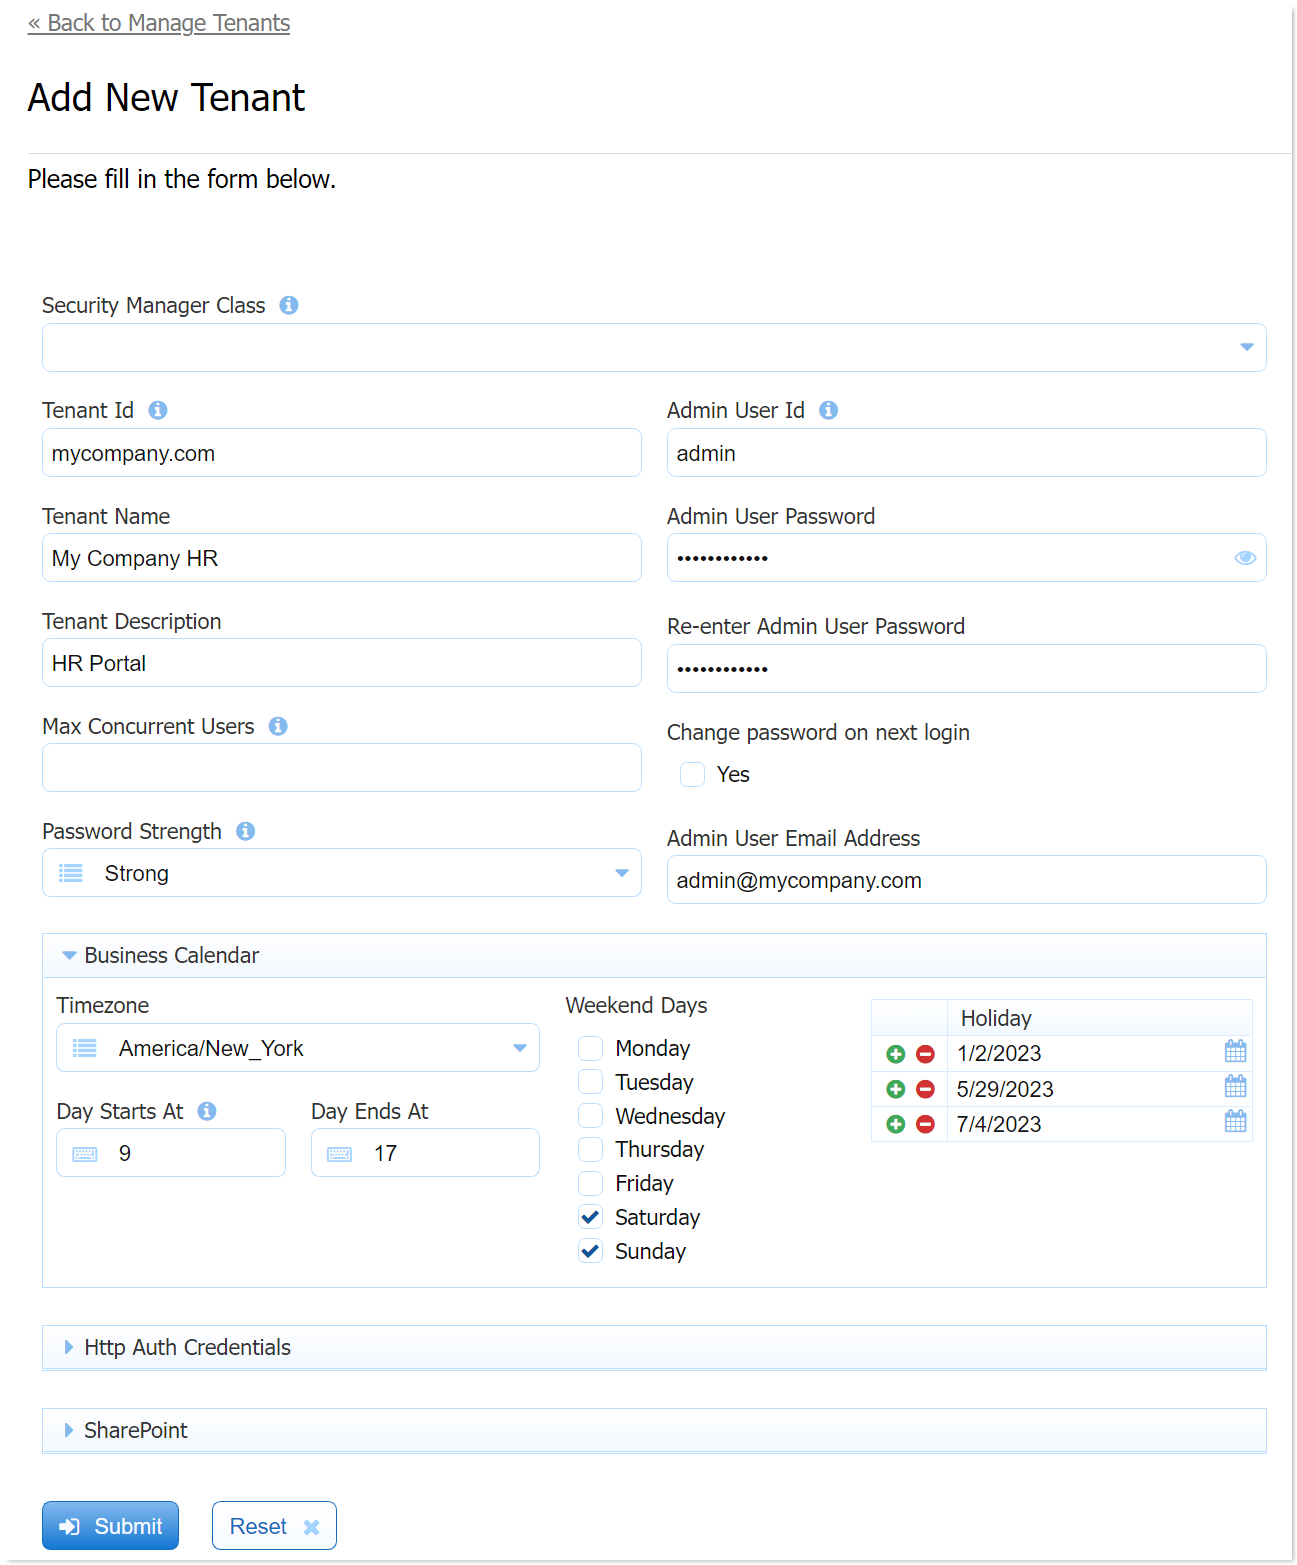
- Leave the Max Concurrent Users and the Security Manager Class blank.
- Fill in the rest of the fields for your tenant. Click Submit.
frevvo On Premise and Online
The next steps are for both frevvo On Premise and Online tenant users:
- Log in as the tenant admin user. An example of the tenant admin user id is admin@mycompany.
Each tenant has its own admin user that has permission to perform management functions for the tenant such as creating new users and roles. For frevvo On Premise software users, it is important to note the distinction between the frevvo admin user and the tenant admin user. Next, we need to create a few users and roles in this tenant that we'll use in our Leave Approval workflow.
Setup users and roles
This is a one-time setup that will have to be performed by an administrator.
We will need to create three roles for the Leave Approval workflow:
.png?version=1&modificationDate=1582924380000&cacheVersion=1&api=v2&width=374&height=250)
Click Manage Roles. Notice that the role frevvo.designer already exist by default and cannot be deleted.
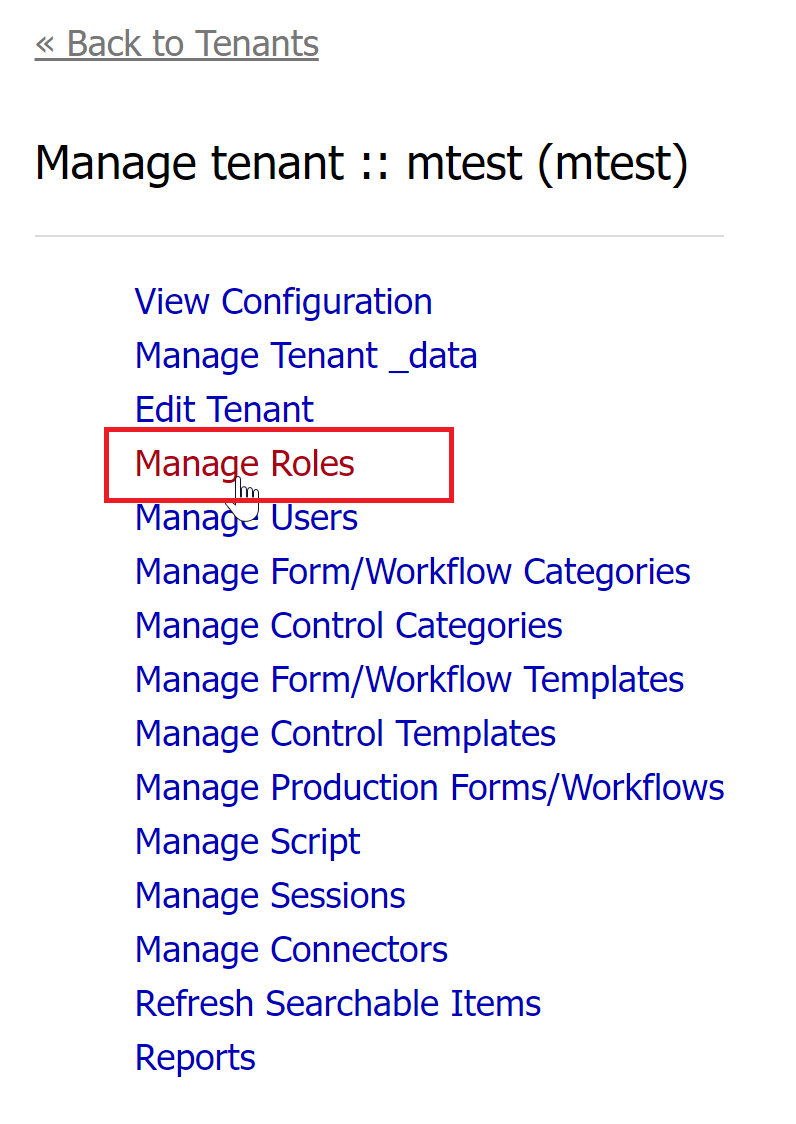
Click the
 icon to create a new role. Add the role name "Employee" and click Submit.
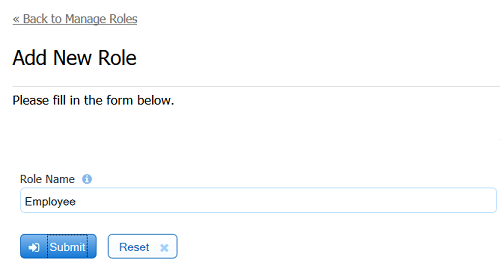
Repeat step 2 to add the "Manager" and "HR" roles.
- Click the Back to Manage Tenant link.
Click Manage Users. Notice that the user admin already exists by default and cannot be deleted.
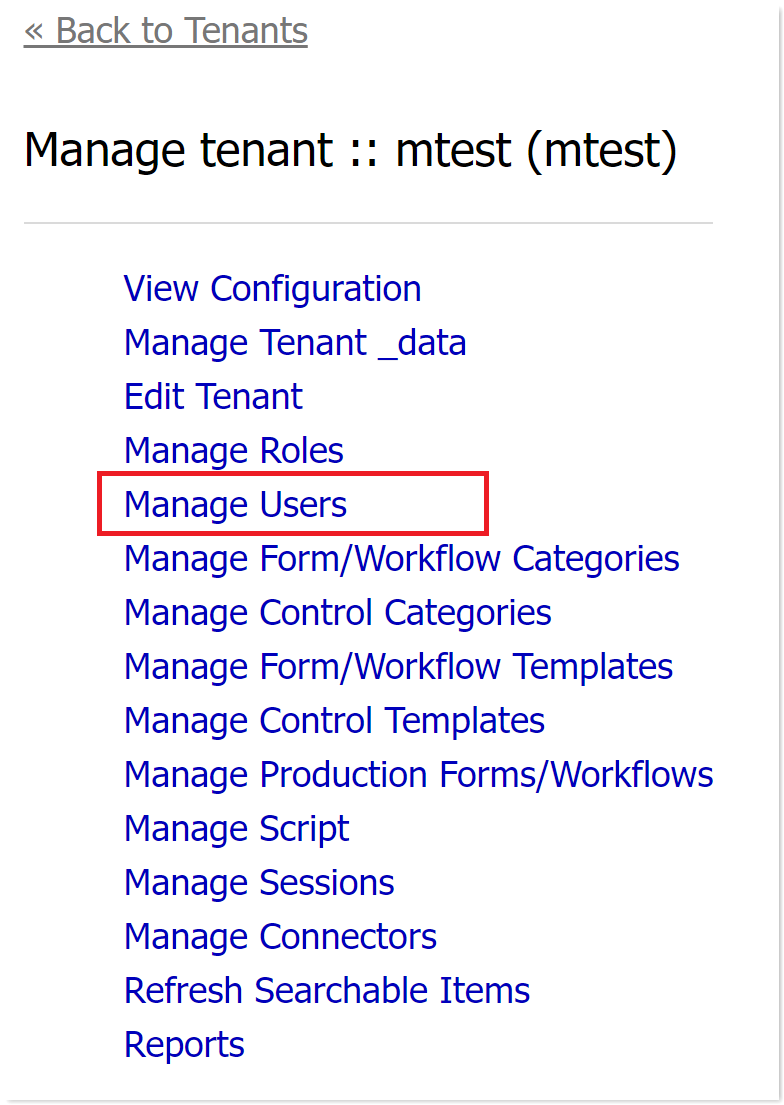
Click the
 icon each time to create a new user.
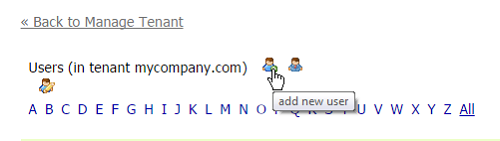
- Add the user named "jerry" and assign jerry the role 'Manager'. Remember to click submit for each one.
- Add the user named "tom". Assign the Employee role to user tom. Since jerry is tom's manager, select jerry from the dropdown list in the 'Reports To' field.

Add the user sue and assign sue the role of HR.
- Add the user named "designer" and assign the special role of frevvo.designer
- Logoff as the tenant admin.
- You now have your tenant setup and ready to create and test a simple Leave Approval workflow.
Creating the Leave Approval Workflow
- Log in to your frevvo tenant as the designer user i.e.designer@mycompany. Replace "company" with the name of your tenant.
On the My Project homepage, click the project name My Company HR that you created in the Build a Form tutorial. You can also select
 Open from the
 Action Menu.
- You will see the Forms and Workflows homepage.
- Click the
 Add icon and select
  Create a New Workflow.
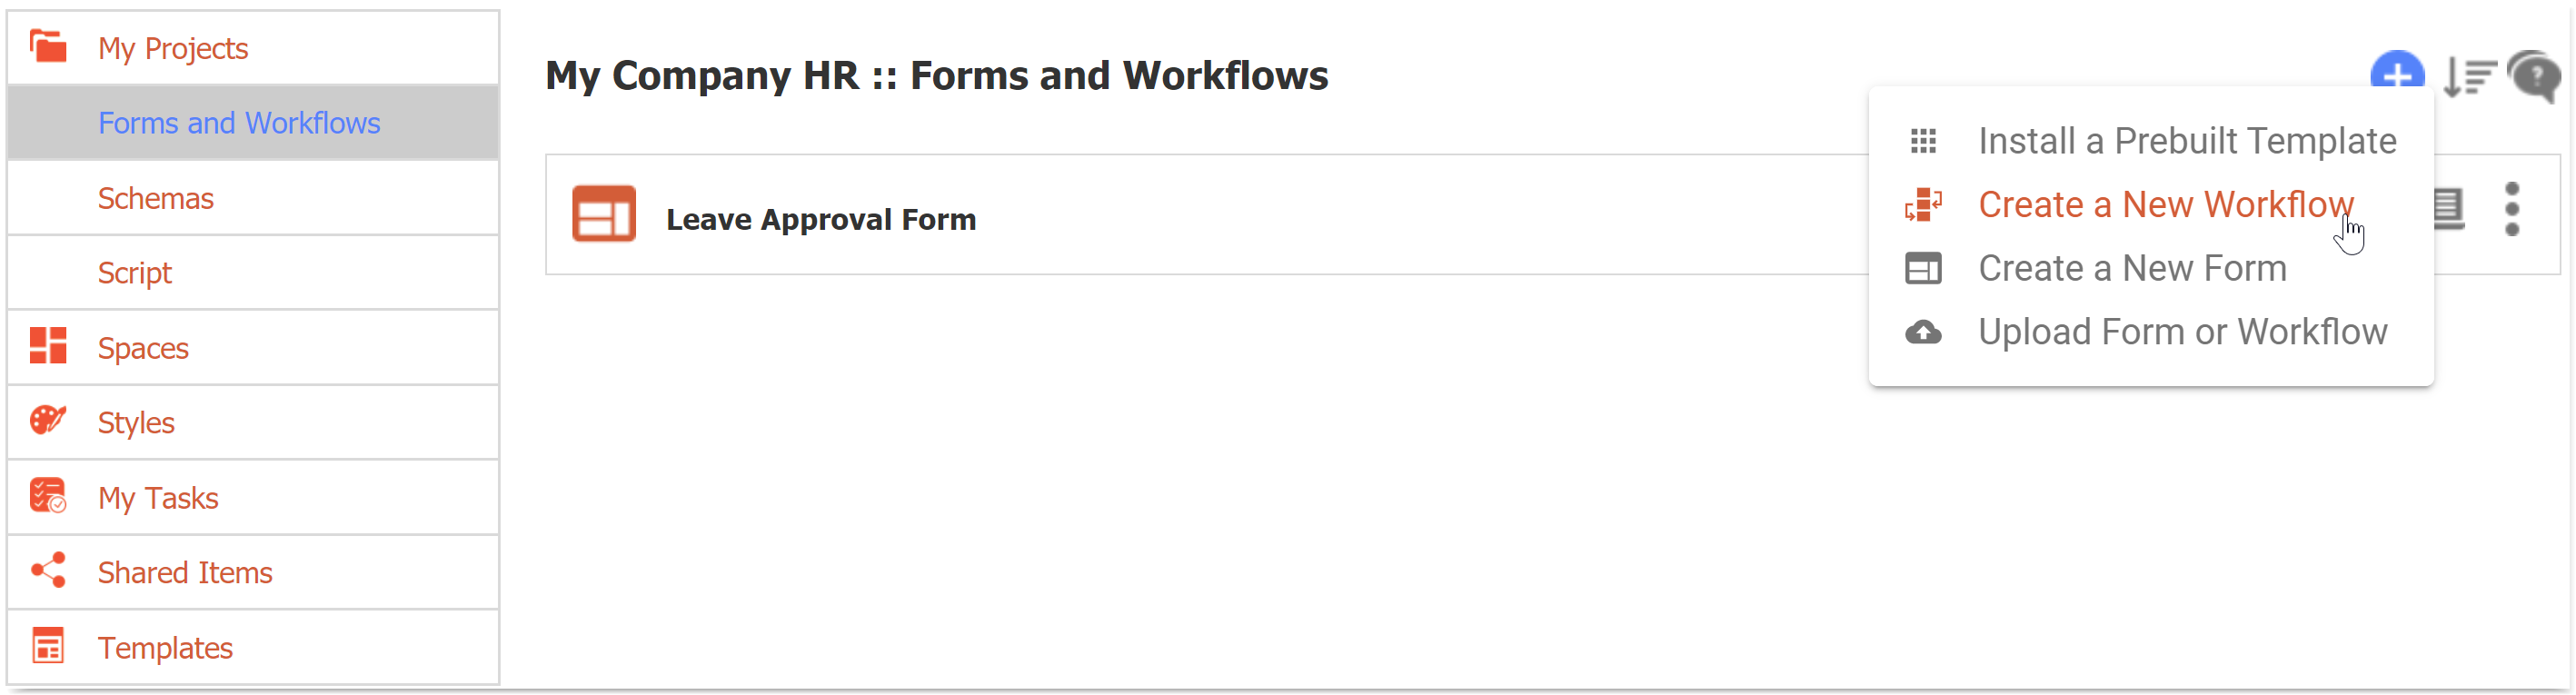
Name the workflow Leave Approval Workflow and give it a meaningful description. Click NEXT.
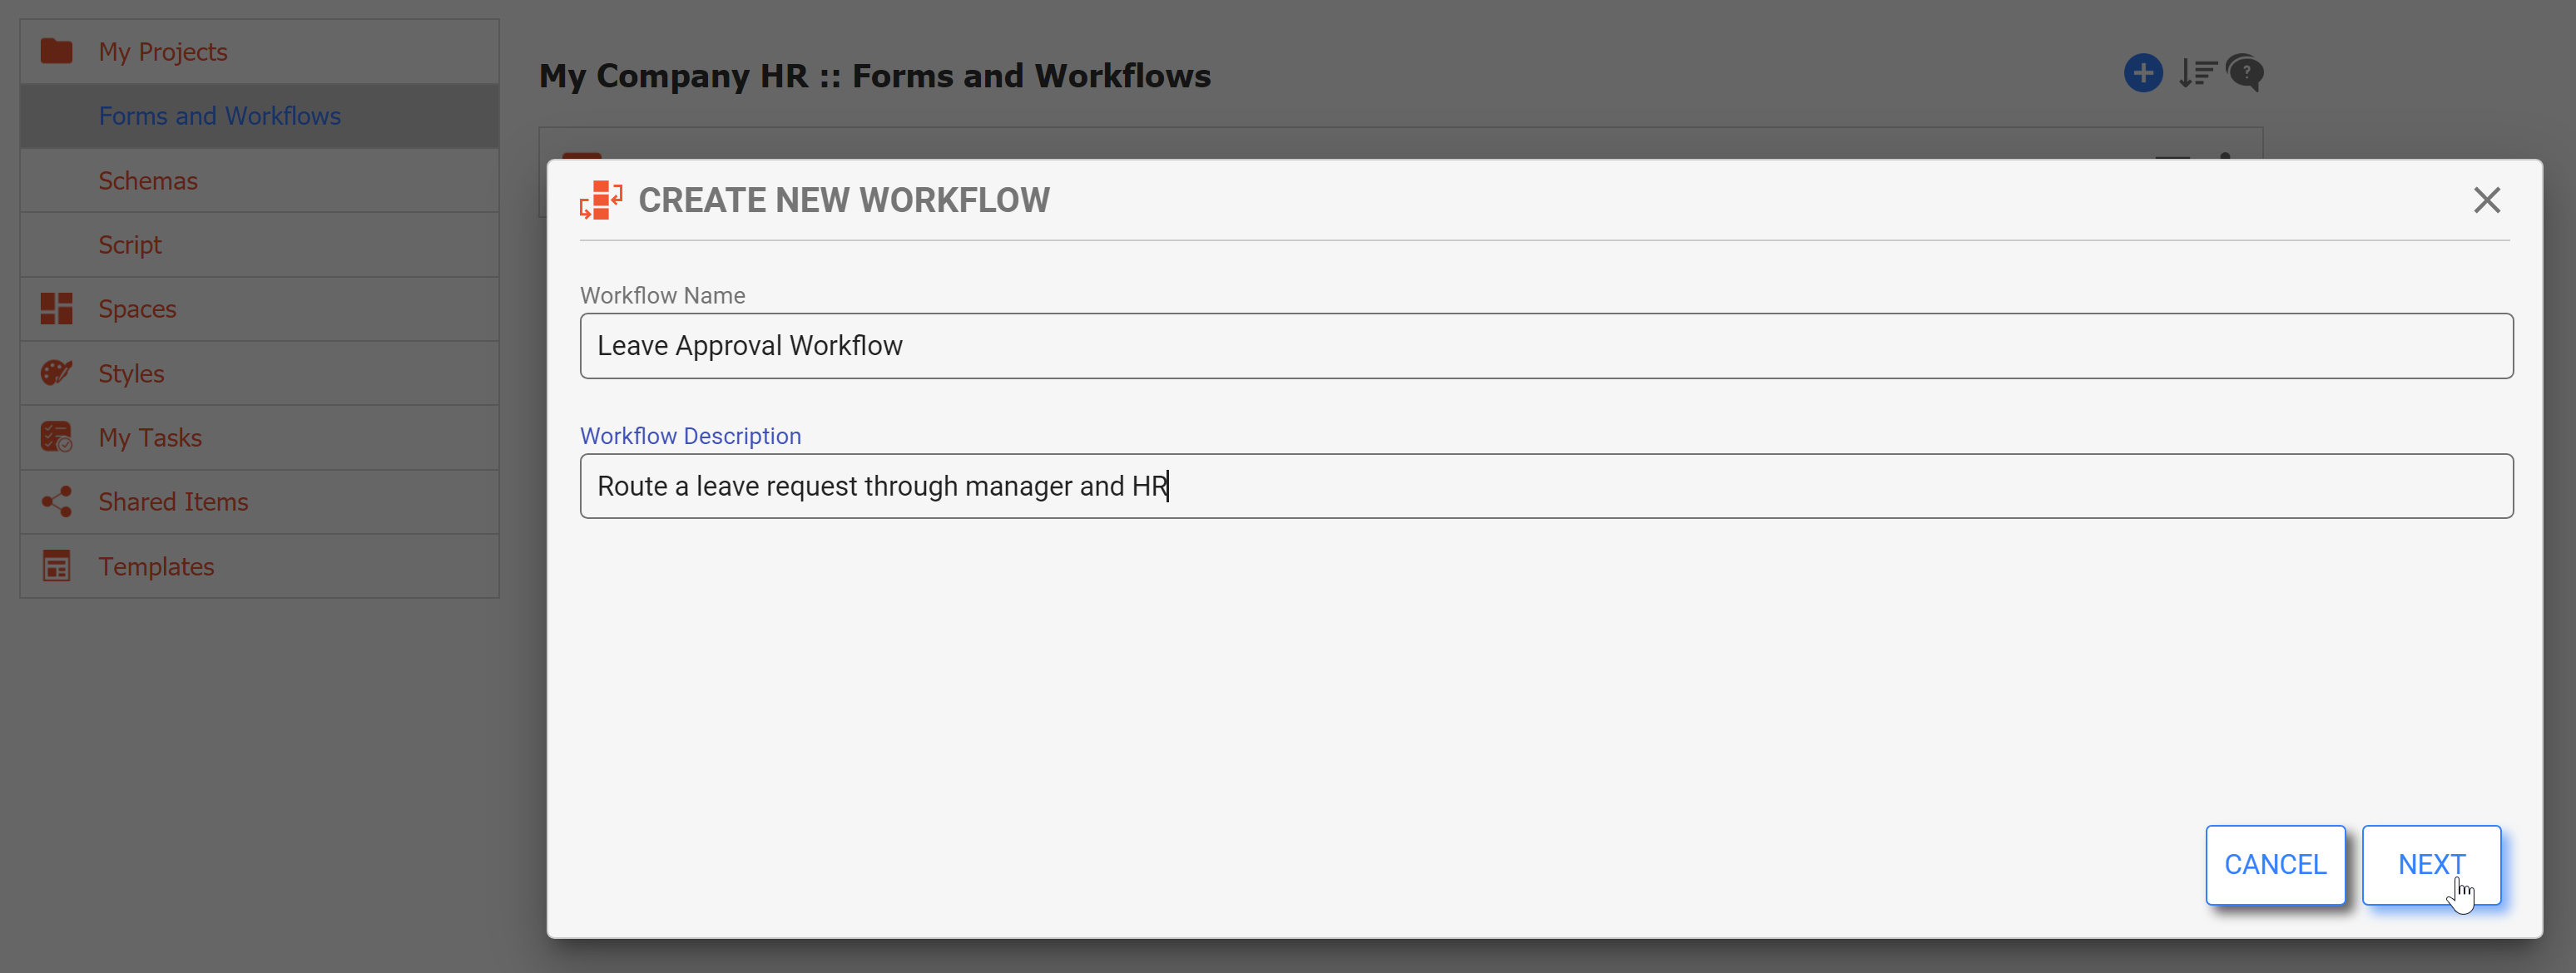
You will be able to search your forms/workflows by Name and Description, so use keywords that will help you find it later.
- Now the Workflow Design Wizard will guide you through creating and assigning steps.
Rename Step 1 "Employee" and change the Step Type to Use Existing Form: Leave Approval. This will use your existing Leave Approval form to start the workflow.
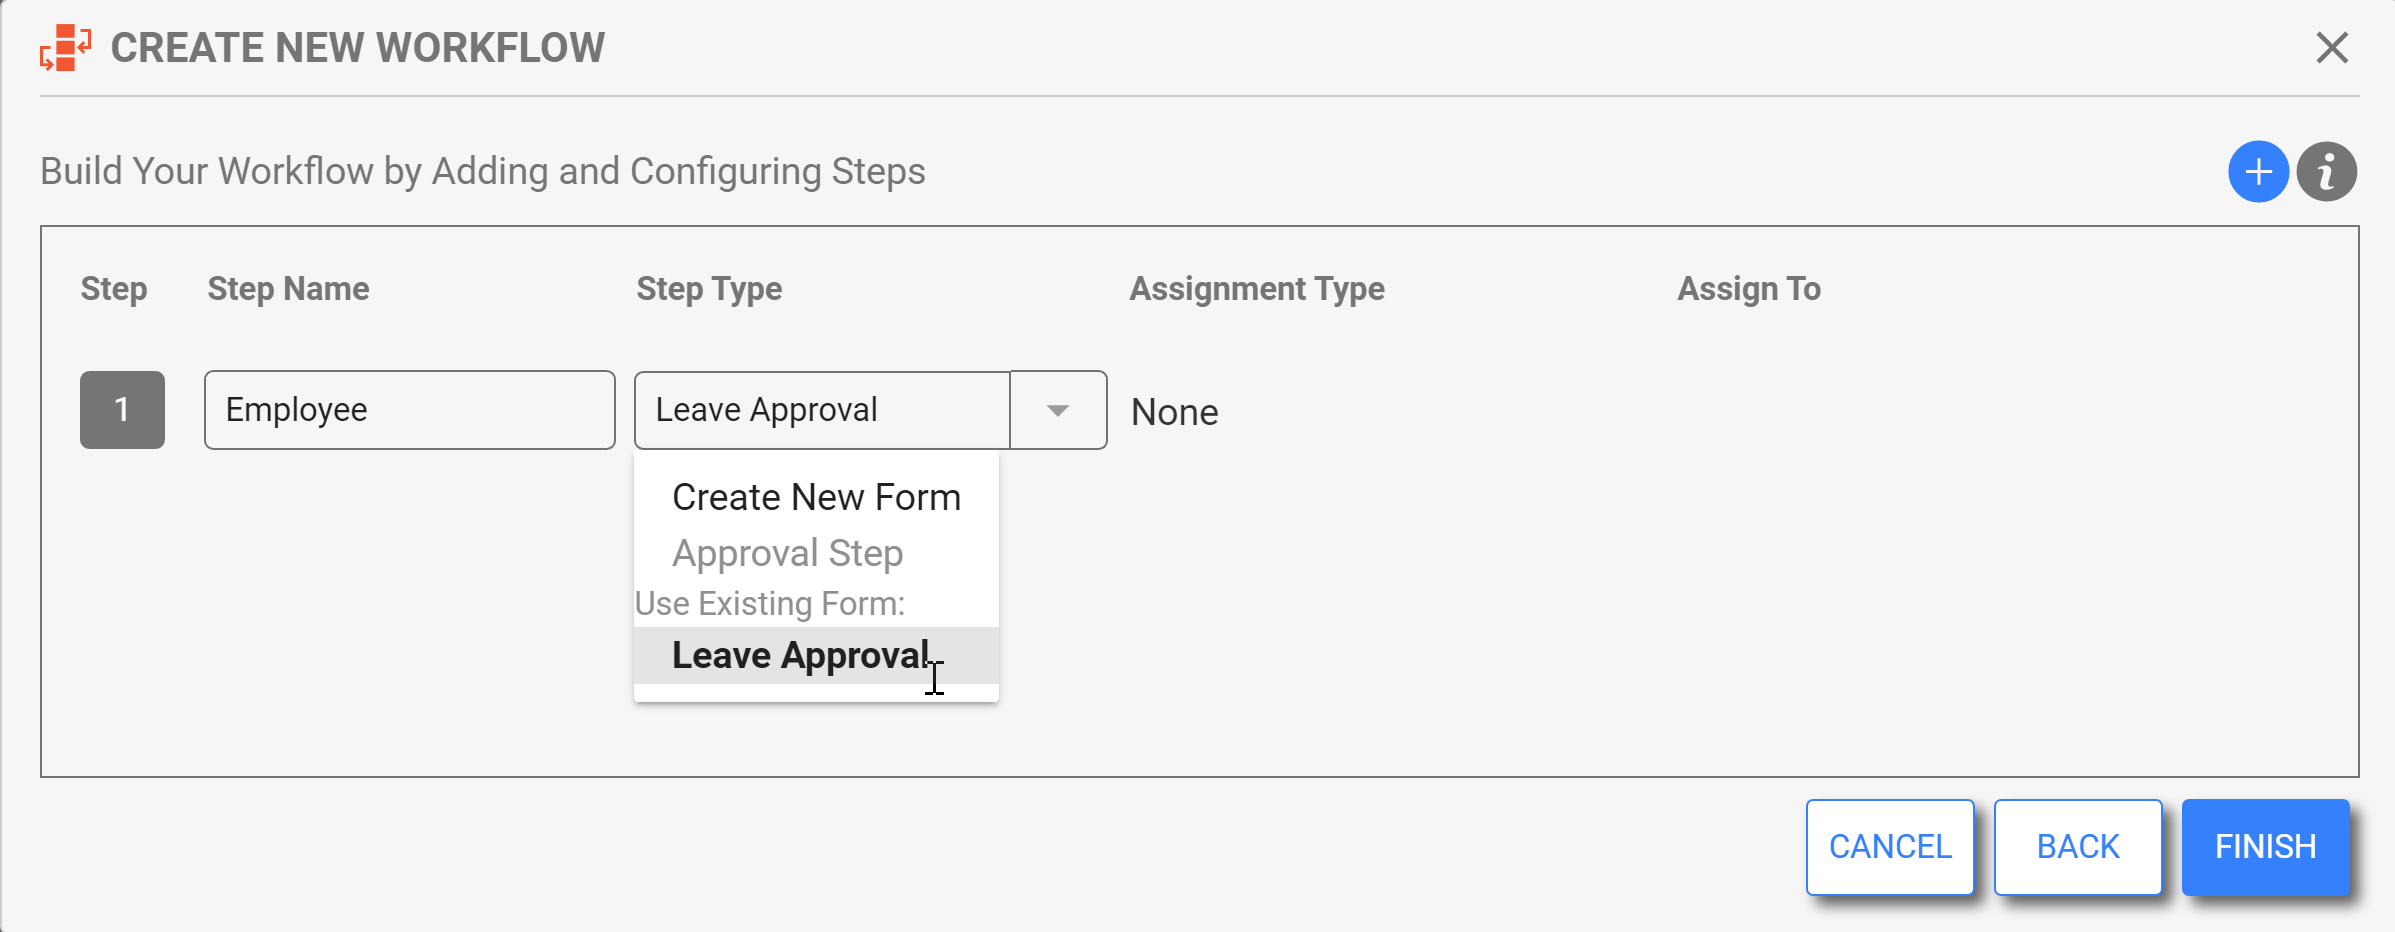
If you completed the Getting Started with Forms exercise, you should have a Leave Approval Form listed. If not, you can select Create New Form instead.
- Click
 Add and rename Step 2 "Manager". Leave the default Step Type of Approval Step. Change Assignment Type to "To a User". You can select any user in your tenant.
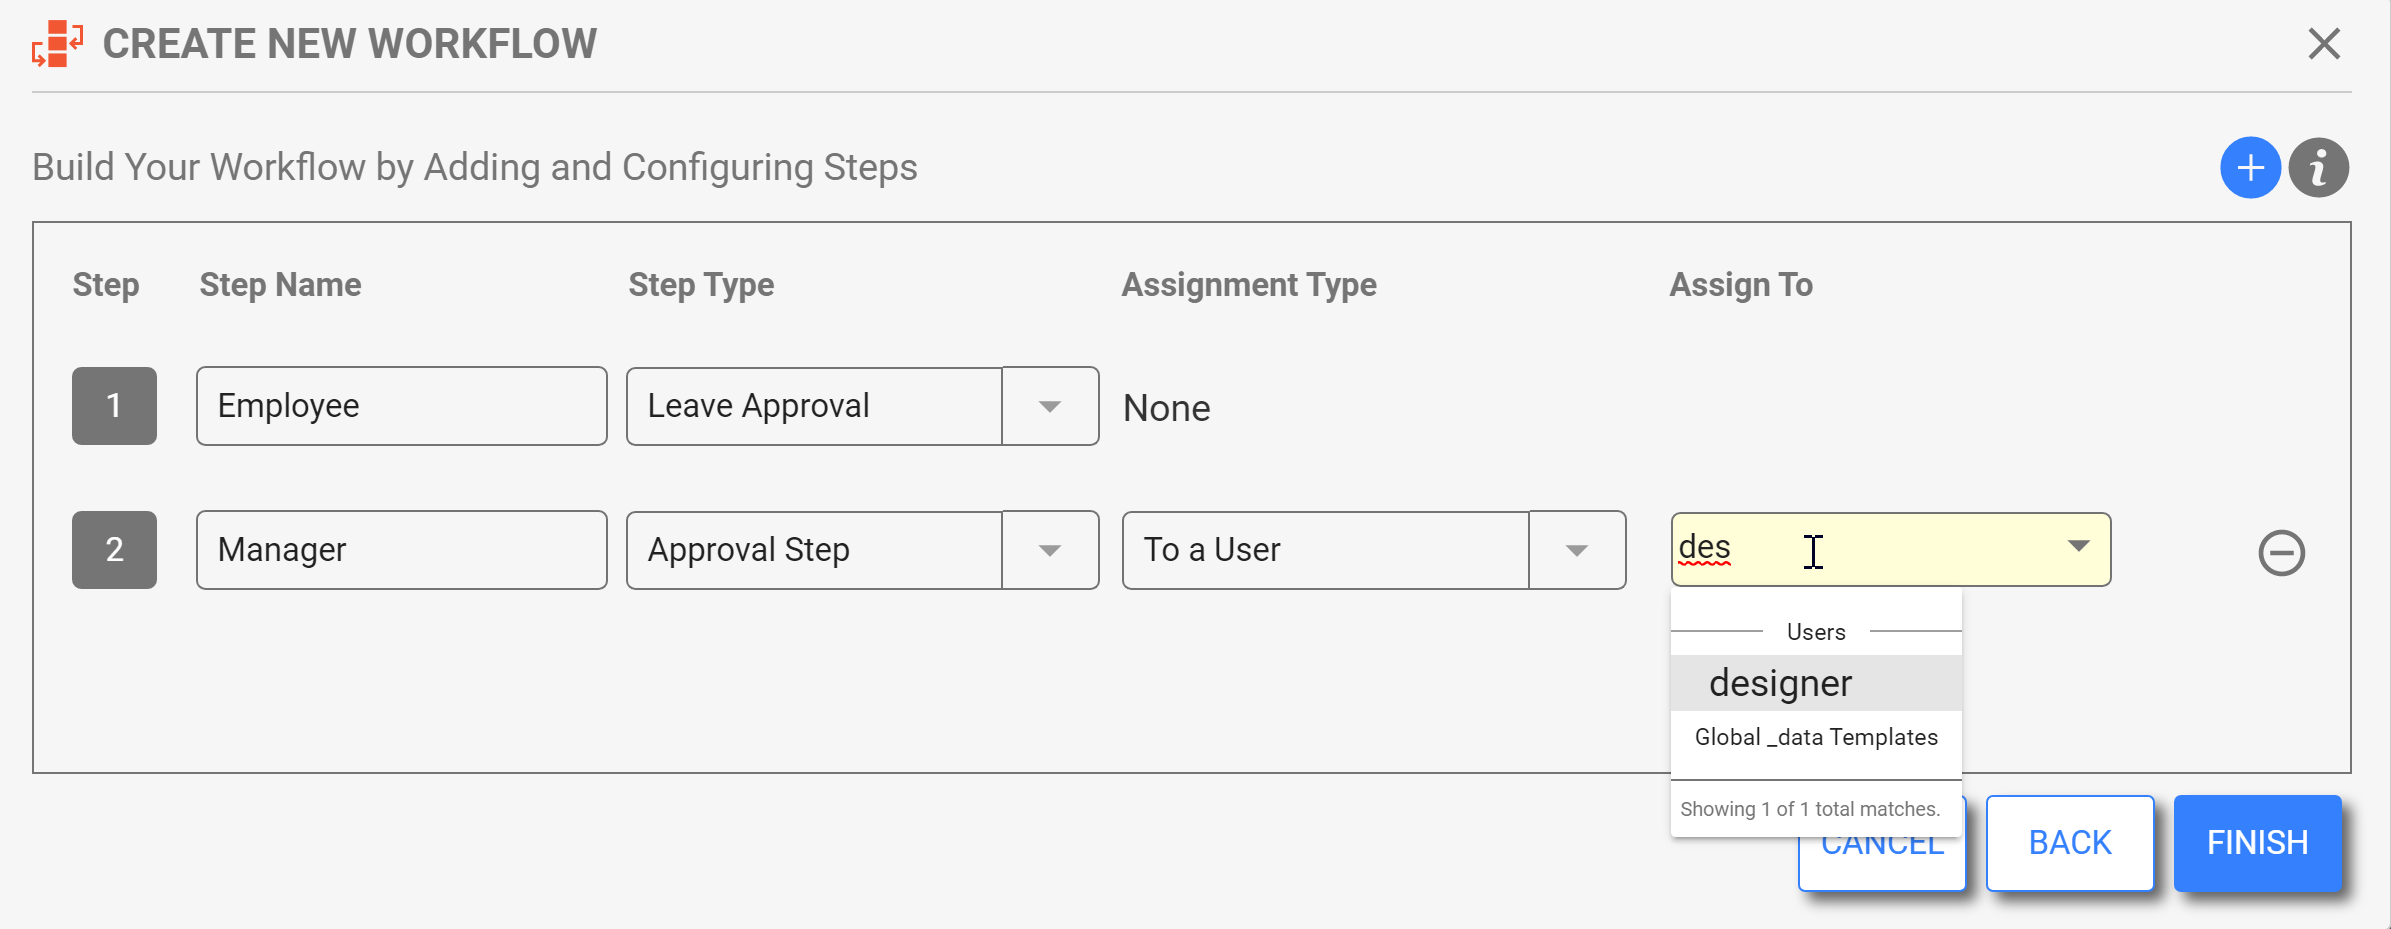
- Click
 Add and rename Step 3 "HR". Leave the default Step Type of Approval Step. Change Assignment Type to "To Role(s)" and select HR.
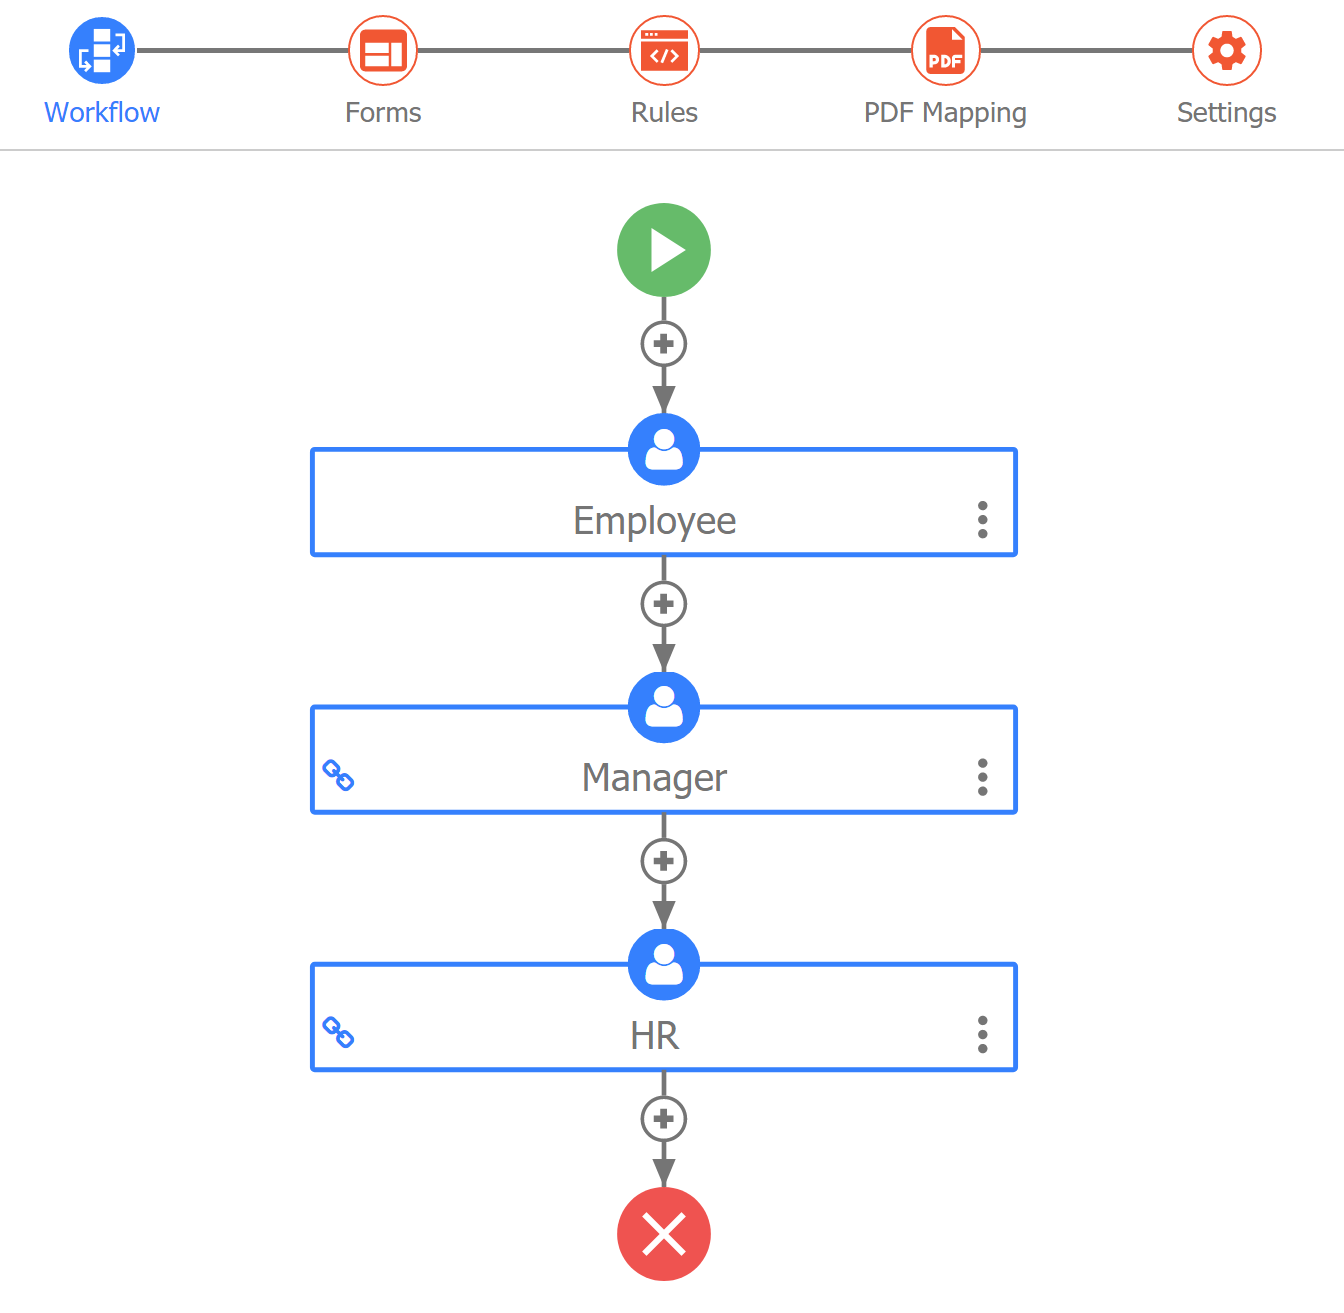
 - Click FINISH. Here is what your workflow should look like:
Workflow
Customize the User's Experience
Next we'll customize the buttons and messages the users will see as they interact with the workflow. First, click Workflow in the Guided Designer header to return to the Workflow Outline.
You can navigate Workflow Step Properties two ways:
- Switch between tabs on a single step; i.e. configure Settings, Assignment, then Messages, etc.
- Switch between steps on a single tab, i.e. configure Settings for Employee, then Manager, then HR.
This example suggests the 2nd approach, but choose what works for you!
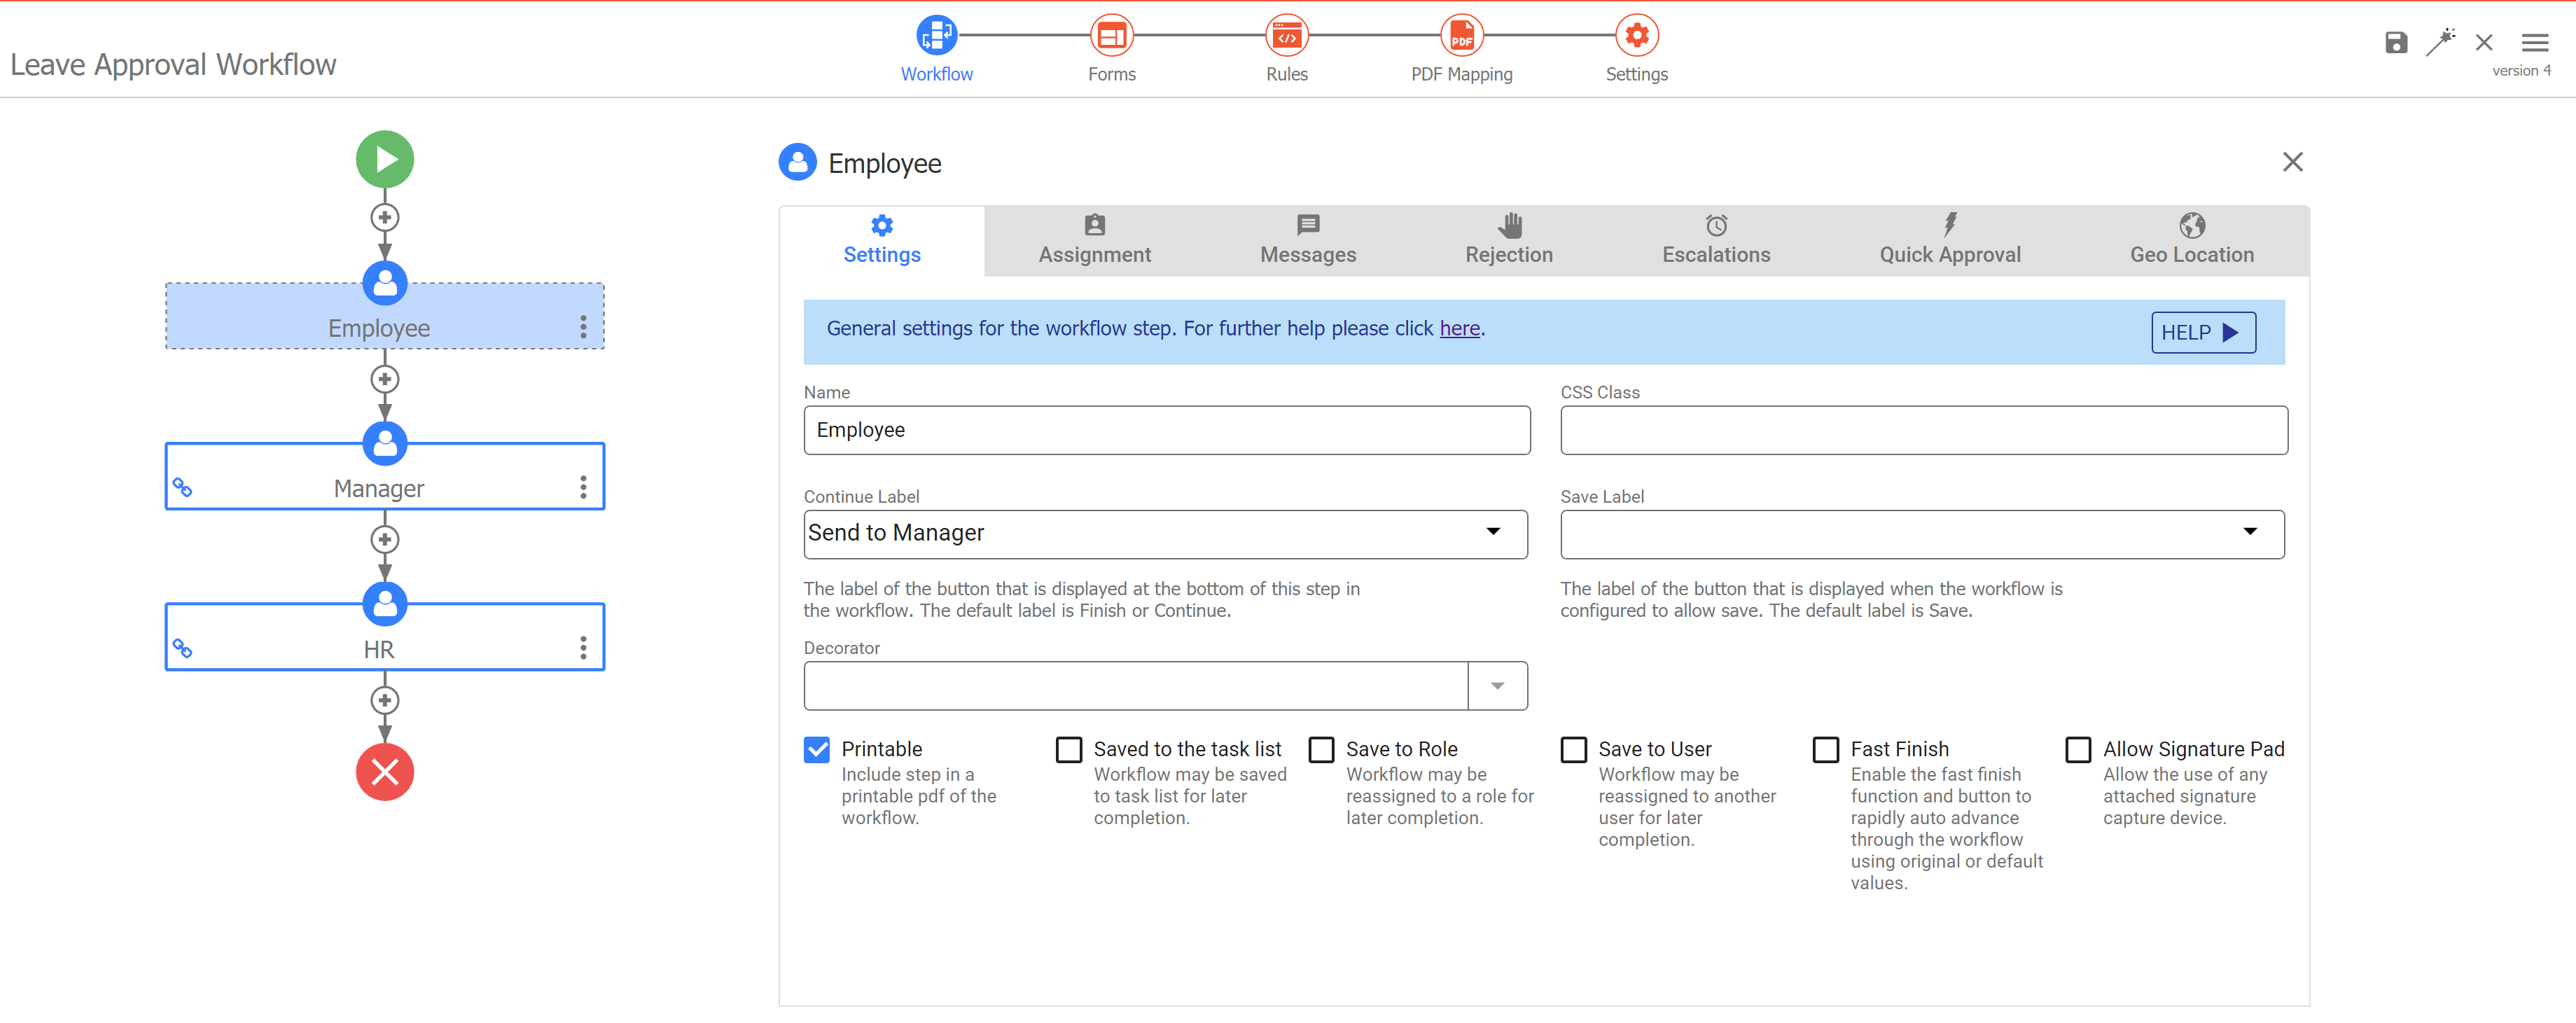
- Click the Employee Step. The Workflow Step Properties will appear on the right.
- Change the text of the Continue Label field to "Send to Manager." This is what the user will see on the Continue Button, and provides more context about what the workflow will do.
- Click on the Manager step.
- Change the Continue Label to Send to HR.
- Click on the Messages tab.
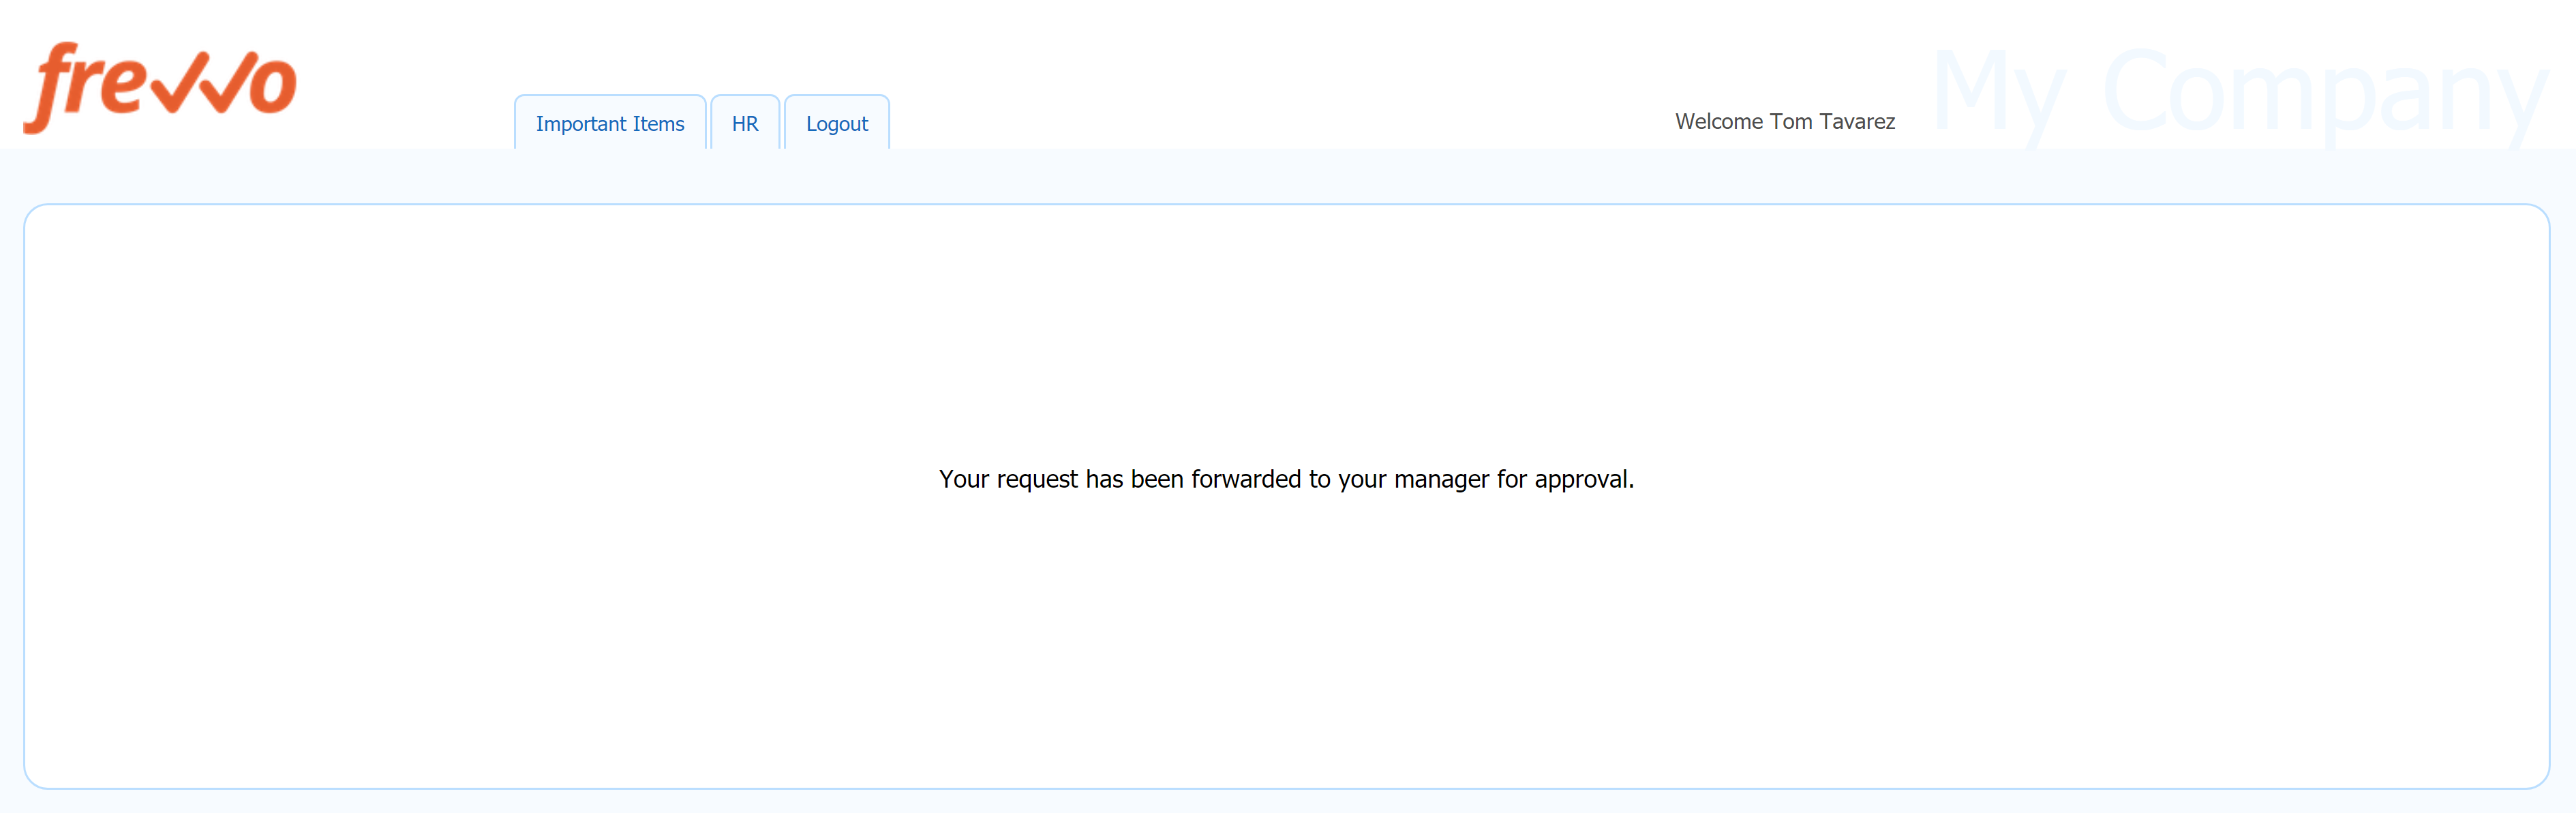
- Enter a Pending Message that Tom (employee) will see when he clicks the Send to Manager button. Ex: Your request has been forwarded to your manager for approval.
Add Task Information so manager Jerry can identify the task when he sees it on the Task List, such as "Leave Approval for {FirstName} {LastName}"
- Click on the HR Step
- Enter "Leave Approval for {FirstName} {LastName}" in the Task Information field.
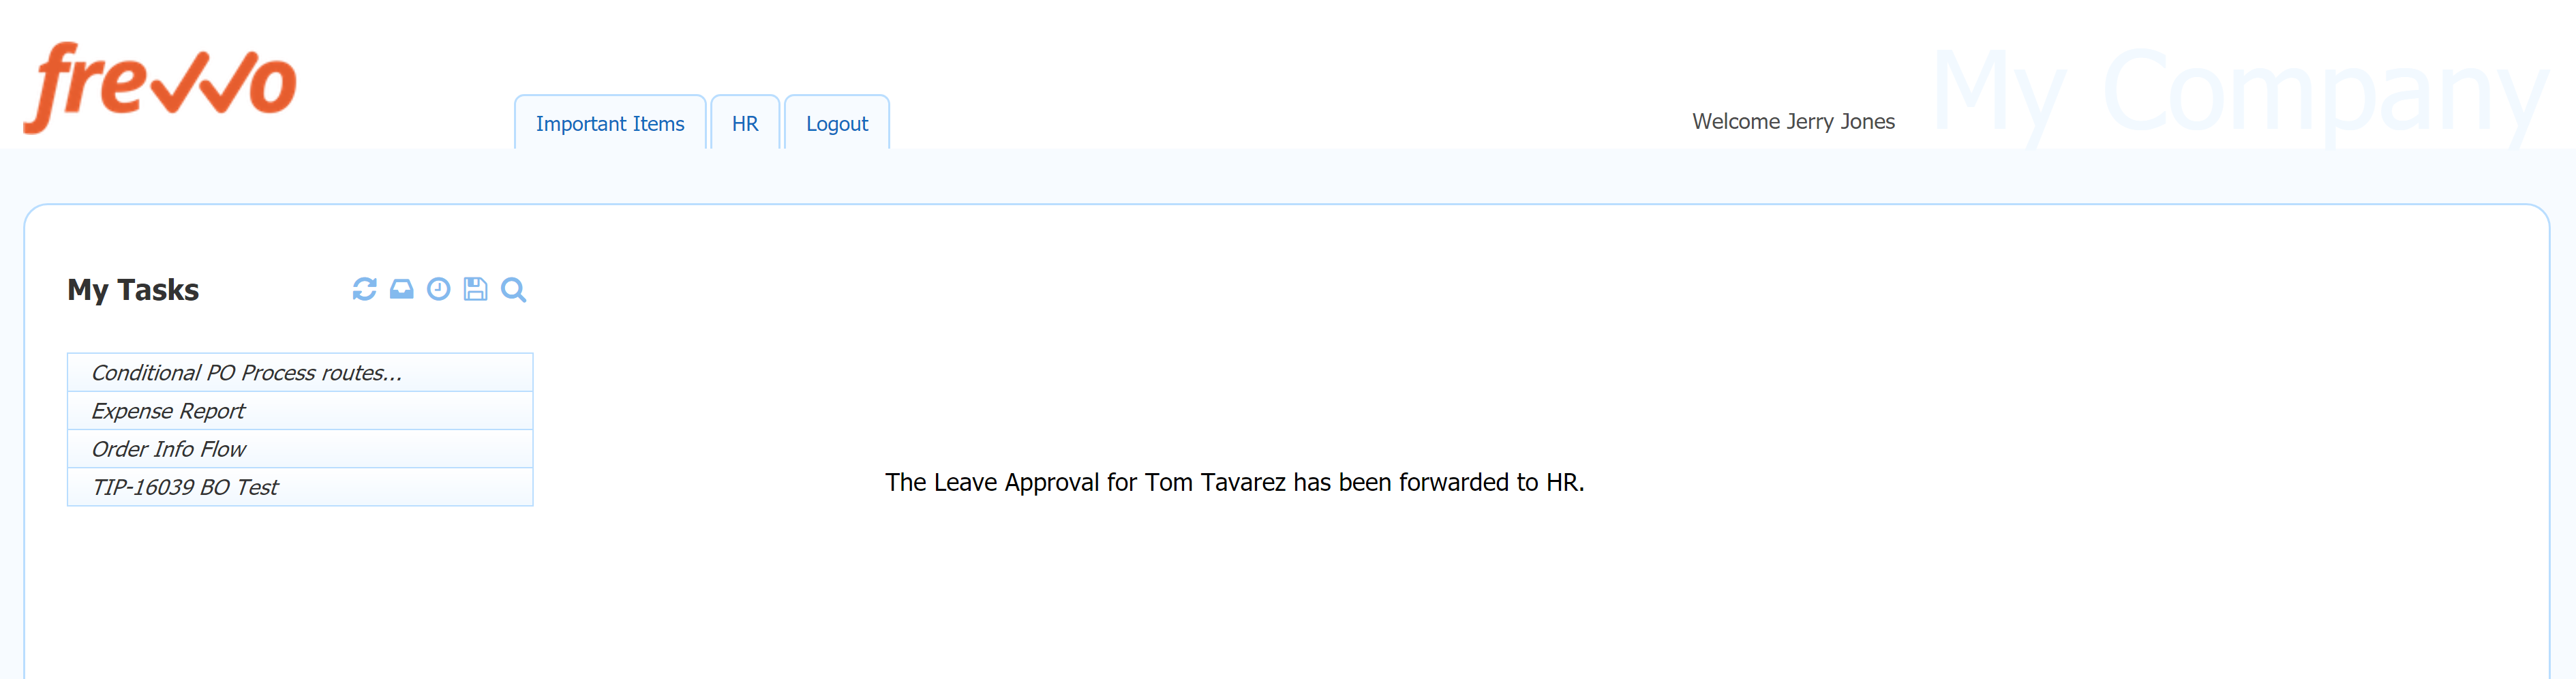
- Enter a Pending Message that Jerry will see when he clicks the Send to HR button, such as "The Leave Approval for {EmployeeName} has been forwarded to HR."
Dynamically Assign the Manager Step
Dynamically assign this step to the right manager based on which employee starts the workflow.
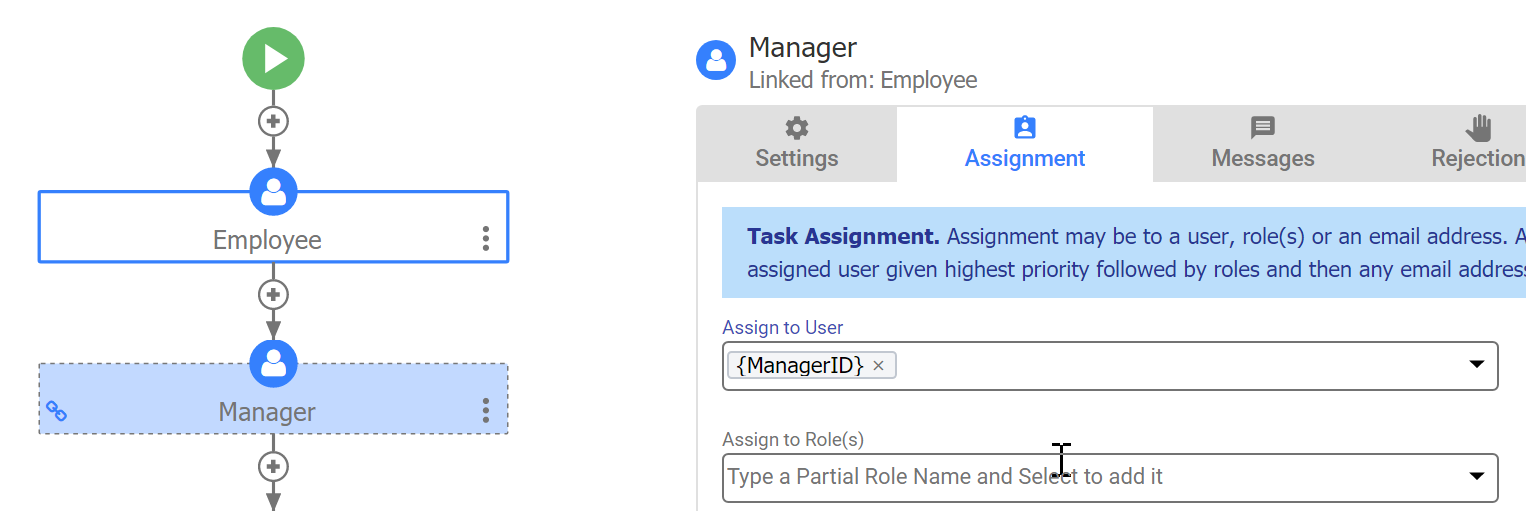
- Click on the Manager Step
- Select the Assignment tab. In the Assign to User field, delete the user you originally assigned.
- Type a left curly brace followed by Man. When you see {ManagerID} in the dropdown, click to select it.
Forms
Click on Forms in the Guided Designer header. Notice that in addition to the Employee Information and Leave Request sections that you added, there are now also sections labelled Manager Approval and HR Approval. These were added by the Workflow Design Wizard, along with rules that show/hide them on the correct step.
You can edit the form in the Workflow designer Forms view.
Be aware that changes made to a form in the Workflow Designer are not reflected in the original form in the Forms designer. If you want your changes reflected in both designers, make the changes in the original form in the Forms Designer, then replace the updated form in your workflow in the Workflow Designer.
Rules
Click the Rules icon in the Guided Workflow Designer header. Notice that several rules are already in the list - the rule you created earlier "Sick Certification", as well as several rules the Workflow Design Wizard created to show/hide our approval sections. We'll add one more.
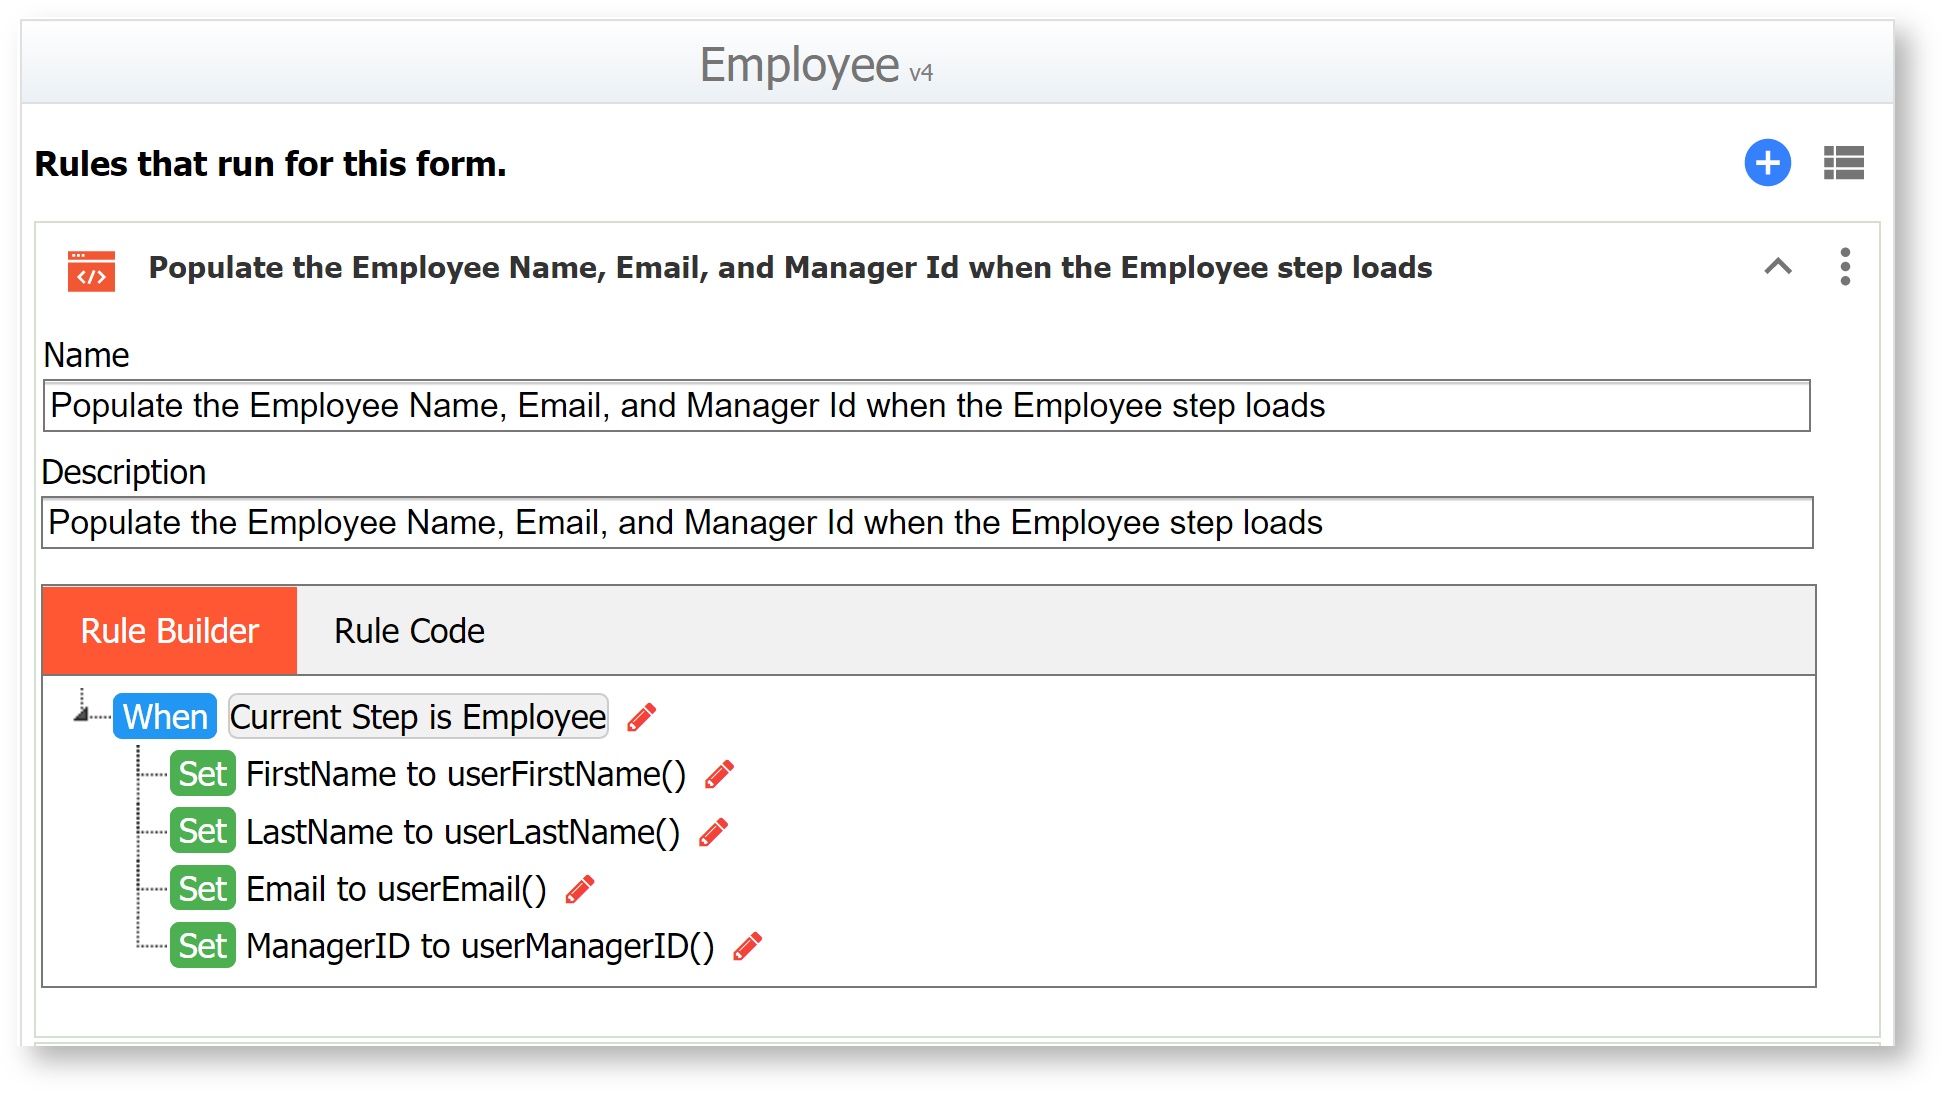
Add a Rule to Prefill Employee Information
Let's add a rule to prefill the user name, email address and manager's id on our workflow. Follow these steps:
Click
Add.Give your rule a Name and Description. Click Run Builder.
Add your condition and actions. For this rule, you don't need Else Actions. Your rule finished rule should look like this.
PDF Mapping
We'll skip this for now, because this workflow will produce a built-in PDF snapshot. Visit Generate Pixel Perfect PDFs for more details about you could map form data to an existing PDF.
Settings
Save a PDF Snapshot
Next we'll make sure to save a PDF snapshot of this form that can be emailed for confirmation or added to the employee's file.
- Click the Settings icon in the Guided Workflow Designer header.

Check the Save PDF checkbox on the Settings tab so that a PDF image of the workflow is saved in the frevvo submission repository. Notice that a PDF Name area appears. Enter
Leave Approval for {LastName}.{FirstName}.{StartDate}Entering a control name inside curly brackets will replace that text with the run-time form/workflow data, providing you with a dynamic experience. Many place have a dropdown to help you select the correct control name, as this is case-sensitive.
- Click
 Save.
Save.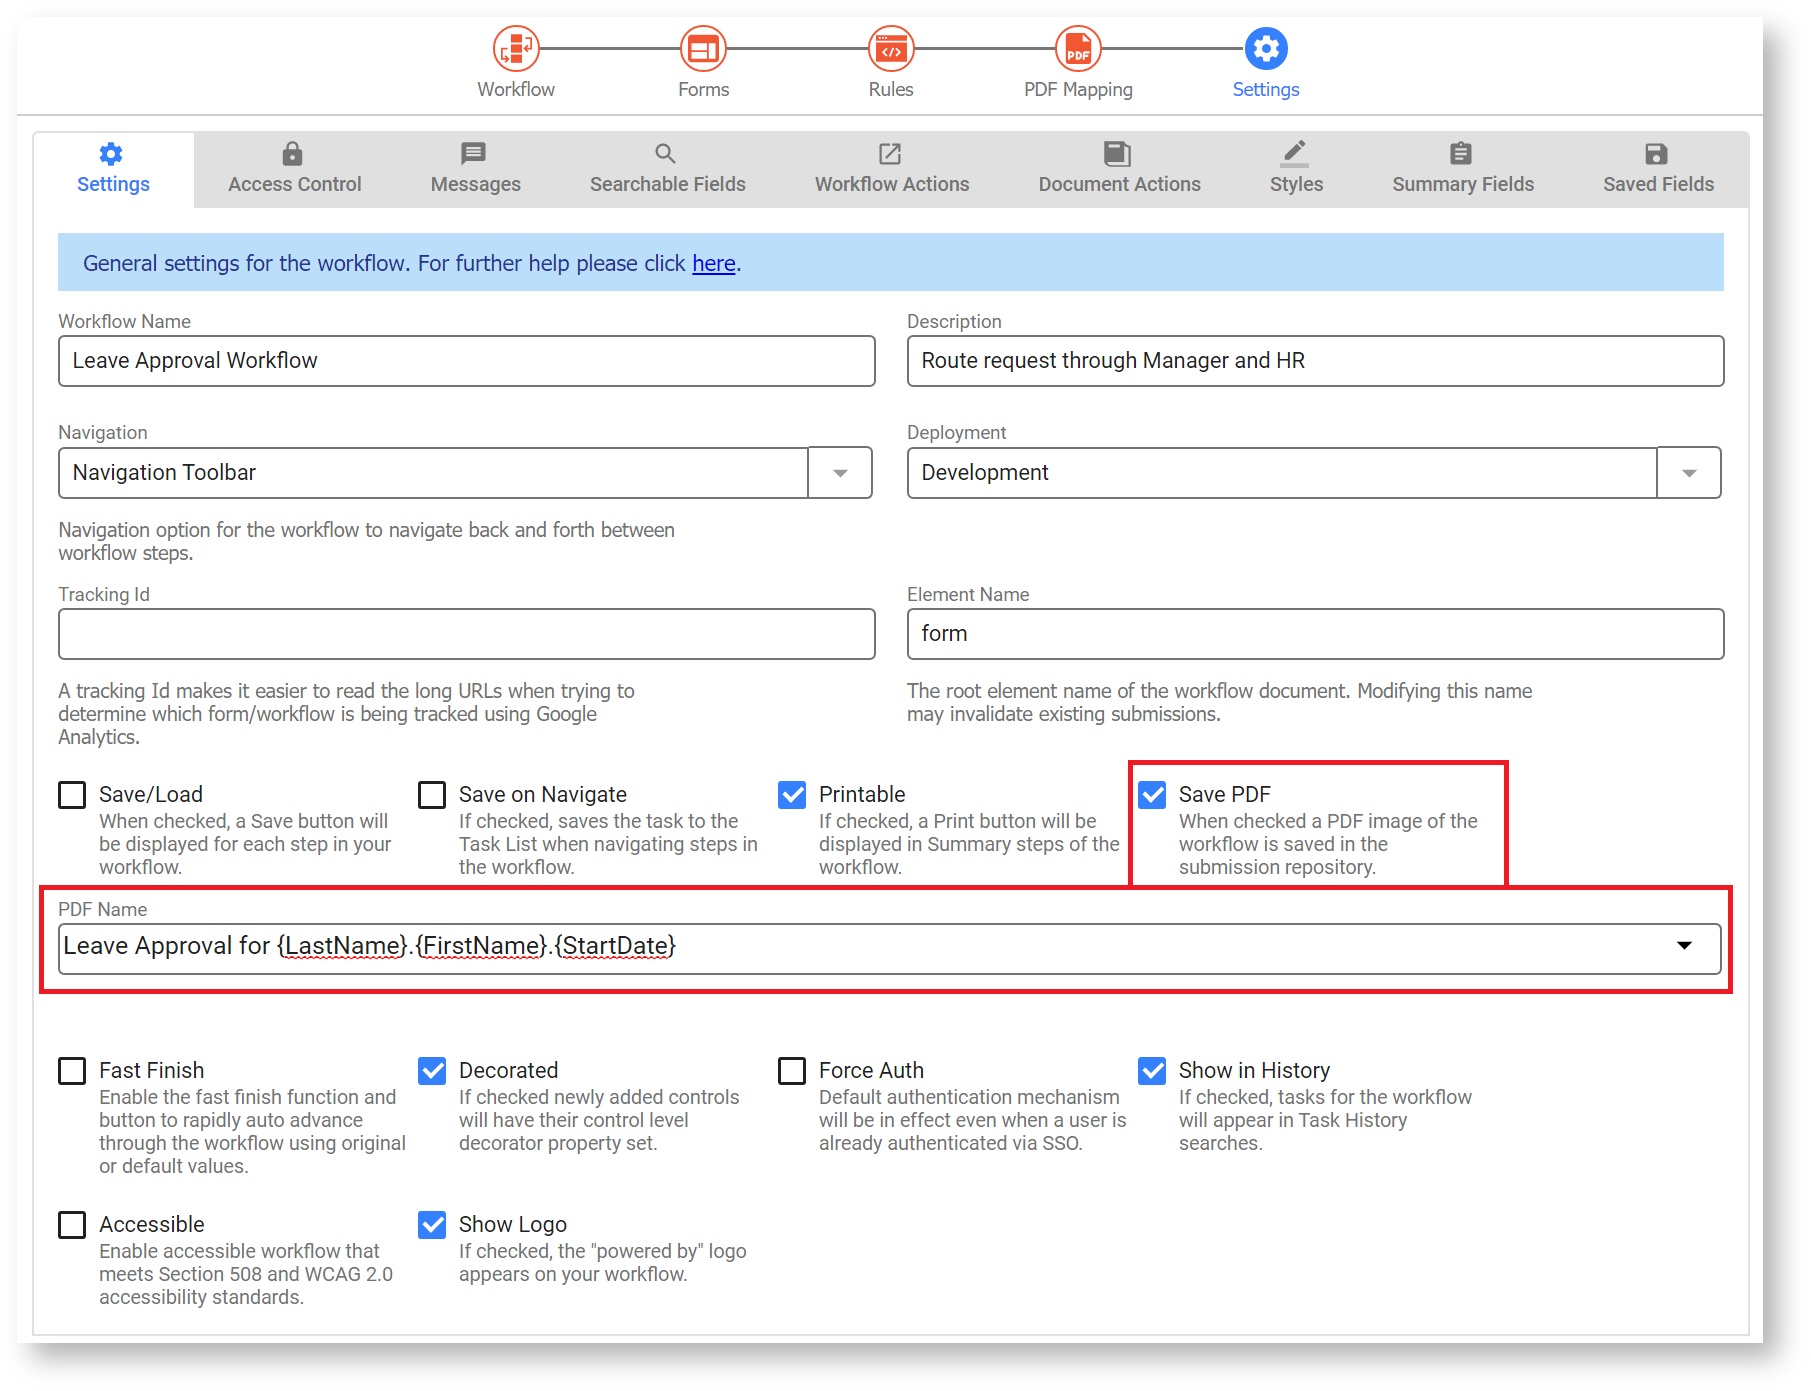
Add a Submit Message
Add a message that the HR user will see when they complete the workflow.
- Select the Workflow Actions tab. Select the Display Message when user submits workflow wizard.
Enter you custom message
Leave Approval successfully processed for {FirstName} {LastName}.
Testing the Leave Approval Workflow
A great way to test your workflow is to use a frevvo space. A space is a frevvo website that is very easy to create. Your deployed forms/workflows are automatically added.
Create a Space
Follow these steps to create the space:
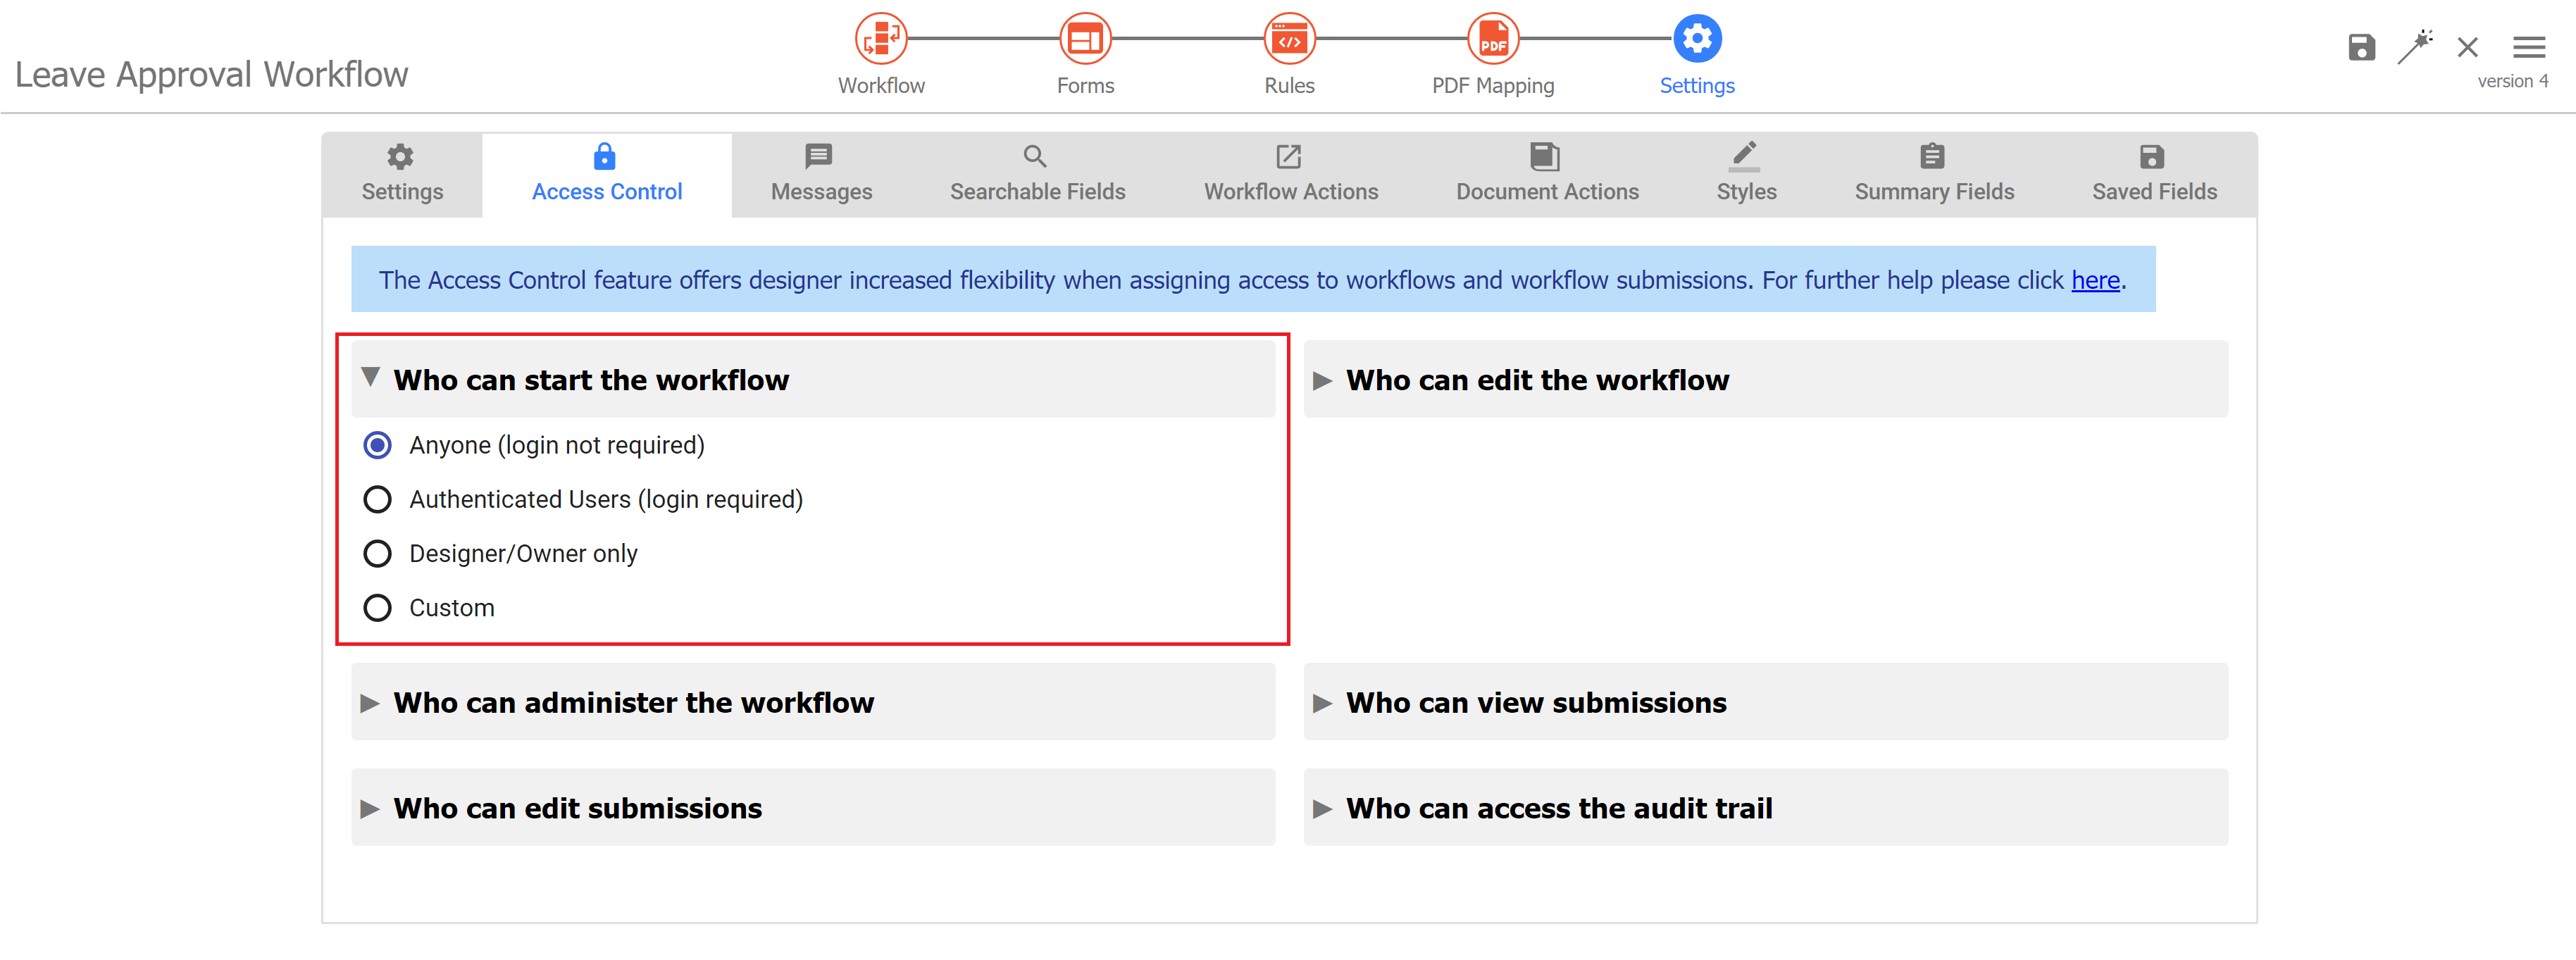
- Ensure the visibility of your Expense Report workflow is set to public in tenant and that it is deployed to production:
- In Workflow Properties, select the Access Control Tab. Set "Who can start the workflow" to "Anyone (login not required.)
- On the Forms & Workflows Homepage, click the Action menu for the Leave Approval Workflow. Select
 Deploy.
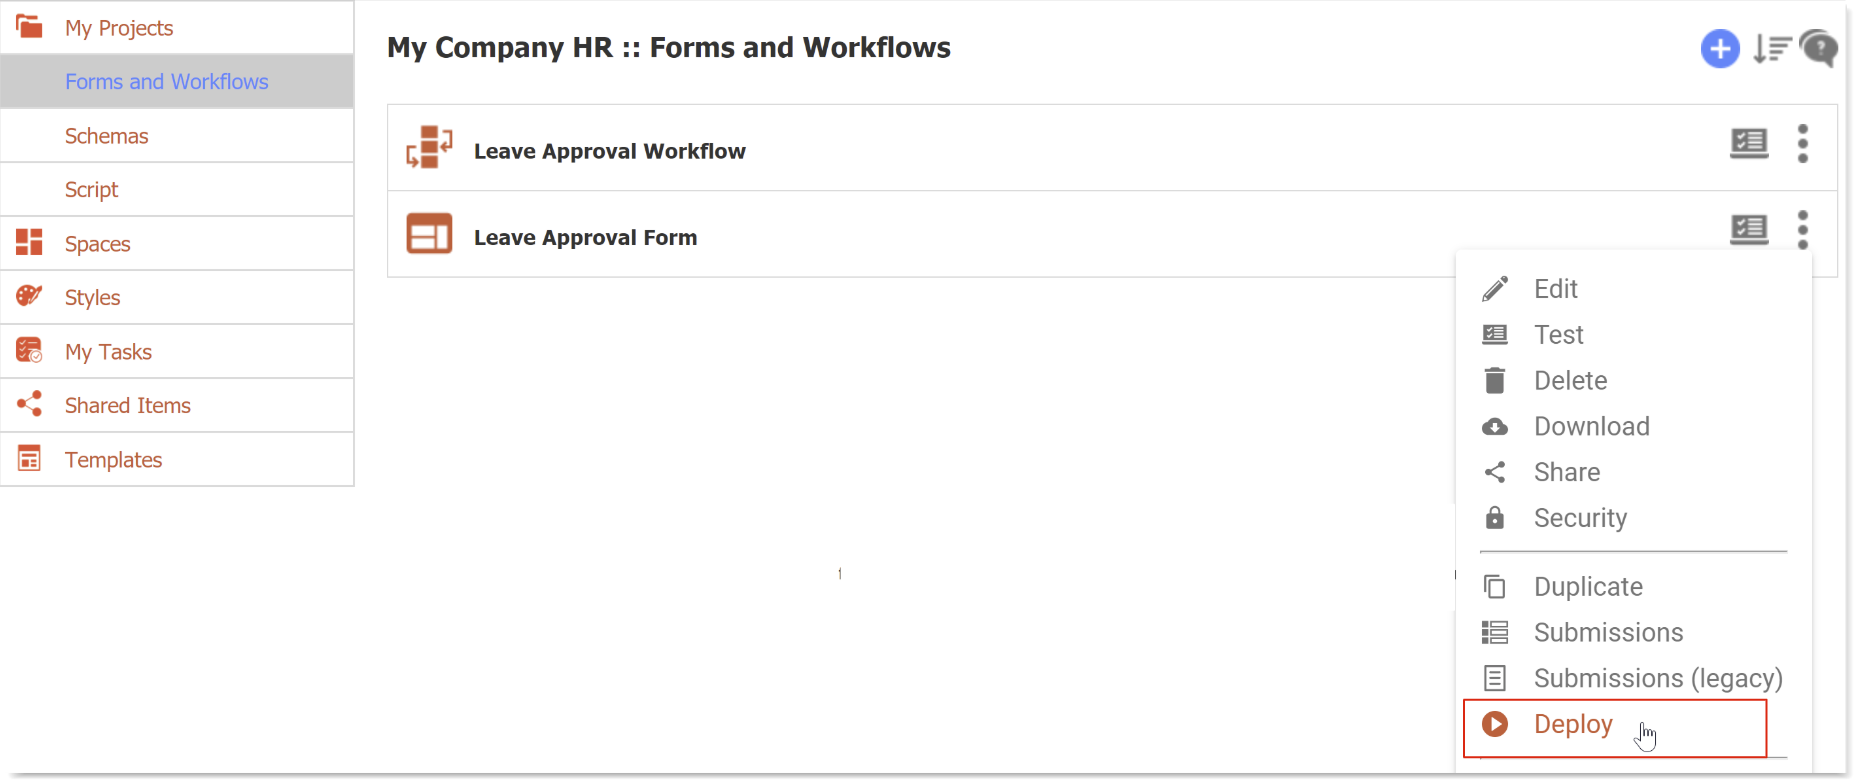
- In Workflow Properties, select the Access Control Tab. Set "Who can start the workflow" to "Anyone (login not required.)
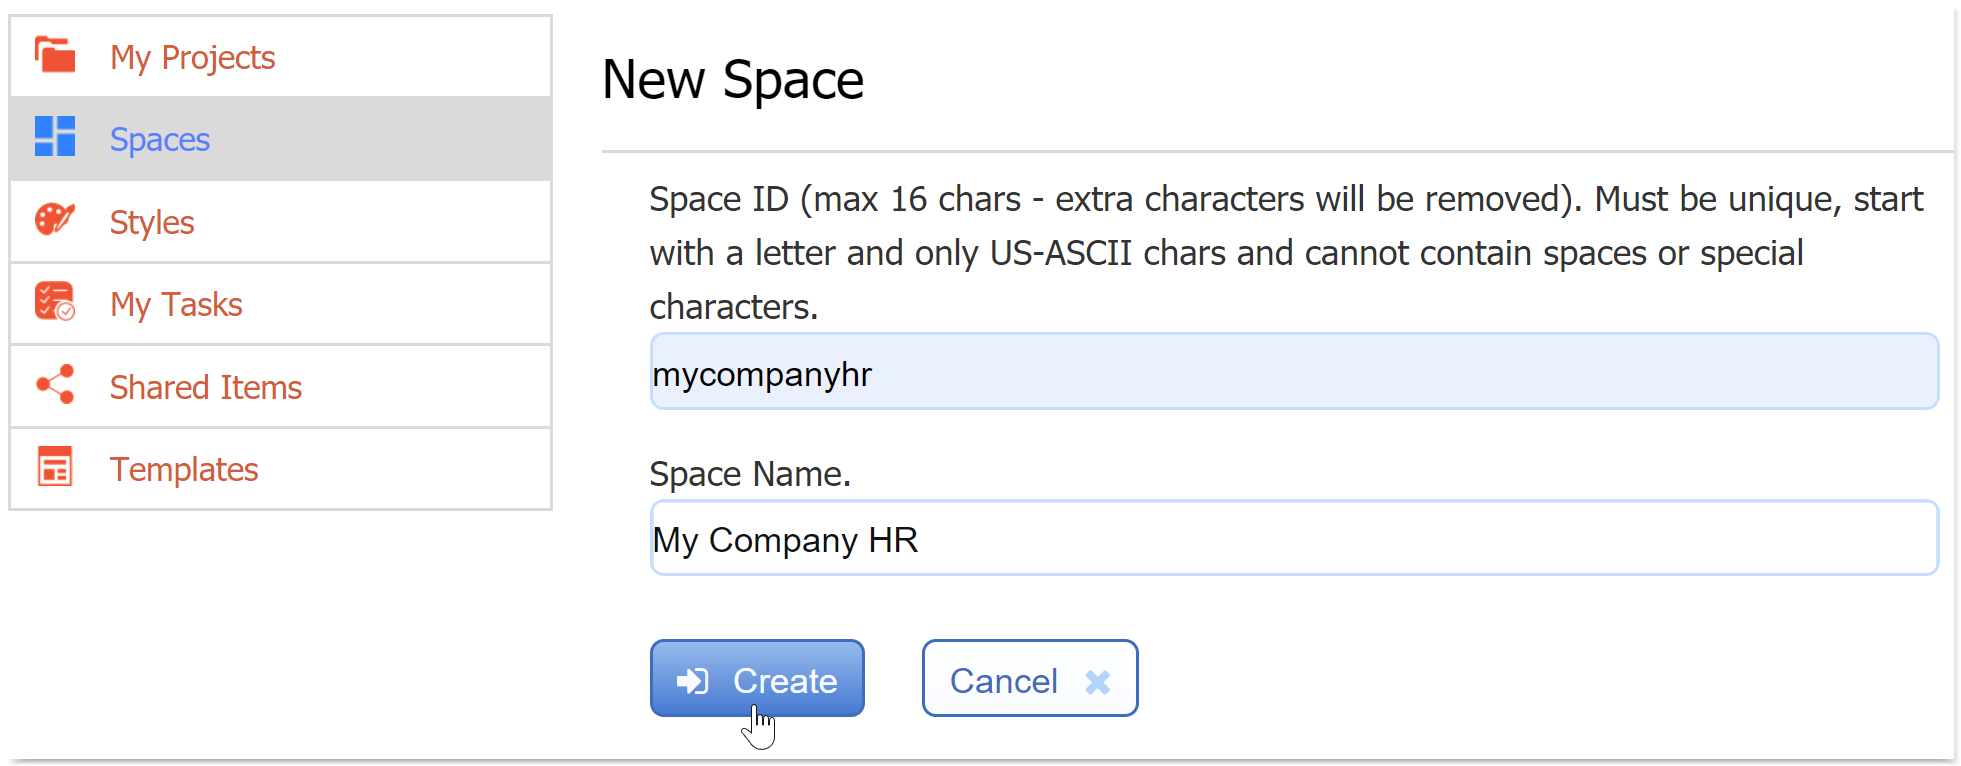
- Click on the Spaces Tab. Click the Add icon. Enter an id and name for your space. Click Create. You will be taken to the Space designer. Simply click the Save & Exit icon to return to your Space list.
- Click the Action Menu and select
 Share.
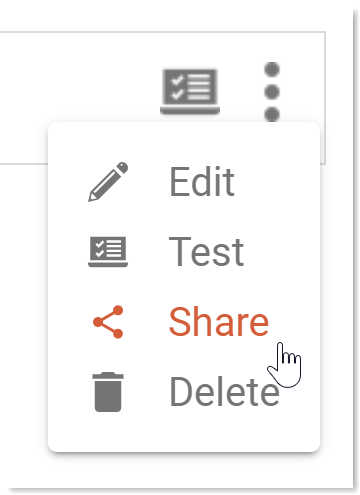
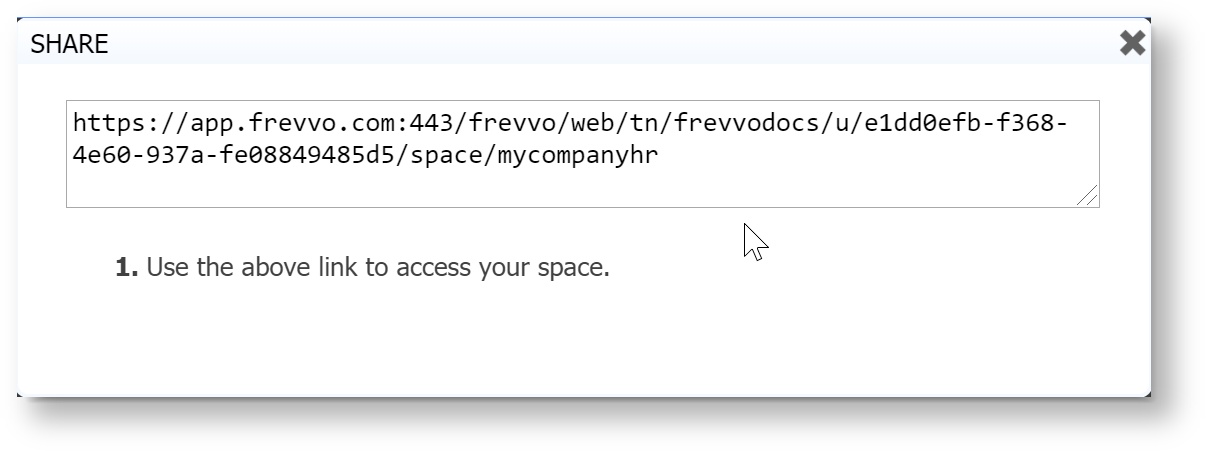
- Copy the share URL for your space then log off frevvo.
Submit a Leave Request (Employee)
- Paste the space URL into another browser or a new tab of the browser you are using. Login as tom@<your tenant name>. frevvo automatically makes your project a tab on the space menu and your Leave Approval Workflow an option on the menu under the tab. Your space should look something like this:
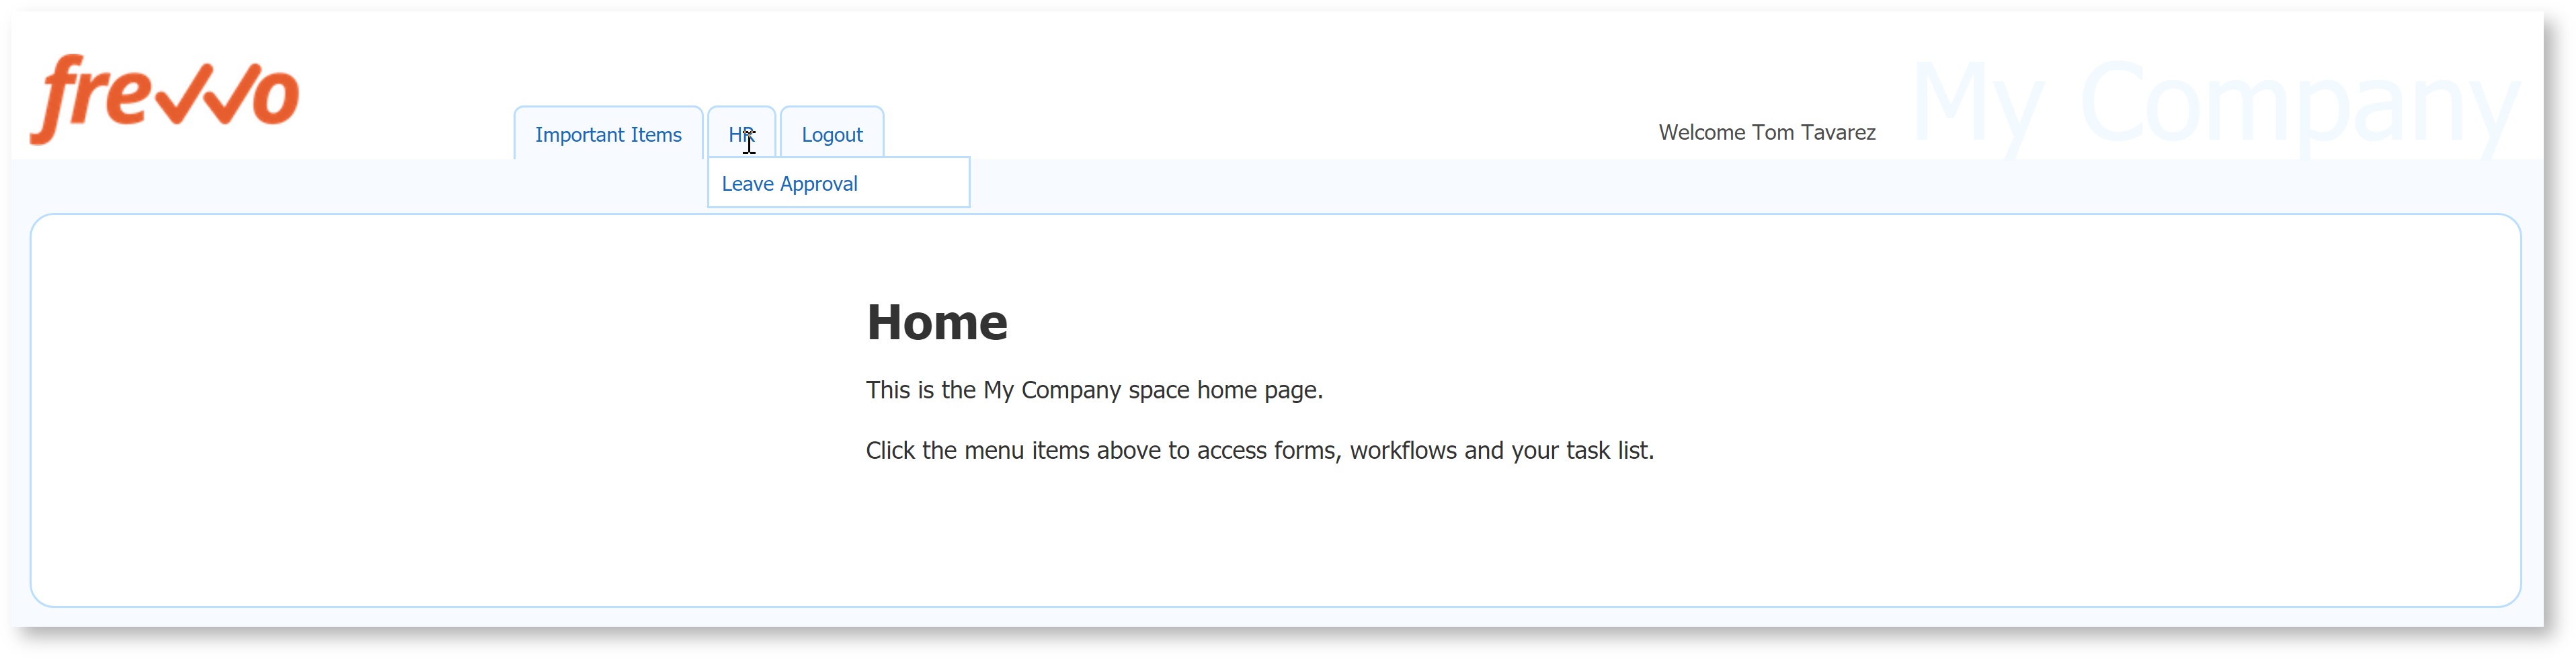
Click on the tab for your project and then click on the Leave Approval workflow. This brings you to the first step in your workflow. The workflow automatically has a navigation bar to indicate which step you are currently in as well as the next steps that are coming.
Fill in the fields in the 1st step, remember to sign and click the Send to Manager button to route the workflow to the Manager for approval.
Tom should see the customized pending message that you set up on the manager activity in the workflow.
Approve the Leave Request (Manager)
- Logout of your space then login to the space as the manager jerry - jerry@<your tenant>.
Click on the Important Items tab, then click the Task List. Jerry will see the pending Leave Approval request from Tom. Note the Task information that we set up on step 2 of the workflow using the template - Leave Approval for {FirstName} {LastName}
- Click the
 Perform icon to display the task. Notice Manager Jerry sees the Employee Information section filled in by Tom and the Manager Approval section so he can approve or reject the request.
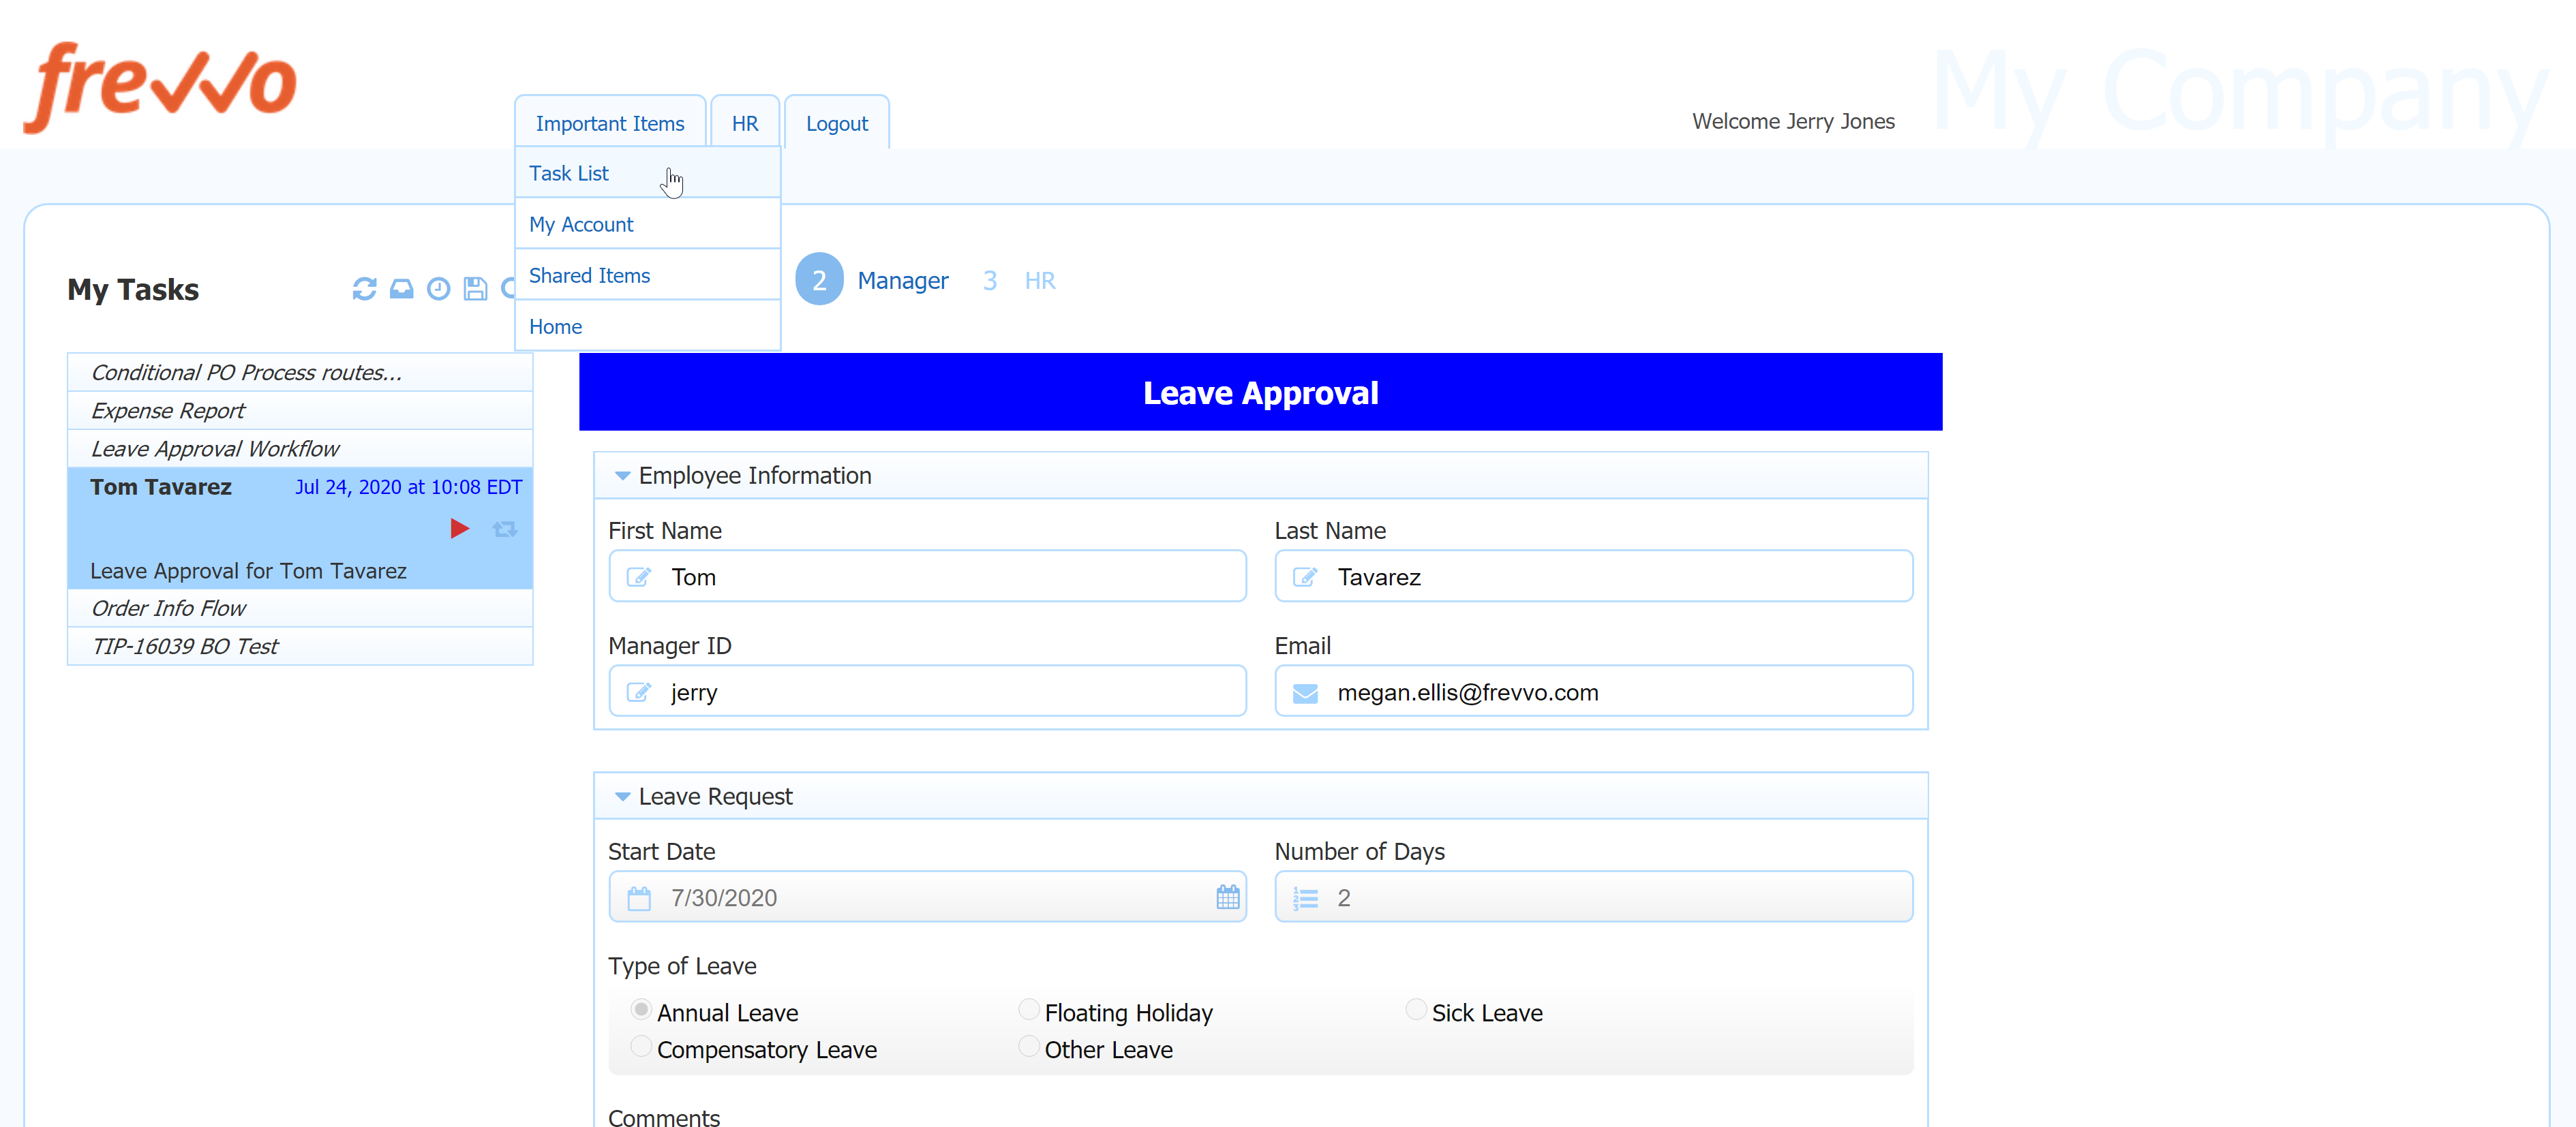
- Add a comment and sign the section.
- Click the customized Send to HR button. The pending message that you set up on the HR step of the workflow displays.
Process the Leave Request (HR)
- Logout of your space and login as sue@<your tenant>.
- Click on the Important Items tab and then on the Task List. The pending task for the HR department displays. Note Sue, the HR employee, sees the Employee Information section, the Manager Approval section and the HR section.
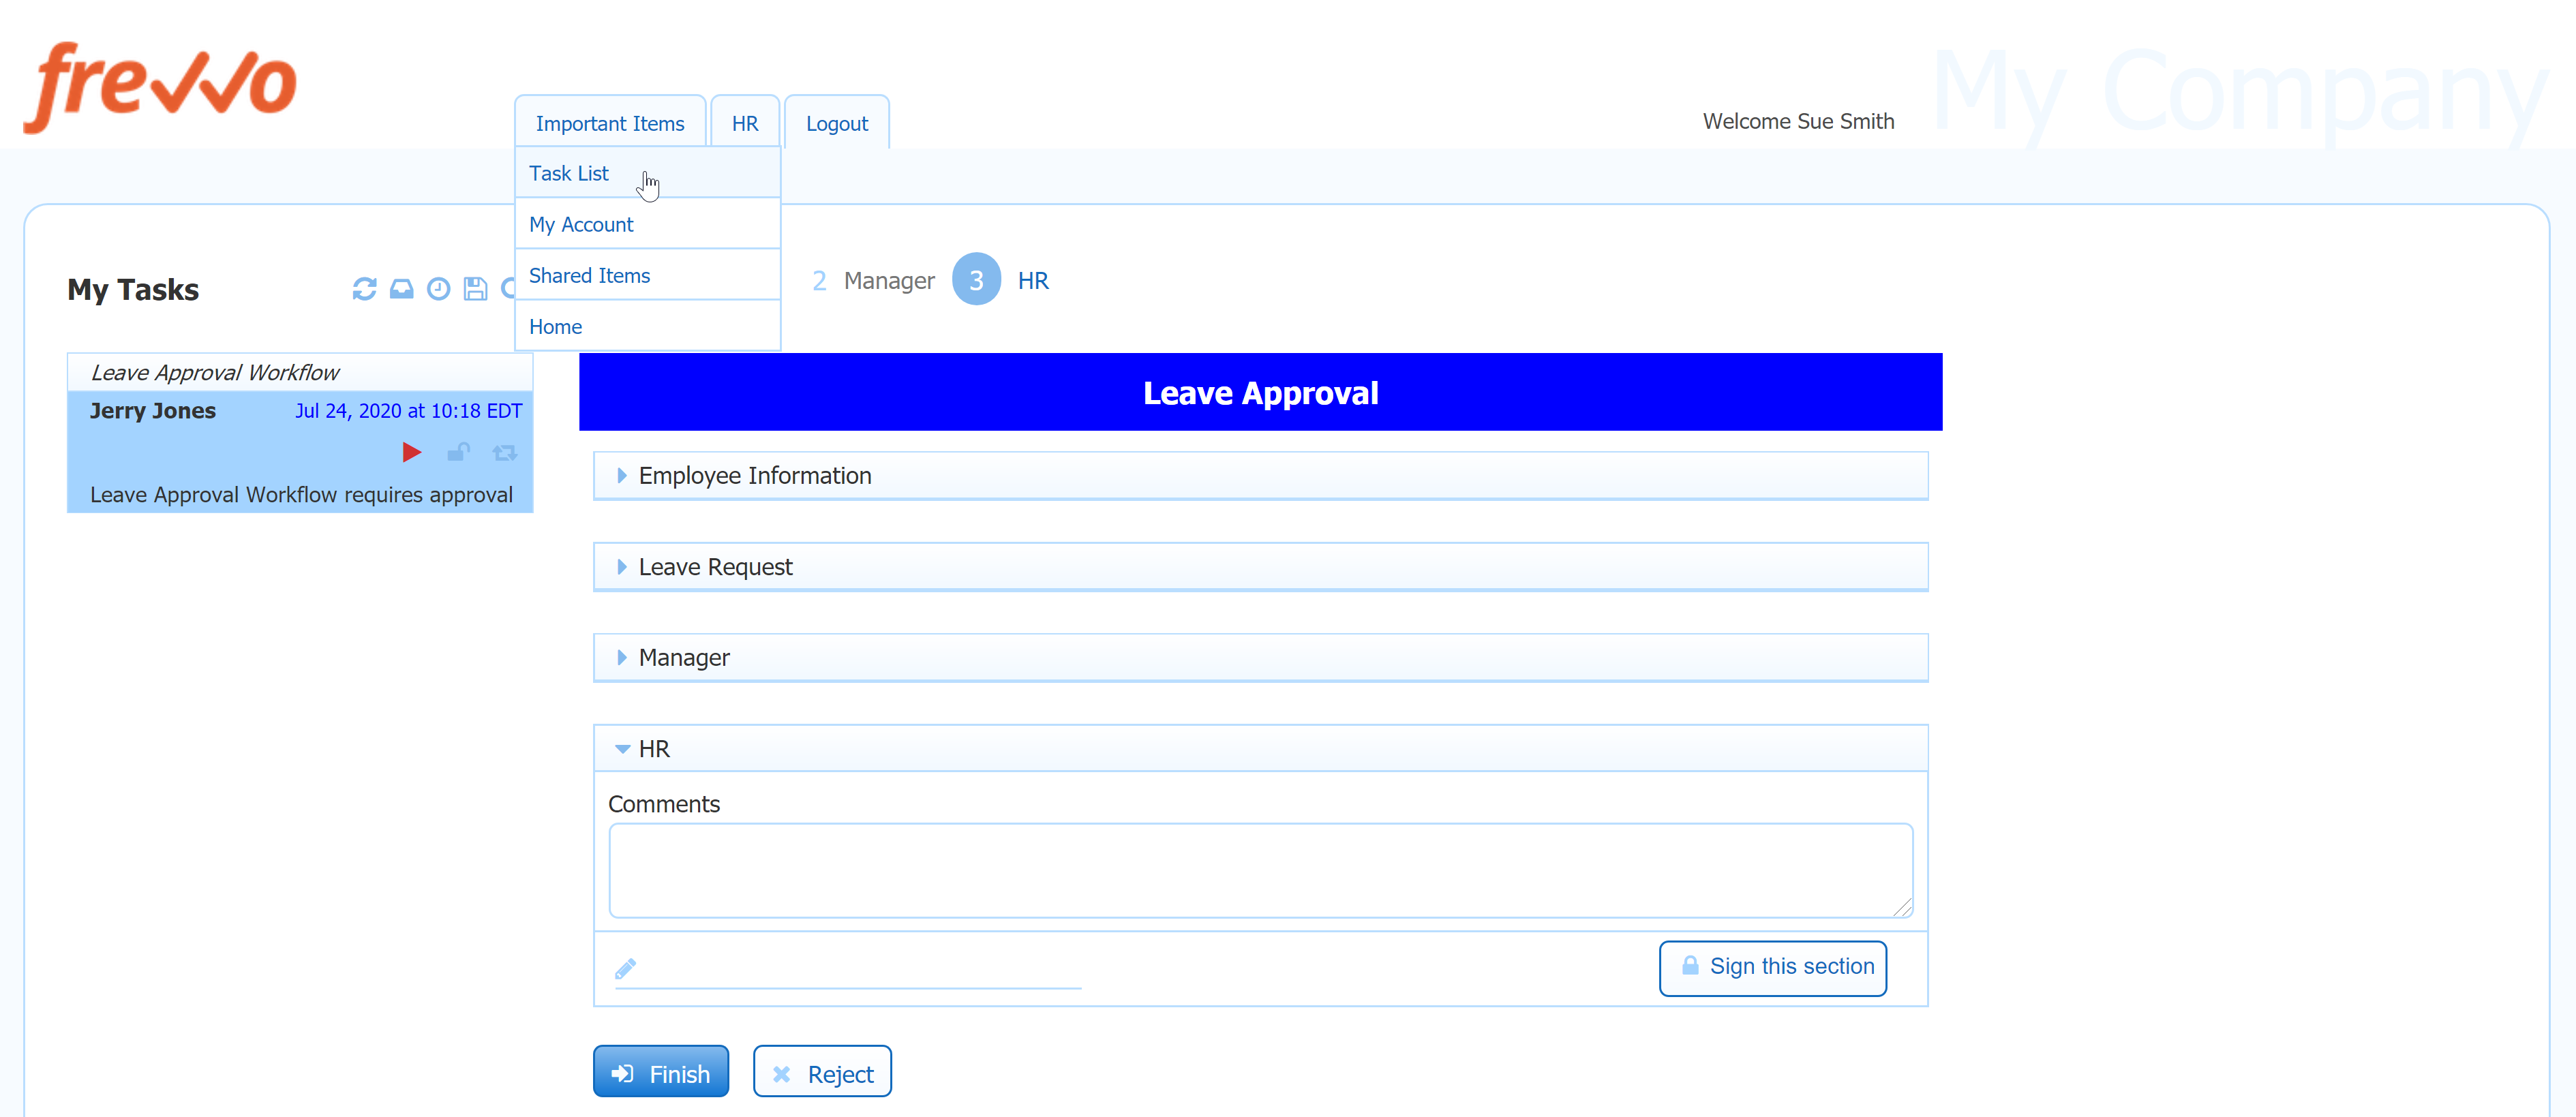
- Click the Finish button to complete the workflow. The workflow's configured form action message displays.

Logout of your frevvo space.
Related Topics
- Read the general documentation on designing workflows for a detailed discussion of frevvo workflows and their features
- Like forms, a workflow has three accessibility states. See making forms/workflows public for more details.
- Like forms, a workflows's doc and form actions are configurable. Go back into the frevvo workflow designer for one of your workflows to use the Form Action and Doc Action buttons. See submitting your form for more details.
Workflows can be custom styled to fit the look & feel of your existing web site. See Layouts and Styles.
Refer to Workflow Design Patterns for a discussion of useful design patterns for workflows.
See the Business Rules chapter for the details and examples of how to add behaviors to your forms/workflows using the Visual Rule Builder.
- Make your forms/workflows more interactive by using templates.
Before publishing forms/workflows to production, please see the Administrator Best Practices documentation. frevvo recommends that forms/workflows be created & tested by one/multiple designers in their own accounts. After the forms are designed/tested, they can be downloaded from the individual designer user accounts and uploaded to a generic production user account (ex: “production@<your tenant>" where the forms can be published and used by your end-users.