Email and Web Hook
- Megan Ellis
Email and Web Hook steps are known as Activity Doc Actions, and they help you configure what happens to your documents and data after each step of your workflow.
Activity Document Actions
What do you do with the data you collect from your workflow? frevvo offers the ability to configure a Document Actions to send a final email, post data to a web service/back end system, update a Google Spreadsheet, or save submissions to Google Drive, your Filesystem, or SharePoint using one of the frevvo Connectors. The Document Actions execute when the workflow is completed.
What if you want to perform some action after a workflow step is completed, instead of having to wait for the workflow to finish? You can configure an email, post to a web application, or both for any step in the workflow using Activity Document Actions. Examples include
- Send a customized email after a particular step, like emailing the client a copy of their Purchase Order after they have approved it.
- Each step of your workflow could post to a web application that will audit workflow steps.
Actions configured on the Email and Web Hook tabs execute when the user clicks the Continue button for each step. It does not matter if the next step is performed by the same user or if the step is put on the task list of a new role/user. These actions do not execute if you save a step back to your own task list by clicking Save instead of Continue, Save to role or Save to a different user.
You can configure both Activity Doc Actions for each step and Document Actions that execute upon completion of the workflow.
Use Email to send a custom email with attachments (if required) to a specified address. The email will be sent when the workflow step completes.
Add an Email Step
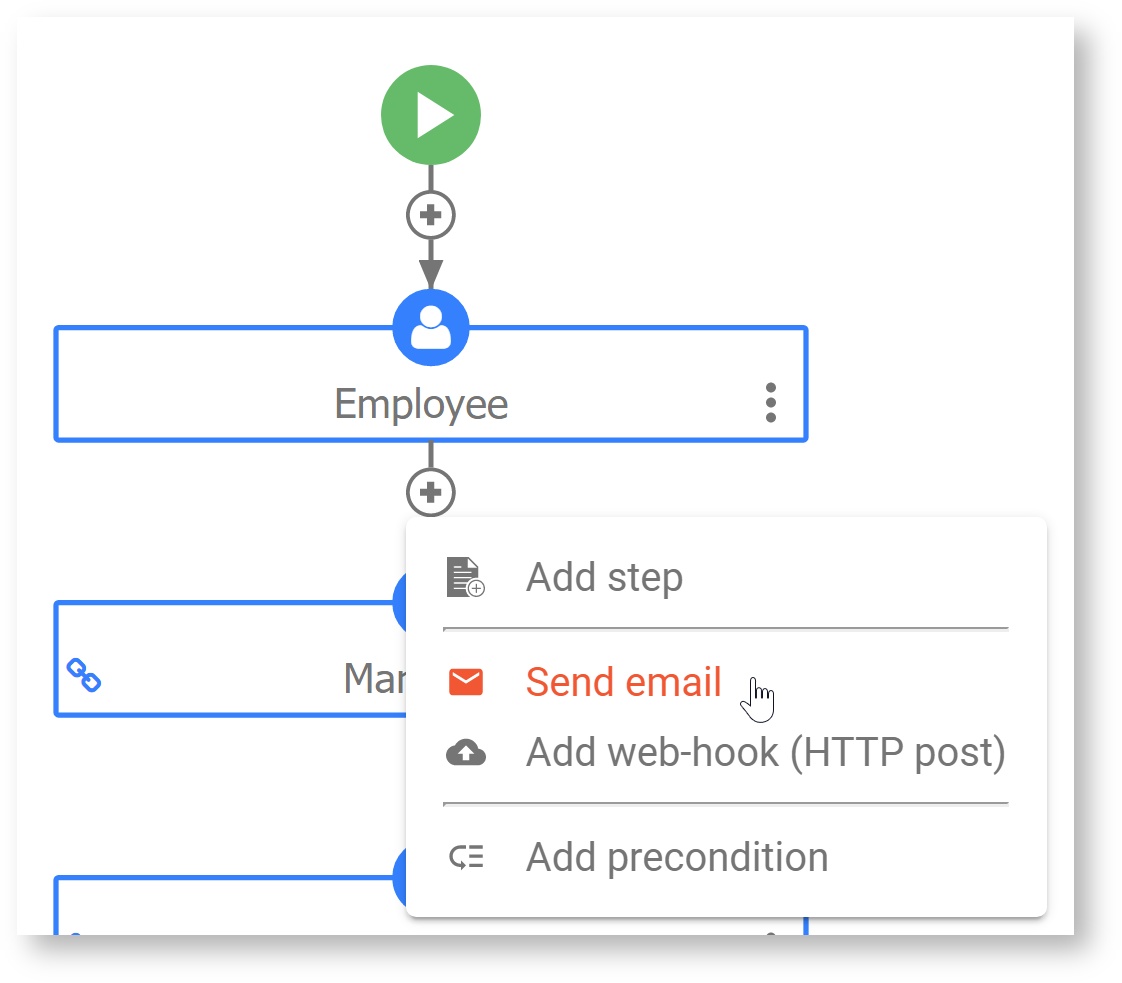
- Click the + Add Step icon just below that step you want to send the email.
- Select Email. The Add Step Email wizard will pop up.
- Enter email addresses or click the
 down arrow to select control and built-in form/workflow templates to dynamically determine it at runtime. *You must enter an email in the user@domain format in order to click Submit. The next three steps are optional and can be configured later.
 - Customize the Subject and Message of the email.
- Select the type of attachments to include in the email.
- Click Submit.
The Email action will be added to your workflow diagram, and its properties will open on the page so can further customize it.
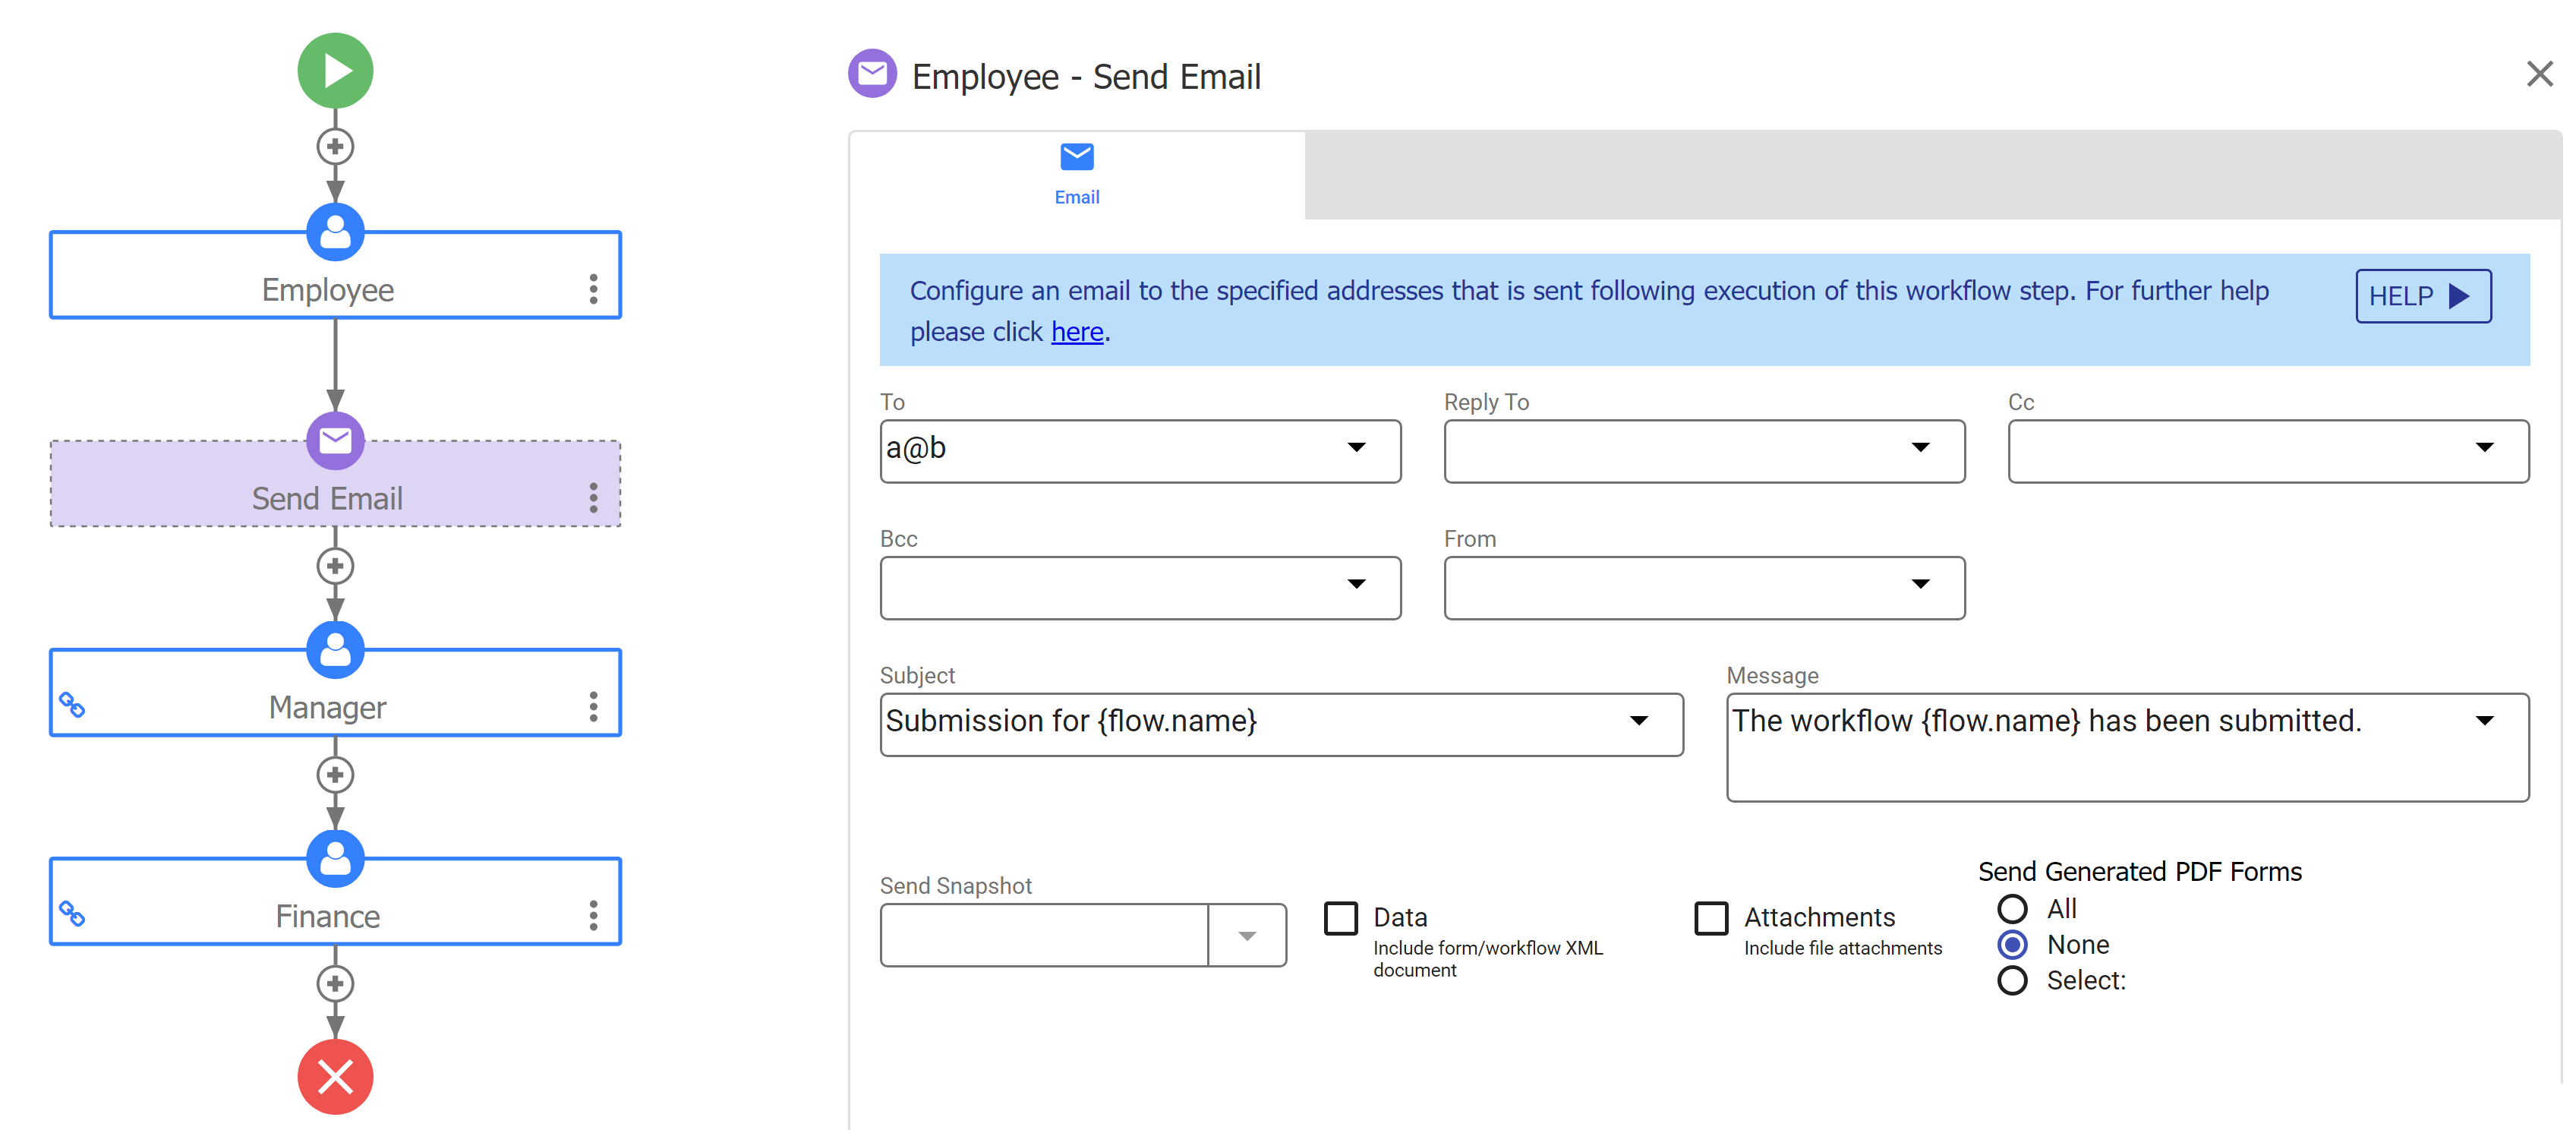
Configuring Email
You can configure the Email tab on as many steps of your workflow. Remember the Document Actions that are set up will execute when the workflow is completed, so you may not need to configure an action for the last step.
Specify the To: email address and the optional Cc: and Bcc addresses. You can enter multiple addresses separated by commas or semicolons in the To, Cc, and Bcc fields and a single Reply-To address.Templates can be used to provide the email addresses if desired. The "To:" email address is required. All other properties are optional. The tenant admin can configure the from email address on the tenant admin's Edit Tenant page. If you want an email to show a different From:address than what is configured on the Edit Tenant page, enter that address in the From: field. You can enter a static address or use templates to make the address dynamic. The From address replaces the default no-reply@…, an address configured on the Edit Tenant screen.
Select which documents are included in the email.
- You have the option of sending a filled form image using the Send Snapshot dropdown. Select the image type from the dropdown. Leave the field blank if you do not want to send a snapshot.
- The Data checkbox adds an XML document of your workflow.
- Check Attachments to include files uploaded to your form/workflow. Uncheck it to exclude attachments in the submission.
If you have Pixel Perfect mapped PDFs (ex: W-4, I-9, etc.) associated with your forms/workflows, choose the action you want to take by checking an option in the Send Generated PDF Forms field:
Check All to send all the Pixel Perfect PDFs in the submission. This is the default value.
Check None to send none of the PDFs.
Check Select to display a list of all the PDFs associated with your form/workflow. Click the ones you want to be part of the submission from the popup.
Snapshots are generated for the entire workflow when step Document Actions are configured on individual steps. For example, imagine a workflow with 2 steps. An email step Document Action is configured on step 1. When Step1 is submitted, a pdf containing all printable controls in both steps will be attached to the email. This is as designed.
Customize the subject and message of the email in the Subject and Message fields on the tab.
Email Example
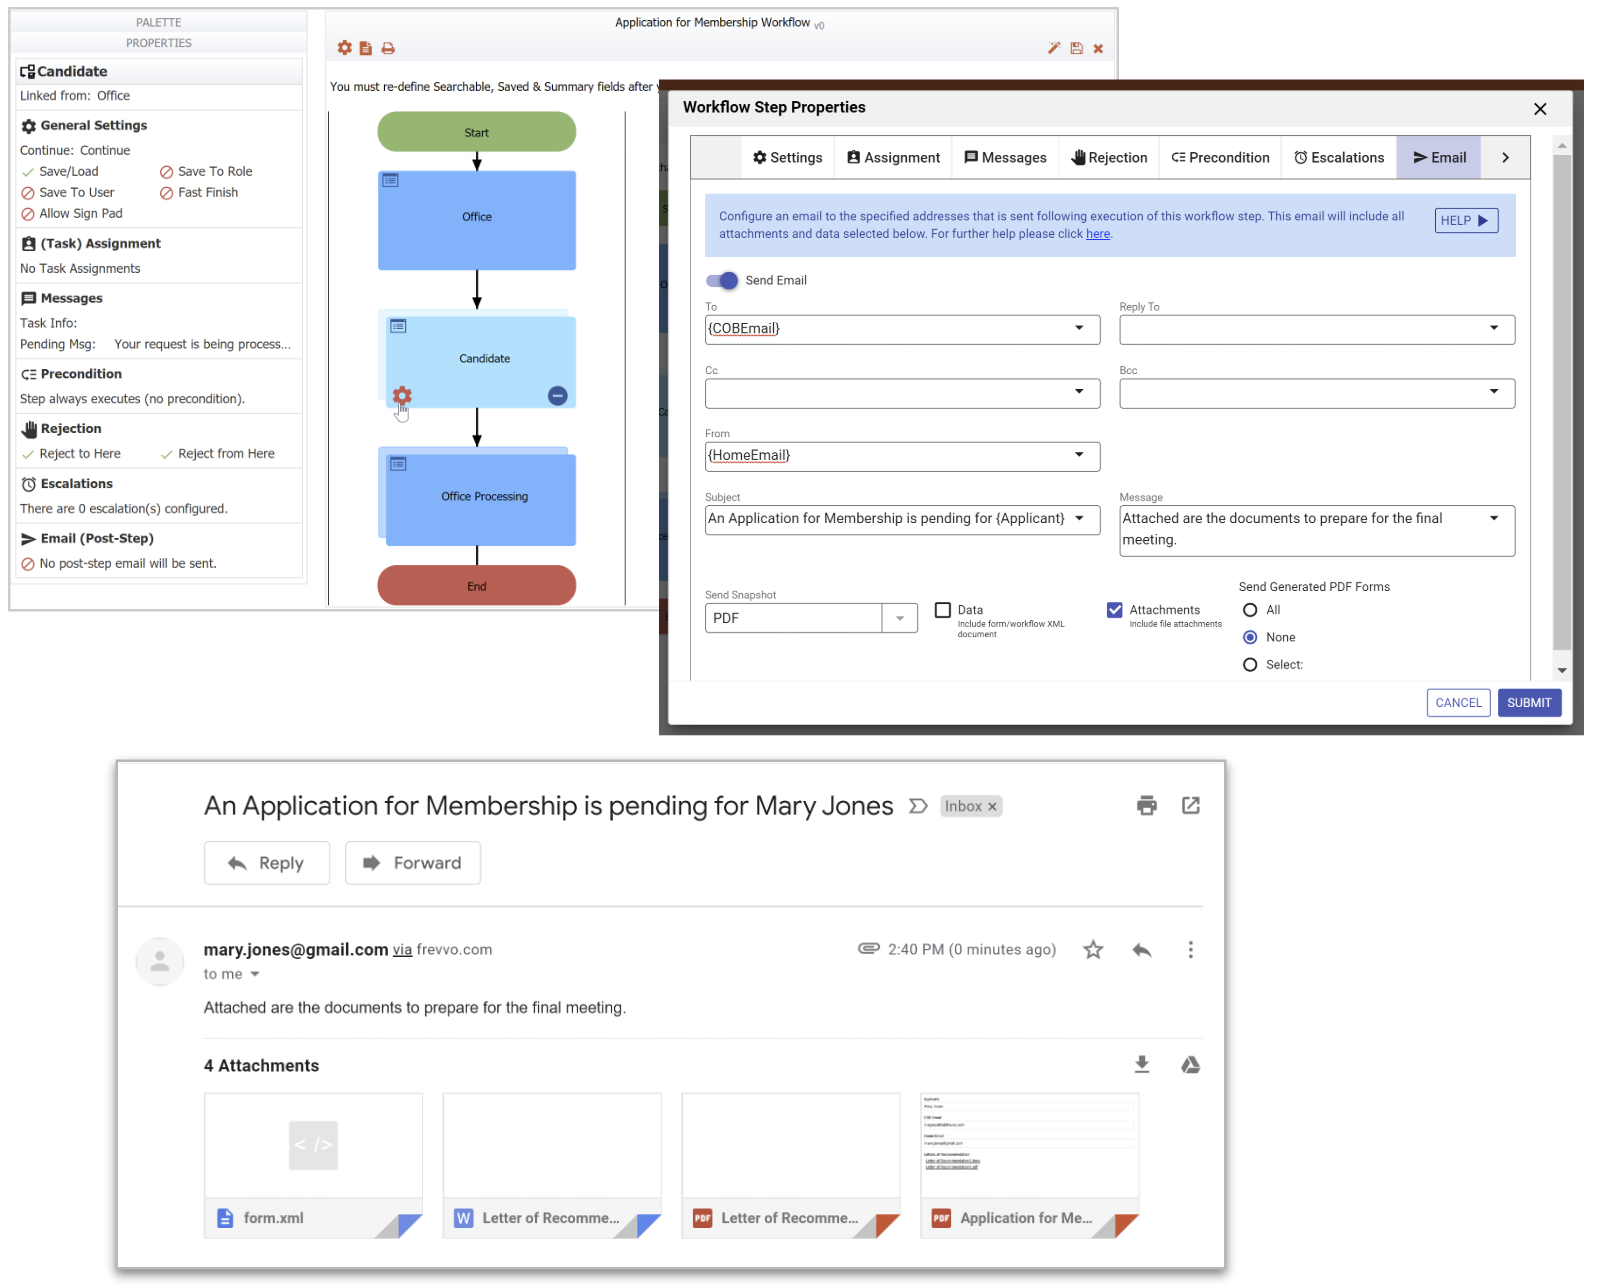
Consider the following Country Club Membership application workflow:
- To join the Country Club, an applicant has to be sponsored by 2 members of the club. Mary Jones calls the Club office and requests a membership application. The office worker creates a frevvo user id and password for the applicant, logs into the club's frevvo portal, submits the first step of the workflow, providing the user id and password for the applicant.
- Mary Jones gets a SetupTaskNotificationEmail with link back to the club portal and the information she needs to log in. She logs into the Country Club frevvo portal, fills out the application, attaches letters of recommendation and a photo, and submits the form.
- Office workers get a task notification email informing them that a membership application task is pending for final processing.
- When the office completes the final processing, an email goes to the Chairman of the Board with all documents attached – (Application, Letters of Recommendation, photo) so he can prepare for the final meeting with the applicant.
In this scenario, the Chairman of the Board is not informed about the applicant until all of the office tasks have been completed. This could delay the process for some time. The Country Club wanted to improve the process by sending the Chairman of the board an email with the relevant documents (application, letters of recommendation, photo) attached after the step in the workflow where the applicant completes the application.
The Email tab can be configured to send an email to the Chairman of the Board when the applicant submits the Candidate step (Step2) of the workflow. The application, required letters of recommendation, and photo are attached to the email. Now the Chairman of the Board can review the application and relevant documents (letters of recommendation, photo) without having to wait for the office to complete the final processing step.
Web Hook
Use the Web Hook tab to post the data from your frevvo workflow to a web application. Your data will post to the web application specified by the URL when the user clicks the Continue button on the workflow step.
For example. Each step of your workflow could post to a web application that you created to audit workflow steps. At this time, Web Hook cannot be used to kick off another workflow (please see this documentation for another option.)
You can display the Web Hook tab by:
- Clicking on the step of the workflow, then click the
 Edit Step Properties icon then click on the Web Hook tab.
 - You will not see a section for this tab in the PropertiesNavigator.
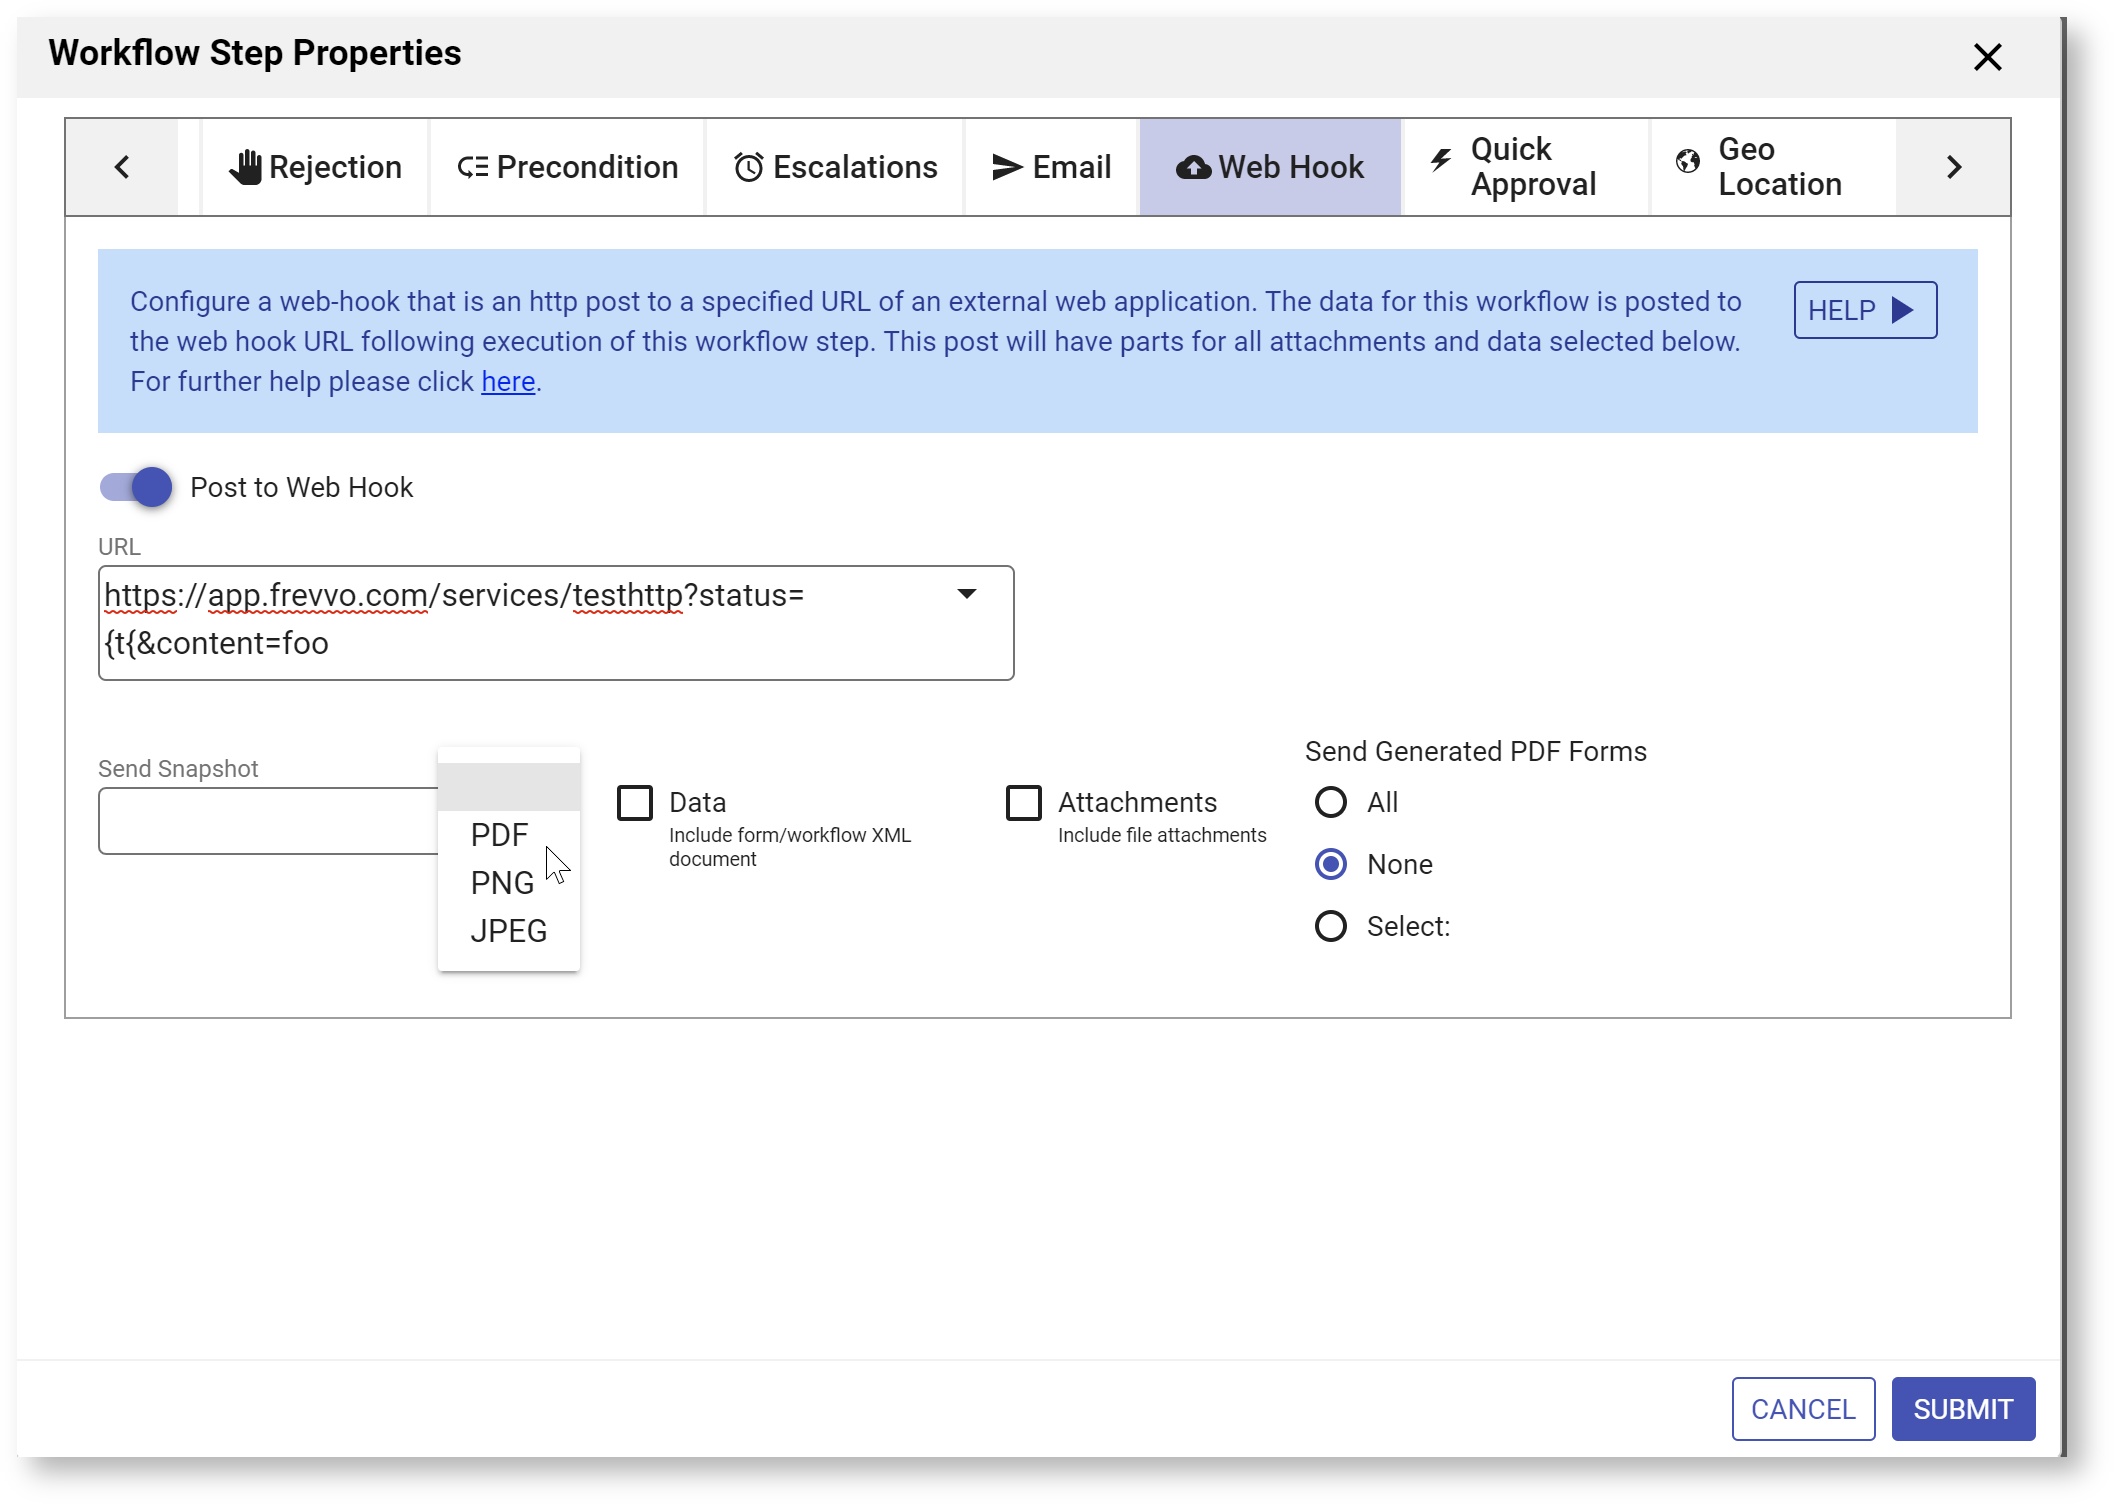
- Slide the
 toggle to the right to turn on the Post to Web Hook feature.
 - Click the down arrow to select control and built-in form/workflow templates in the URL.
- Select the type of attachments, if any.
- Remember to click Submit to save your changes.
Configuring the Web Hook
- Type the URL to your web application in the URL field. Templates can be used. Click the down arrow in the URL field to select control and built-in form/workflow templates in the URL to your Web Application. When the form is submitted, frevvo POSTs the document set to the specified URL. This option may be used for additional processing of data.
- You have the option of also sending a filled form image using the Send Snapshot dropdown. Select the image type from the dropdown. Leave the field blank if you do not want to send a snapshot of the workflow
- The Data checkbox sends the workflow XML document.
- Attachments uploaded to your form/workflow are sent if the Attachments checkbox is checked.
If you have Pixel Perfect mapped PDFs (ex: W-4, I-9 etc…) associated with your forms/workflows, choose the action you want to take from the Send Generated PDF Forms control:
Check All to send all the Pixel Perfect PDFs in the submission. This is the default value.
Check None to send none of the PDFs.
Check Select to display a list of all the PDFs associated with your form/workflow. Click the ones you want to be part of the submission from the popup.
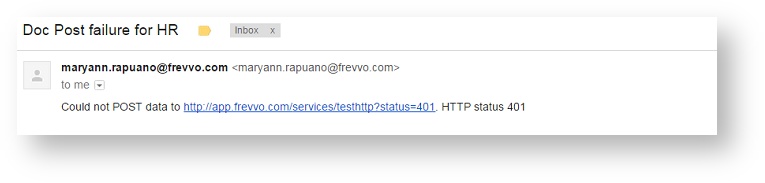
Activity Document Action Failure Notification
If the data from your workflow steps do not successfully reach the web application configured on the Web Hook tab, frevvo notifies all users in your tenant with the role of tenant admin of the failure via an email. If workflow administrator(s) are configured, the workflow administrator(s) receive the email instead of the tenant admin(s). HR is the name of the step in the workflow in the image.
Activity Document Action Behavior for Failed Post
If the HTTP POST returns a status code 422 and an error message, frevvo interprets this code to mean that the activity in question should be re-run. For workflow steps, this means that the form for the workflow step is re-rendered.
If you want to display a message to the user when the post fails,
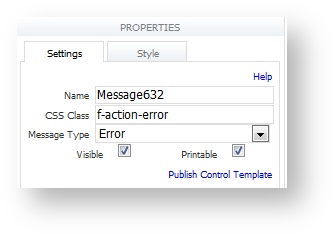
- Add a Message control with the text you want to display to the workflow step
- Add the class f-action-error to the CSS class property of the Message control. Controls with this class are not visible when the workflow step loads, even if the Visible property is checked.
- If the post returns a status code of 422 and some error text, the workflow step will be re-rendered and the Message control will display.
For example, Let's say you have a fields on the last step of a workflow step to collect a credit card number and the expiration date. The user fills in the information then clicks Finish. There is a Post Submission to a web app configured on this step.
https://<your server>/services/testhttp?status={t}&content=errortext
If the web app returns a status code of 422 and some type of error message, the workflow step will be re-rendered. The message informing the user to check the information and resubmit displays.
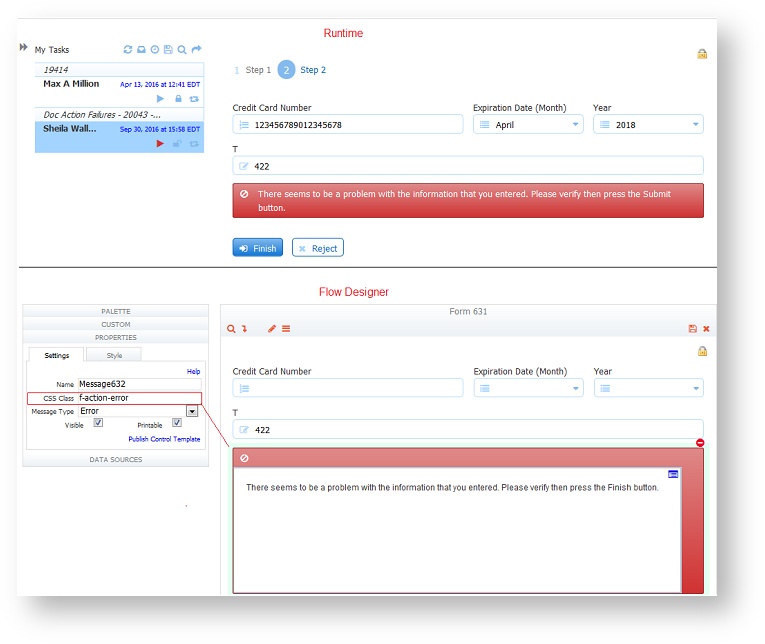
The workflow step will continue to be re-displayed until the post returns an Ok status (HTTP 200).
This behavior ONLY applies to POSTs to a web app in workflows. The behavior changes slightly if a Quick Approval/Rejection Setup is configured on the step. Refer to the Quick Approval Behavior when Activity Document Action post fails topic provides the details.