Live Forms v7.4 is no longer supported. Please visit Live Forms Latest for our current Cloud Release. Earlier documentation is available too.
Forms Home Page
- Former user (Deleted)
The forms home page appears after you create/edit an application or install a Form Template application.
On This Page:
You won't see any forms the first time you use , but as you soon as you create some or you install a form template application you'll see them here. Forms are single page.
Click the Page Help button  for information about the features on the Forms Home page. This feature is only available for Cloud customers.
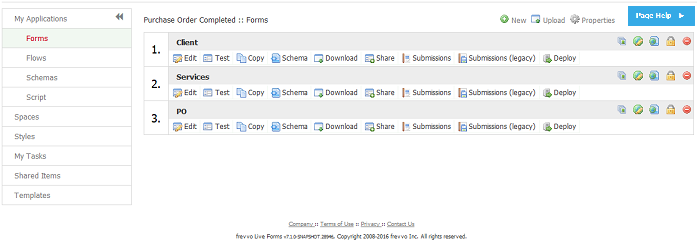
There are three icons at the top of the forms home page. Each is described below.
- Click the
 icon to create a new form. Once you have created some forms, the forms will be displayed based on the creation date with the oldest form on top. You cannot change this default sort order.
 - Click the
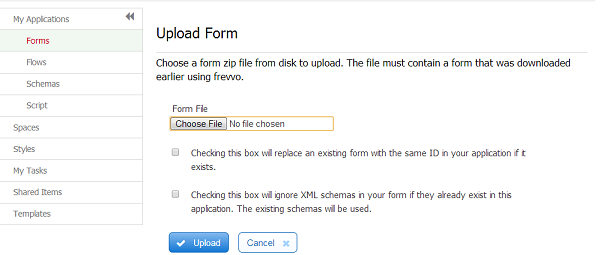
 icon to upload a form zipfile previously downloaded to disk.
 - Click the
 icon to edit the application properties.
To the right of each form name are five icons. Each is described below.
- Click the
 icon to attach a thumbnail icon to your form. You can select one of the icons provided by
 or you can upload your own. The icons will display when you access your forms/flows from a
- Click the
 icon to internationalize a form with translations in different languages.
 - Click the
 icon to publish your form as a template that you can use when creating other new forms. See Templates.
 - The next icon controls the Visibility of the form. Clicking on the
 icon brings up an enhanced Access Control wizard that allows the designer to specify runtime access for the form, configure selected users or roles that can execute the form and view/edit form submissions.
 - Click the
 icon to delete the form. Keep in mind there is no Undo feature so this action is permanent.
Deleting a form also deletes all associated form submissions and any saved in-process form instances. See replacing forms.
Below each form name are eight more icons. Each is described below.
- Click the
 icon to open your form and edit it in the Forms Designer.
 - Click the
 icon to test your form. See Testing Forms.
 - Click the
 to make a copy of your form. The newly copied form will be independent from the original; any changes you make to the copy won’t affect the original and vice versa. Since the newly copied form will be your most recently created form, it will appear at the bottom of your list of forms. Access Control permissions assigned to the original form are retained in the copy.
 - Click the
 icon to download the automatically generated schema associated with your form. This schema will contain all the controls added to your form from the Palette. This will not contain controls added to your form from your own schemas. See Schemas for more details.
 - Click the
 icon to download a zipped version of the form to disk. A single zip file will be created with the name of your form, followed by _form.zip. This icon also appears on the Applications home page so you can zip your entire application, including all the forms it contains. The zip file name will be the name of your application, followed by _app.zip.
 - Click the
 icon to share your forms in a number of different ways. Before you click this remember to mark your form public or you will not be able to share it with others. See Sharing Forms.
 Click the
 icon to view the submissions for this form. Click the
  icon to view submissions in the Legacy view.The Export of submissions to Excel feature has been replaced by the Download to CSV. If you have not used the Export to Excel feature in the past, we recommend that you become familiar with the Download to CSV.You can still use the Export to Excel feature by accessing it from the Submissions Legacy view. However, the Legacy Submissions view and the Export to Excel may be removed in a future release.
- Click the
 icon to deploy a form to Production state and remove the Development watermark. This toggles the icon to the
  undeploy icon. If your form server license enables a limited number of Production forms you will get an error message when you hit your license production form limit.
 - Click the icon to undeploy a form and move it from the Production state back to the Development state.
Assigning a Thumbnail Icon to a Form
You can attach a thumbnail icon to a form/flow by clicking in the icon or the Forms/Flows Home Page. You can select one of the icons provided by or you can upload your own. The icons will display when you access your forms/flows from a
space on mobile devices (iPhone and iPad) mobile devices. See below. If you do not specify an icon for your form/flow,
will display a default thumbnail where required.
When you first click on the icon, you will see a list of icons provided by .
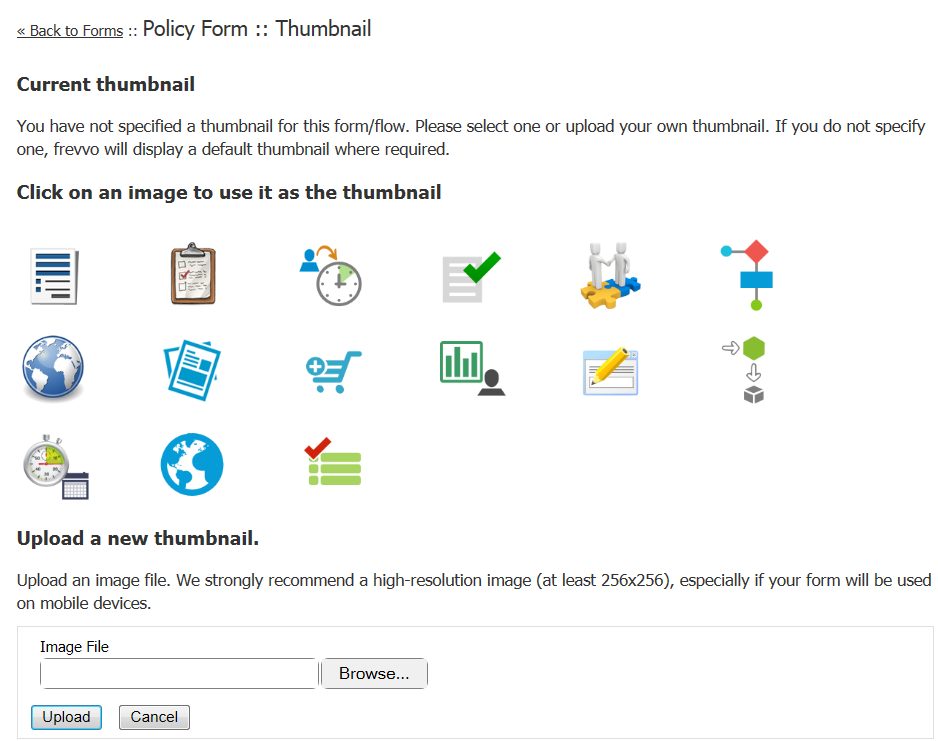
Since the form/flow does not have an icon assigned at this time, the Current thumbnail section of the screen will display the message "You have not specified a thumbnail for this form/flow. Please select one or upload your own thumbnail. If you do not specify one, frevvo will display a default thumbnail where required." Once you select or upload a thumbnail, the Current thumbnail section will update with that icon. You will not be able to delete the current thumbnail once it has been assigned but if you update the form/flow icon by selecting another one from the list or by uploading an image file, the updated icon will be reflected in the Current thumbnail section.
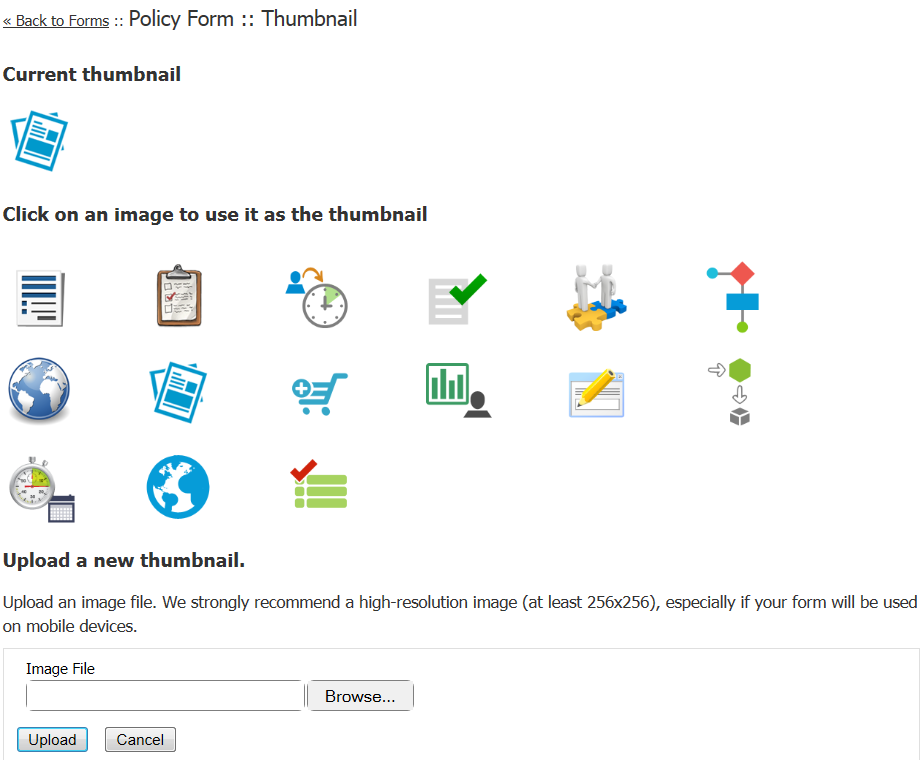
If thumbnail changes are not reflected immediately, refresh the screen.
Production Forms
New forms have a default deployment state of either Production or Development. The icon on each form toggles this state. Forms in the Development state have a watermark. Change them to Production to remove the watermark. Your license key controls the number of forms that can be set to Production.
The deployment state defaults to Development irrespective of the default deployment state set by your license key and by your tenant admin for the following scenarios:
- When a form is uploaded into your application from disk
- When you make a copy of your form
- When you create a new form from a form template other than the default template
To manage production forms go to your My Account -> Manage Production forms page. See managing production forms for more information
Deleting Forms
When you delete a form, by clicking the icon the form is permanently removed and cannot be restored. The delete operation also deletes all submissions from ' submission repository and any saved in process form instances.
Before deleting you may wish to download a copy of the form to disk by clicking the download icon. Click deleting an application and deleting/replacing flows for information on deleting applications and flows.
Uploading/Replacing Forms
If your goal is to update your form to a new version that you had previously downloaded to disk or to revert to an older version previously downloaded to disk, do not first delete the form since, as stated, this removes all associated saved/submitted/pending form instances. Instead leave the original as it is and upload the version from disk by clicking the upload icon. A dialog will display that lets you browse to the form on disk and give you the option of replacing the current with this new version. Checking the option to ignore XML schemas in the form being uploaded if those schemas already exist in the application, results in the existing schemas being used.
Designer ACL
Designer users can grant other users the ability to edit a form and access related submissions. The Access Control and Shared Items topic explains the details.