This documentation is for Live Forms 9.1. v9.1 is a Cloud Only release. Not for you? Earlier documentation is available too.
COVID-19 Response Info: At frevvo, our top priorities have always been employees and customers. We have taken several steps to promote the well-being of our people, to minimize services disruptions, and to help where we can. Visit our website for updates.
Getting Started with Forms
- Former user (Deleted)
- Megan Ellis
Thank you for your interest in frevvo . The steps will guide you through the creation of a form that can be used by any HR department for employee Leave Approval requests. When this form is completed you can easily incorporate it into a
workflow.
We strongly recommend that you jump directly to the Forms Tutorial if you are already comfortable with the drag and drop feature. The Forms Tutorial is a quick introduction to many of the basic features and controls available in the
form designer. If you prefer detailed step by step instructions to help you make your first form then continue with this tutorial.
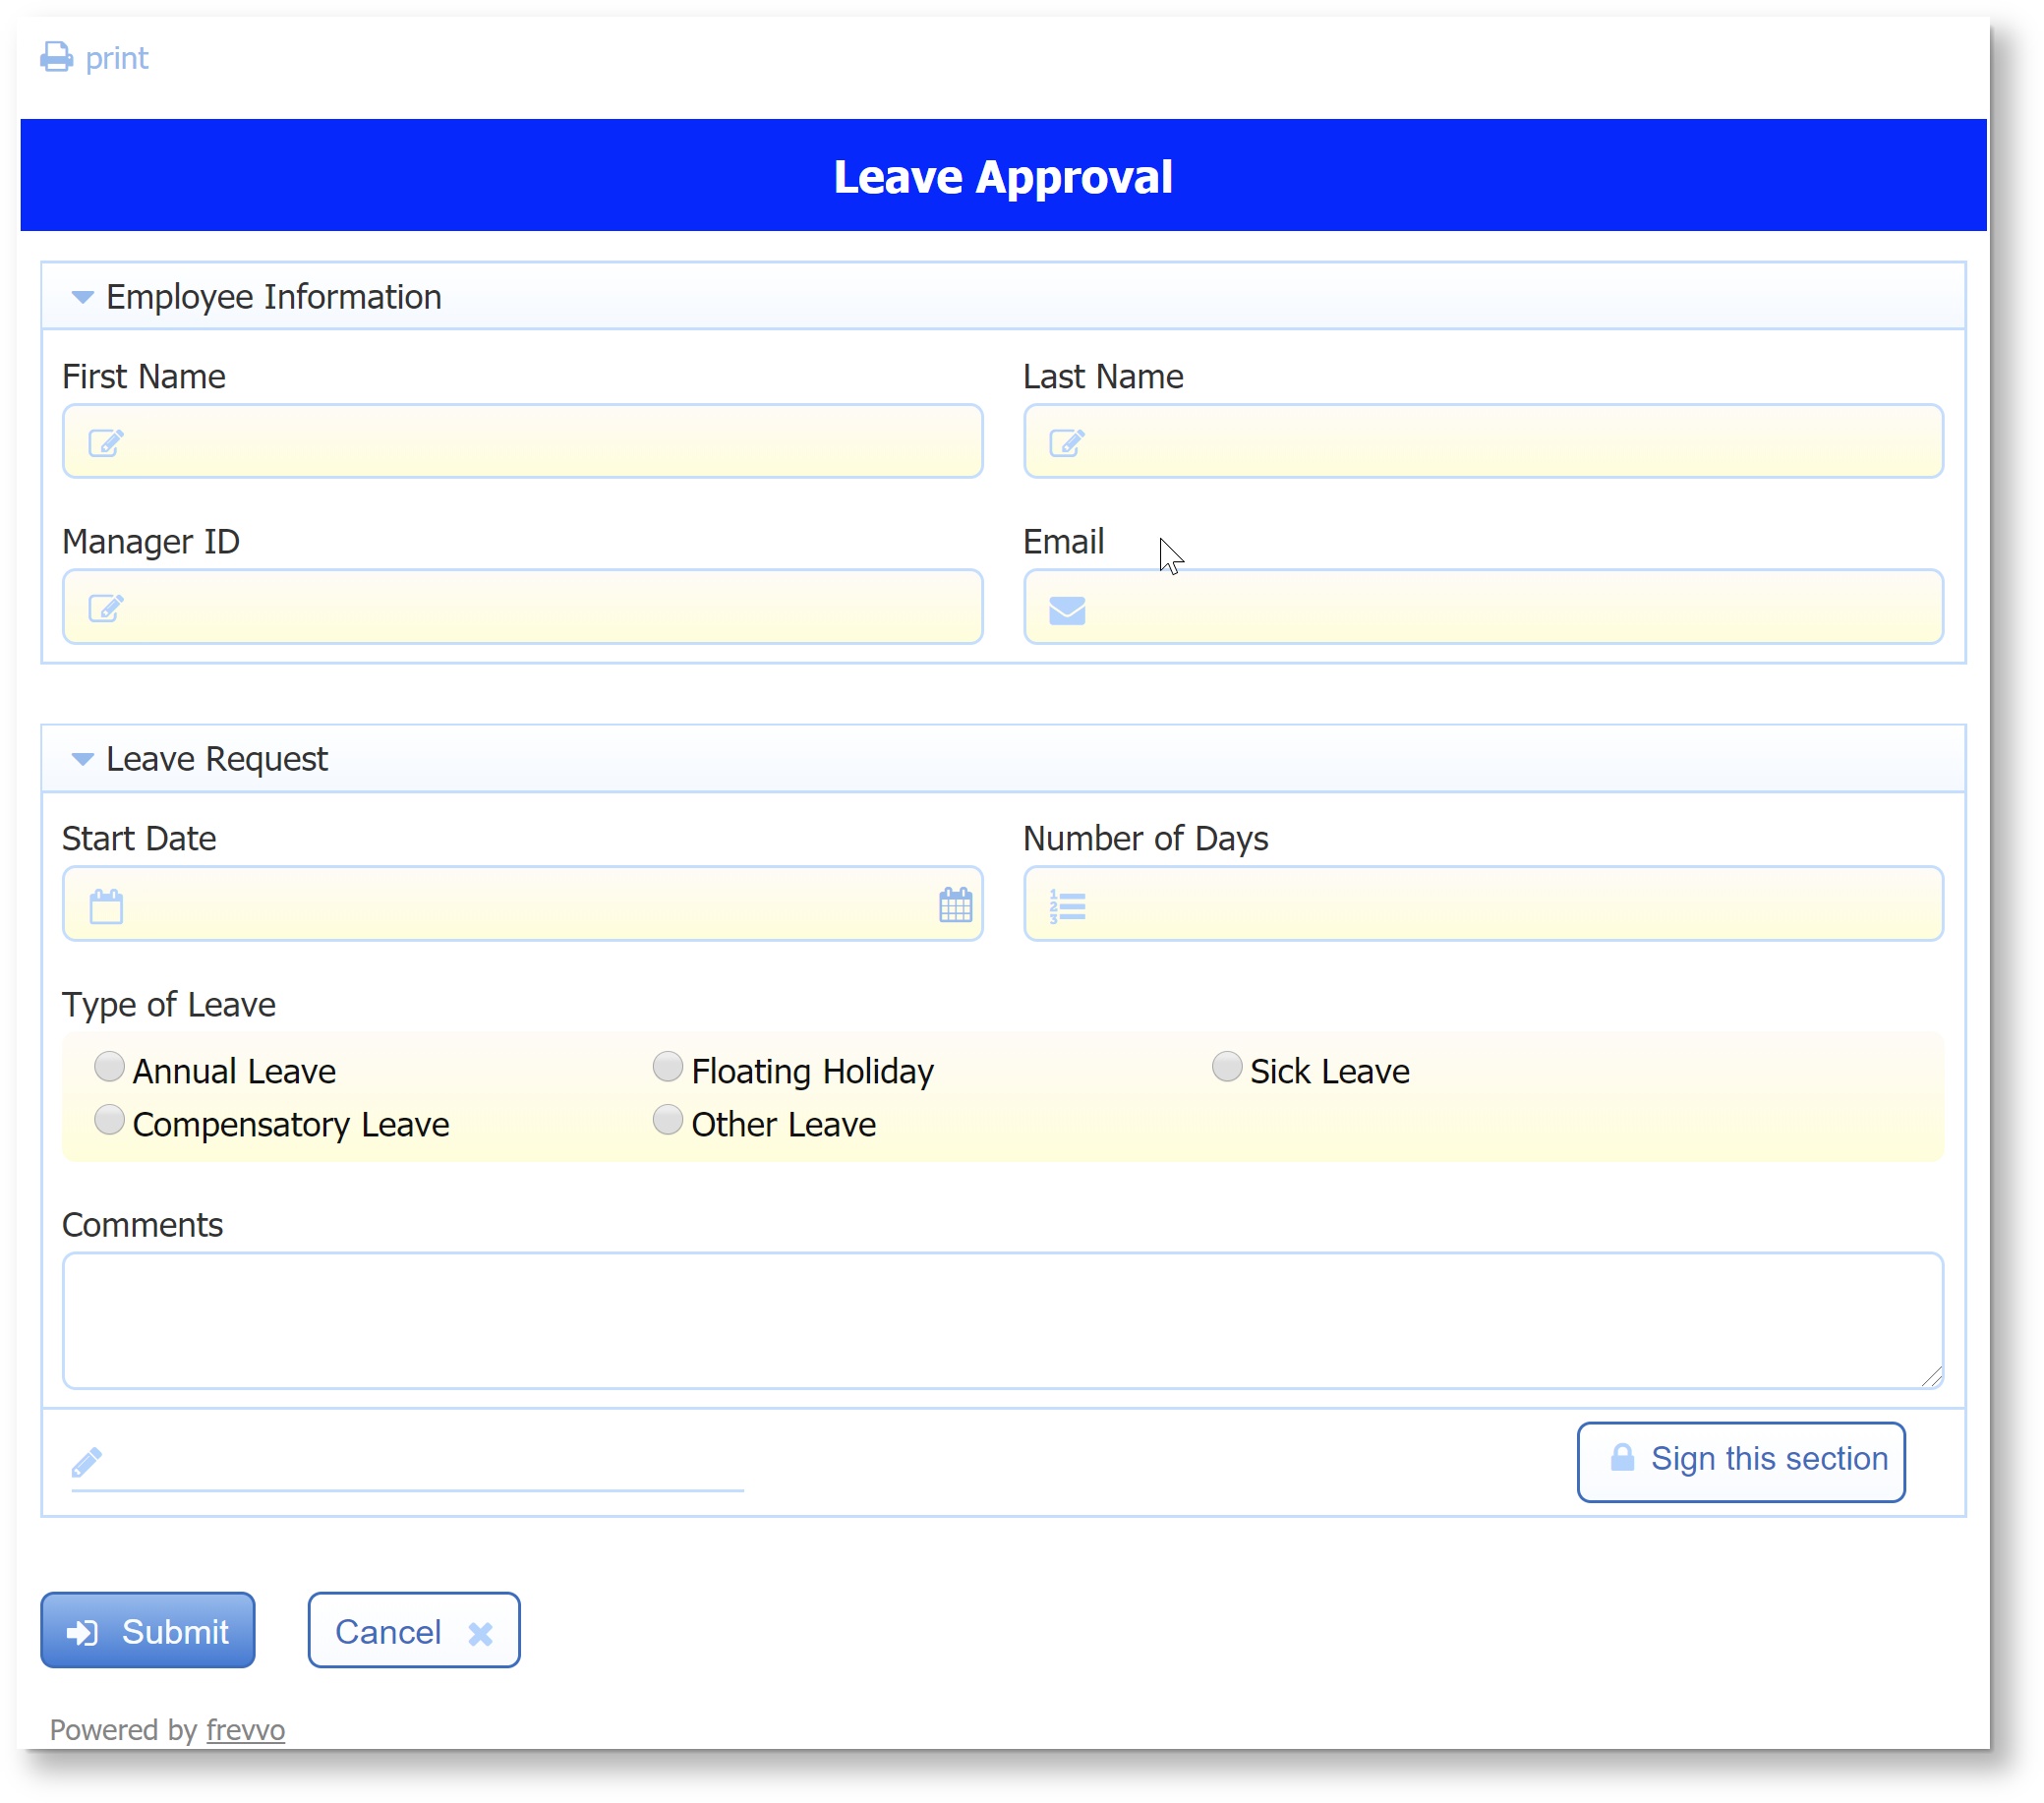
Create a Leave Approval Form
The Leave Approval form you are going to create contains two sections: one to collect information about the employee requesting the Leave and a second section to collect details about the leave and the employee's signature. The form will contain one business rule to show/hide a verification field if the employee selects the sick option as the type of leave.
Add the Title and the Employee Information Section
Logon to your
tenant as the designer.
- Click the
 Add icon and select Create a New Form.
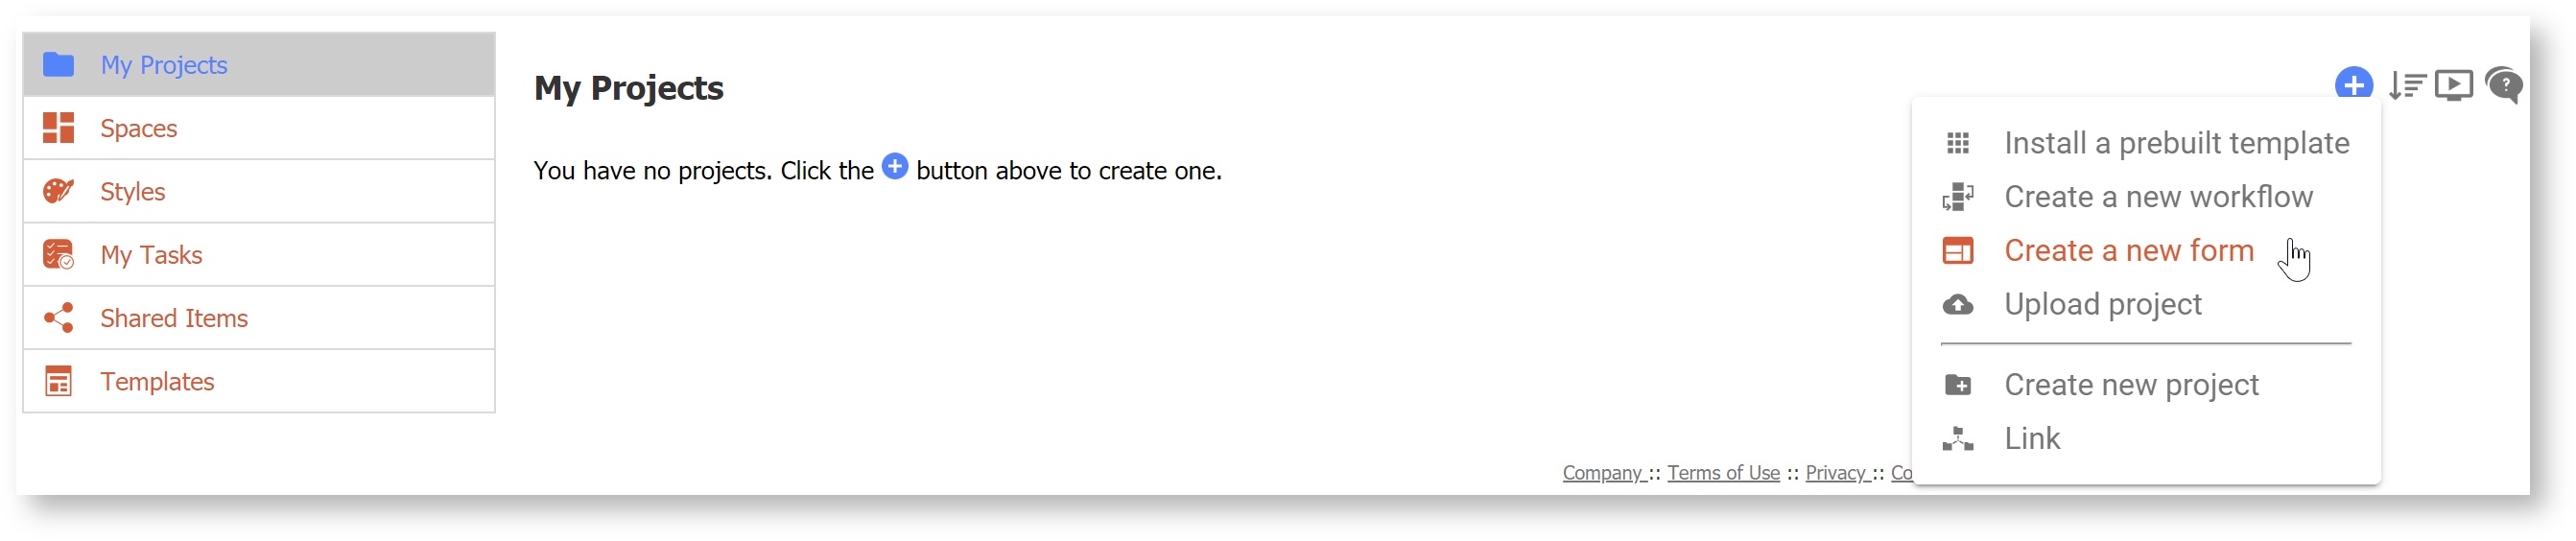
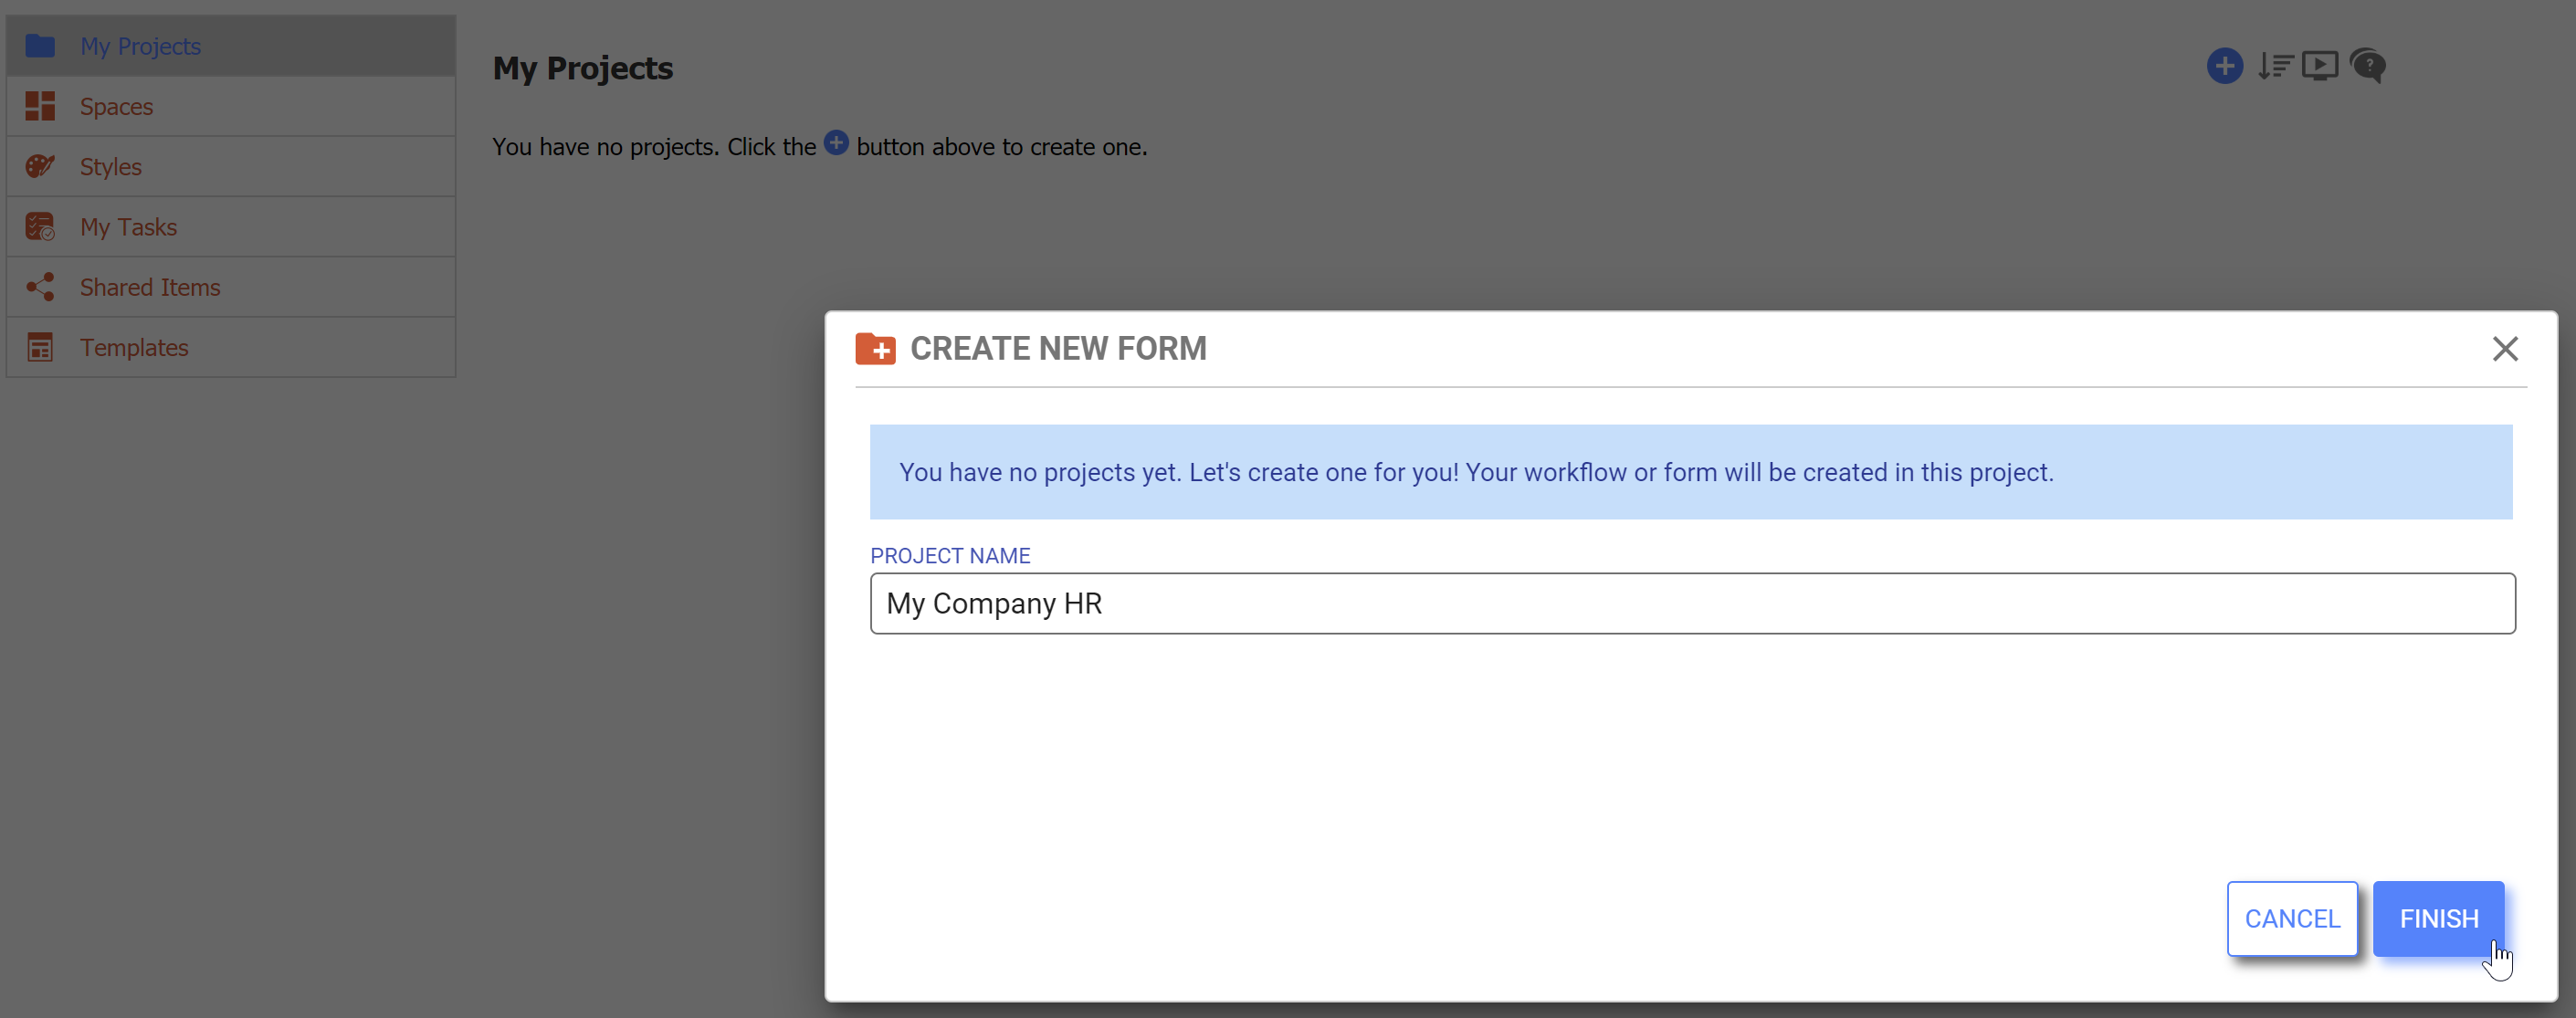
- When prompted, change the Project Name to "My Company HR." (If you already have Projects in your list, you may choose whether to create a new project or add to an existing project.)
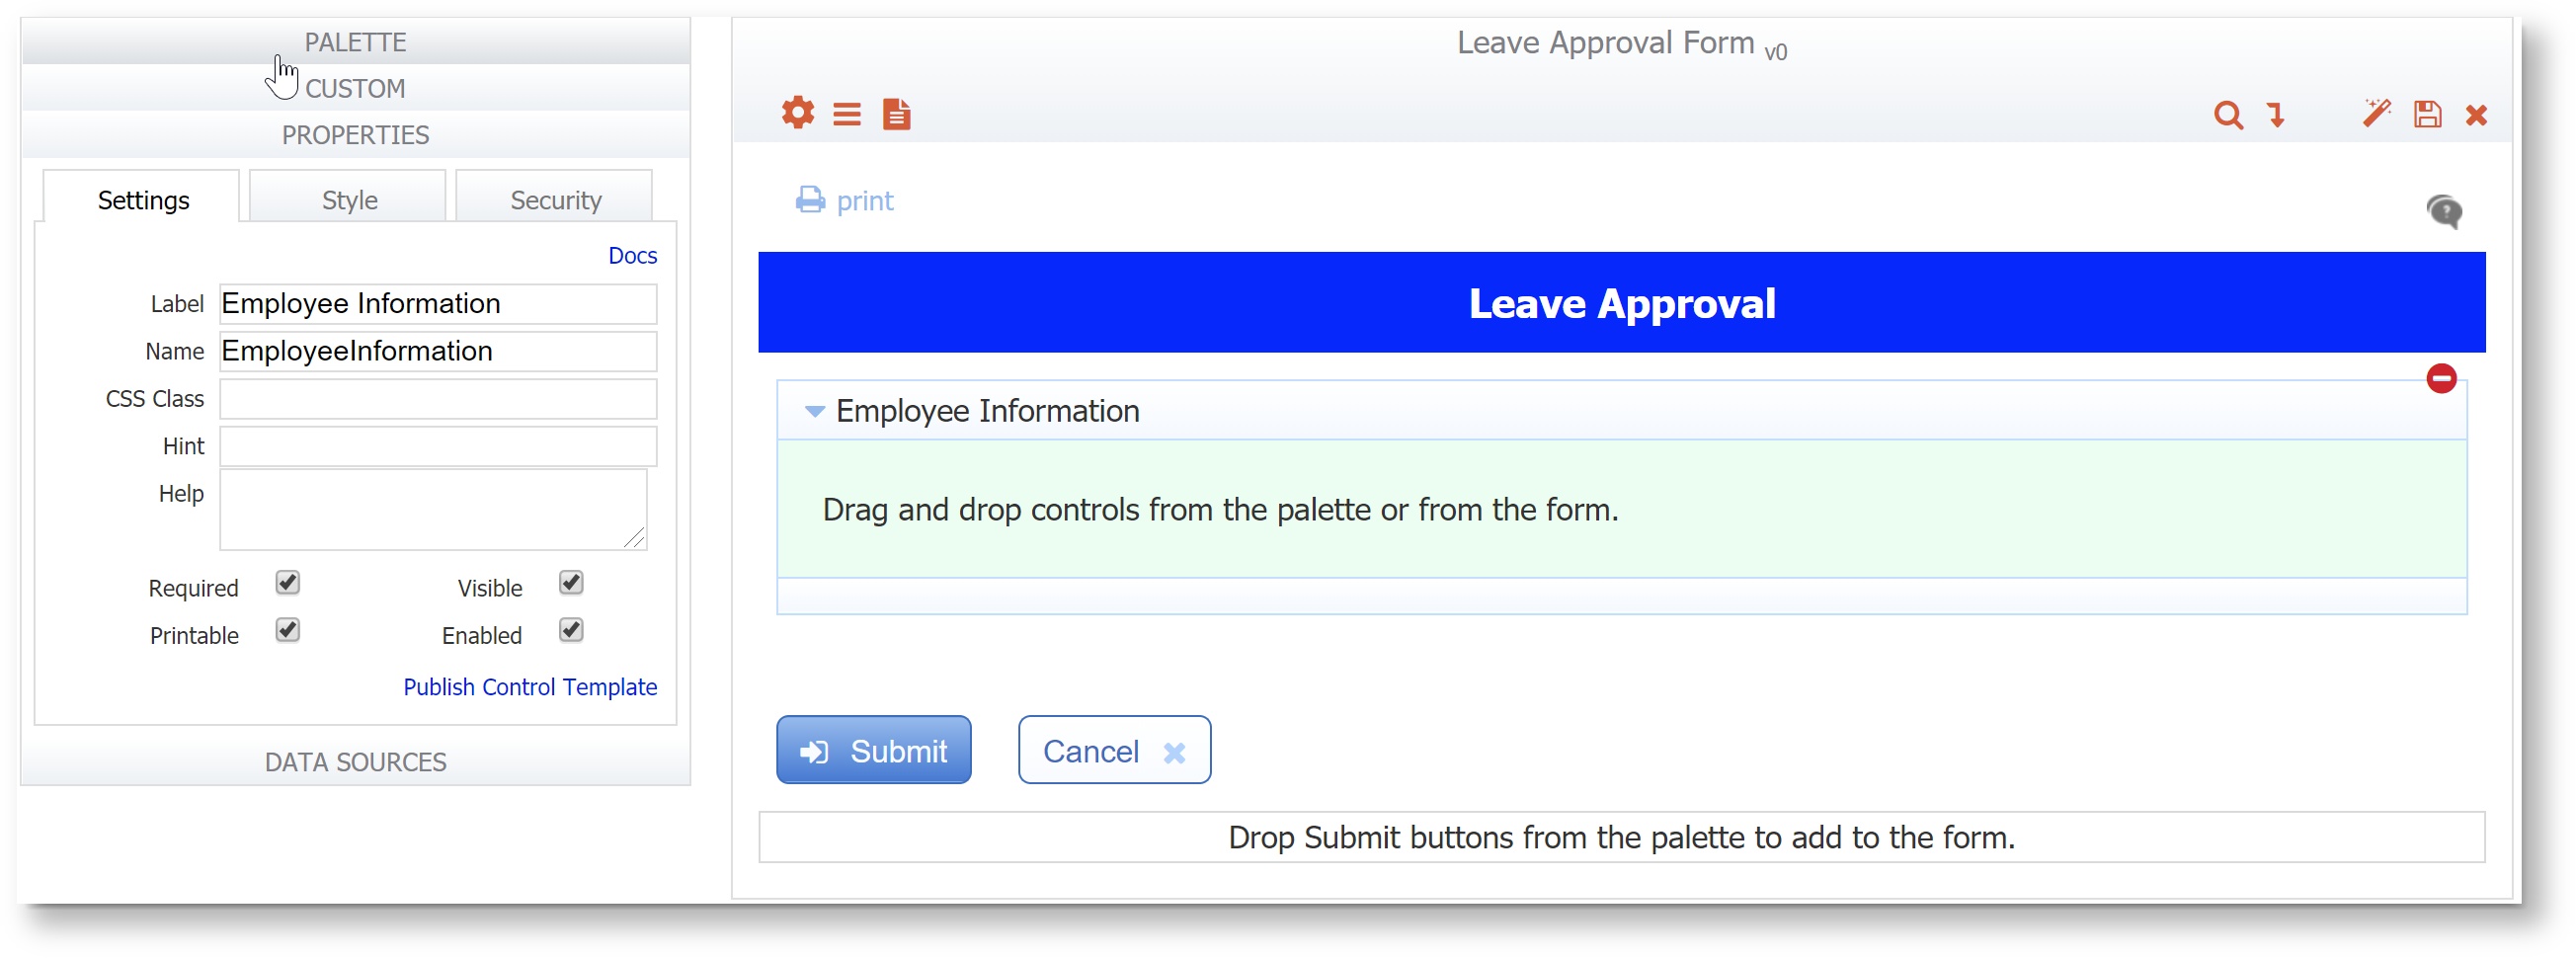
- You will be taken directly to the Form Designer. Change the form name to "Leave Approval Form" by click on the form name in the toolbar, or in the Properties Navigator on the left side.
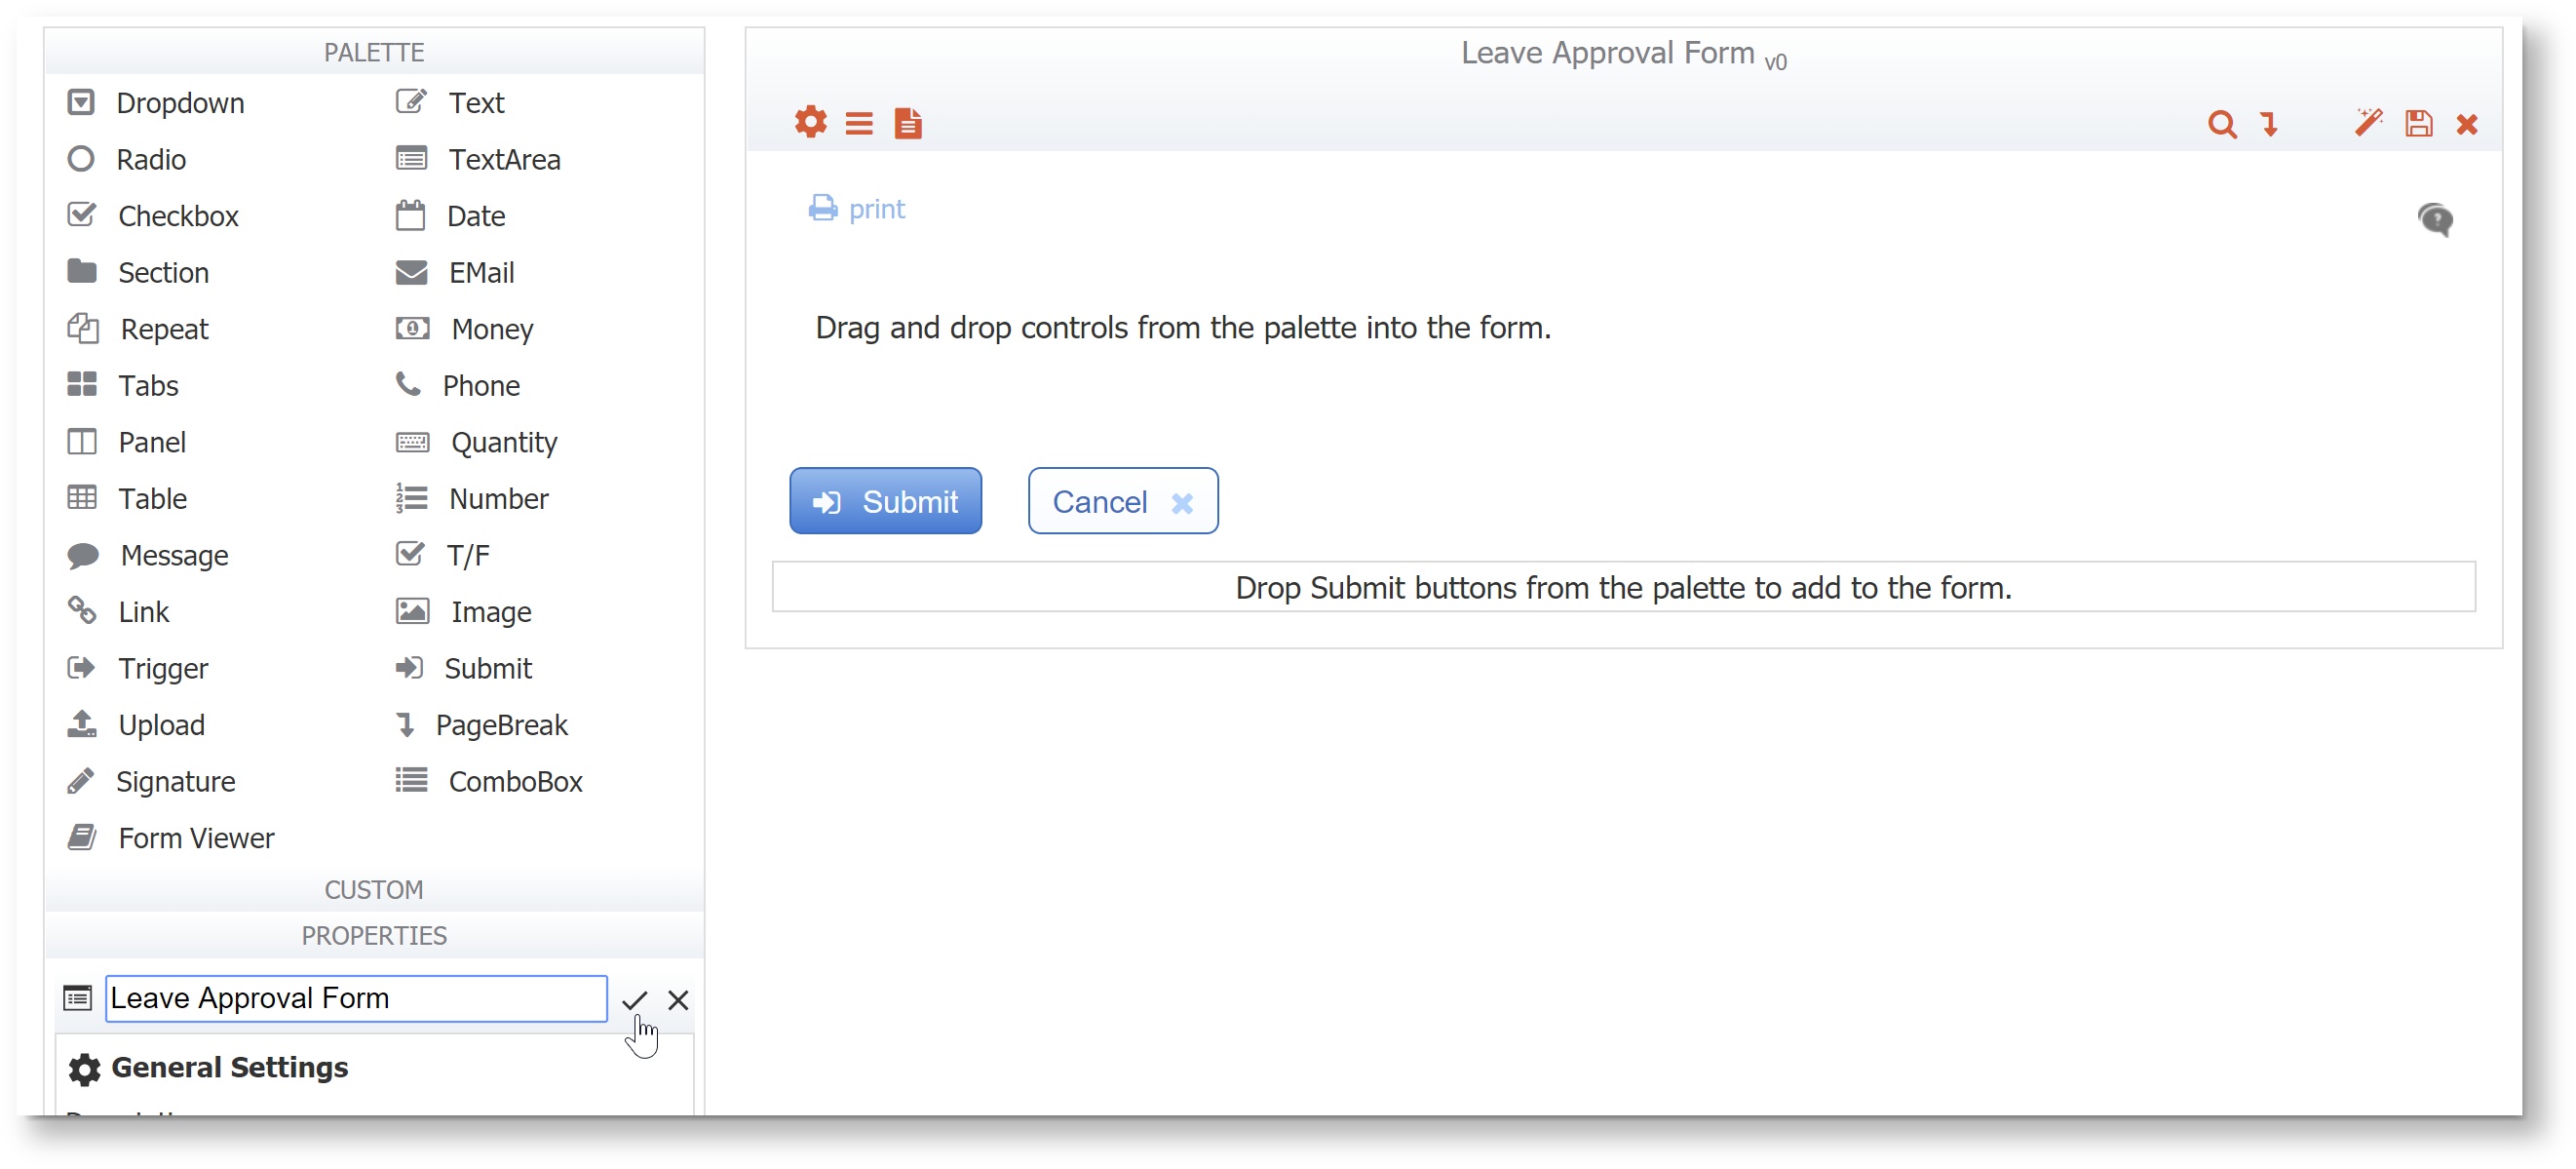
- Drag a Message control from the palette and drop it onto the canvas. Look for the green arrows to help you drop the control in the desired place on the form. As you add more controls, you will see double green arrows, up, down or side arrows to help you place controls on the canvas.
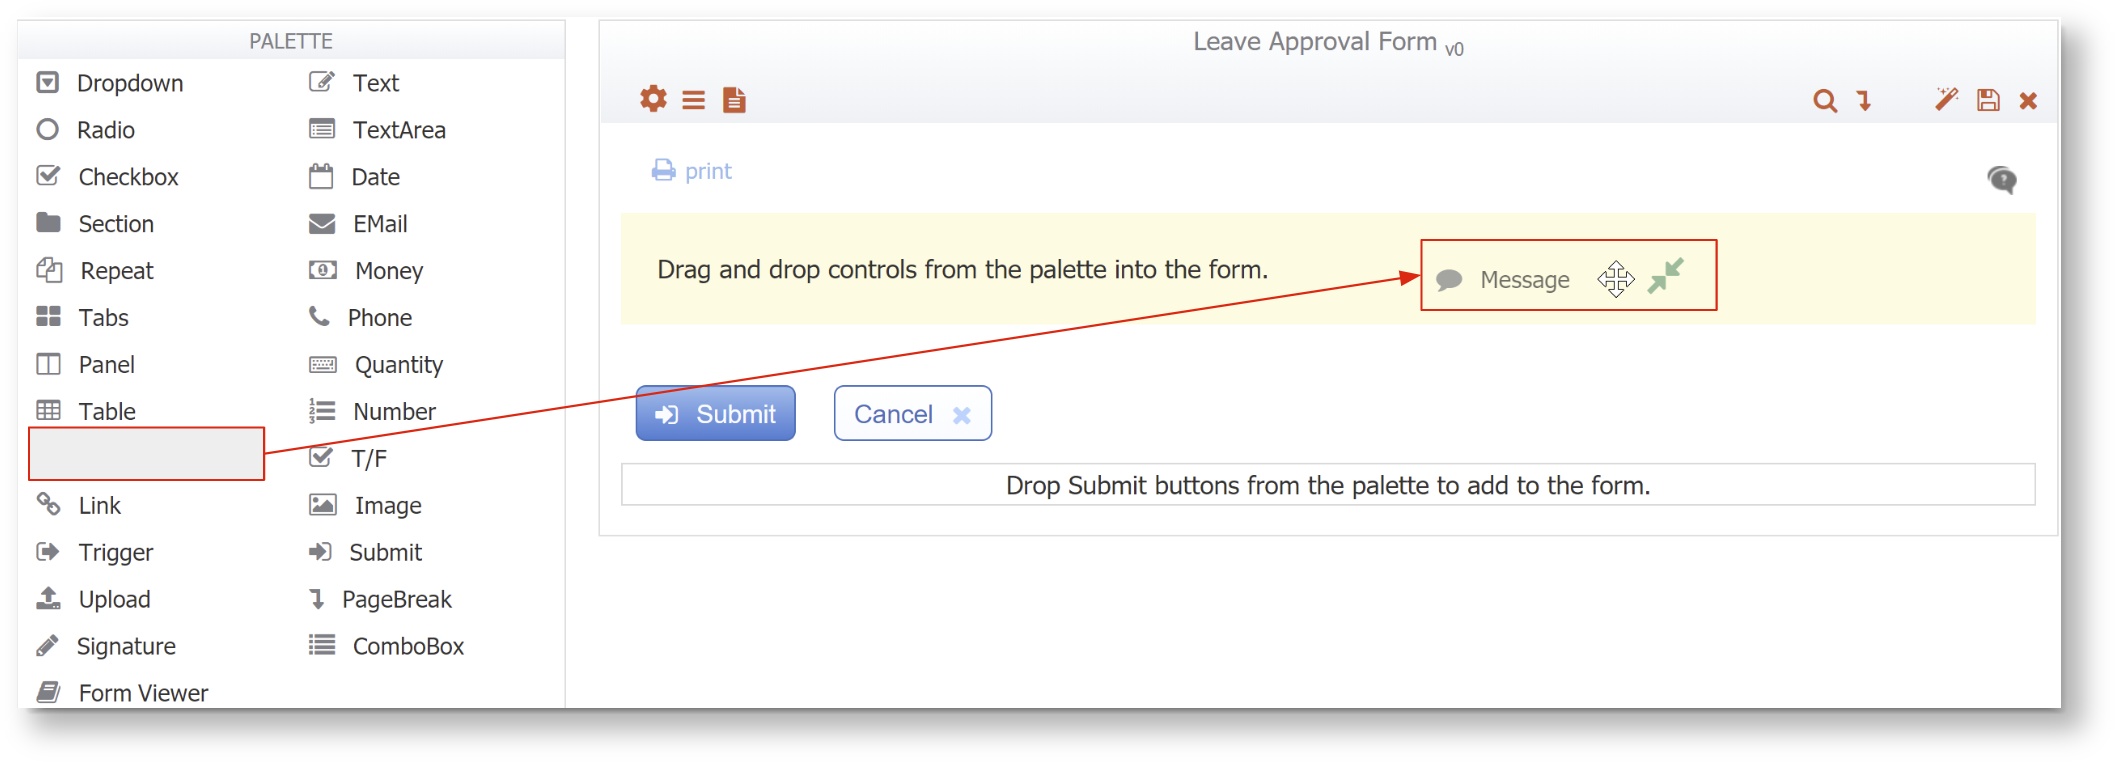
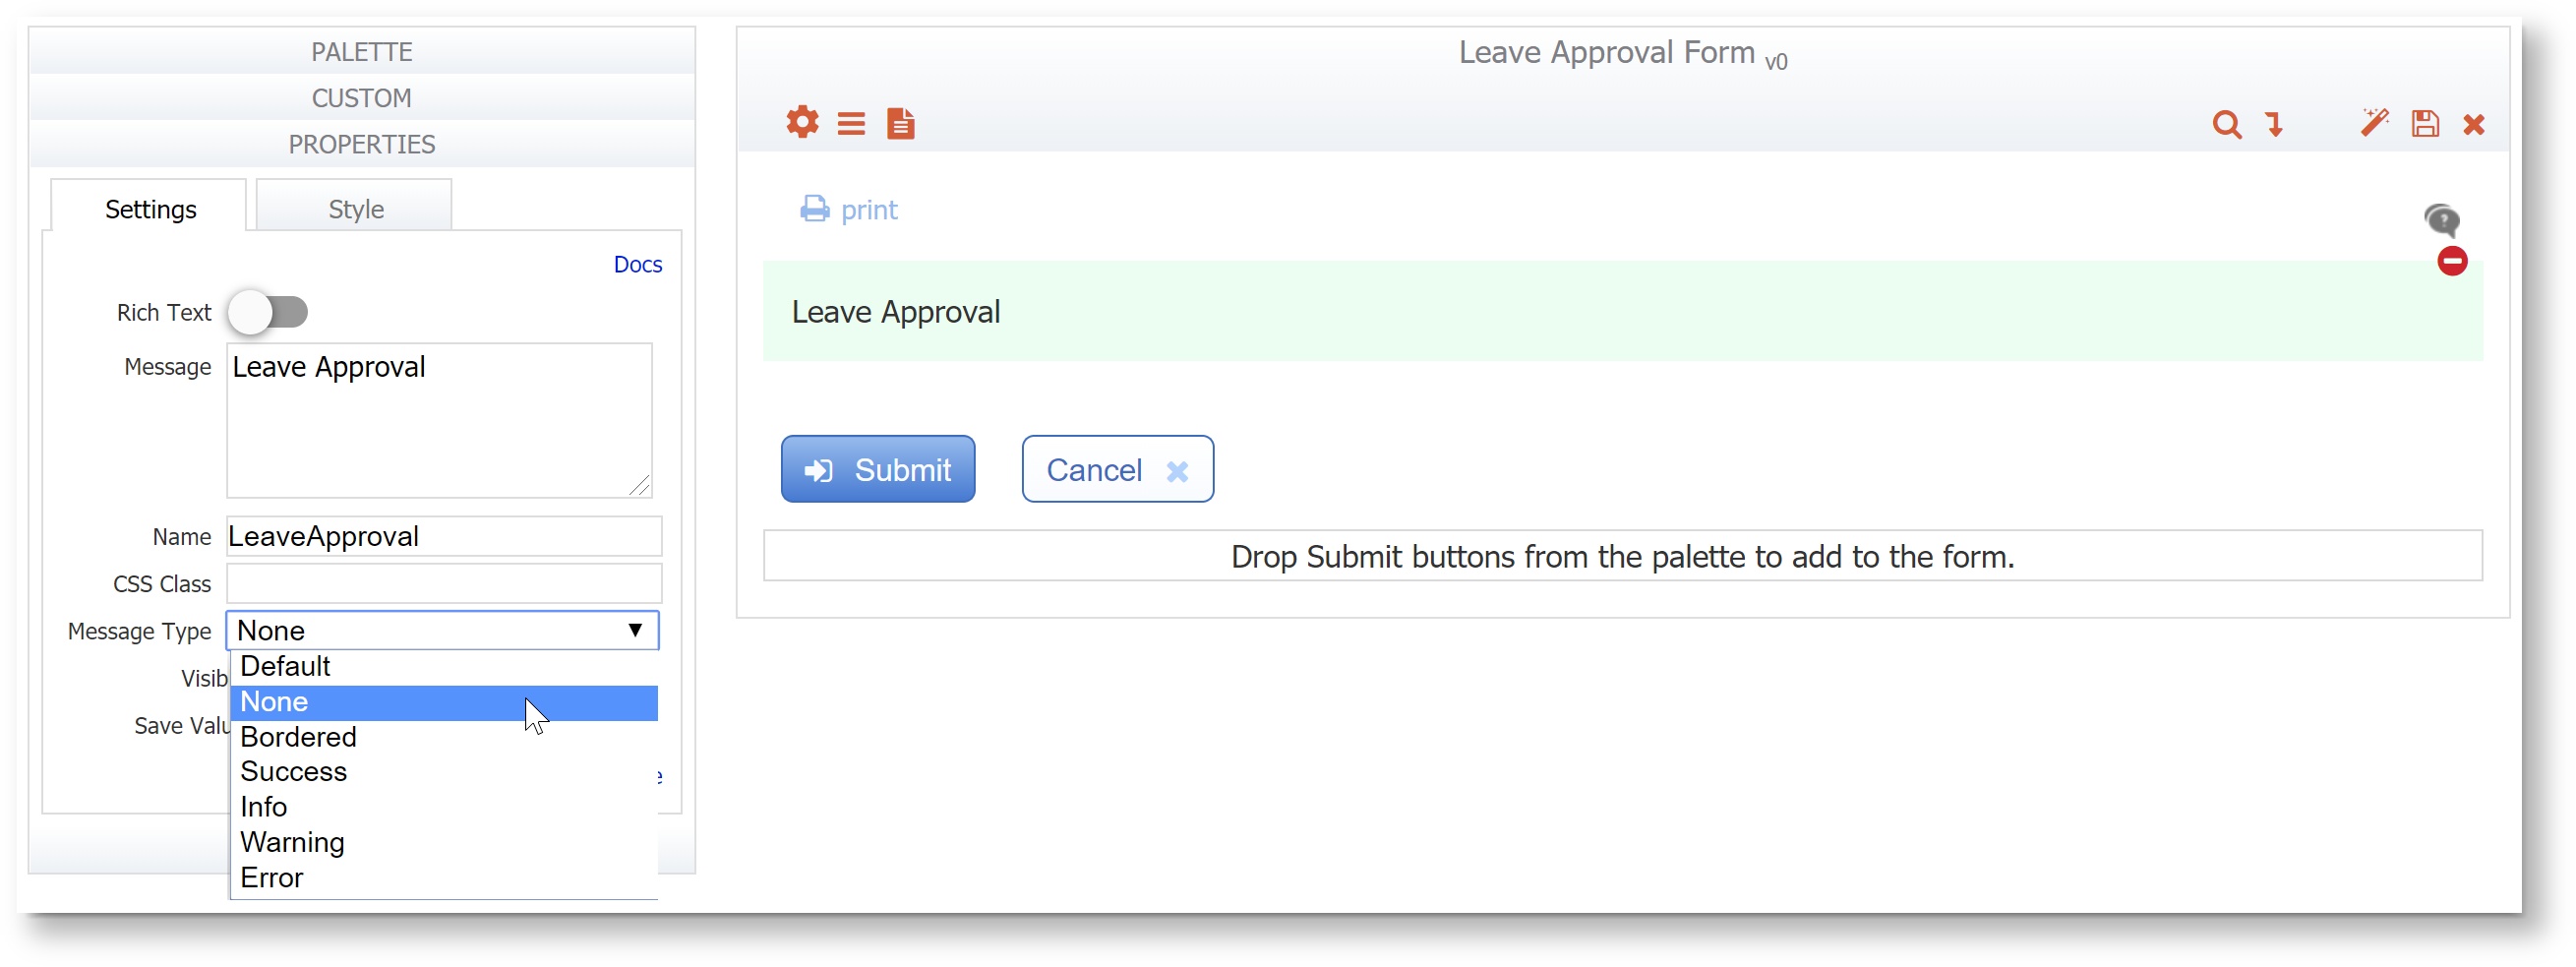
Change the Message text to "Leave Approval." Change the control name to "LeaveApproval" (no spaces.) Change the Message Type to None by selecting it from the dropdown.
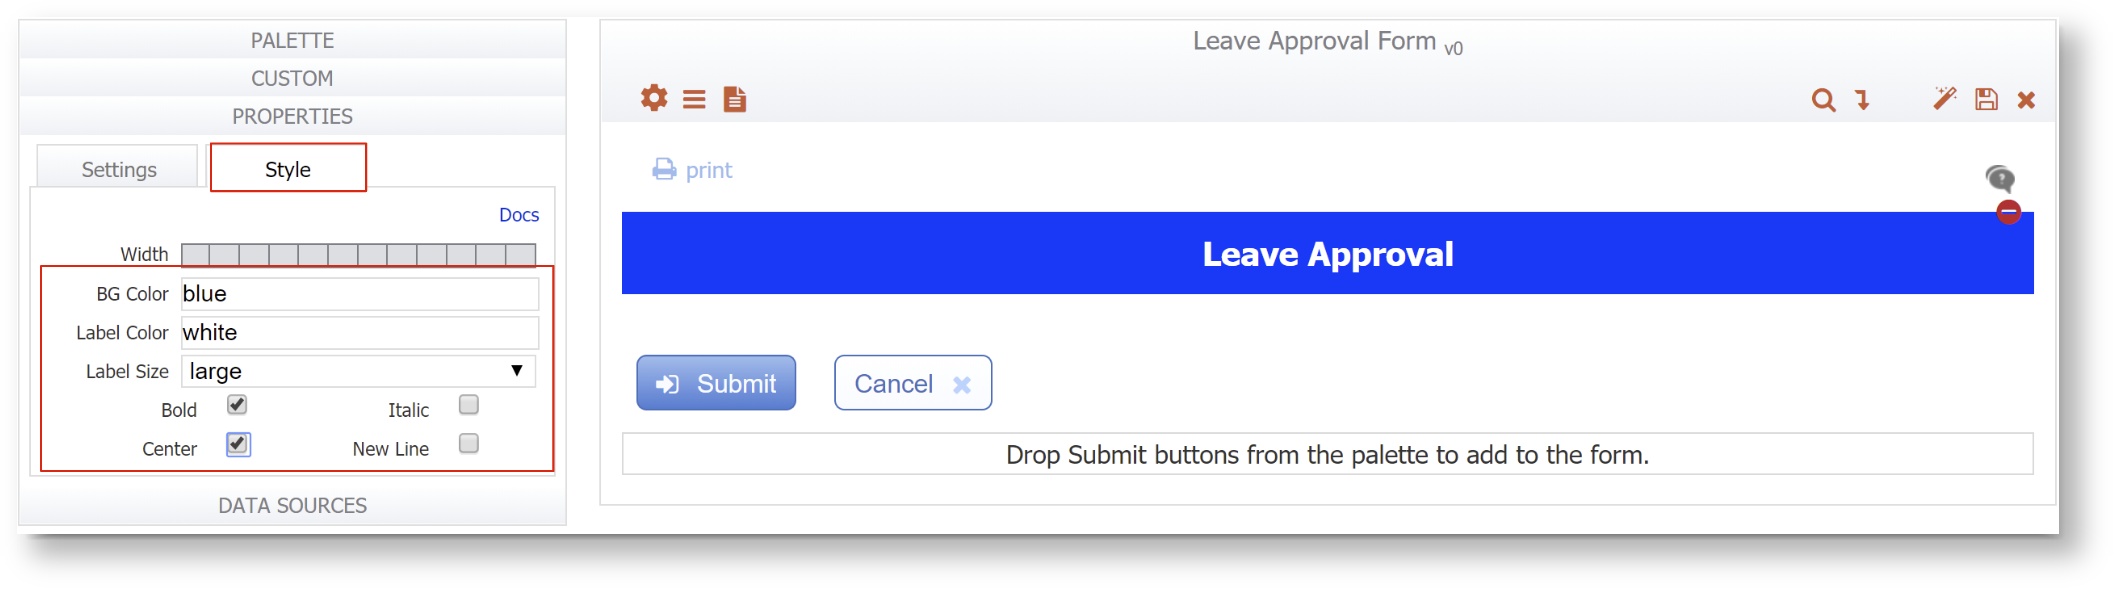
Click the Style tab on the Properties pane for the Message control. Type blue for the Background color, white for the Label Color. Select large for the Label Size. Check the Bold and Center checkboxes, if desired.
Drag a Section control from the palette and drop it below the Message control.
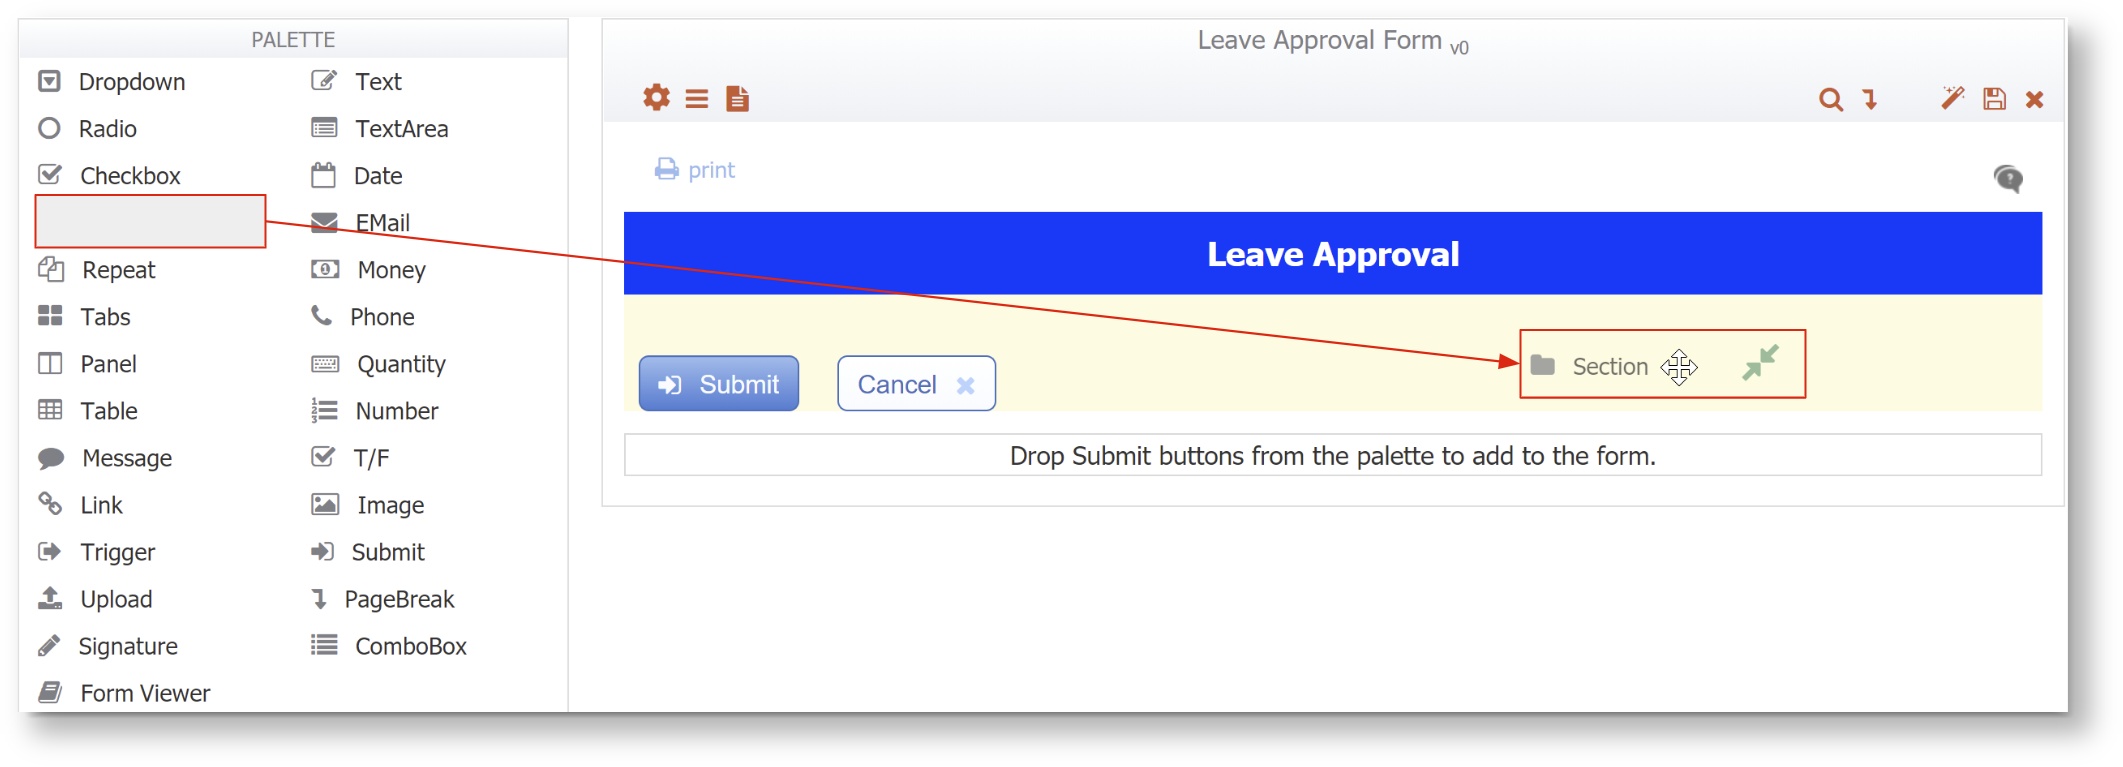
- Click on the section label and change it to Employee Information. Notice that
- Drag a Text control from the palette and drop it into the Section control when you see the
 green double drop arrows.
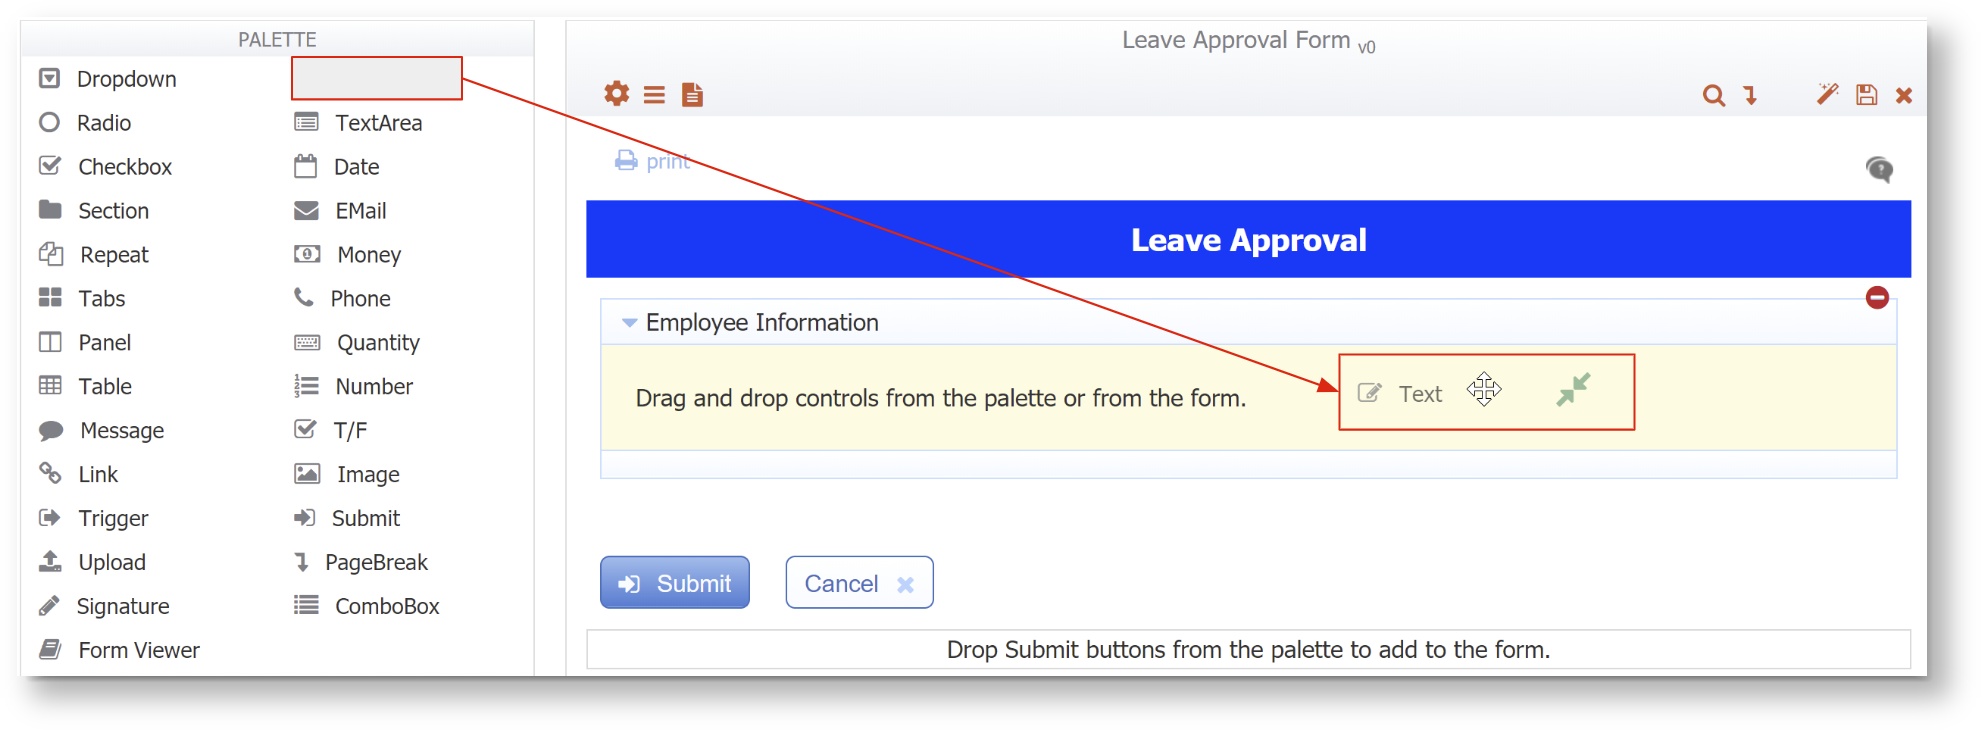
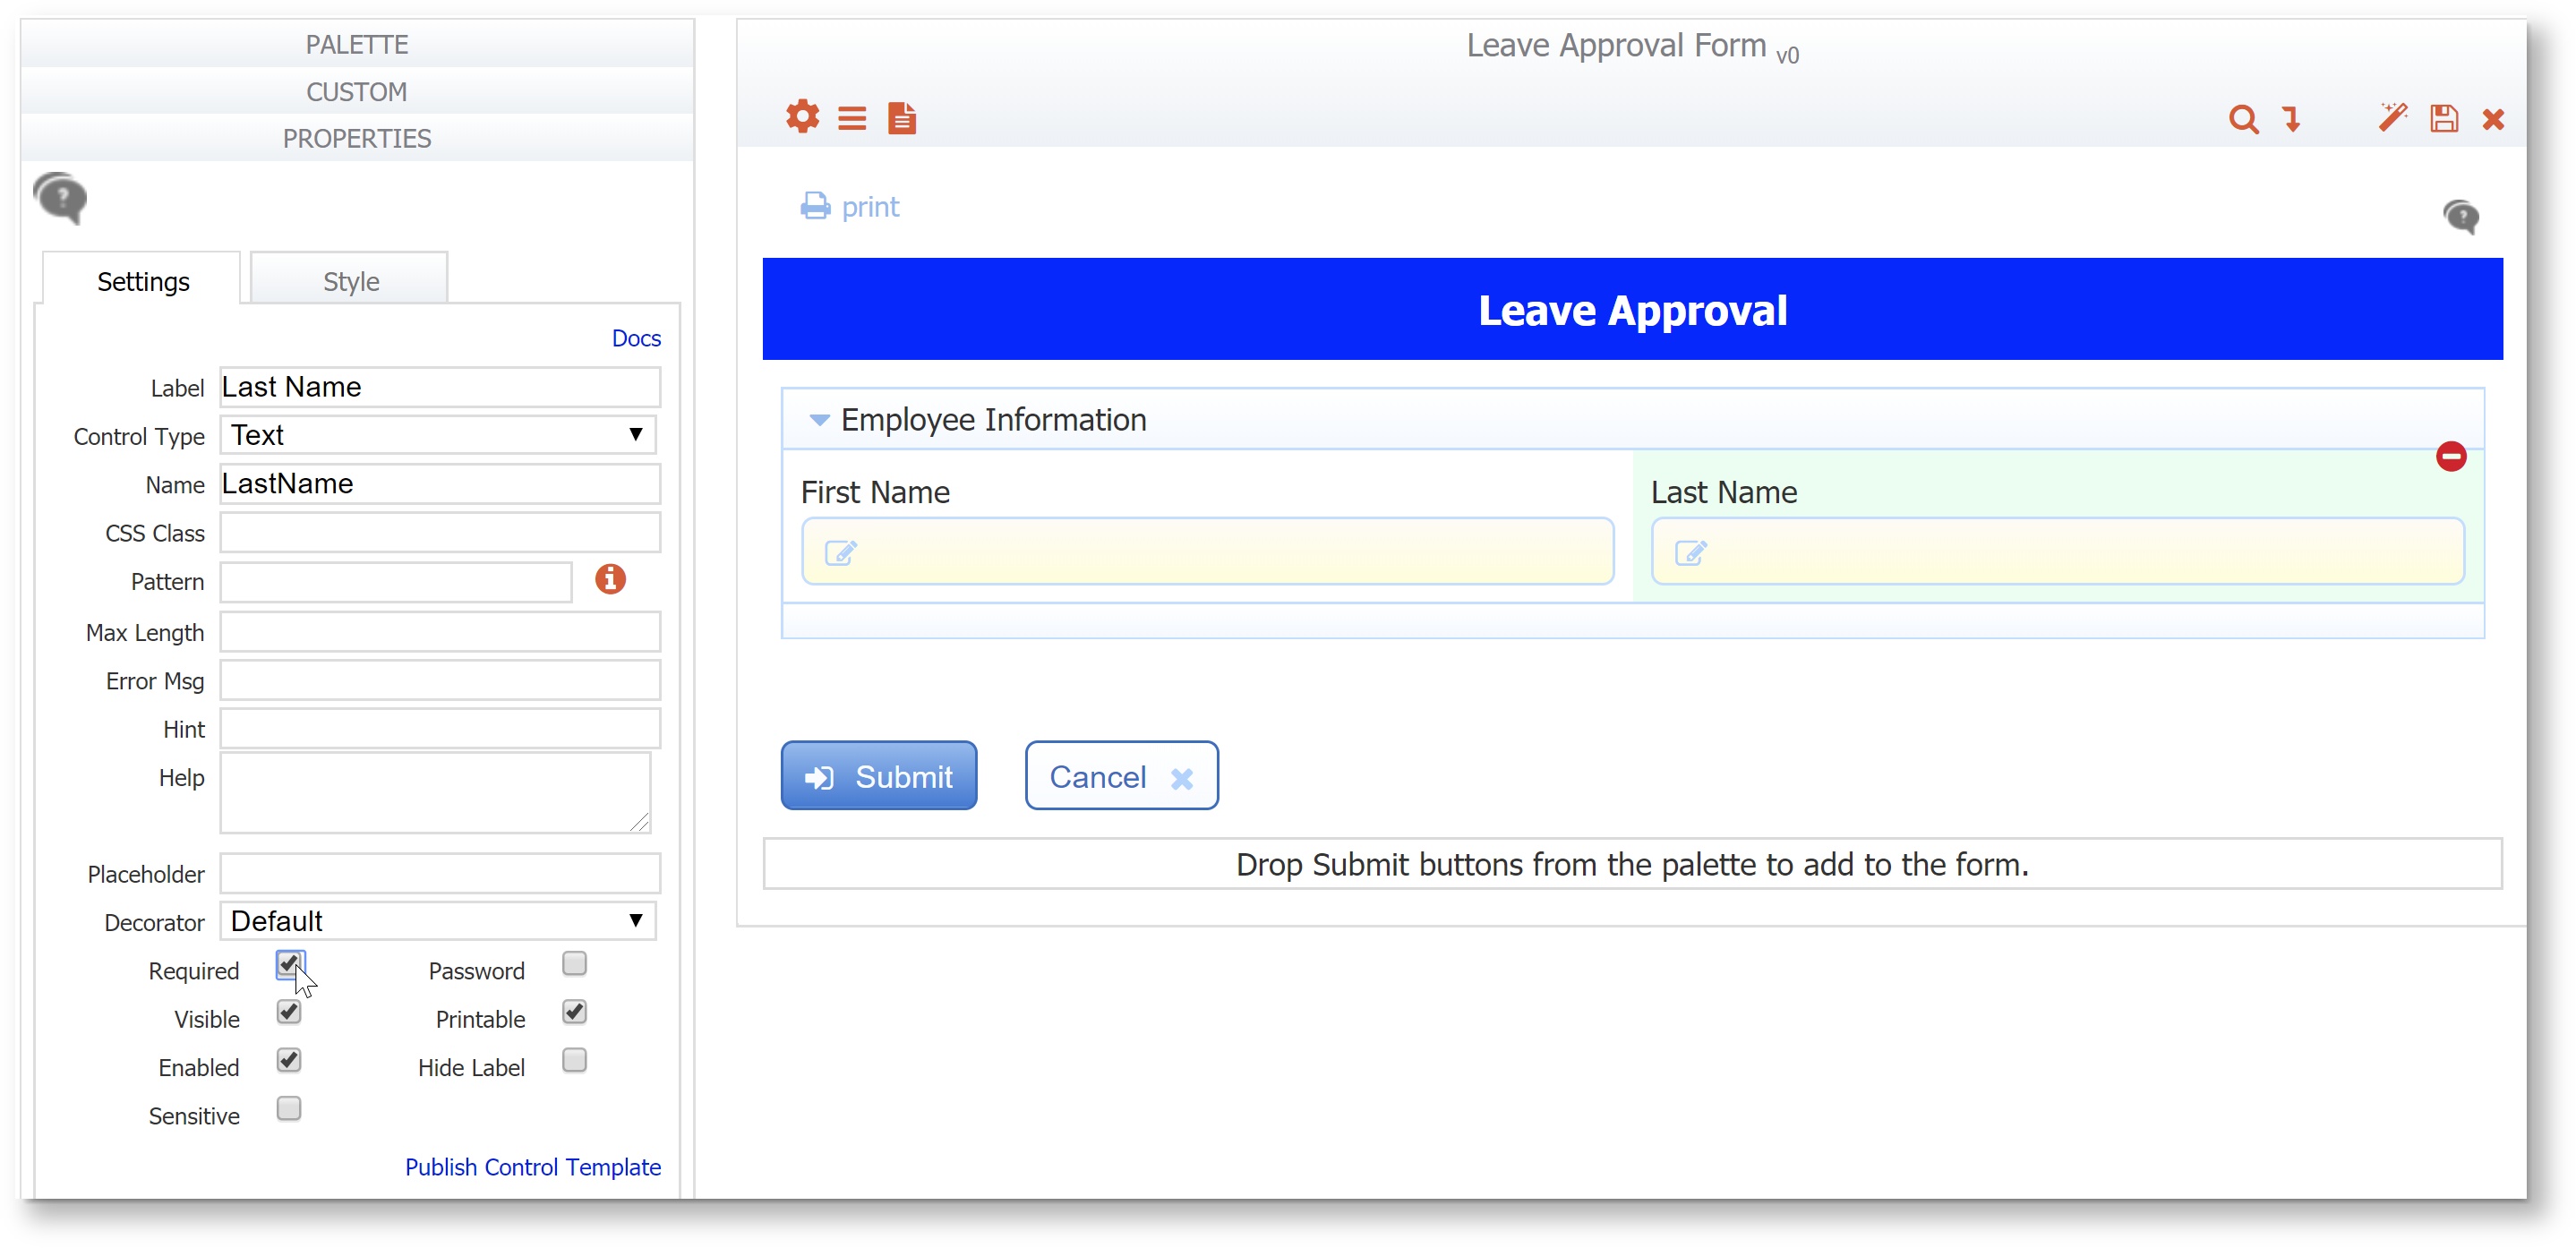
- Click on the properties section for this text control and in the Settings Tab change the label to "First Name." Click on the Styles tab. Change the width of the control by selecting 6 columns on the grid.
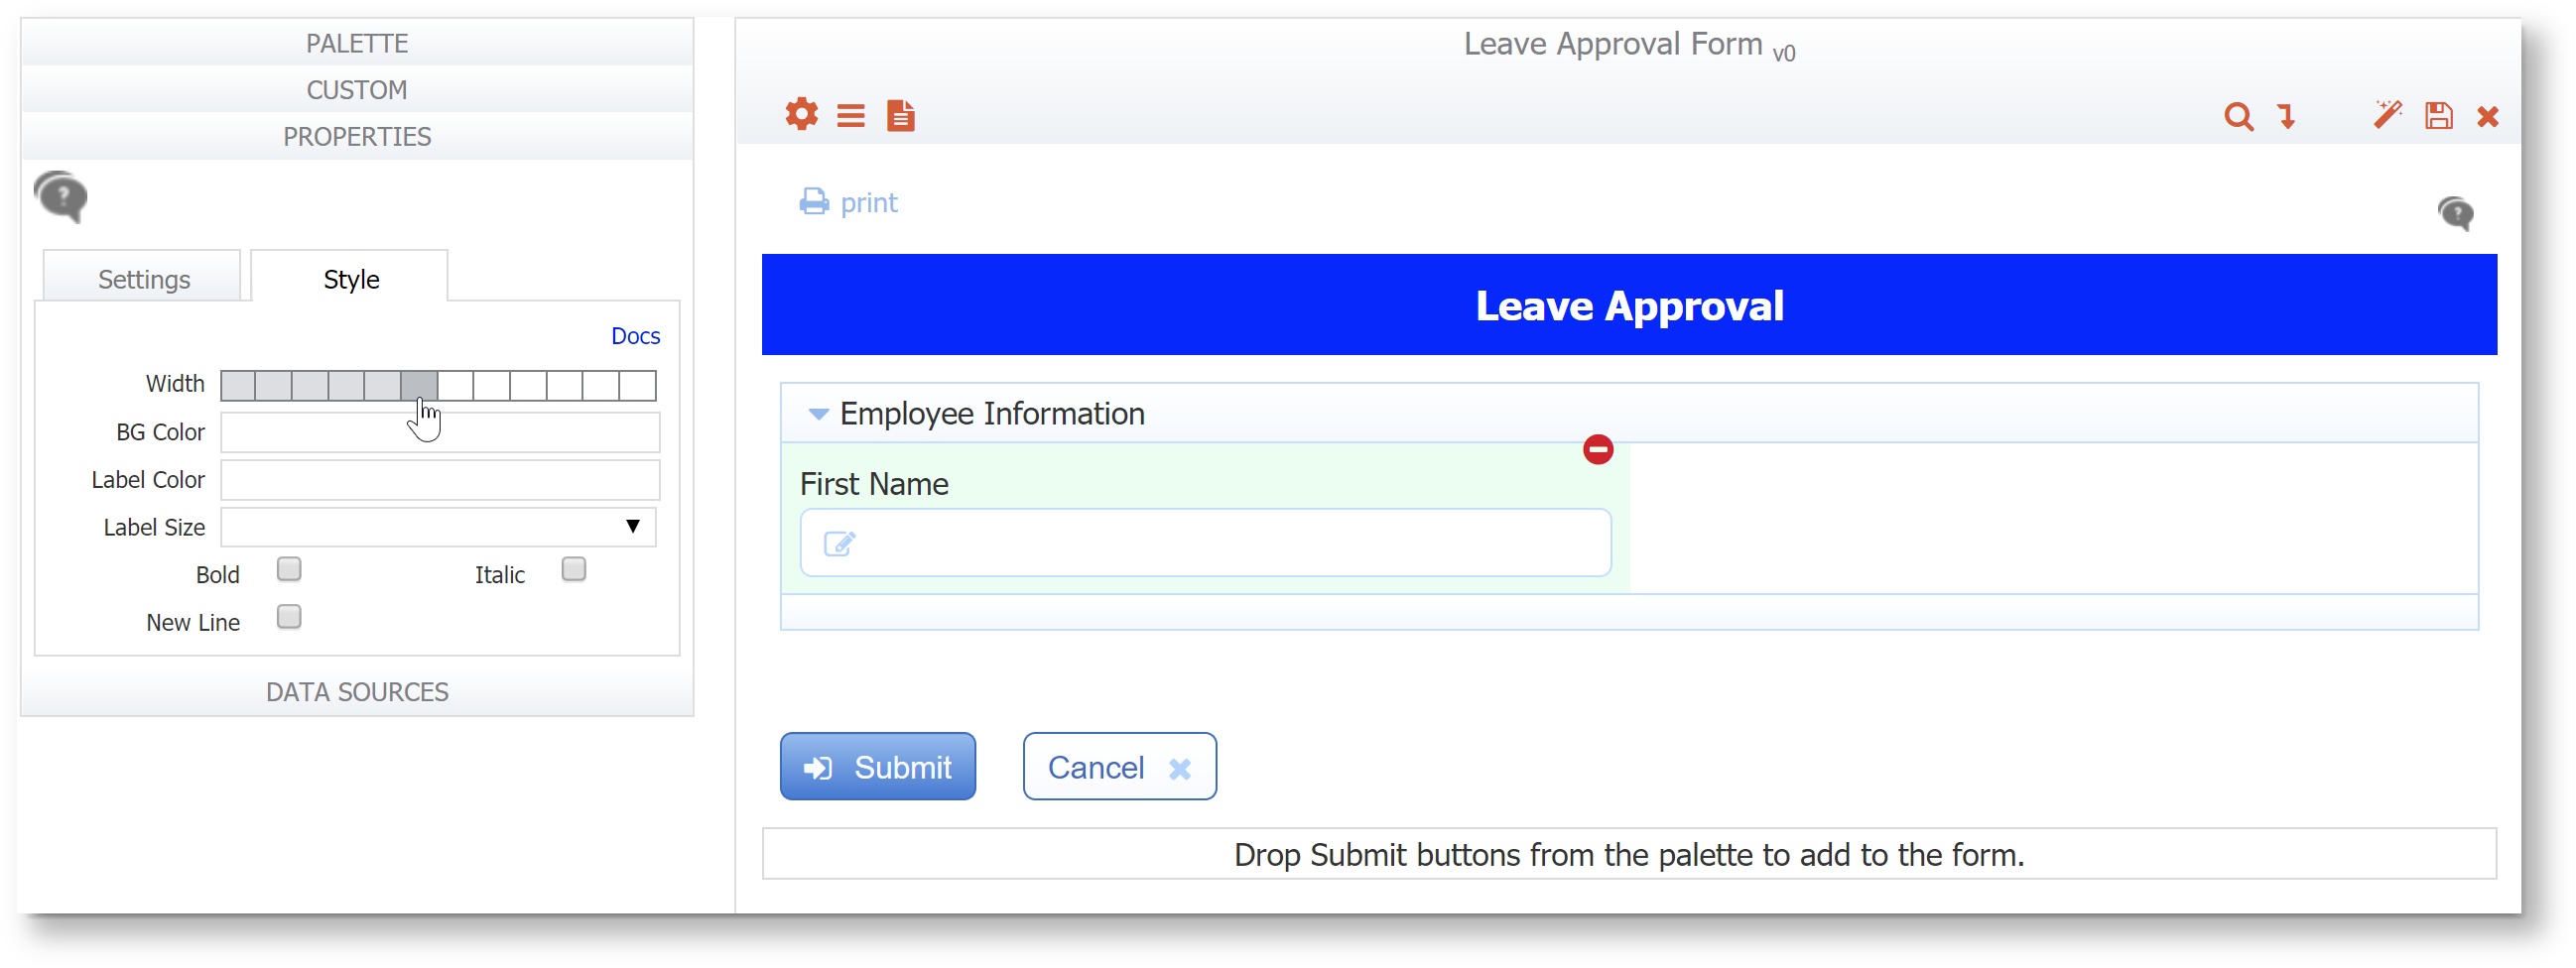
- Check the Required property on the Settings tab for the First Name control.

- Drag a second text control from the palette over the first name and drop it when you see the
 right green arrow. This should position the second text control to the right of the first one.
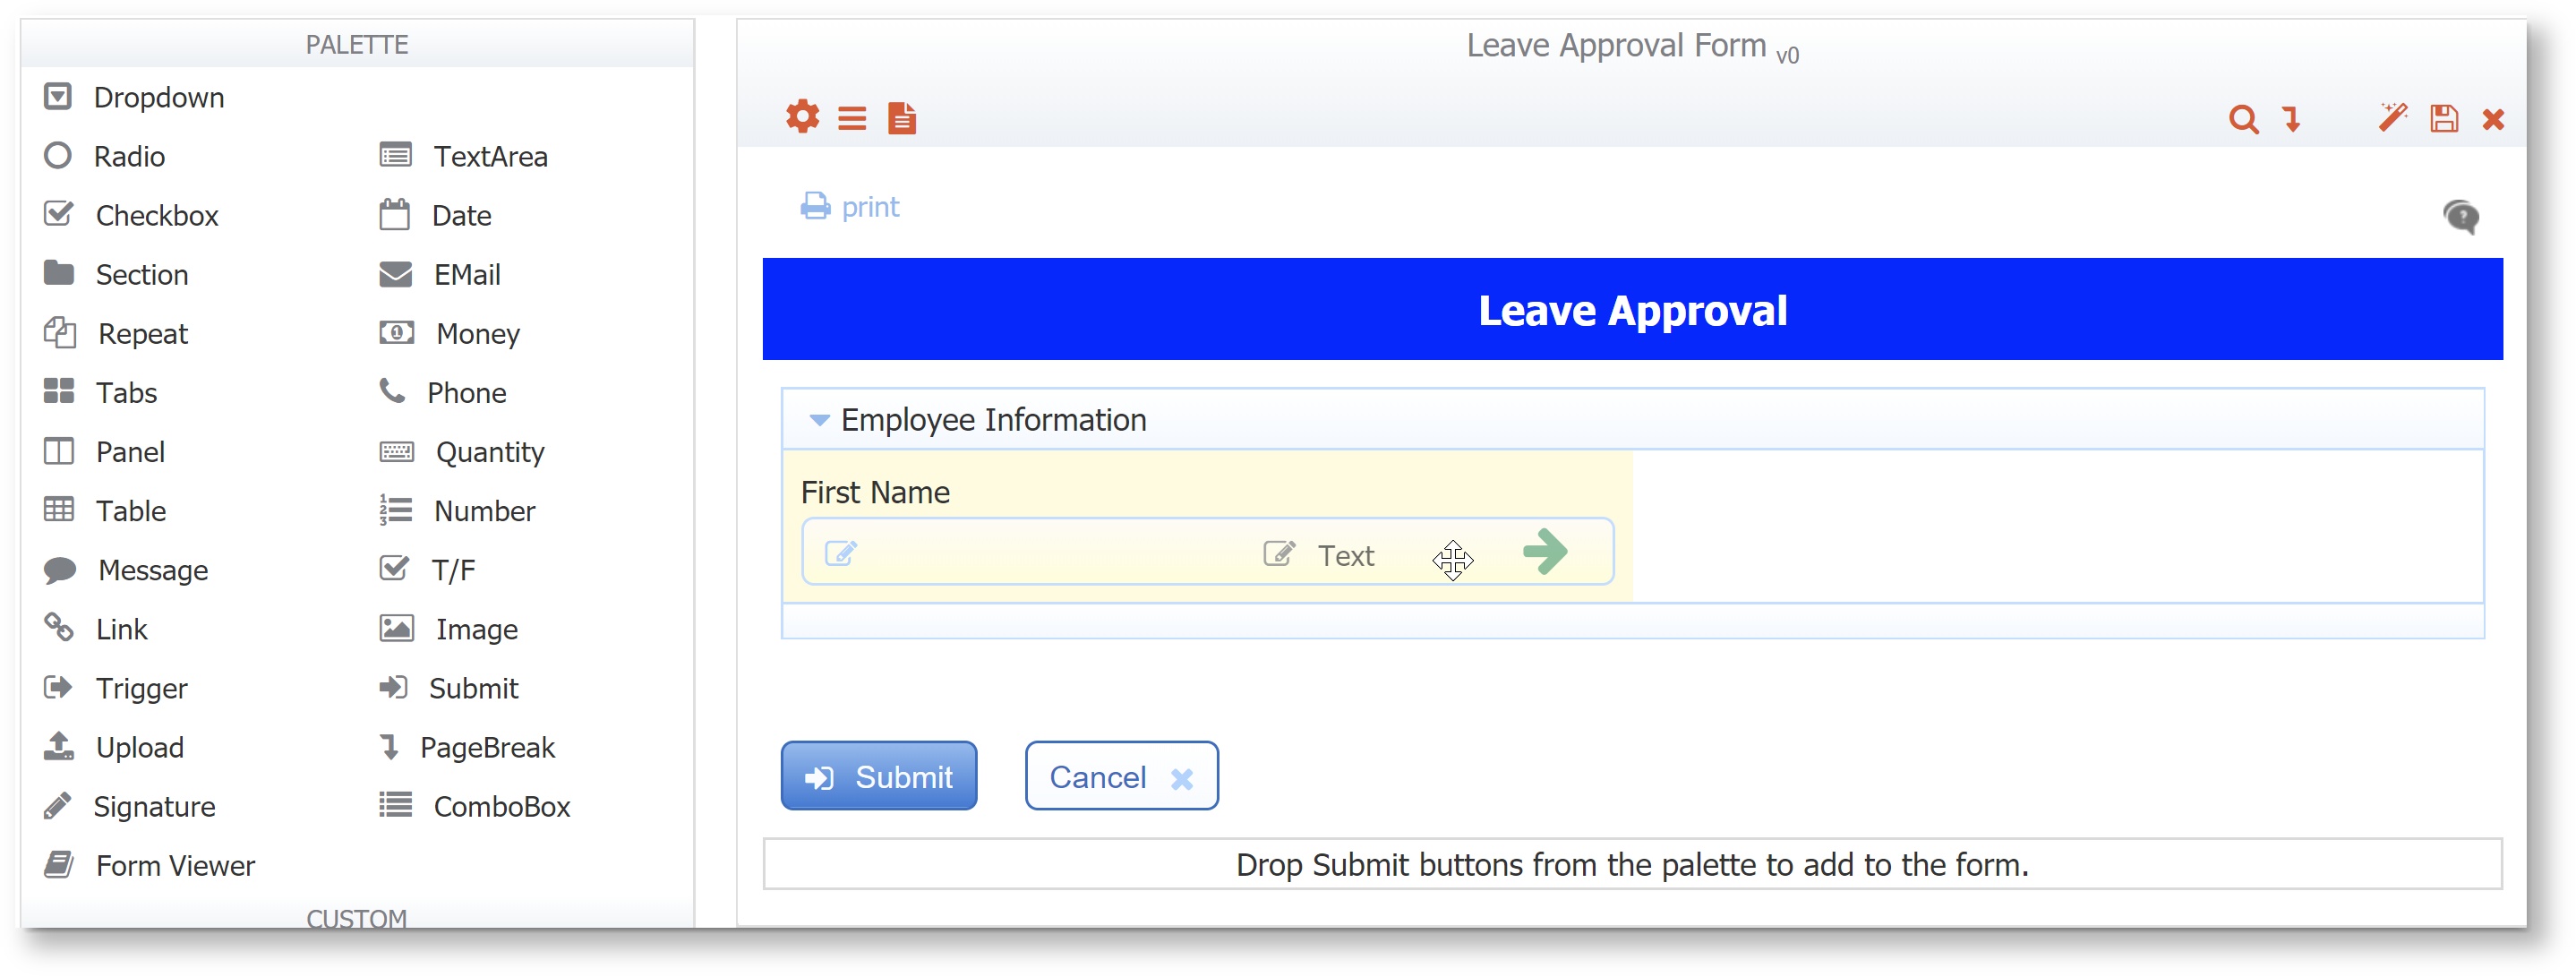
- Click on the second text control label and change the label to Last Name. Check the Required property.
- Drag a third text control from the palette over the Last Name control. Drop it when you see the right green arrow.
Click on the third text control label and change the label to Manager Id. Check the Required property.

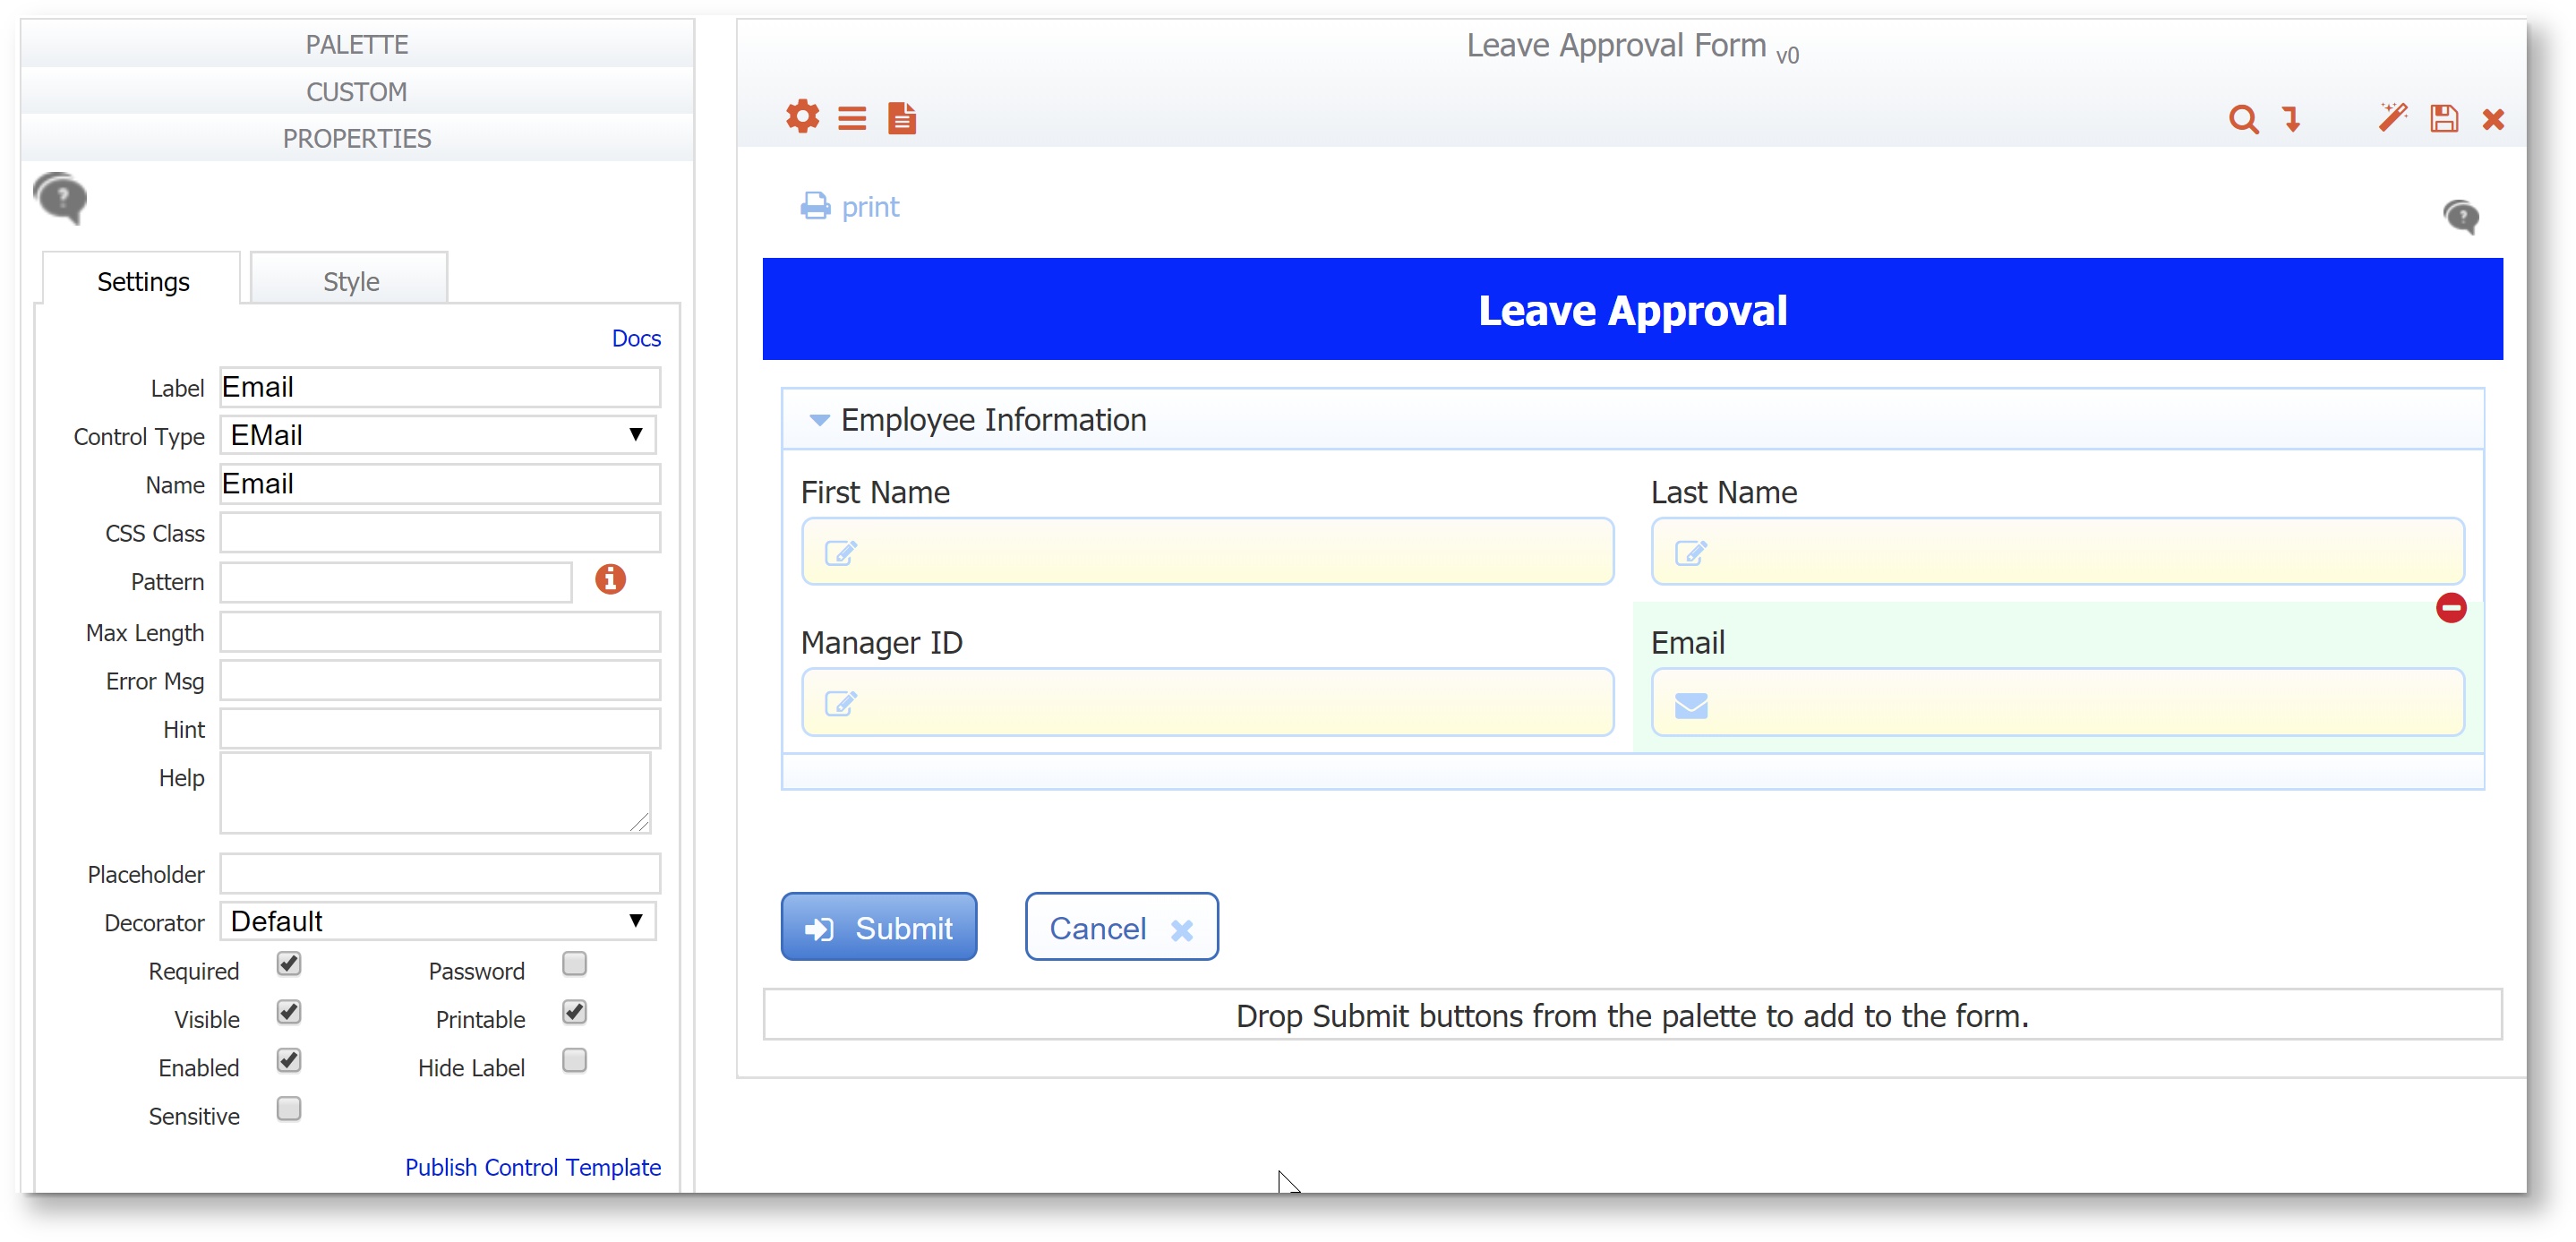
Drag an Email control to the right of the Manager Id control. Drop it when you see the
green right arrow. Using the Email takes advantage of 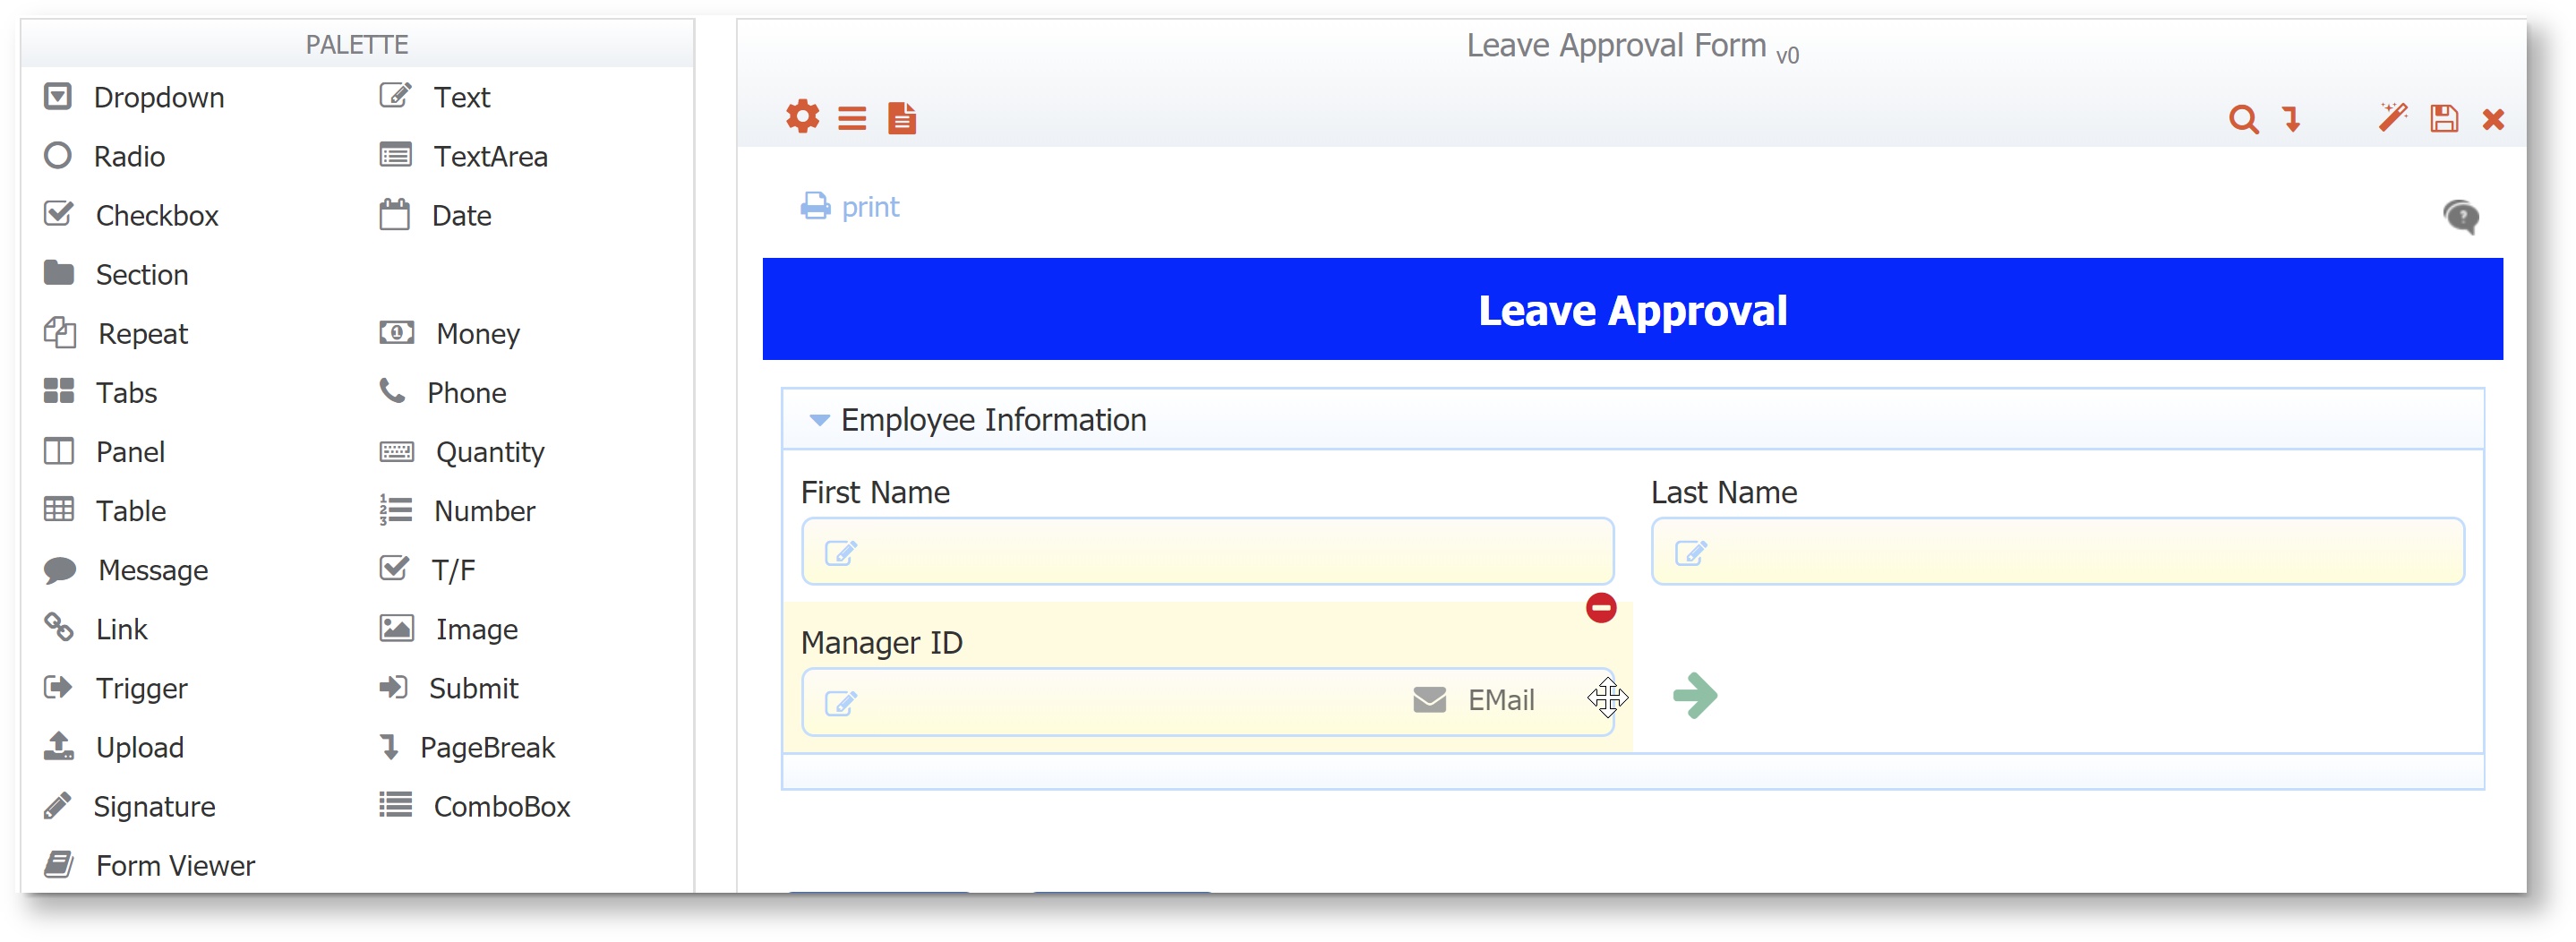
- Click on the Email control label and change the label to Email. Check the Required property on the Settings tab.
- Click the
 Preview Form icon on the designer toolbar to see how your form will look to users.
- Click the Close this Window now link to return to the designer from Preview mode.
- Click the
 Save and exit icon to save work you have done so far.
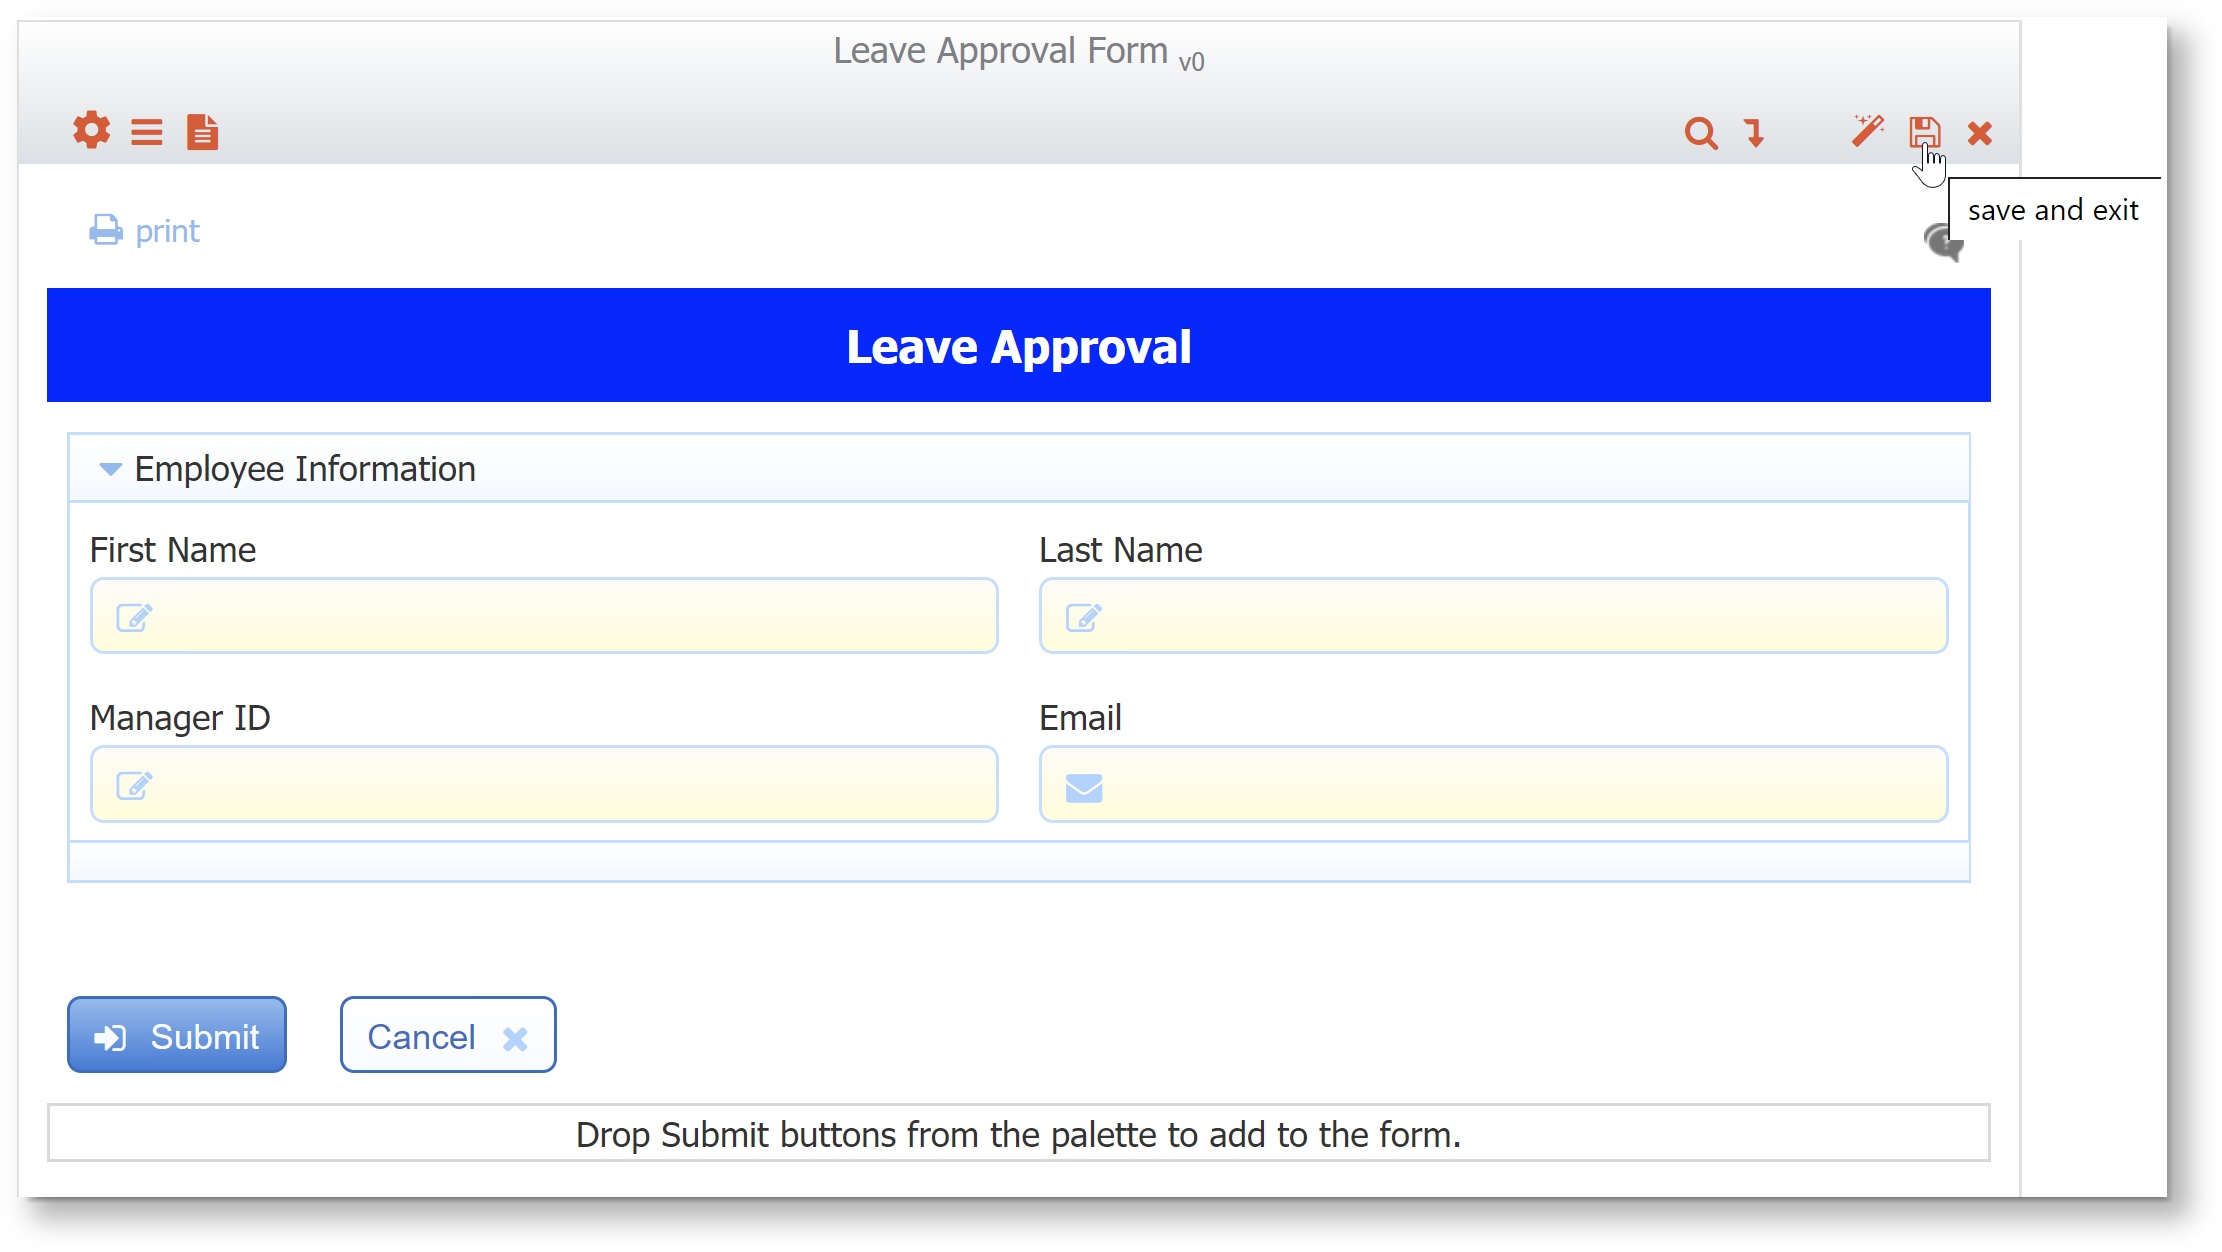
- Continue with the instructions to add the Leave Request Section to the form.
Create the Leave Request Section
This section is filled in by the Employee who is requesting the leave.
- Click the
 Action Menu for the Leave Approval Form and select
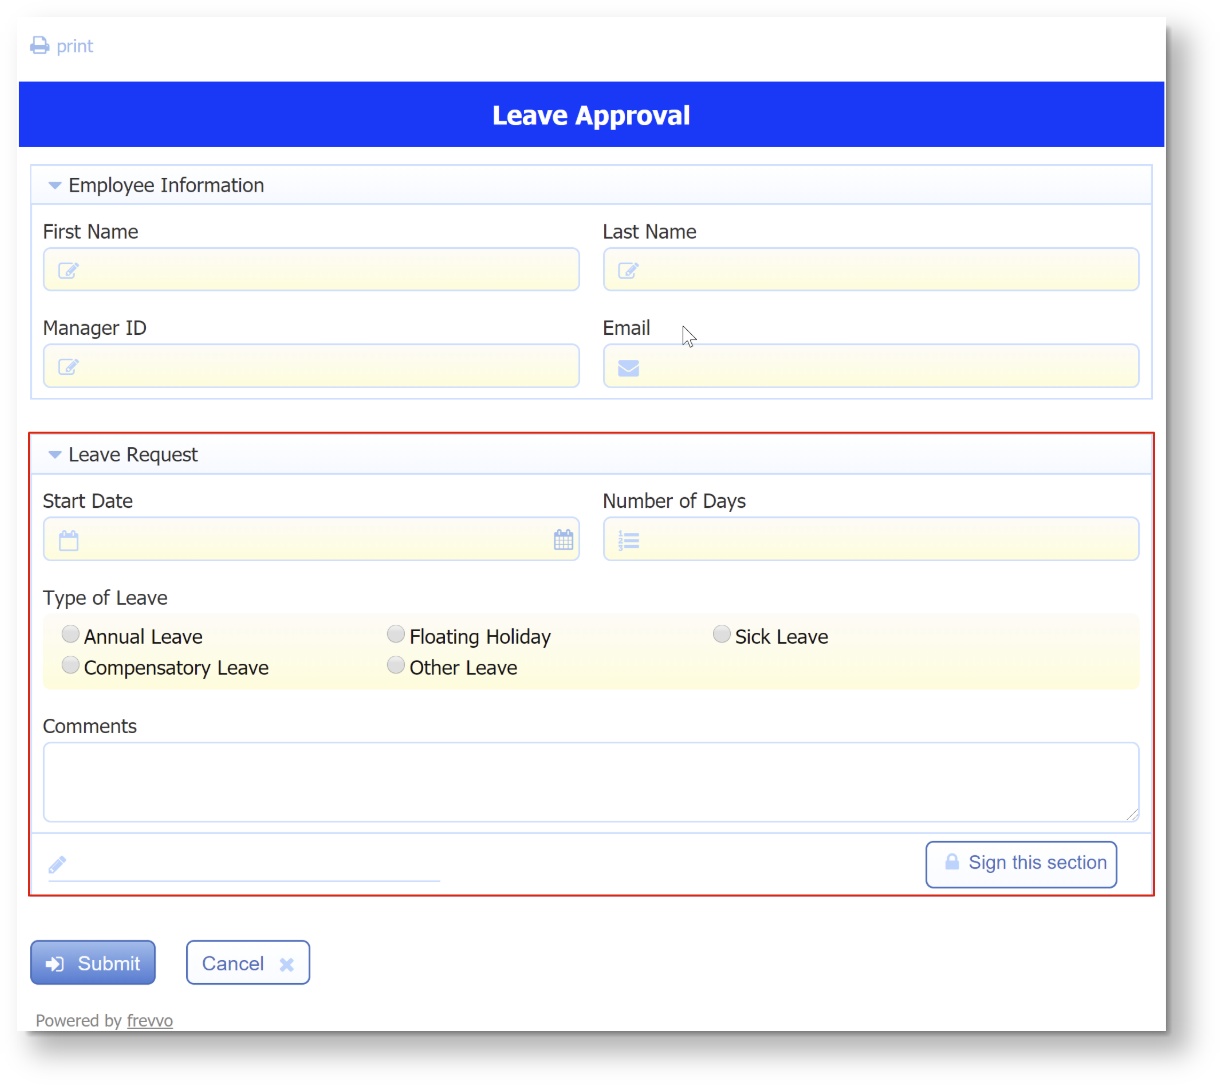
  Edit to add the Leave Request section. You may notice the Employee Information section is collapsed in the images for this section.
 - Drag and drop a Section control below the Employee Information section. Look for the green down arrow. Name it Leave Request.
- Drag a Date control from the palette and drop it into the Leave Request section. Check the Required property. Change the label to Start Date. Change the width to 6 columns.
- Drag a Number control from the palette and drop it into the Leave Request section to the right of Start Date. Change the label to Number of Days. Change the width to 6 columns. Check the Required property.
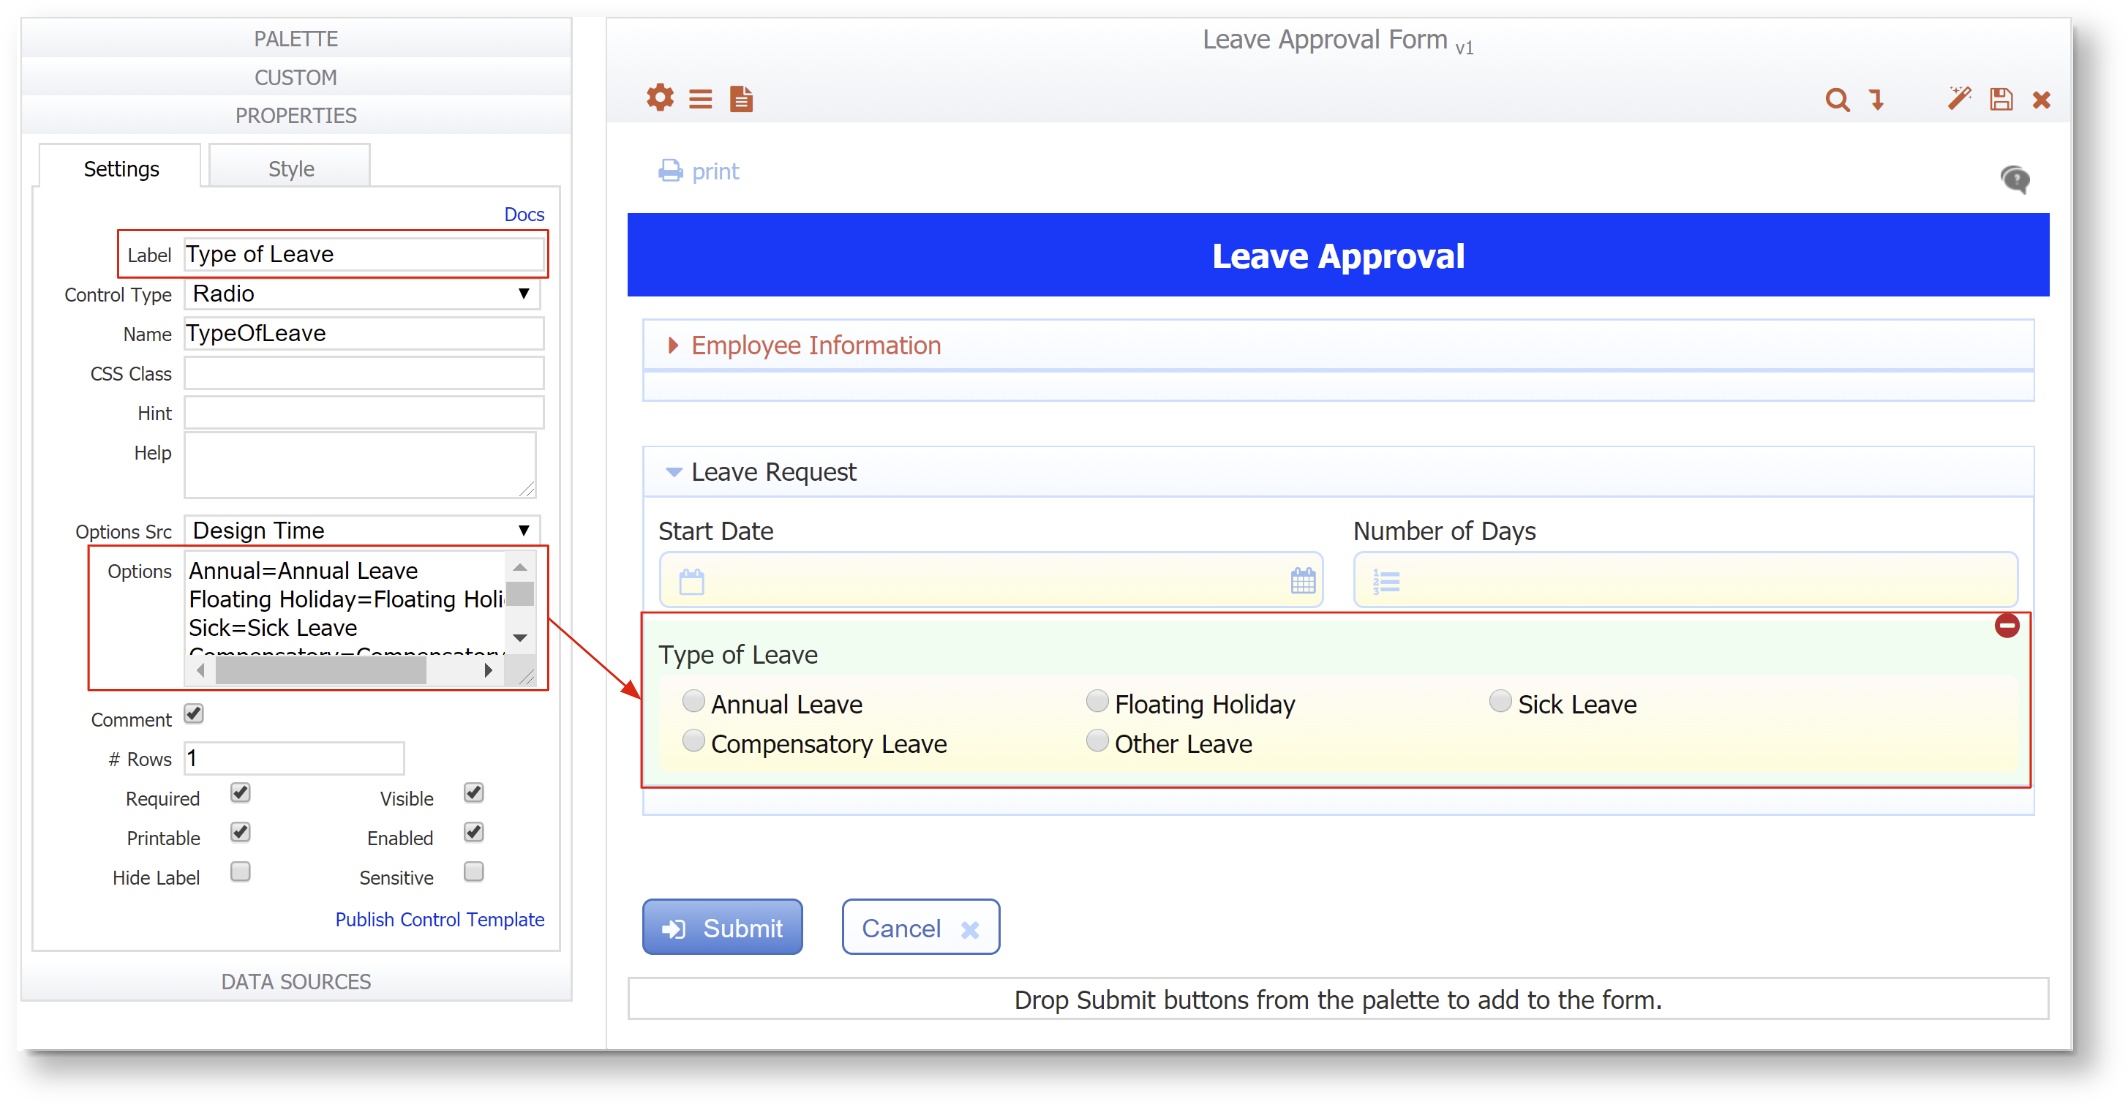
- Drag a Radio control from the palette and drop it under the Start Date field.
- Change the control label to Type of Leave, delete the default options, and add these choices for the options: Annual=Annual Leave, Floating Holiday=Floating Holiday, Sick=Sick Leave, Compensatory=Compensatory Leave, Other=Other Leave
- Check the comment box and specify 1 as the number of rows. Check the Required property.
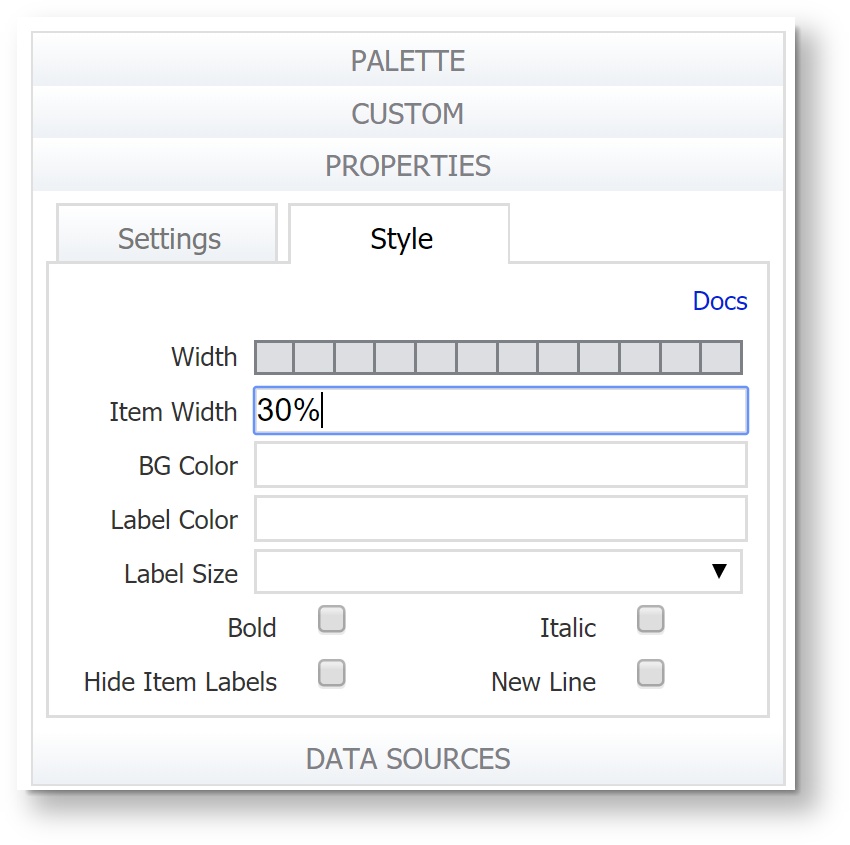
- Click the Style tab and add a value of 30% to the Item Width. This changes the layout of the options from vertical to horizontal.
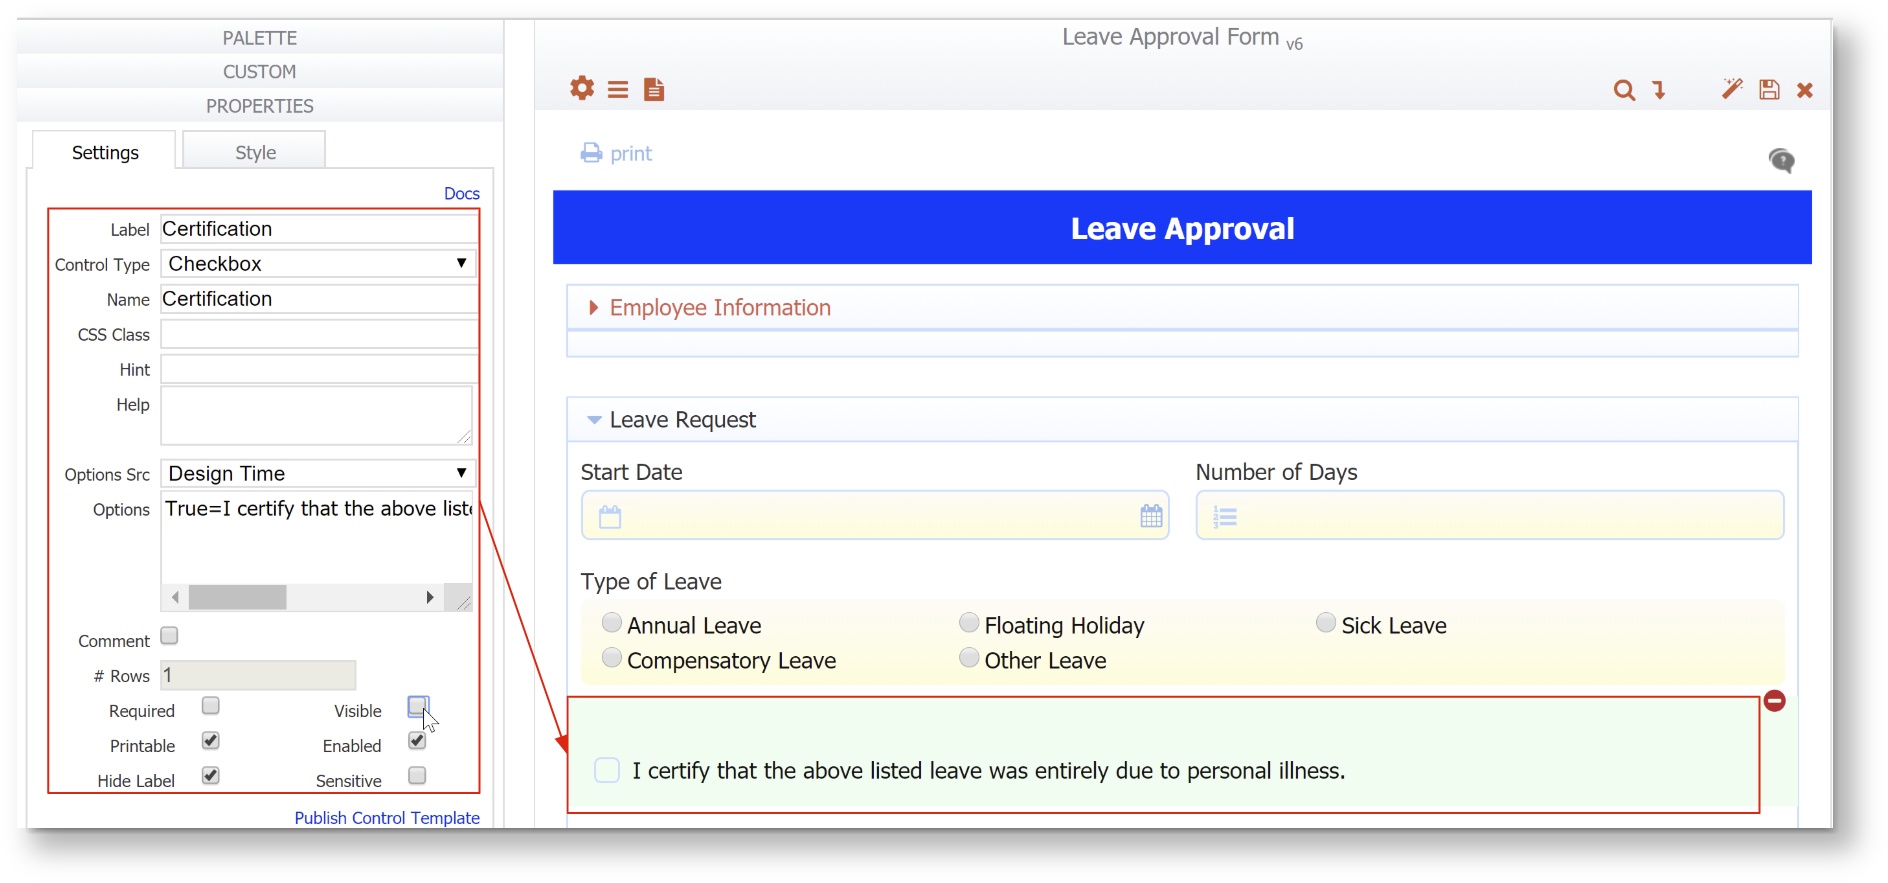
- Create the Certification question that will appear when the employee checks the Sick Leave option by dragging a Checkbox control from the palette and dropping it below the Type of Leave control.
- Change the label to Certification and the name to Certification. Add a single option: "True=I certify that the above listed leave was entirely due to personal illness." Do not check the Required property for this control.
- Uncheck the Visible checkbox on the Certification field. This field is not visible on the form unless the Employee selects Sick Leave as the Type of Leave. This will be handled by a rule discussed later.
- Check the "Hide Label" button. The label will be hidden and the user will see only the single option.
- Drag a Textarea control from the palette and drop it below the Type of Leave control inside the Leave Request section when you see the
 green down arrow.
 - Change the label to Comments. Do not check the Required property for this control.
- Select the section by clicking on its header.
- In the properties panel, select the Security Tab.
- You can set up this as a Signed Section. Two types of signatures are available from the Signature drop down: Text/Signature Image or Wet Signature. Here is information about the difference between the signature types. Select Text/Signature Image from the dropdown.
- Check the Must Sign checkbox to require the signature and verify that the Lock checkbox is checked to prevent tampering with the signed data .
- Notice that a "Sign this section" button and a
 pencil icon with a line appear at the bottom right and left of the section when the signature type is selected.

- The Employee will have to sign the section before it can be submitted.
- Click the Save and exit icon to save work you have done so far.
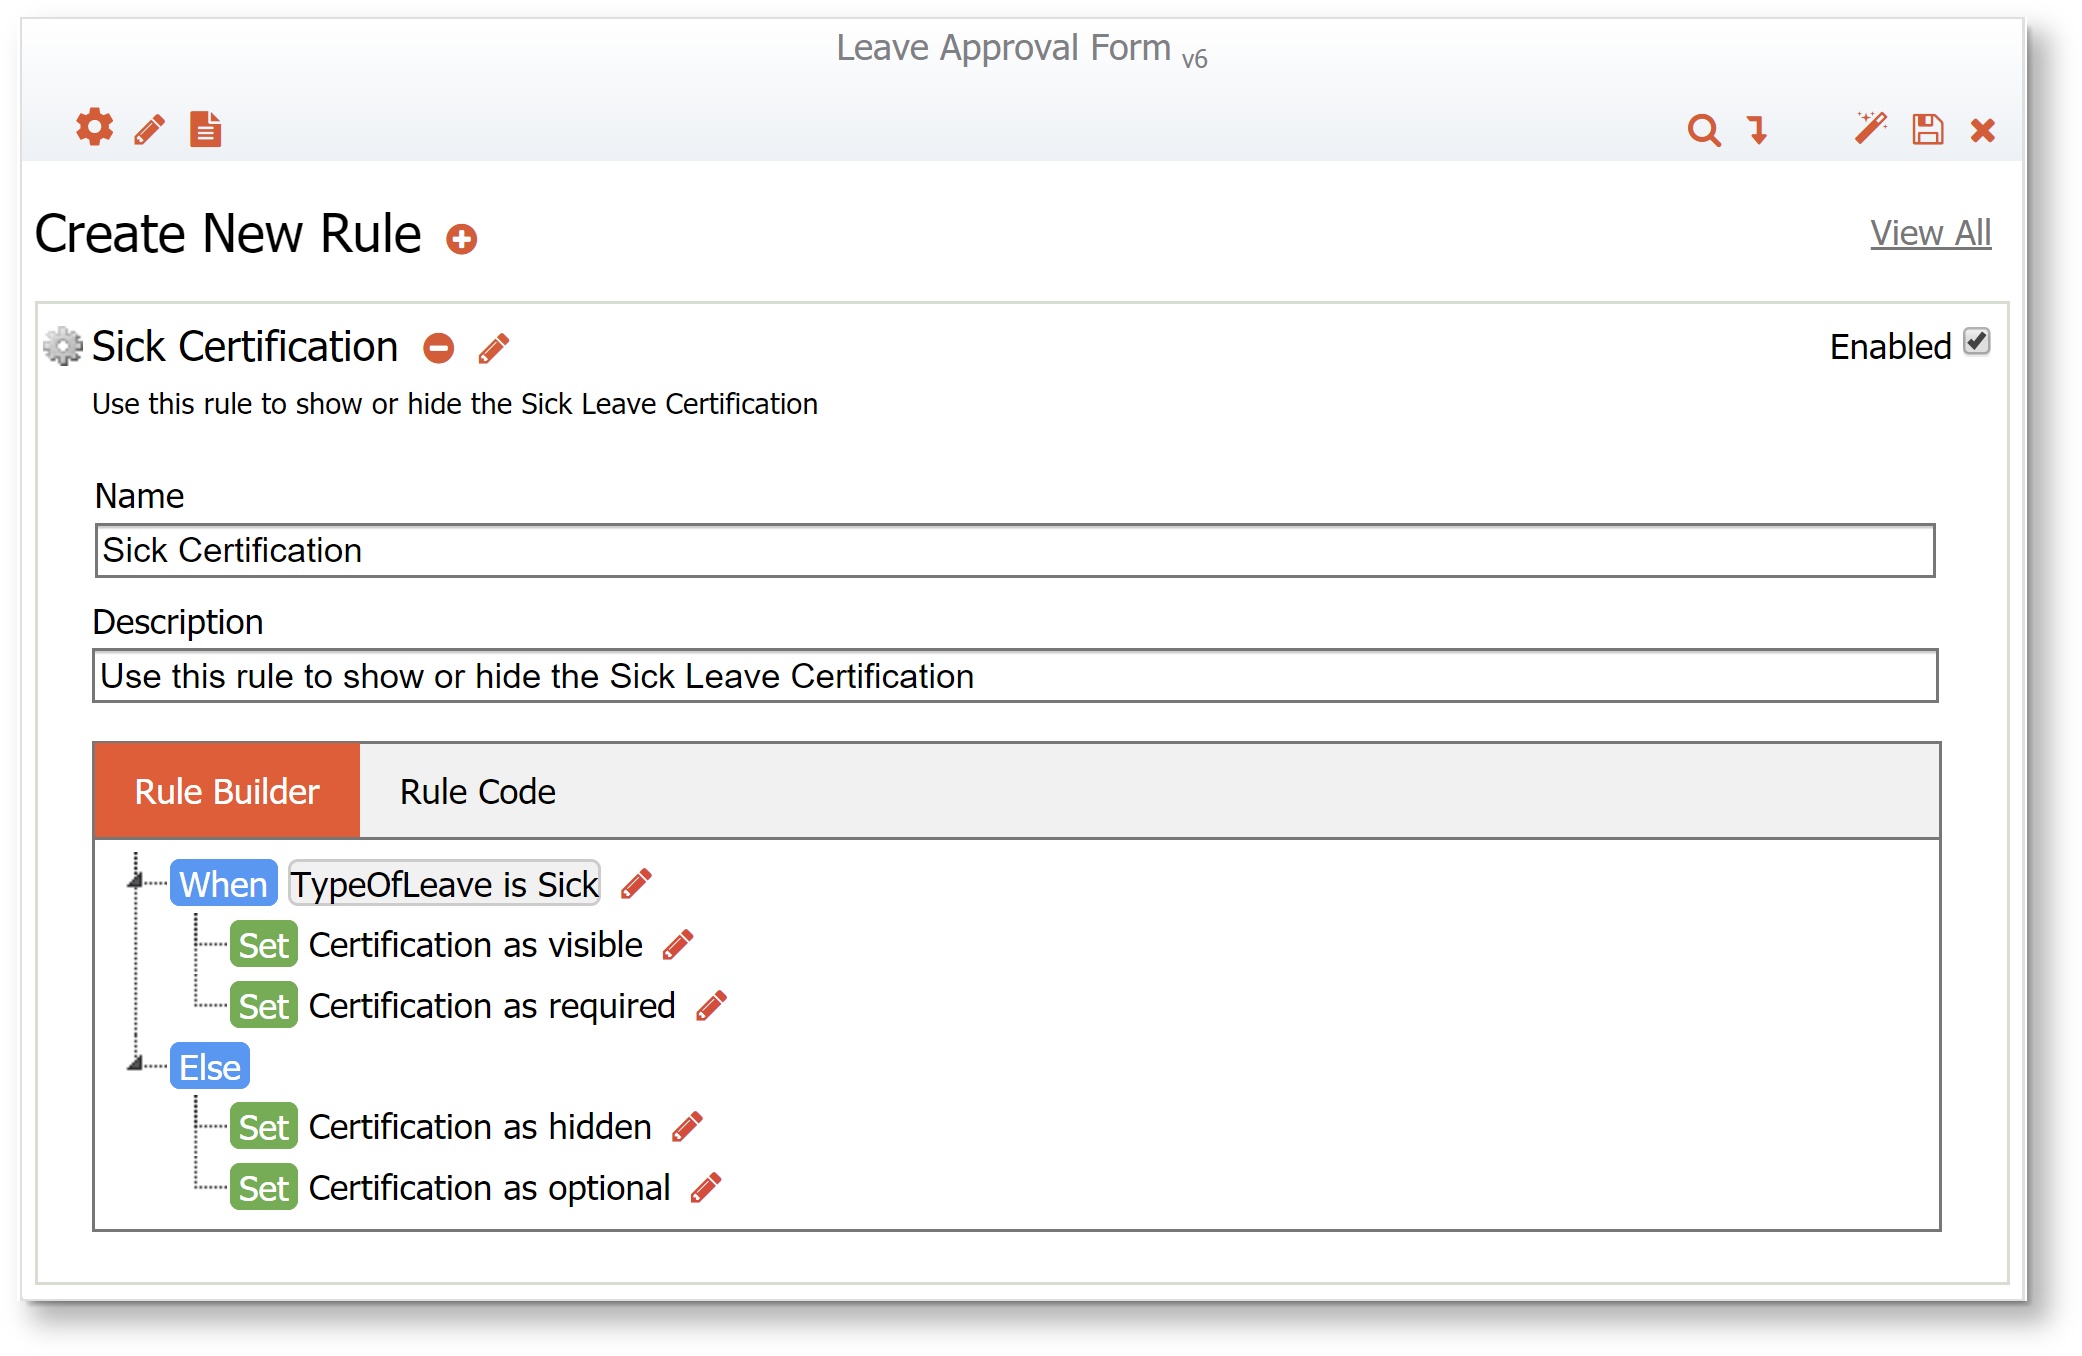
Add a Business Rule
We will add one business rule to show/hide the Certification control if the employee checks the Sick option in the Type of Leave dropdown. Follow these steps:
- Click the Action Menu for the Leave Approval Form and select Edit.
- Click on the Rules icon in the designer toolbar. This opens the Visual Rule Builder,which consists of 3 wizards:
- Condition wizard - describe the conditions under which a set of actions should be executed
- Action wizard - declare the actions that should be taken when the condition is true
- Else Action wizard - declare the actions that should be taken when the condition is false

Click the
 plus icon to Create a new rule.
- Name the rule Sick Certification. Add a Description such as "Use this rule to show or hide Sick Leave Certification."
- Click Run Builder.
- Click Add Condition - this is the Condition wizard
- Select the Type of Leave field from the first dropdown.
- Select is from the second dropdown
- Slide the
 toggle to the right then enter "Sick" without the quotes in the third field.
 - Click Next then click Add Action - this is the Action wizard where you set up actions that will happen if the condition is true
- Select the Certification field from the first dropdown.
- Select as visible from the second dropdown
- Click Next then click Add Action - this is the else action wizard where you set up actions that will happen if the condition is false
- Set the Certification control to hidden
- Click Finish
- When you are finished, the rule should look like this in the Rule List.
6. Click the Save and exit icon to save the rule and the form.
Test the Leave Approval Form
- From the Forms and Workflows homepage, click the
 Test icon.
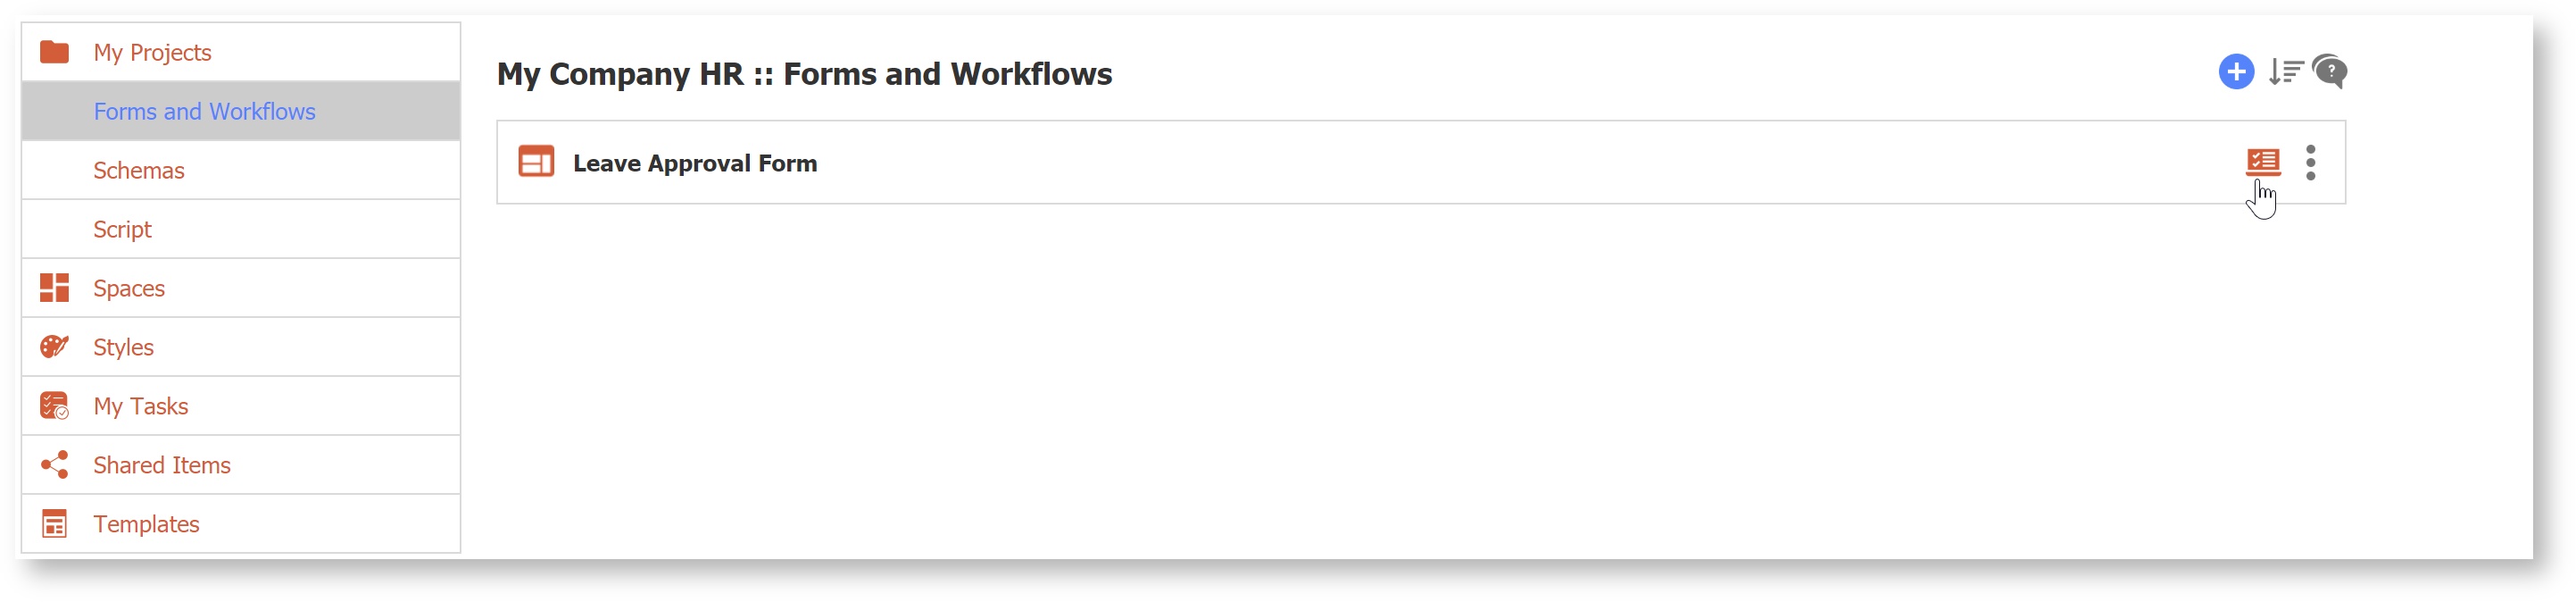
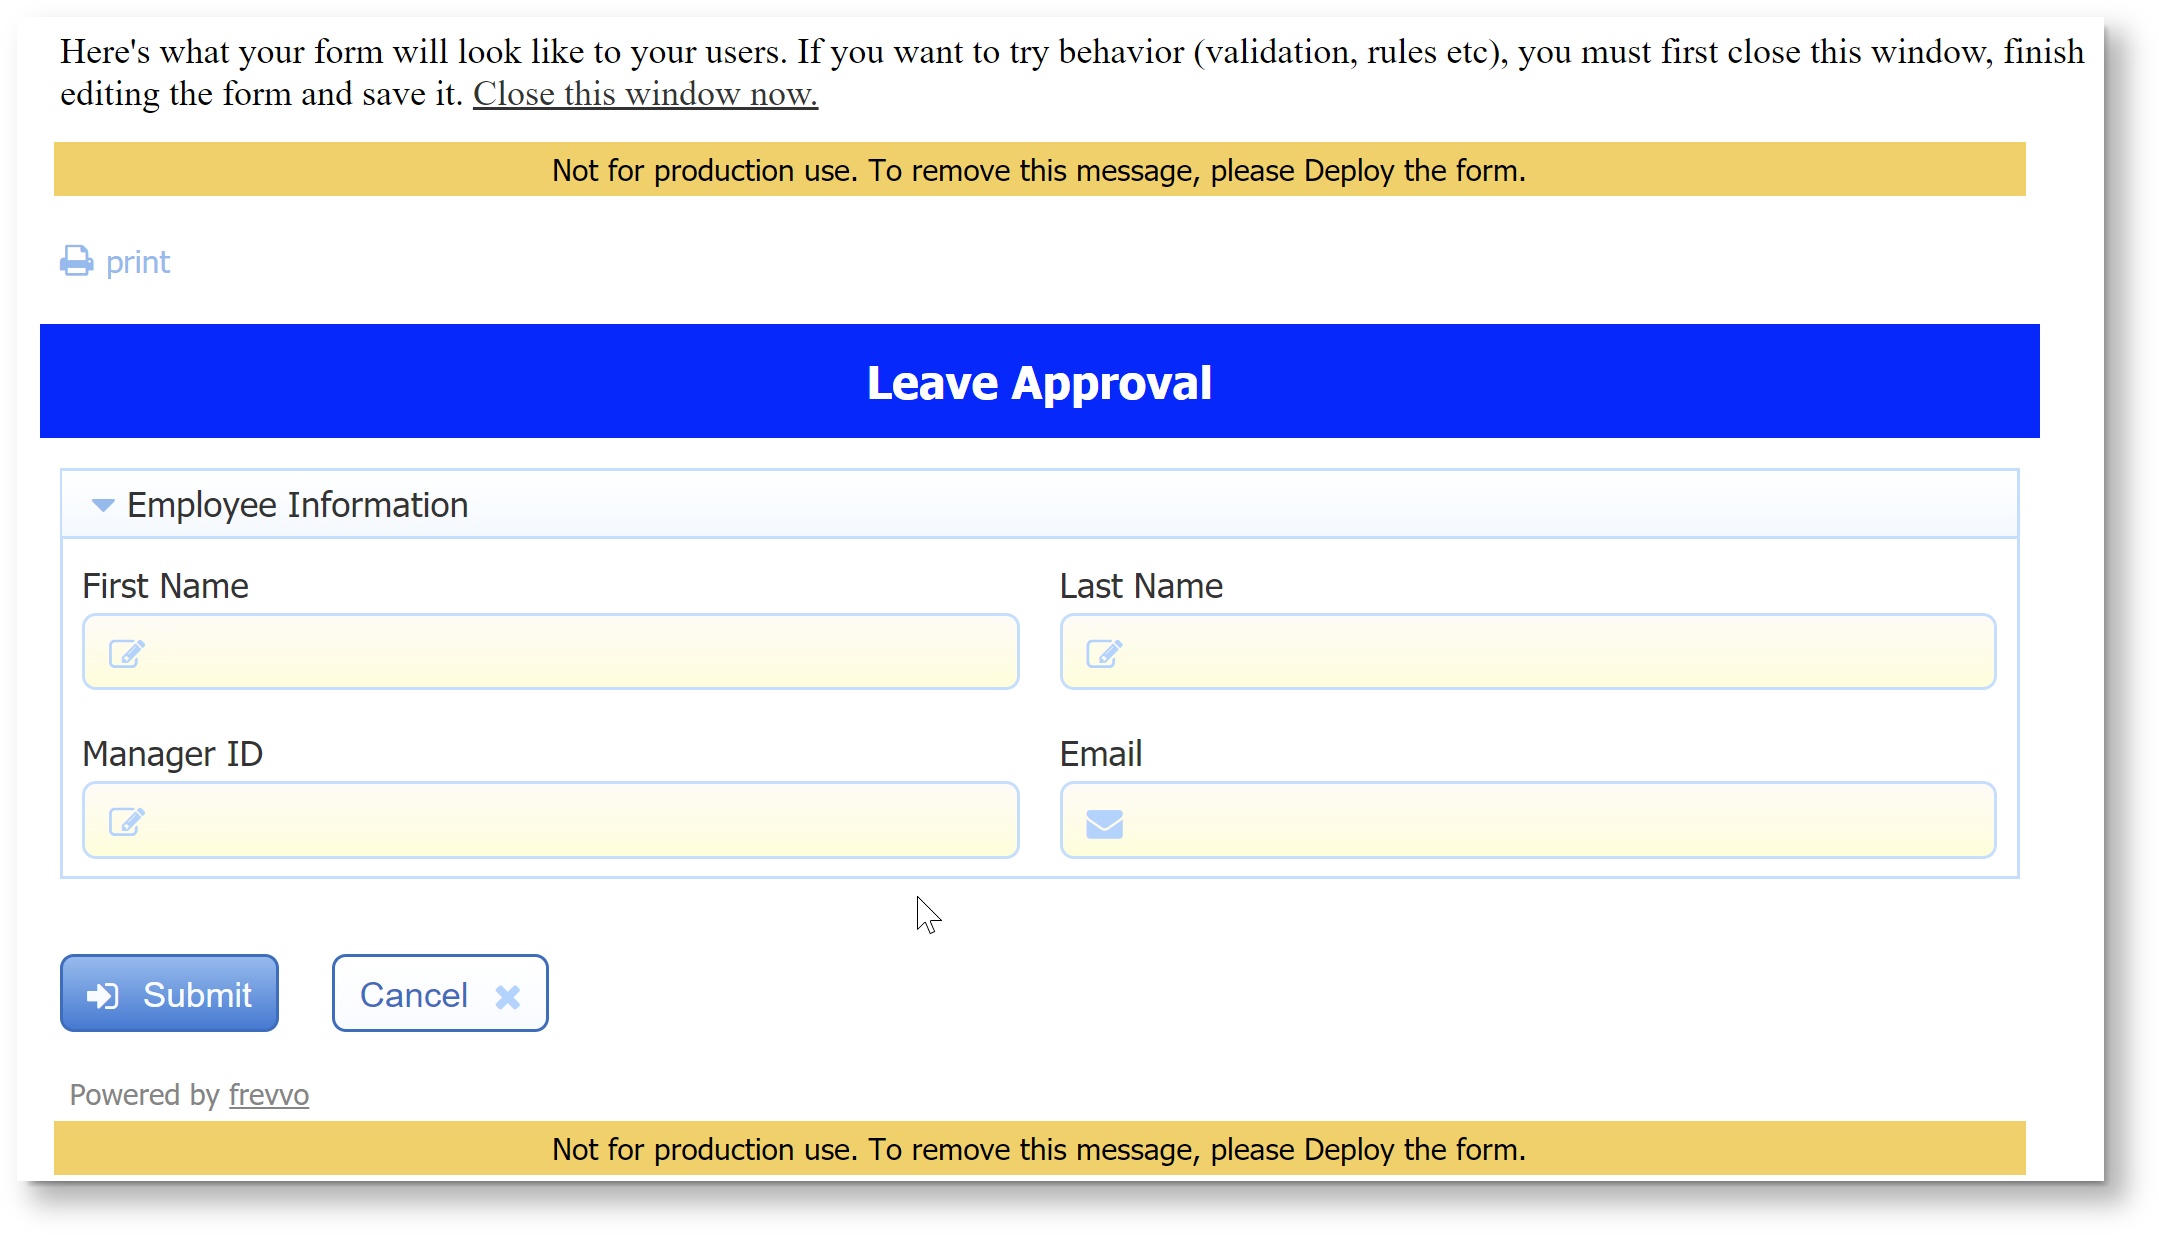
- Fill in the information in the Employee Information and Leave Request sections. Notice that you must fill in all required fields and that all fields must contain valid data. For example, the image shows an empty required field (Manager Id) and an incomplete email address displayed with an orange background. The user must correct these issues before the form can be submitted.
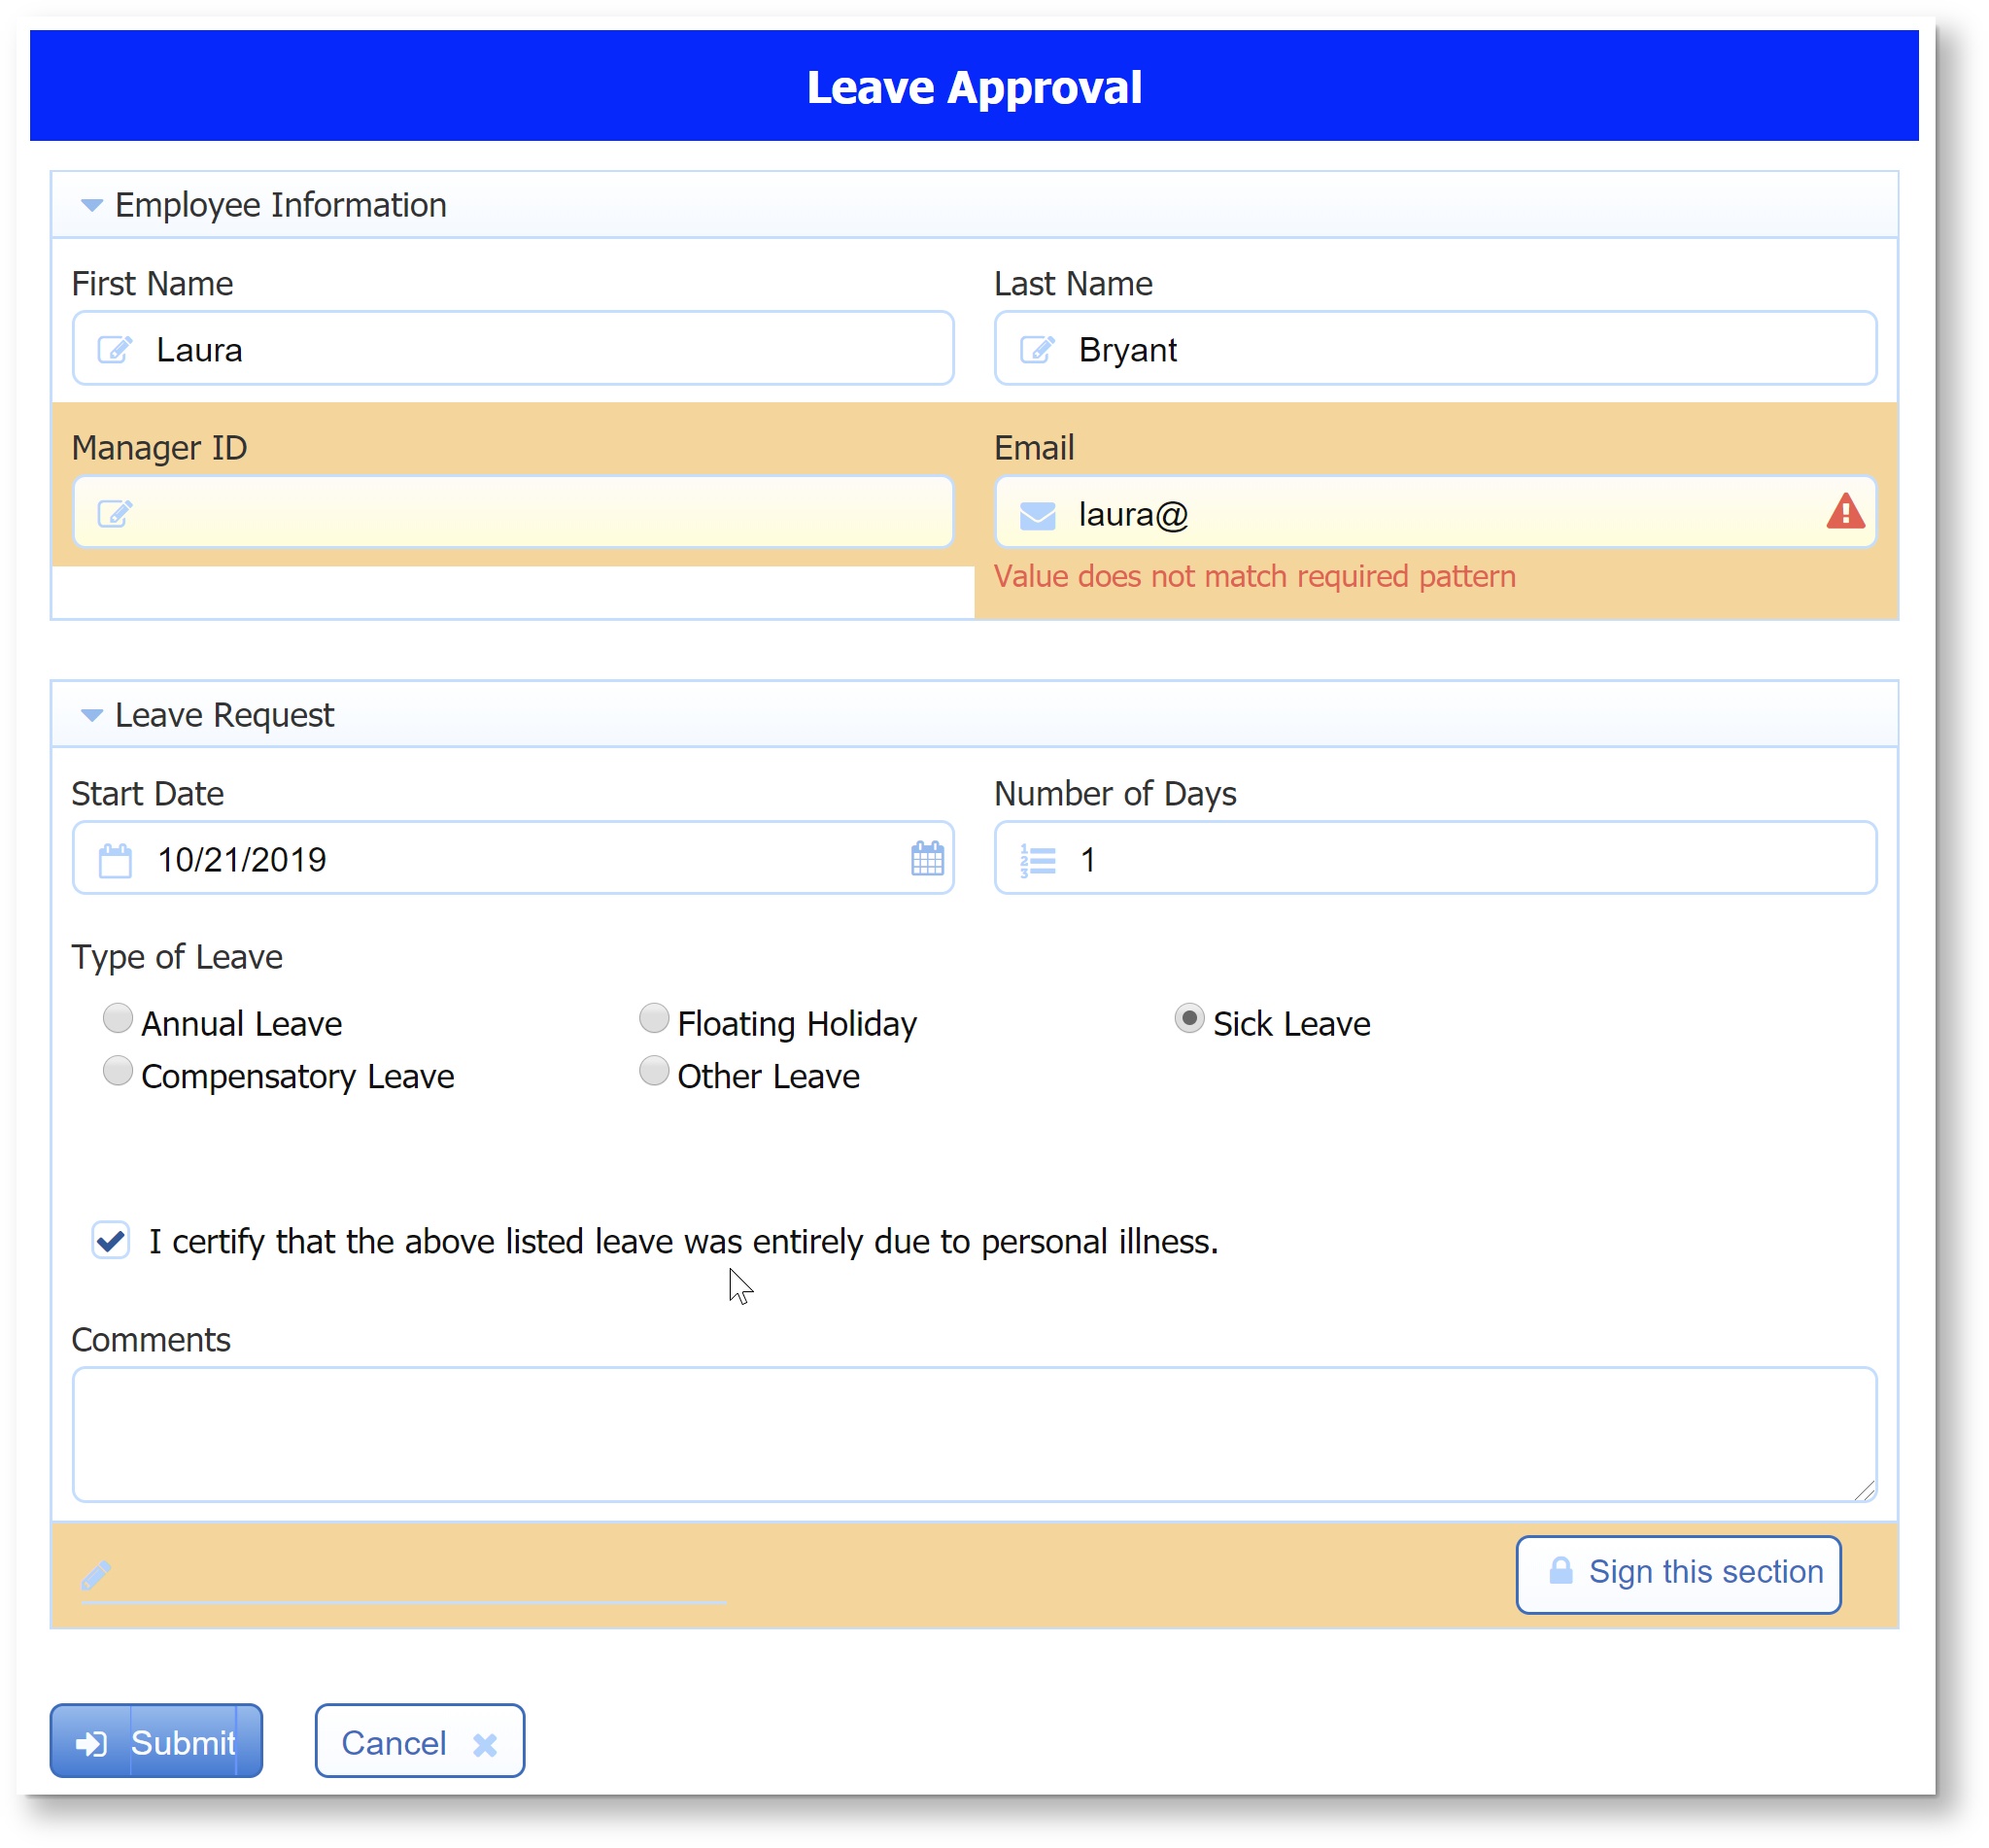
- Check Sick for the Type of Leave.
- Verify that the Certification control displays when the Sick option is selected as the Type of Leave option and that it is hidden when any of the other choices are checked.
- Click the Sign this Section button to sign the form as the logged in user, in this case, the designer.
- Correct any validation issues. Click submit.
If you prefer step by step instructions to create a Leave Approval workflow, click here.
We strongly recommend that you jump directly to the Workflow Tutorial if you are already comfortable using the Workflow Designer. The Workflow tutorial assumes that you have some basic understanding of the Workflow Designer. The Workflow Tutorial teaches you important workflow design patterns and increases your skills using the many workflow designer features.
Related Topics
- Detailed information about all of the features and functions available with
- Where does the form data go when the user clicks the submit button? This is controlled by your form's Doc Action. A common action is to Email data to a specified address
- What does the user see when they click the submit button? This is controlled by your form's Form Action .
- Want to make your form accessible to everyone? The owning designer always has access to the form but may configure selected users and/or roles (i.e. users with these roles) to have runtime access to the form. See how to make your form's visibility private, public in tenant, public or custom.
Want to add some colors or tighten up your forms layout? The Layouts and Styles tab enables you to customize the style of your forms & workflows so that they fit into the look & feel of an existing web application.
- Want to create forms/workflows that do cool things? See the Business Rules chapter for the details and examples of how to add behaviors to your forms/workflows.
Eventually you will want to integrate your new