This documentation is for Live Forms 9.1. v9.1 is a Cloud Only release. Not for you? Earlier documentation is available too.
COVID-19 Response Info: At frevvo, our top priorities have always been employees and customers. We have taken several steps to promote the well-being of our people, to minimize services disruptions, and to help where we can. Visit our website for updates.
Email Integration
- Former user (Deleted)
- Megan Ellis
Form submissions can be emailed to a recipient when the user clicks the submit button. To configure the form to send an email upon submission, open the form designer and and select 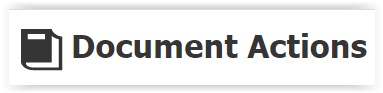 in the left-side properties pane. This will launch the Form Properties window. Select the Document Actions tab. Choose the Send Email radio button.
Each time the form is submitted, will send an email message to all recipients with the form submission data, optionally an attachment snapshot of the form image, and optionally the data in XML format in an attachment named "form".
On This Page:
Email Addresses
You can enter multiple recipients in the To:, Cc:, and Bcc: fields (comma or semicolon separated,) and a single address in the Reply To: and From: fields. There are several ways to enter recipients:
- Static email address such as info@frevvo.com
- Semi-dynamic address by using a template for the name with a static domain, such as {person}@frevvo.com
- Dynamic from a control or form template, such as {emailAddress}
The To: email address is required. All other properties are optional.
The tenant admin can configure the From: email address on the tenant admin's Edit Tenant page.
The designer can enter a different address in the From: field on the Document Action tab. This From address replaces the default no-reply@…, the address configured on the Edit Tenant screen or any settings in the frevvo-config.properties file for In-house customers.
You can even use the standard internet address convention, for example: From: frevvo Client Services <services@frevvo.com>, so that your emails appear in people's inboxes looking like this:

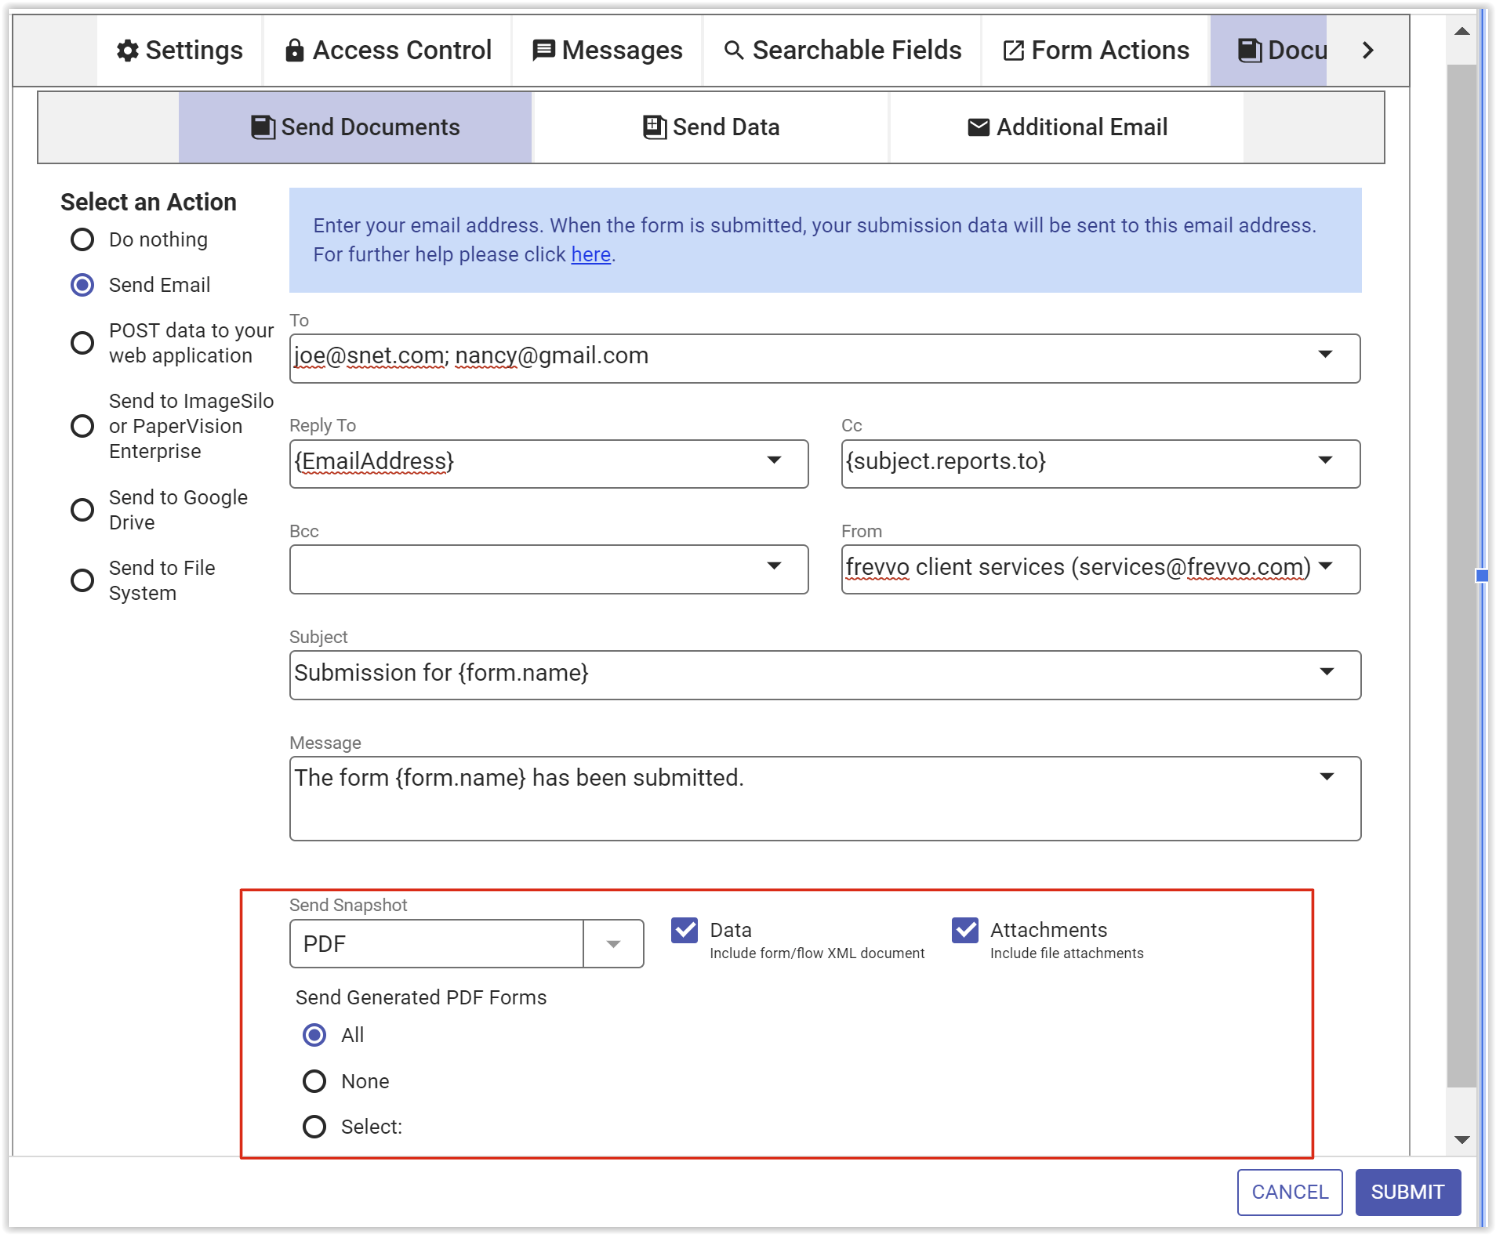
Select the Submission Documents for the Email
When the form is submitted, Live Forms will send an email message with the following selectable options attached. These include submission data, an XML document, an image of the filled form, attachments uploaded to the form and any, all or none of the Generated Forms (Pixel Perfect PDFs) associated with your form. Using the dropdowns and checkboxes, select the documents that you want to be included in the email.
- Send the data as a PDF attachment or other image type using the Send Snapshot dropdown. The image type options are PDF, PNG or JPG. Select the blank option from the dropdown to exclude this attachment in the submission.
- Attach an XML data document using the Data checkbox. This checkbox is checked by default. Uncheck it to exclude the XML data document in the email.
- Attachments uploaded to your form/workflow are included in the email if the Attachments checkbox is checked. This checkbox is checked by default. Uncheck it to exclude attachments in the email.
If you have Pixel Perfect mapped PDFs (ex: W-4, I-9 etc…) associated with your forms/workflows, choose the action you want to take from the Send Generated PDF Forms control :
•Check All to send all the Pixel Perfect PDFs. This is the default value.•Check None to send none of the PDFs•Check Select to display a list of all the PDFs associated with your form/workflow. Click the ones you want to be part of the submission. Hold down the Shift key then click the files in the list to select all PDFs or hold the control key and click specific PDFs.
We suggest you uncheck "Send Data" if you don't need the xml attachment. Also leave the "Send Snapshot" dropdown blank if you do not need the form image attachment. Both options have small performance and memory overheads. So don't select them if you're not going to use these attachments.
Example using the Email wizard
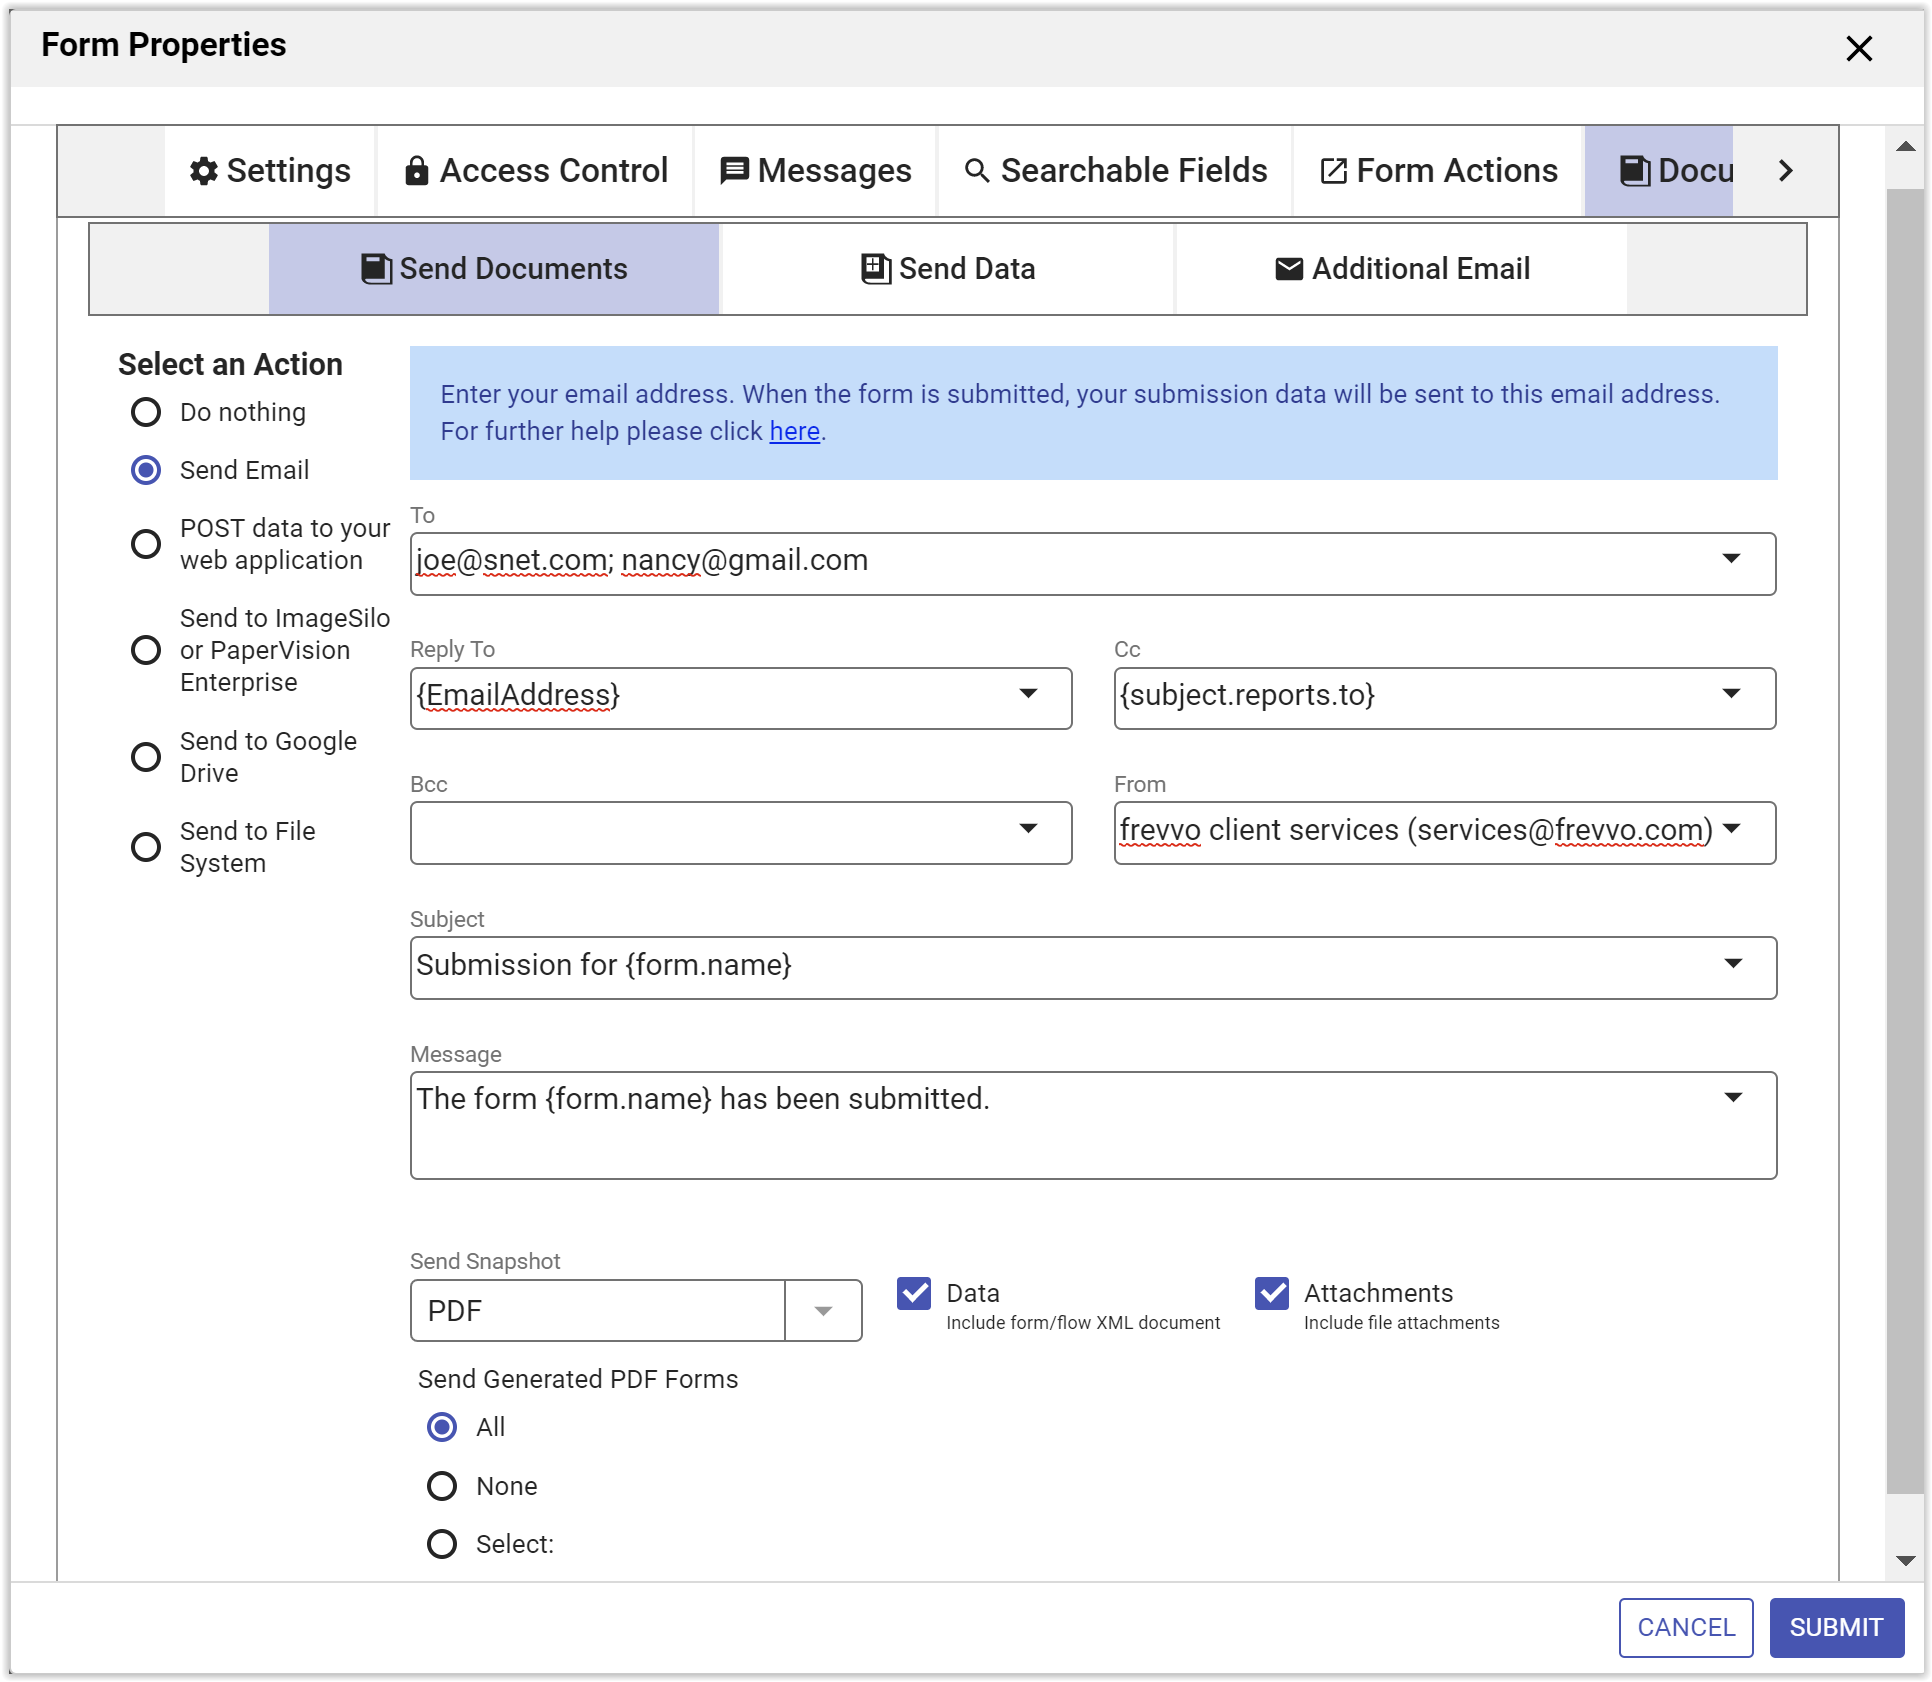
Here is an example using the dynamic template {emailAddress}. You must name one of your form controls emailAddress.
Step 1: First name one of your controls emailAddress. You do this by entering that string into the control's Name property as shown below.
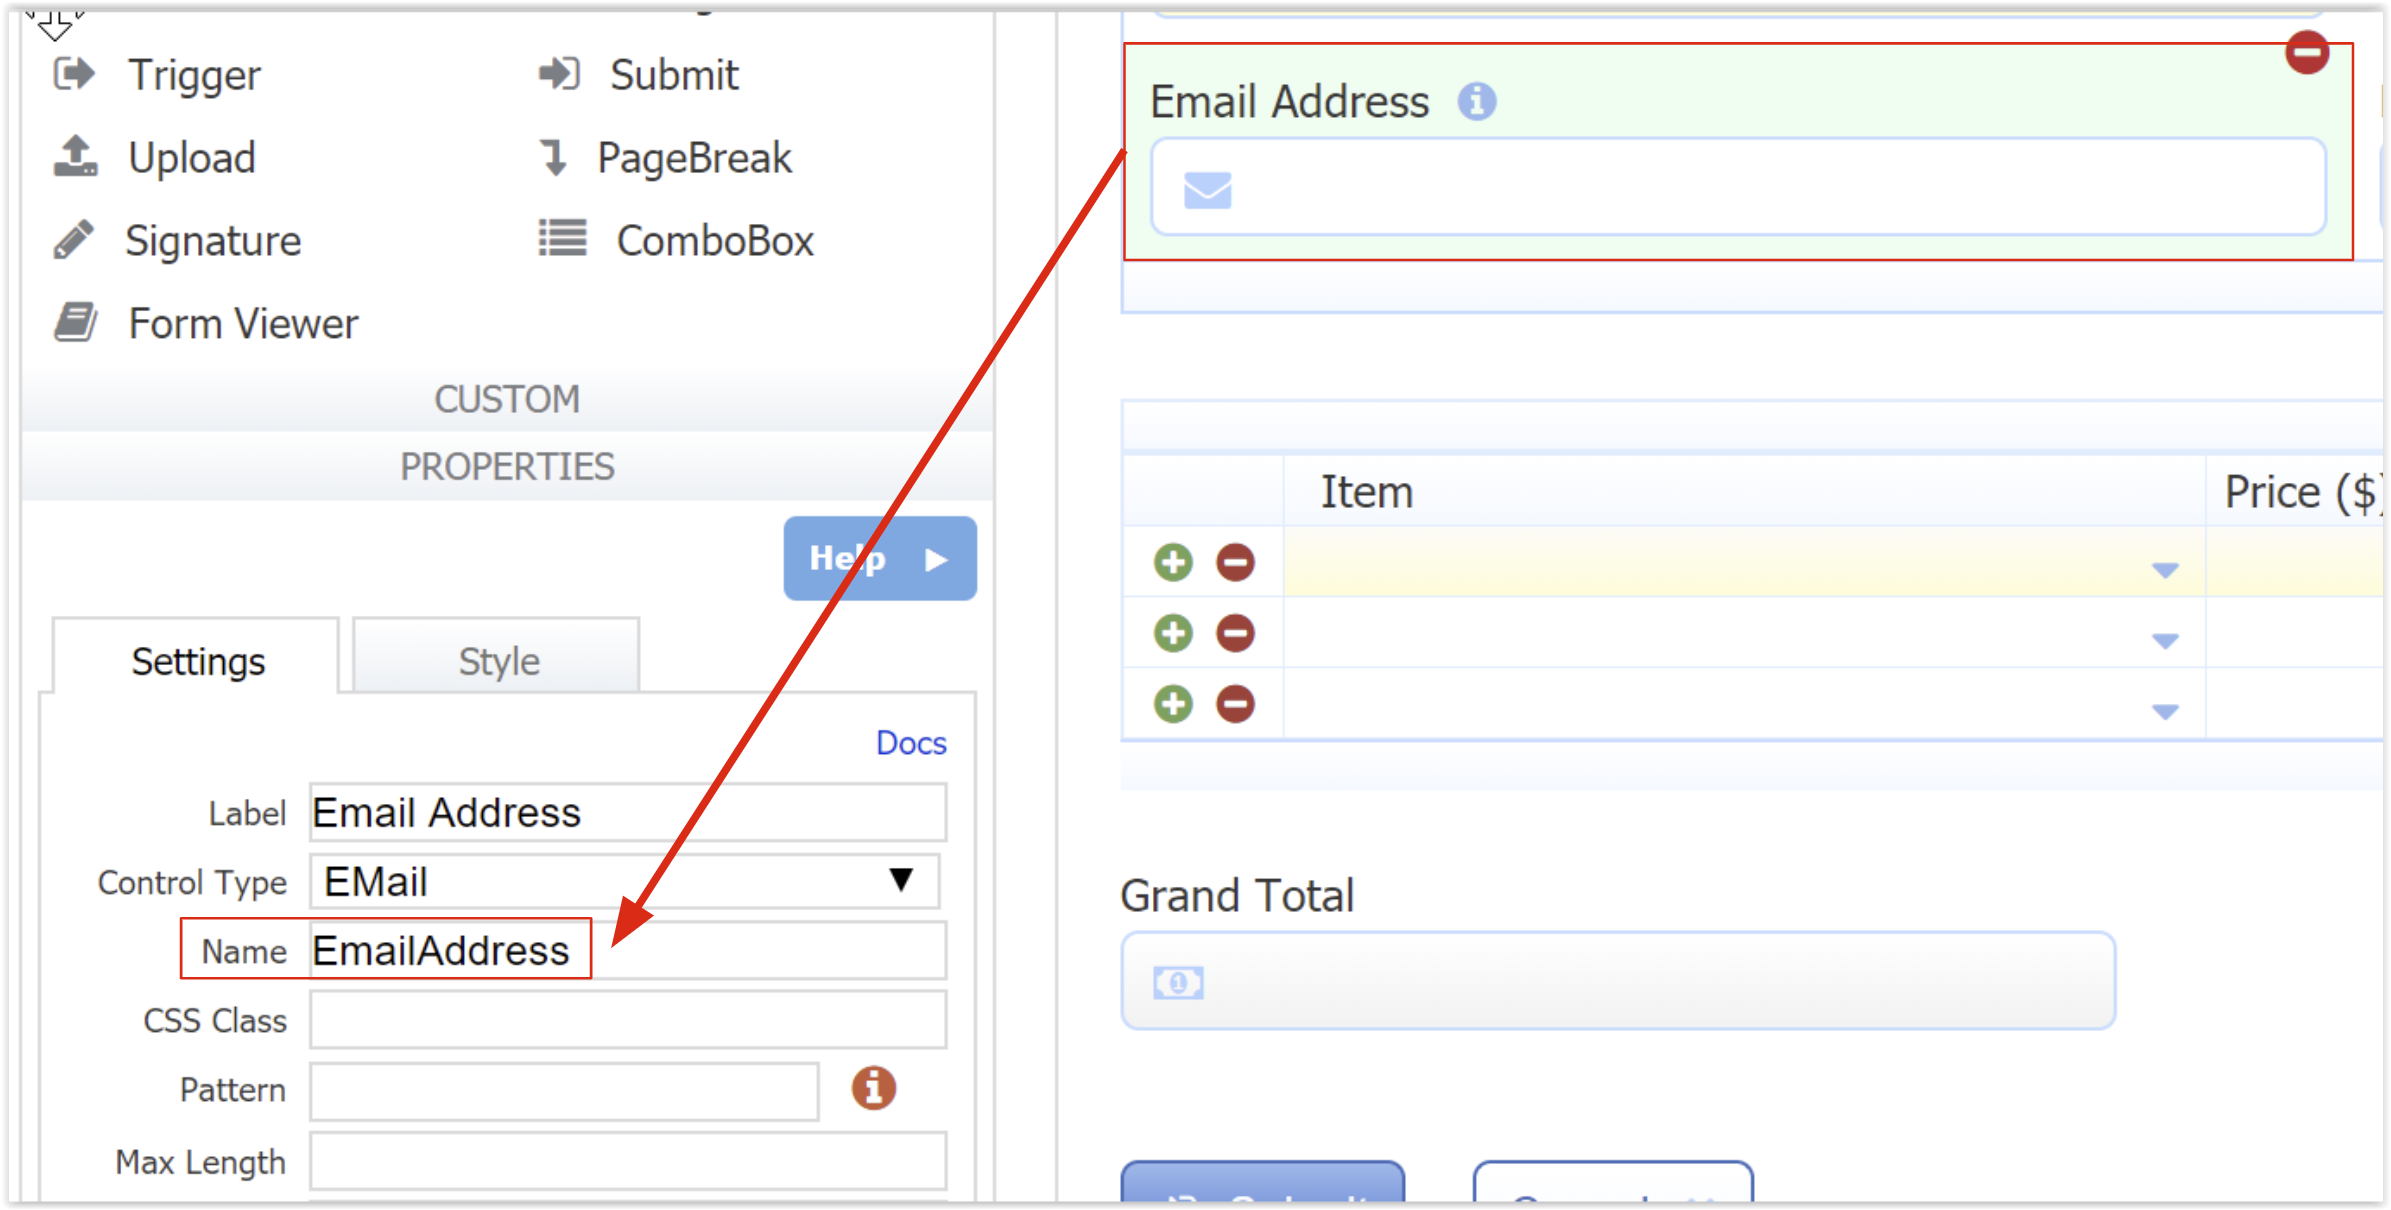
Step 2: Next, open the Doc Action Email Wizard. Select the Send Email radio button. Enter the template: {emailAddress} in the To: field You can typeahead by typing a "{" and the first few letters of a control name to search available templates, or click on the down arrow for a list.
You can specify an email address containing a template and static text such as: {customer}@frevvo.com. In this case the value in the form field named "customer" would replace {customer}. If the user enters "Joe" into the customer form field the submission would be emailed to Joe@frevvo.com.
The Reply To, Cc, Bcc, and From fields are options. All can be populated with emails or templates as well.
Step 3: The email wizard lets you set your own email subject and message. The message body can contain html and css giving you the ability to generate very nicely formatted emails. Form data values can be added to the message subject and body using control template names. Use the down arrow to select from a list of templates. The default message contains very simple text.
Here is a sample of formatted message body. Note the use of html.
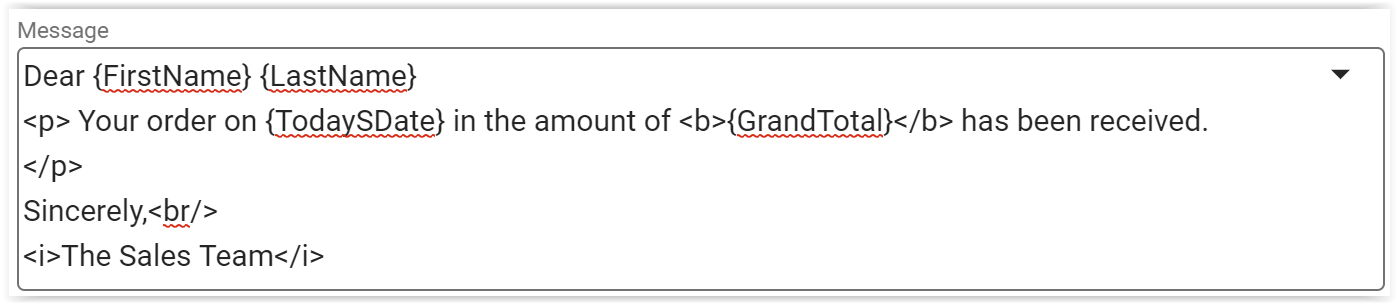
Dear {FirstName} {LastName}
<p> Your order on {TodaySDate} in the amount of <b>{GrandTotal}</b> has been received.
</p>
Sincerely,<br/>
<i>The Sales Team</i>
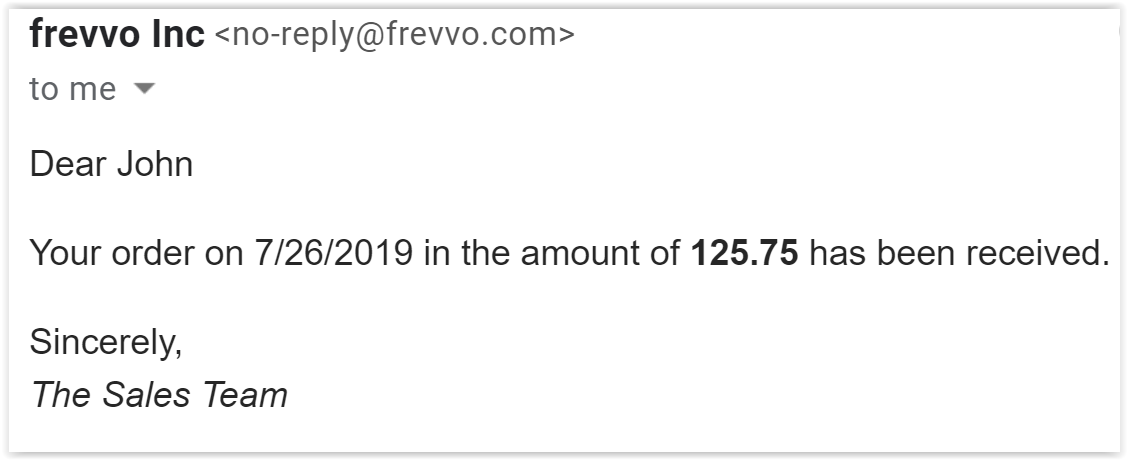
Here is the resulting email message:
Note that html "pre" tags are needed around the message body if you use data from textarea controls in your message body. By default any newlines in the textarea are removed by html. This is a feature of html that can be turned off using the html "pre" tag.
Step 4: Attach a snapshot of the form as a PDF, PNG, JPEG or TIFF. In-house customers must install the Tiff generator in order to see the Tiff option.
You can find information about PDF Styling and support for international characters in submission PDFs here.
FAQ
Why are emails from frevvo marked as spam?
Customers using a custom domain to send or receive confirmation and notification emails may need to whitelist the frevvo IP address and/or edit your domain's Sender Policy Framework (SPF) records to ensure proper delivery.
- Whitelist the frevvo IP the emails are sent from: 50.31.42.138
If you have an existing SPF record, you will want to add the following string to it to allow frevvo to send email on the behalf of your domain:
include:app.frevvo.com
If you don’t have an existing SPF record, use this string to authorize frevvo as a sender on the behalf of your domain while not interfering with existing email services:
"v=spf1 a mx include:app.frevvo.com ?all"
SPF records are a list of hosts specified by the domain administrator that are verified to send email on your behalf. The SPF record is located in the Domain Name System (DNS) settings for the domain. Your network or infrastructure expert should be able to perform the steps listed here.
This Google Support article may be helpful for customers using gmail.