This documentation is for frevvo v10.0. Not for you? Earlier documentation is available too.
Templatized Strings
- Former user (Deleted)
- Megan Ellis
Templates are like variables in your form that will be replaced with the actual values users enter into the form during use mode. Templates make your form feel more interactive and are useful in summarizing information in collapsed section controls. Templates can be used in the form designer in the following control properties:
- Labels
- Hints
- Help
- Error Msg
Templates can also be used in:
- Business Rules
- Form Actions
- Doc Actions
- Display Messages
- Email Action
- Form Url Parameters _data
Refer to the following chapters for related information:
- Integrations
- Using Forms
- URL Template Variables for more details on these other uses.
Templatized String Syntax
Templates have the syntax: {<control name>}. For example, this form contains three controls labeled "Apples", "Oranges" and "Pears". The controls are named "Q1", "Q2" and "Q3" respectively and would be referenced in a template as {Q1}, {Q2} and {Q3}.
Templates can have default values. The syntax is {<control name>=<default>} For example, this form also contains a control labeled "Total Items in Cart" which is named "T". A template {T=0} would resolve to the value "0" when the field named T is empty otherwise it would resolve to the entered value.
The Shopping Cart section control contains templates for its Label, Hint and Help.
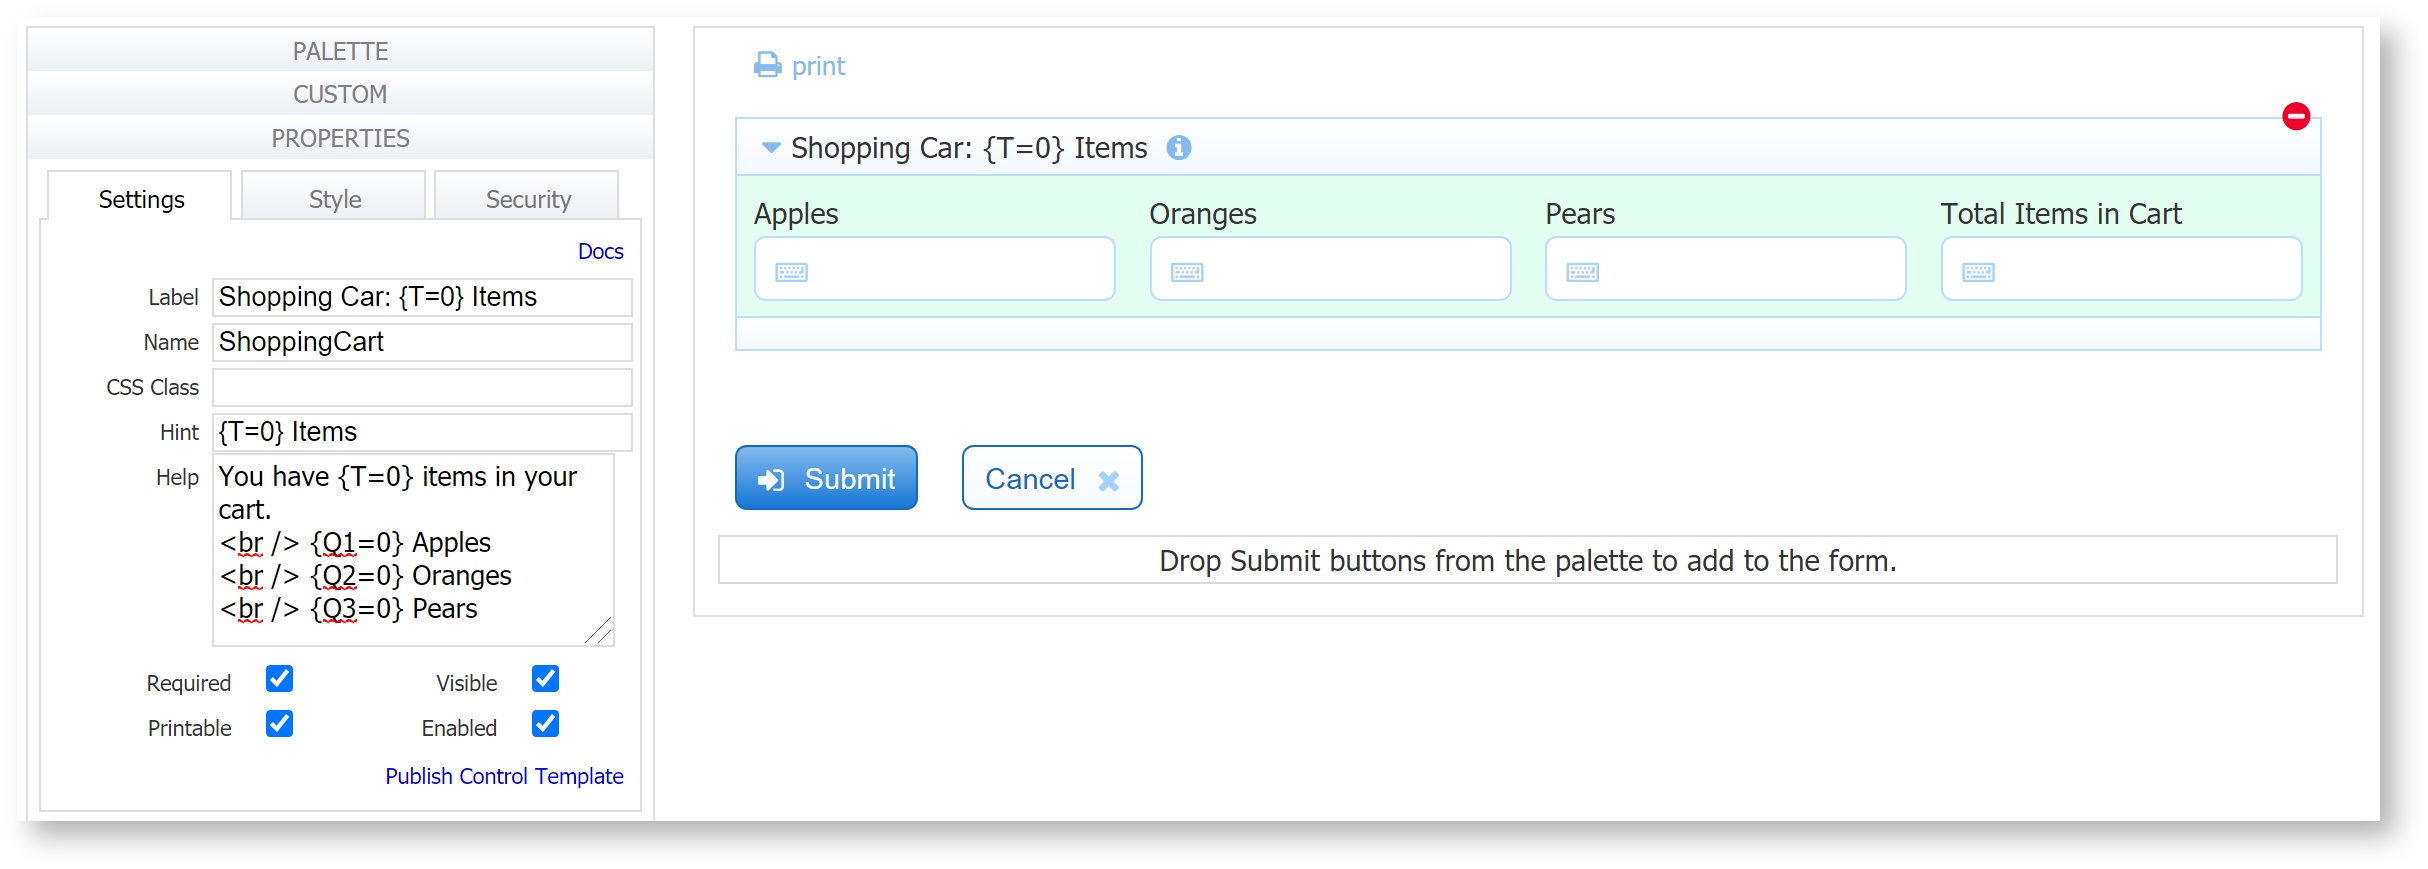
You have {T} items in your cart.<br/>
{Q1=0} Apples<br/>
{Q2=0} Oranges<br/>
{Q3=0} Pears
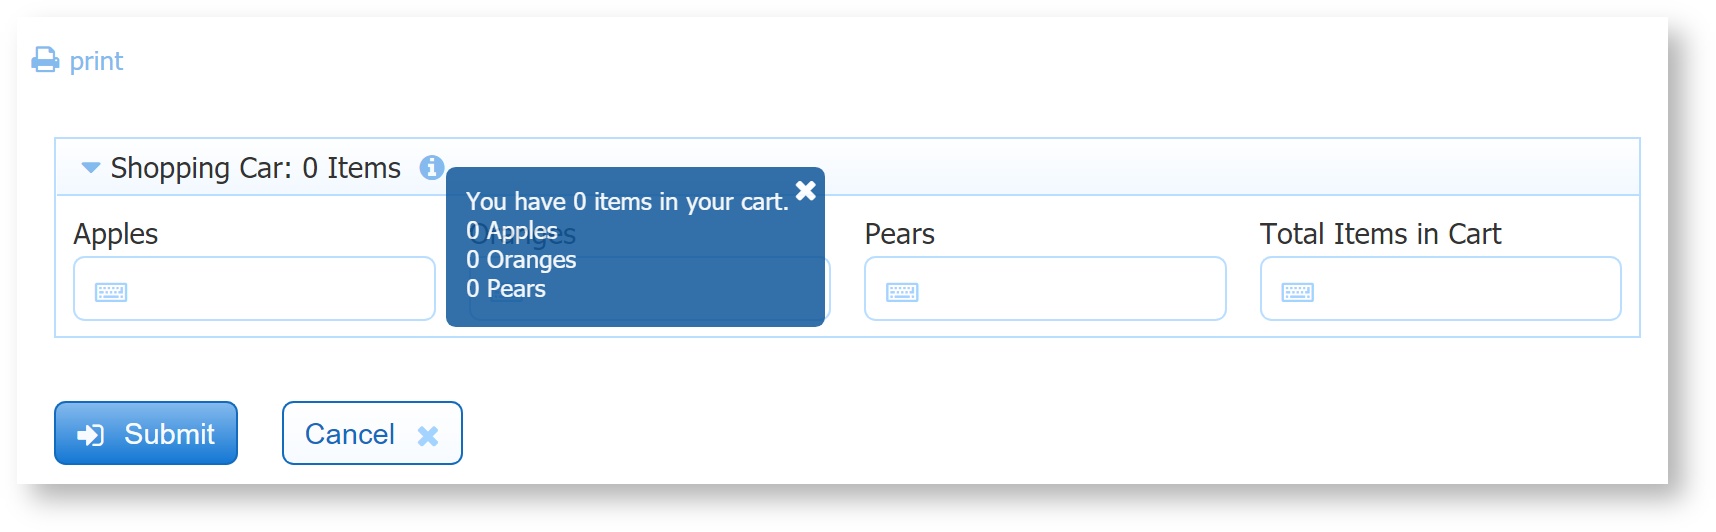
Before the user starts entering values into this form they will see:
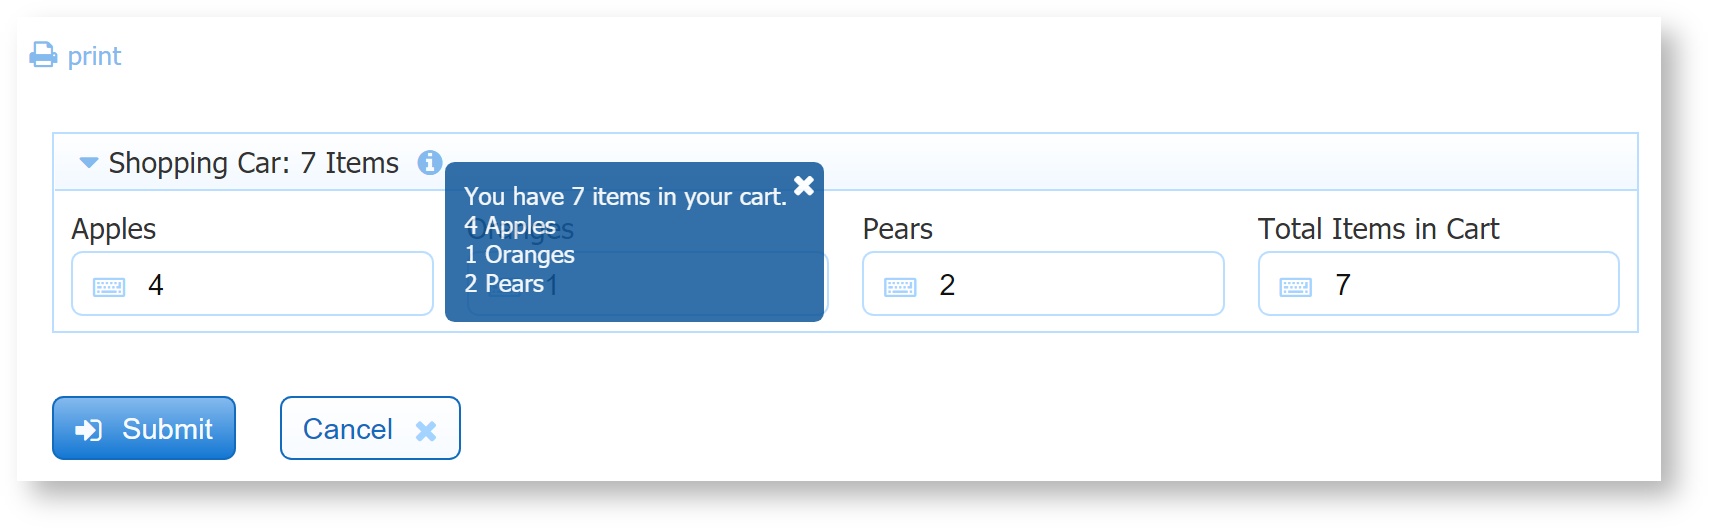
As a user begins entering values into the form fields, the templates will immediately begin appearing, and the user will see:
Templatized String Parameters
Templates support parameters. The syntax is {<control name>=<default value>!<parameter>}. The supported parameter is:
- encode={true/false} – If encode is false the template is not encoded after resolving it. The default is true
The encode template parameter is very useful when the template value is a URL. For example, if the template is {svchost}?name={svcps} and svchost has the value http://localhost:8080/, it will get mangled by encoding. Instead use {svchost!encode=false}?name={svcps} and it will not get mangled by encoding.
Repeat Controls
The template syntax is extended for controls inside repeats. The name of the repeating control must be proceeded with the pipe '|' character. For example if you have a control name Phone inside a repeat, the template must be written as {|Phone}. The result of this template is to output the list of all phone numbers entered into the form.
The default separator is a single space. The syntax also allows for an optional defined separator, such as a comma. If you would like to get the list of phone number items separated by ", " (comma and space), use the following template: {, |Phone}. If you used these templates in a form's Doc Action Display Message and two phone numbers were entered (i.e.. 203.208.3117 and 203.208.3118) you would see this output for those templates:
//default space separator {|Phone}
203.208.3117 203.208.3118
//optional comma and space separator {, |Phone}
203.208.3117, 203.208.3118
Another example is {<br/>|Names} for a control named Names inside a repeat you would see the output:
Joe
Nancy
James
Configuring a template using the pipe (|) to specify repeats/table rows will not work for the Upload control File Name property.
Repeat Item Labels
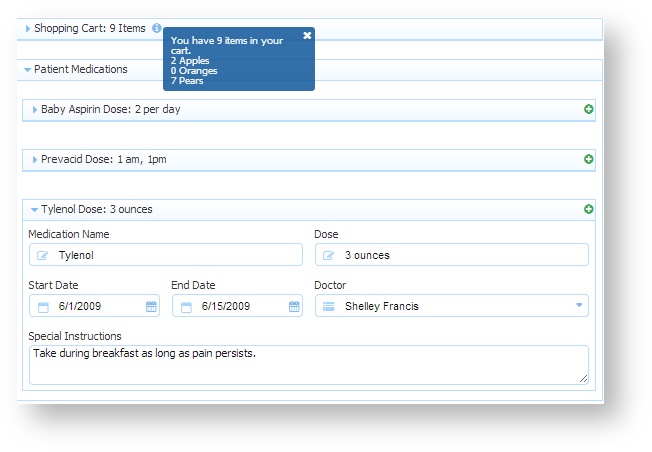
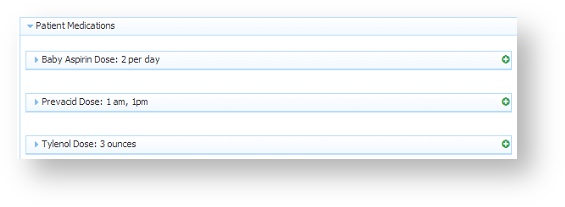
It is very useful to use templates with repeat controls. Imagine a long list of medications that appear on the form in a collapsed state. It is helpful if the section labels are not simply a static text such as "Medication" but rather dynamic and indicative of the values entered into the form.
Complex Templates for Workflow Routing and Escalations
When you are setting up step Assignments or Escalations for workflows, you can assign a user/role template where only part of the text is inside the curly brackets - {}. This is best explained with a simple example using roles for workflow routing. Let's say the roles in your organization are floor-manager, sales-manager and store-manager. Of course, these role names and users assigned these roles must exist in your tenant. Your form has a dropdown control named roles with these options: floor, sales, store. Users select the first part of the role from the dropdown. The suffix -manager is typed in after the role template in the Assignment tab to create the complex template - (floor-manager, sales-manager, store-manager). The workflow step with the complex template assigned will navigate to the appropriate role. A partial match template lookup is available on the Assignment and Escalations tabs to select the complex template from dropdown options. We will assign the {role}-manager on the Assignment tab of a workflow as an example: Type the control name of the template surrounded by curly brackets - in our example - {role} Type the dash - followed by manager. The {role}-manager appears in the dropdown Click on it to select. Click Finish to save the changes to the Assignment tab then click the The partial lookup works with users/roles and prefixes/suffixes in the users/role names.  save and exit to save the changes to the workflow.
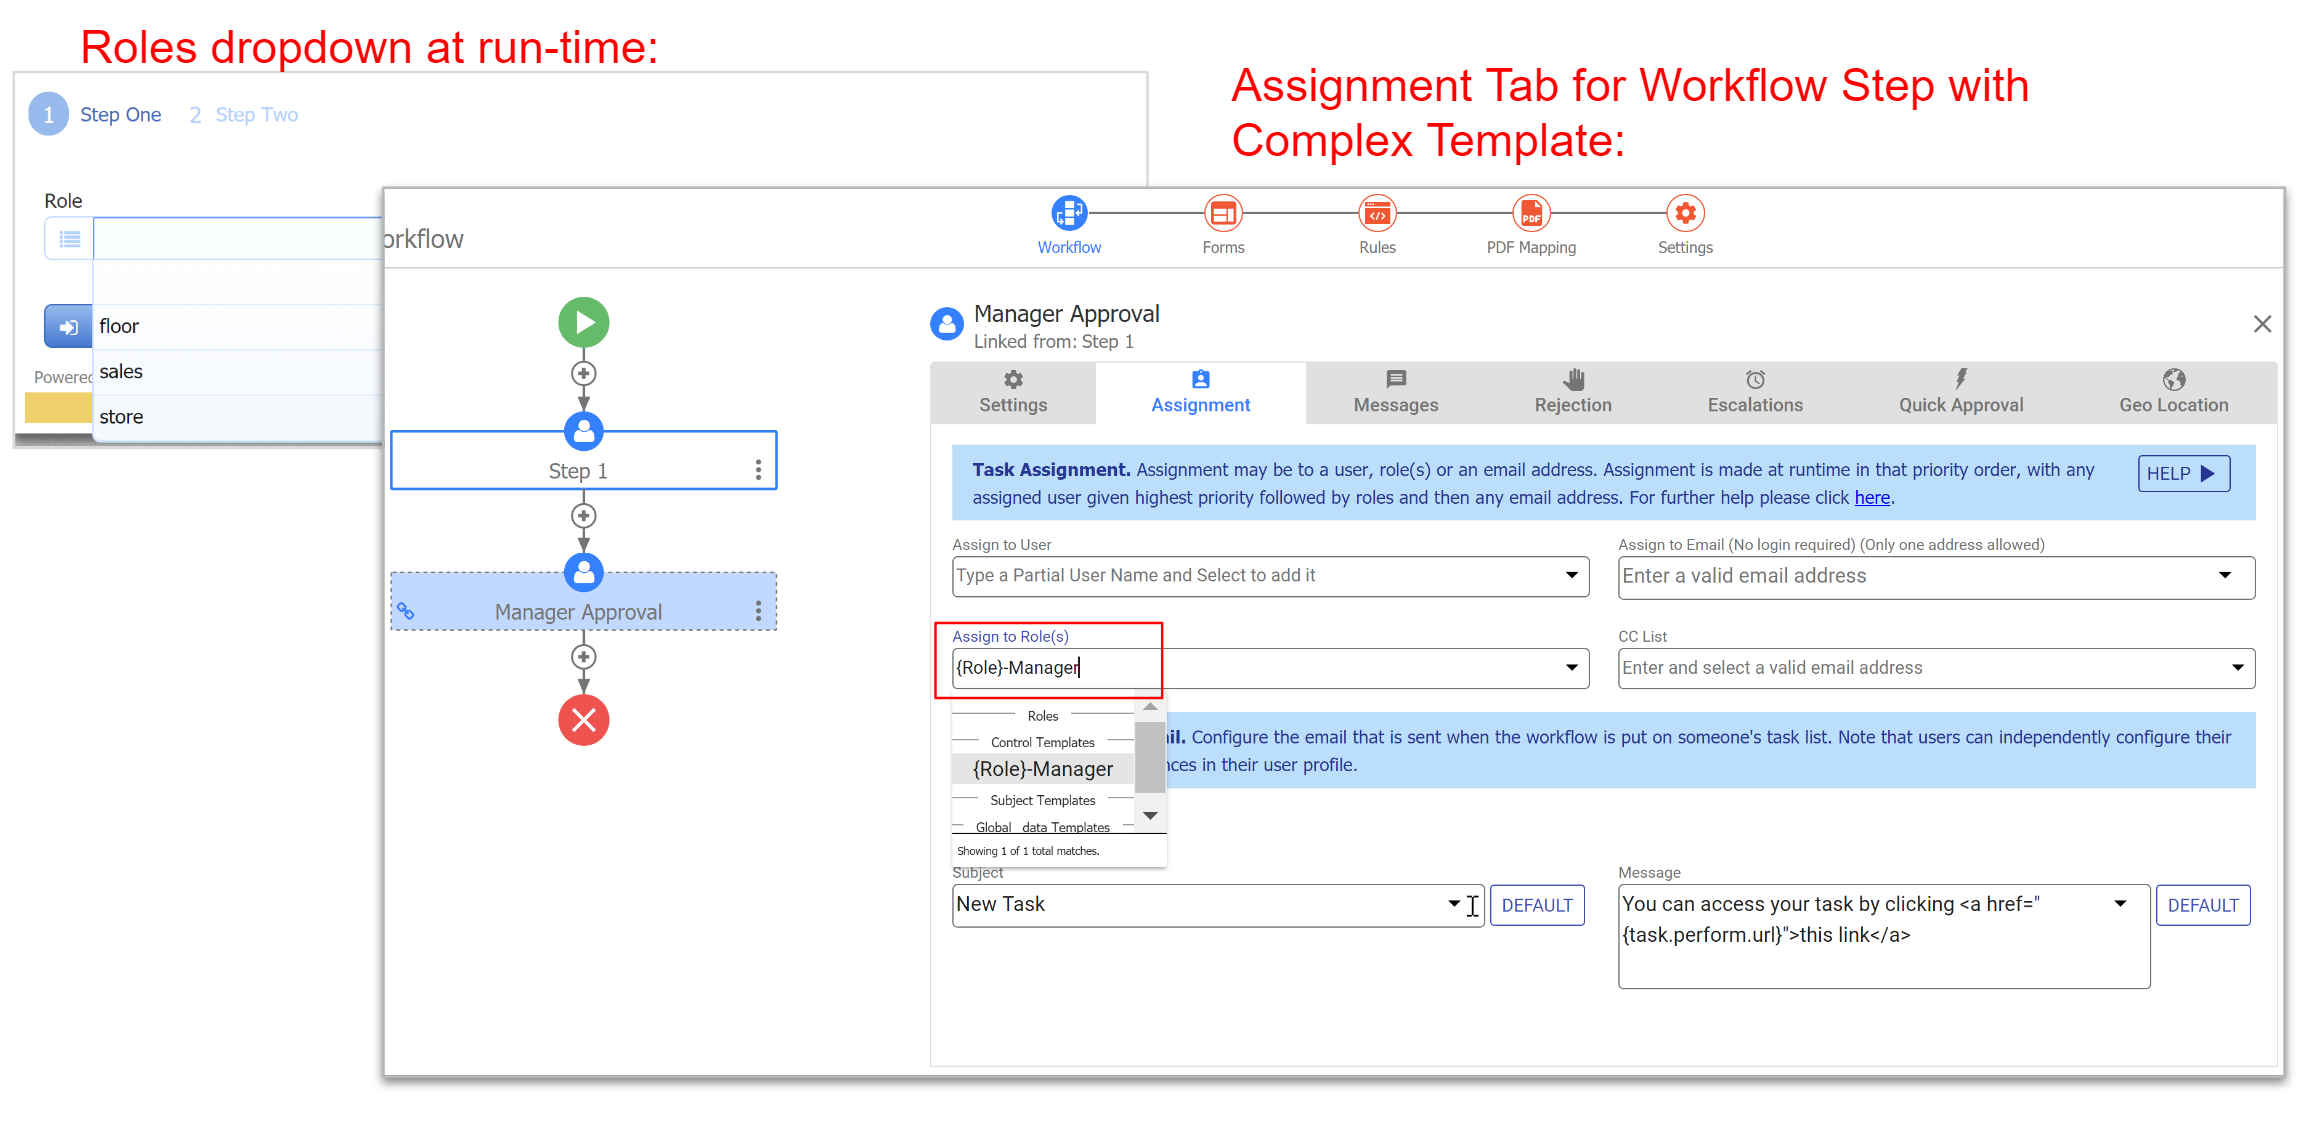
Templatized Selection Controls
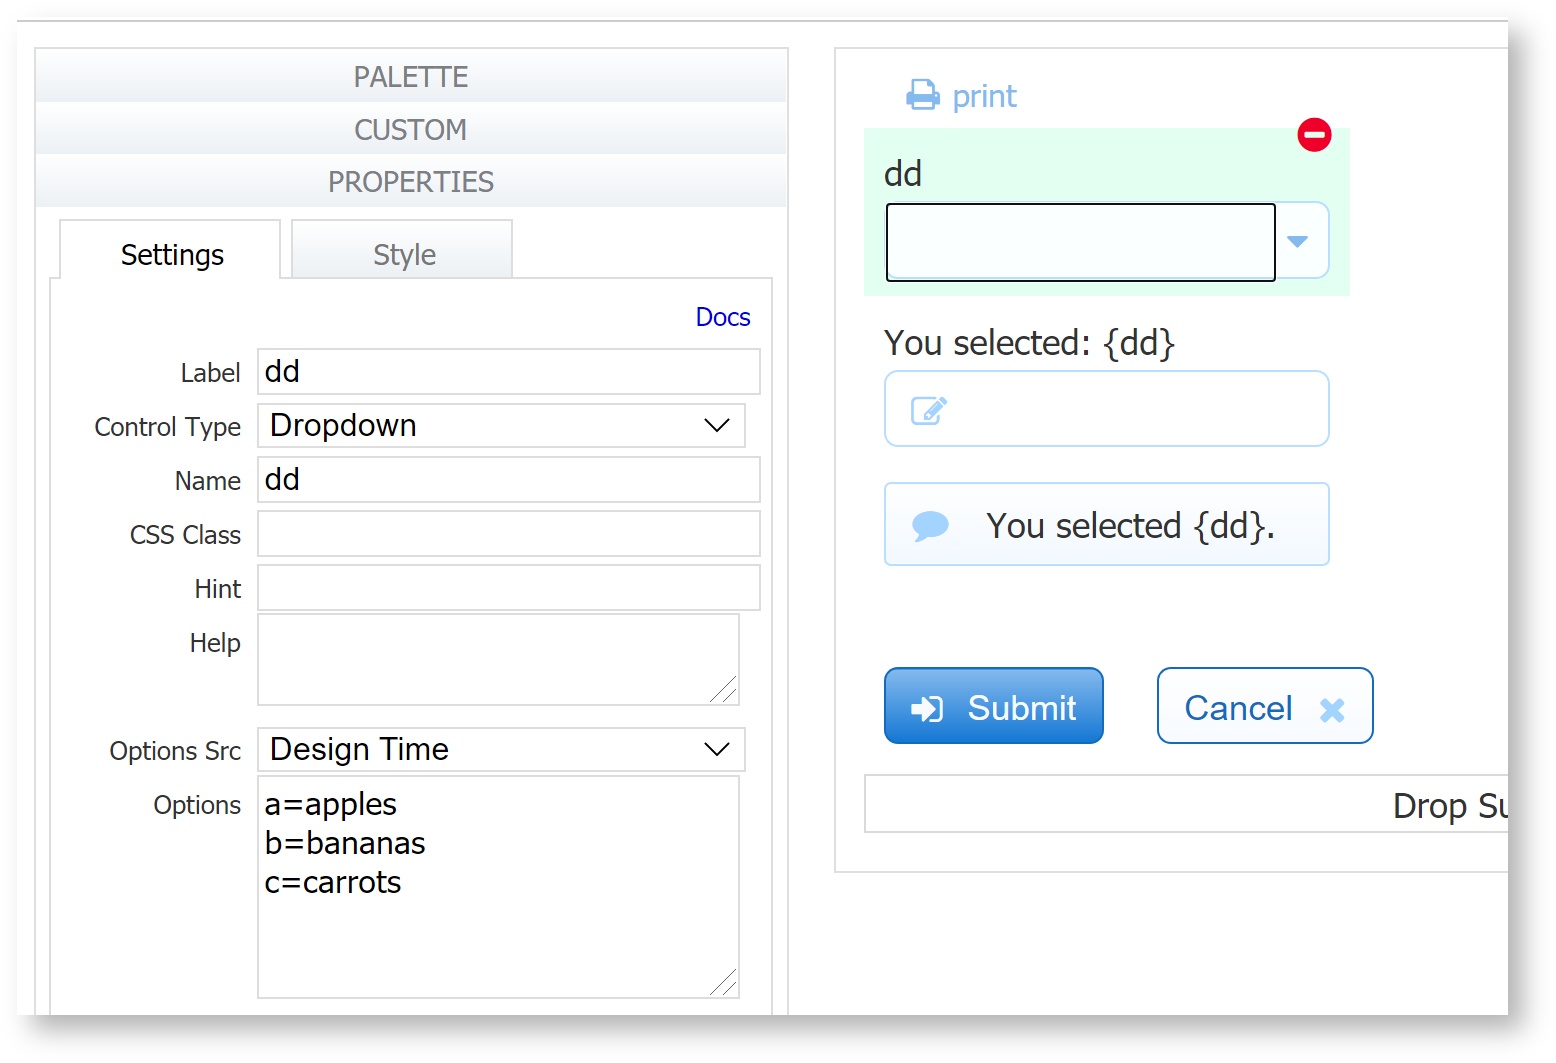
When a template refers to a selection control such as a dropdown, radio or checkbox, the selected option label will show in the form/workflow's run-time UI. So, a selection control template used in a message control or the label of another control will display the selected option label. However, when the template is used in form/workflow settings, such as a Form Action, Pending Message, or Doc Action Email, the template will display the option value. In this example we have a dropdown control named "dd" with options a=apples, b=bananas, c=carrots. Another control's label has the template {dd} and the message control also uses the template {dd}.
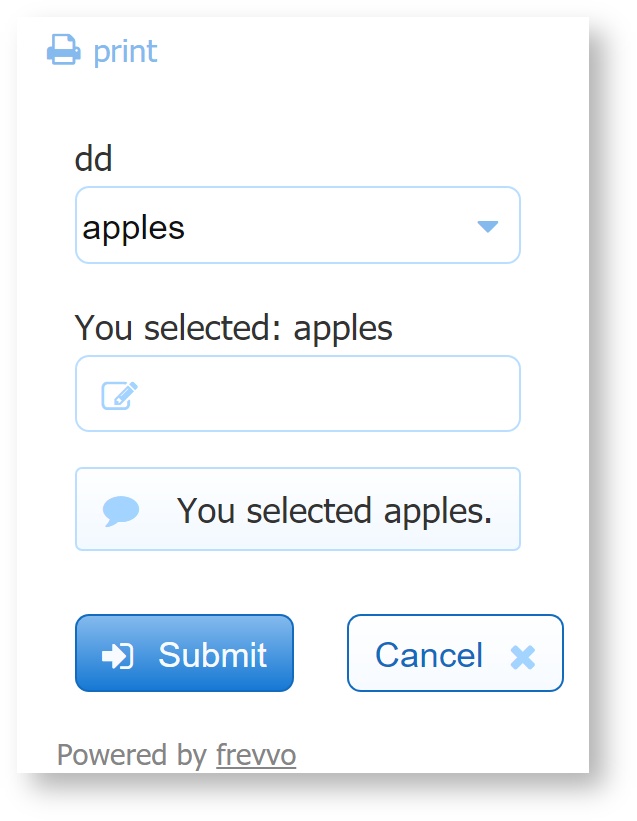
At run time, the template displays the selected option label in the UI. Notice that the user sees "apples" in both the text control's label and in the message. If Save Value is checked on the message, the value passed will be "You selected apples", retaining the dropdown template's label in the message control's value.
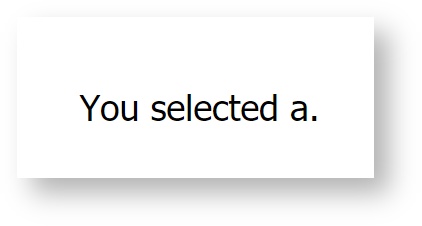
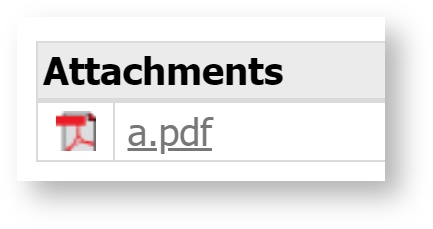
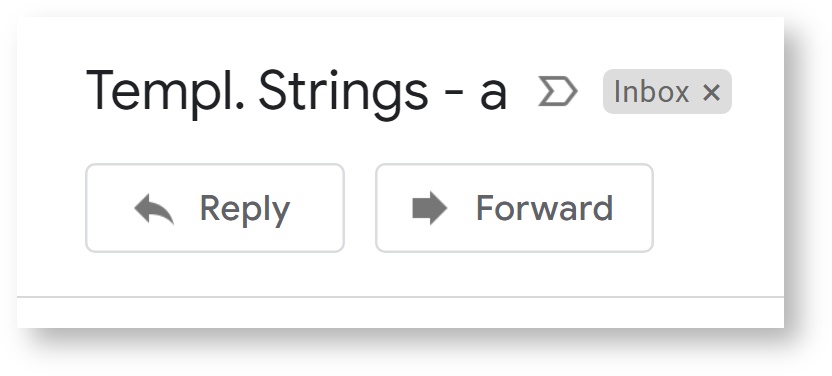
We've also used the template {dd} to name the Form Settings to display a Form Action Message, set the PDF Name, and in the Email subject line.
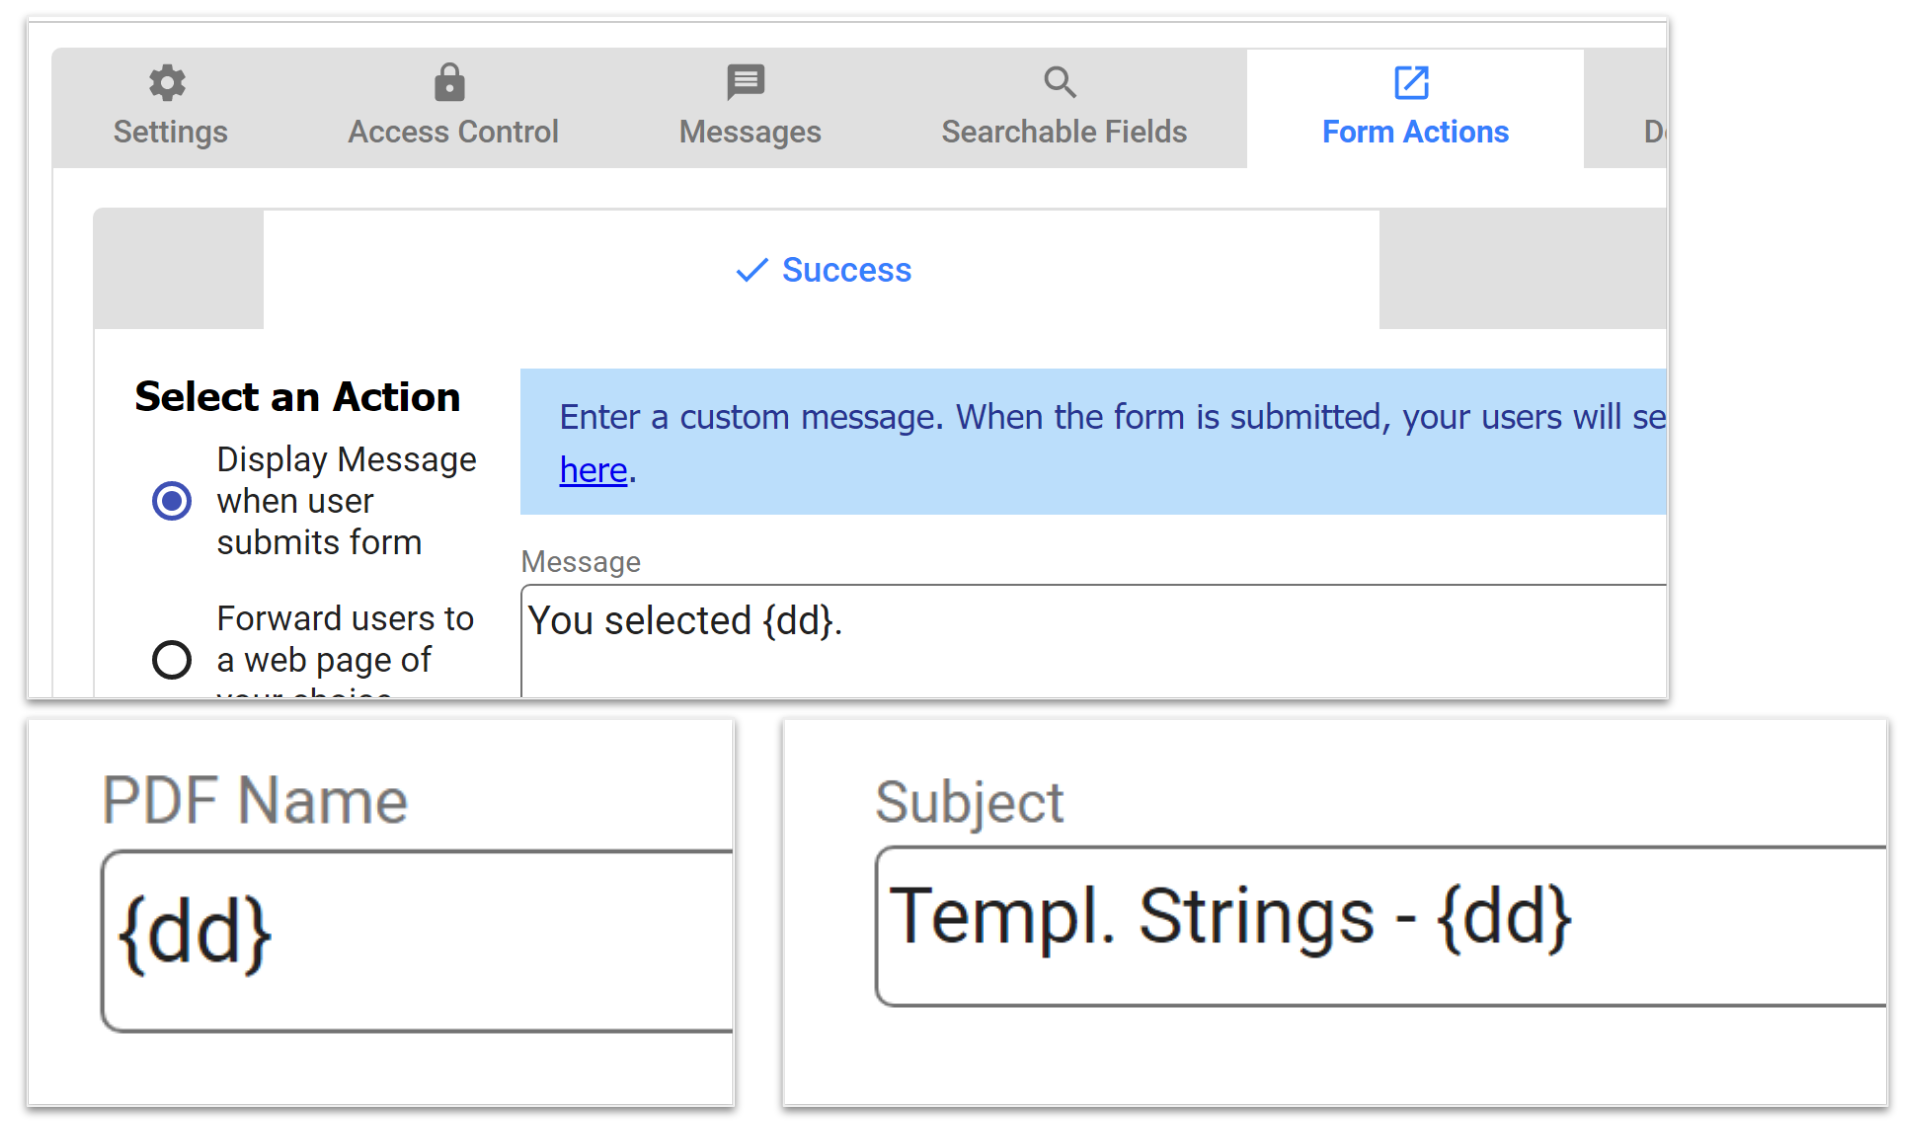
Each of these uses will return the selection option value for the template. Notice instead of "apples" the template displays "a".
Form Action:
PDF Name:
Email Subject:
If you need to use the selected option's label in such cases, consider using a business rule like this example to get the option label and set it in a hidden control. Then use the hidden control's template in the form/workflow settings.
Template Syntax for the Comment Field of Selection Controls
The comment field of selection controls (dropdowns, checkboxes and radios) can be accessed in templates. This is supported for templates in forms and workflows.
The commentValue syntax in the template will also work i.e. substitute {Products.commentValue} instead of {Products.comment}. Both properties are supported for templates.
The special syntax that is required is discussed below.
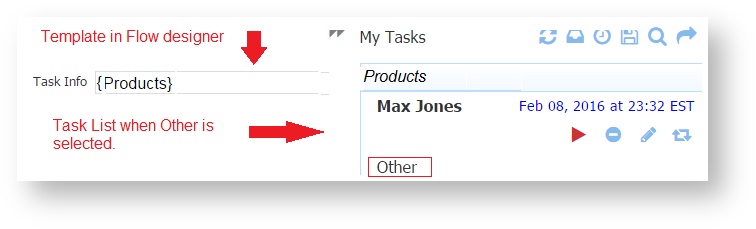
Let's say you have a radio control named Products in a form/workflow step. The options are Computers, Cell Phones, DVDs, TVS and Other. If Other is chosen, a comment field displays for additional information.

Use this syntax to access the selection control option and/or the selection control comment in a template. The examples use templates to specify the Task Information field on the Task List for a workflow:
- To access the value of the selected option via the template the syntax is - {your selection control name}
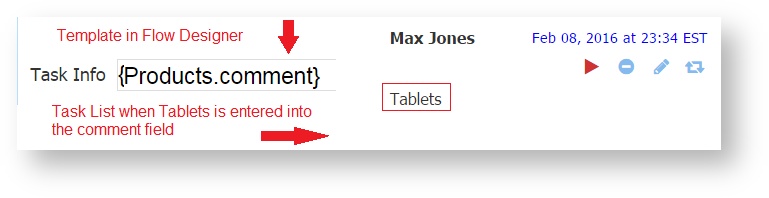
- To access the value of the selection control comment via the template the syntax is - {|your selection control name.comment}. The commentValue syntax in the template is also suppported i.e.{, |Products.commentValue} instead of {, |Products.comment}.
- To access the value of the selected control options in a repeat the syntax is - {the separator |your selection control name} - curly brace - the separator - space - pipe - your selection control name - curly brace.

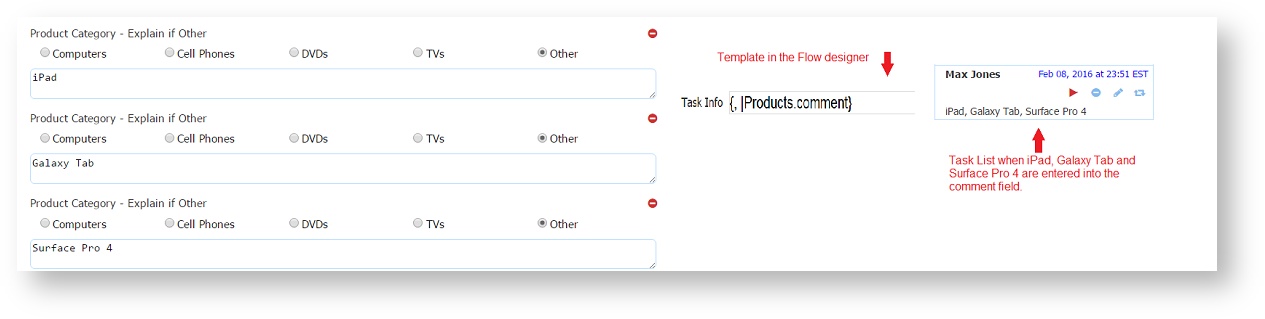
- To access the value of the selected control comment fields in a repeat the syntax is - {the separator |your selection control name.comment} - curly brace - the separator - space - pipe - your selection control name.comment - curly brace.
Template Validation
Template references used in frevvo will be automatically validated when:
- the form/workflow is first loaded
- uploading a form/workflow
- saving a form/workflow
Warnings appear in several places when there is a template validation error. This warning is non-fatal and will still allow the form/workflow to run. These types of templatization errors are typically introduced by renaming or deleting a control that is the target of a template elsewhere, or by a typo in a template name.
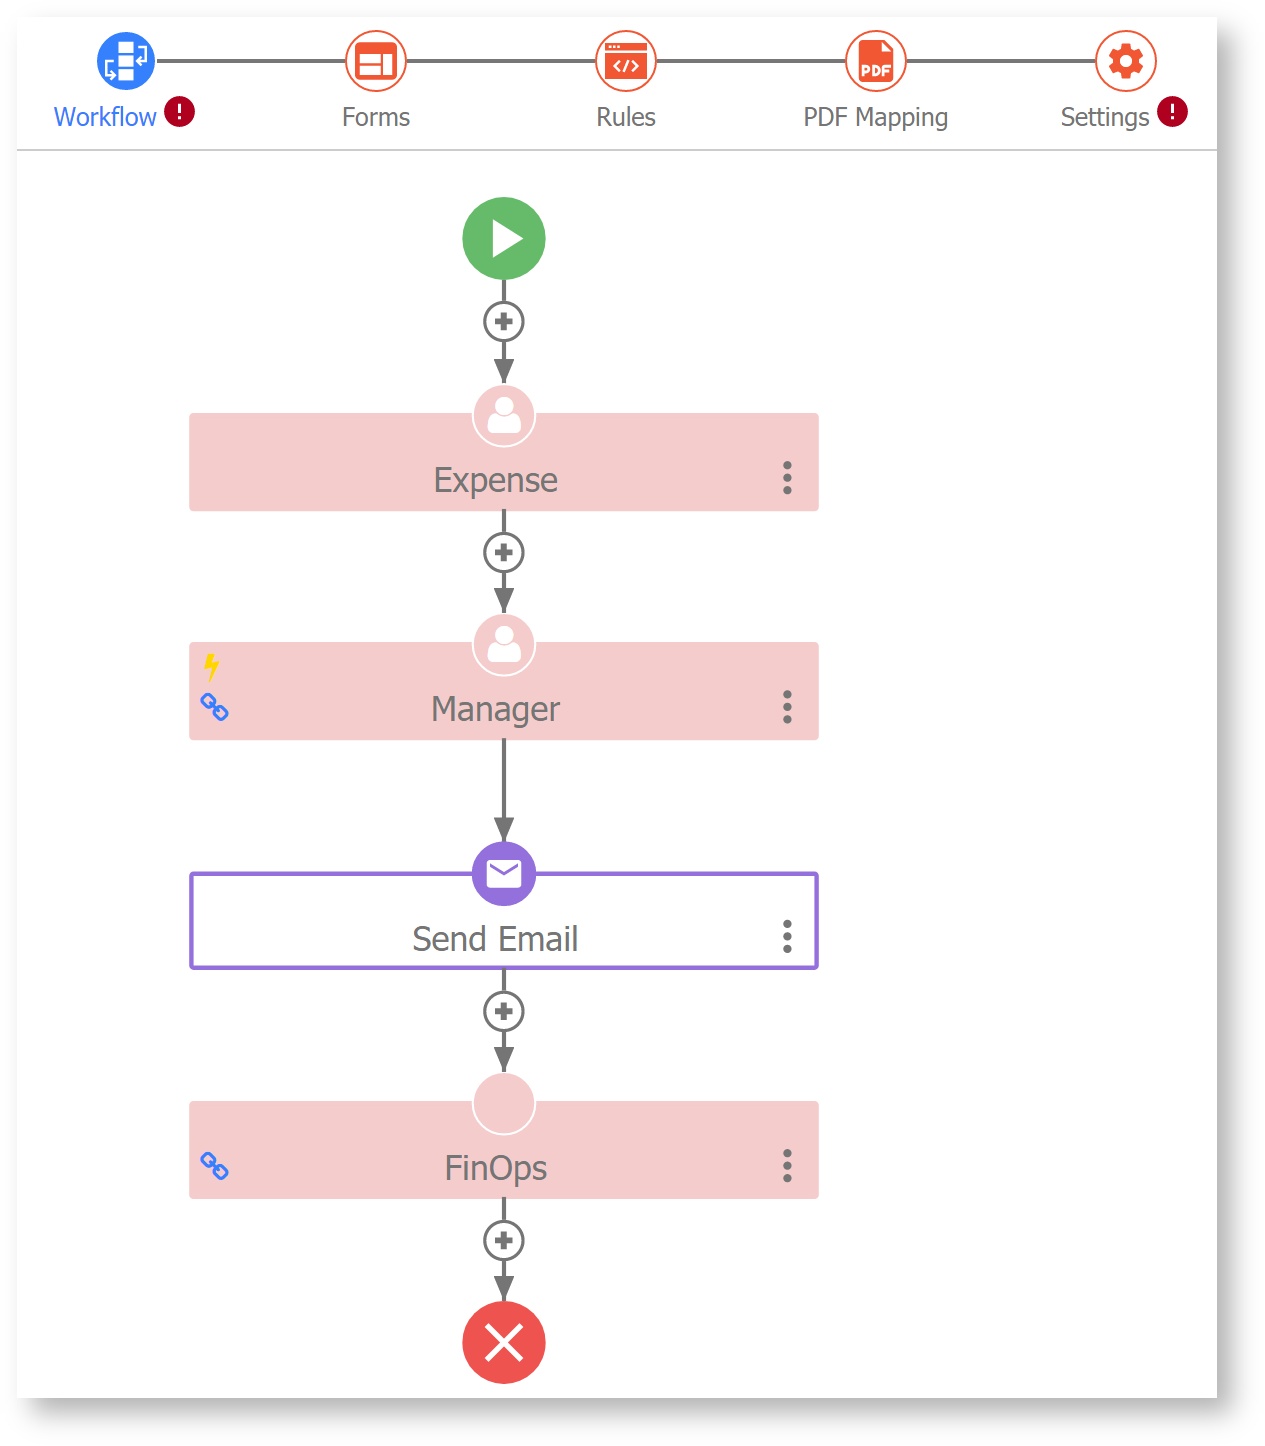
A form or workflow that has a templatized property validation error will appear in the list of forms/workflow with a pink/salmon background. 
The Guided Designer editing mode icons will have a red '!' indicating a validation error. Workflow steps with validation error appear with a pink/salmon background.
Any control that has a templatized property error will show an error message below it (red text on gold background).

If there are form/workflow/workflow step templatized property validation errors present, then when the designer opens the corresponding properties dialog, all properties on all tabs are immediately validated. Any tab containing an error will be displayed in red text. 
- Any templatized property that references a value to be supplied by _data (either the uploaded _data file or the _data url parameter) that is not also a control name will result in a non-fatal validation error. In this situation, the designer can either ignore the error or, if the validation is for a form/workflow or workflow step property that prevents saving the properties, add a hidden control of the same name so that validation passes.
- When templates are used in places that have a length limit, such as Email Subject lines, server side validation truncates the template's value by removing extra data which is more than 255 characters.
- Control names with a ":" after the first word are ignored in Template Validation. This prevents the validator from erroneously flagging internal css styles as invalid templates.