This documentation is for frevvo v10.0. Not for you? Earlier documentation is available too.
Employee On Boarding Tutorial
- Former user (Deleted)
- Megan Ellis
frevvo enables universal access to e-forms and workflows on tablets and smart phones in addition to desktop support on all standard browsers. iOS 6+ devices, iPad and iPhone, running mobile safari are supported. This tutorial will incorporate several frevvo features into an Employee On Boarding workflow. For example;
- Touch screen wet signature - the new employee can sign to verify the information using their finger or a pointer.
- Take advantage of device specific capabilities - you will see the correct date picker and keyboards pop-up on your mobile device
- Screenflows - ability to further divide a screenflow into sections that better lend themselves to an iPad or iPhone using the PageBreak control
- Ability to upload an existing image or a picture taken with the device camera to the e-form
- Use the iPad's location services to fill in the address
- Spaces that render in a device specific manner - support swipe gestures and customized icons
- Enhanced Task List for mobile devices
- Quick Approval feature - allows quick review of a task by the appropriate person with accept/reject buttons
- Generate an additional Pixel Perfect PDF for the federal W - 4 form. It is important to note here that there is no limit on the number of PDFs that can be generated. For example, you can collect the information in your form once and then use it to fill in an unlimited amount of PDFs for the new employee i.e. -the federal W - 4 and the I - 9.
 You can download this tutorial as a PDF.
Please view the New Employee On Boarding video for an introduction to some of the exciting features we will be using in this tutorial. We estimate about 2.5 to 3.0 hours for an experienced frevvo designer to complete this tutorial. It may take up to 4.0 hours if you are a new user.
What are we going to build?
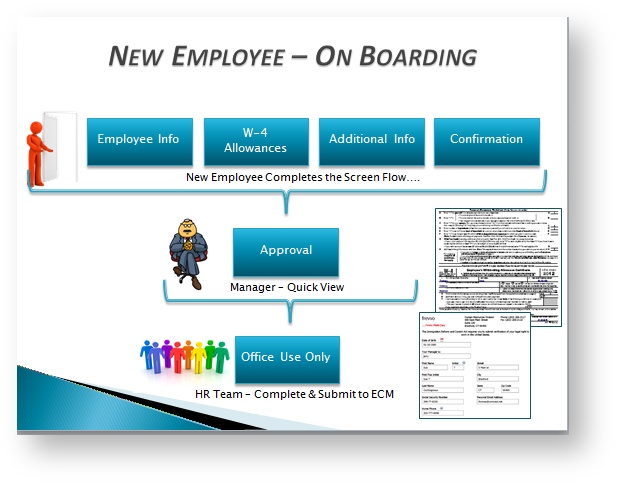
A frevvo workflow is a series of routed forms that can run on any devices including the tablets and smart phones. In this tutorial, we will create a workflow that can be used when onboarding a new employee joining your company. There will be three participants: the new employee, the new employee's manager and an employee that works for the company HR department. The new employee will complete three forms (Employee Information, W-4 Allowances, Education History) and a confirmation step, where they will have an opportunity to confirm the entered data with their signature after reviewing a the completed W-4 as a PDF. These four steps are referred to as a screenflow. A screenflow consists of steps in a workflow that are performed by the same person. The new employee will complete the screenflow from an iPad and the task will be sent to the new employee's manager for approval. The approval step will be performed on an iPhone using the Quick Approval feature. Once the task is approved, it will go to the HR department for finalization and storage. This tutorial will cover the following:
- Create the frevvo roles and users needed.
Create the Employee Onboarding Workflow using the PageBreak control to design the forms for a mobile device, in this case, the iPad. The screenflow includes a confirmation form for the new employee to review the generated W-4 PDF. The Confirmation form utilizes the Form Viewer and Signature controls.
- Create the Approval step using the Quick Approval feature. This step will be performed on the iPhone by the manager.
- Create the HR Step
- Generate an additional PDF for the federal W - 4 forms
- Add a field for the signature to the W-4 using PDFescape.
- Upload the W-4 template to frevvo.
- Map the e-form controls to the field.
- Create a frevvo space.
Test the workflow on the tablet, mobile device and desktop
What are we going to need?
- A frevvo account on the frevvo Cloud server or a working in-house installation.
- A tablet, mobile device and desktop computer. If you do not have mobile devices, you can perform the Employee On Boarding workflow from your desktop computer.
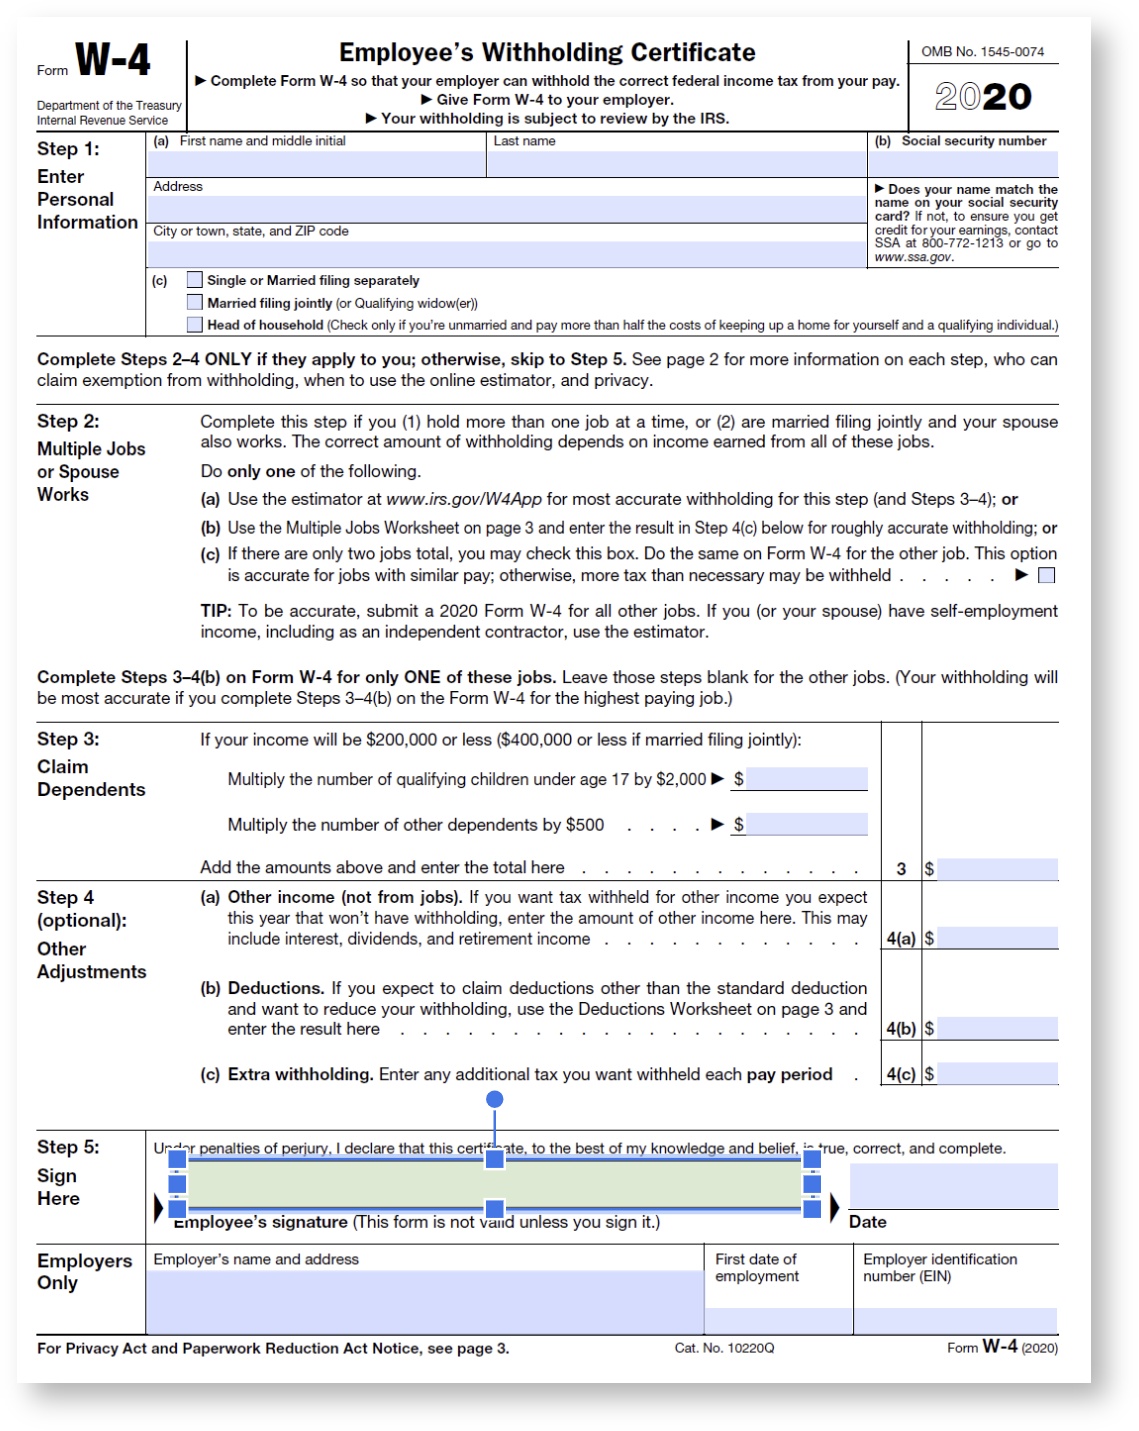
- You will need to download the W-4 form. You can find the latest version here. Right click and save the form to your desktop. Open the form. Notice the name field is a combination of the new employee's first name and middle initial and there is no writable field in the PDF for the Employee's Signature or the date field next to the signature.
- A PDF viewer such as Adobe Reader or Mac Preview and a PDF editor such as PDFescape.
Setup users and roles
This is a one-time setup that will have to be performed by an administrator.
We will need three roles: employee, manager and hr. To create these roles in frevvo:
If you are using frevvo Online, go directly to Step 5. frevvo in-house users will have to create a tenant first before adding roles/users. Follow Steps 1-4 to do that:
- Login as the frevvo in-house superuser admin.
- Click the
 icon to create a new tenant
 - Fill in the Add Tenant screen.
- Click the Submit button. Logoff as the superuser.
- Login to frevvo as the administrative user for your tenant.
- If you do not already see the Manage Tenant page, click the Manage link at the top right of the page.
- On the page that is displayed, click the "Manage Roles" link.
- Click the icon and in the form that is displayed, type in the desired role. Note that role names are case sensitive.
- Repeat for the second and third roles.
The admin user will also need to setup three users, assigning one of the three roles to each one: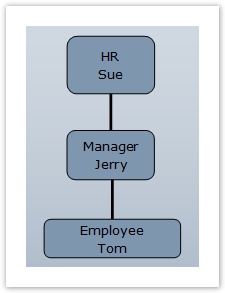
- Login to frevvo as the administrative user for your tenant.
- If you do not already see the Manage Tenant page, click the Manage link at the top right of the page.
- On the page that is displayed, click the "Manage Users" link.
- Click on the
 Add User icon.
 - Complete the new user form for Jerry Mouse, the manager, Tom Cat, the employee (Select Jerry from the Reports dropdown for user Tom) and Sue Smart - HR personnel
- Assign the roles shown in the image above to the users.
- Submit the form.
Make one more user named designer and assign this user the frevvo.Designer role. Use the designer user to create the Employee On Boarding workflow.
Create the Employee On Boarding Workflow
- Login as the Designer user.
- From the Project home page, click
 Add Content and pick
  Create a New Workflow. This launches the Workflow Design Wizard.
 - Select Add to New Project and name the new project "Employee Onboarding Tutorial." You can provide any description you want. Click Next.
- Name the workflow "Employee Onboarding Workflow" and click Next.
- Rename Step 1 "Employee" and leave the default type Create a New Form.
- Click Add a New Step.
- Rename Step 2 "Allowances", Step Type "Create a New Form", Assignment "None"
- Repeat steps 6-7 two more times, naming the steps "Education" and "Confirmation".
- Add another step, name it "Approval", Step Type "Approval Step," Assignment "To a User: jerry"
- Add another step, name it "Office Use", Step Type "Approval Step," Assignment "To a Role: HR"
- Click Finish.
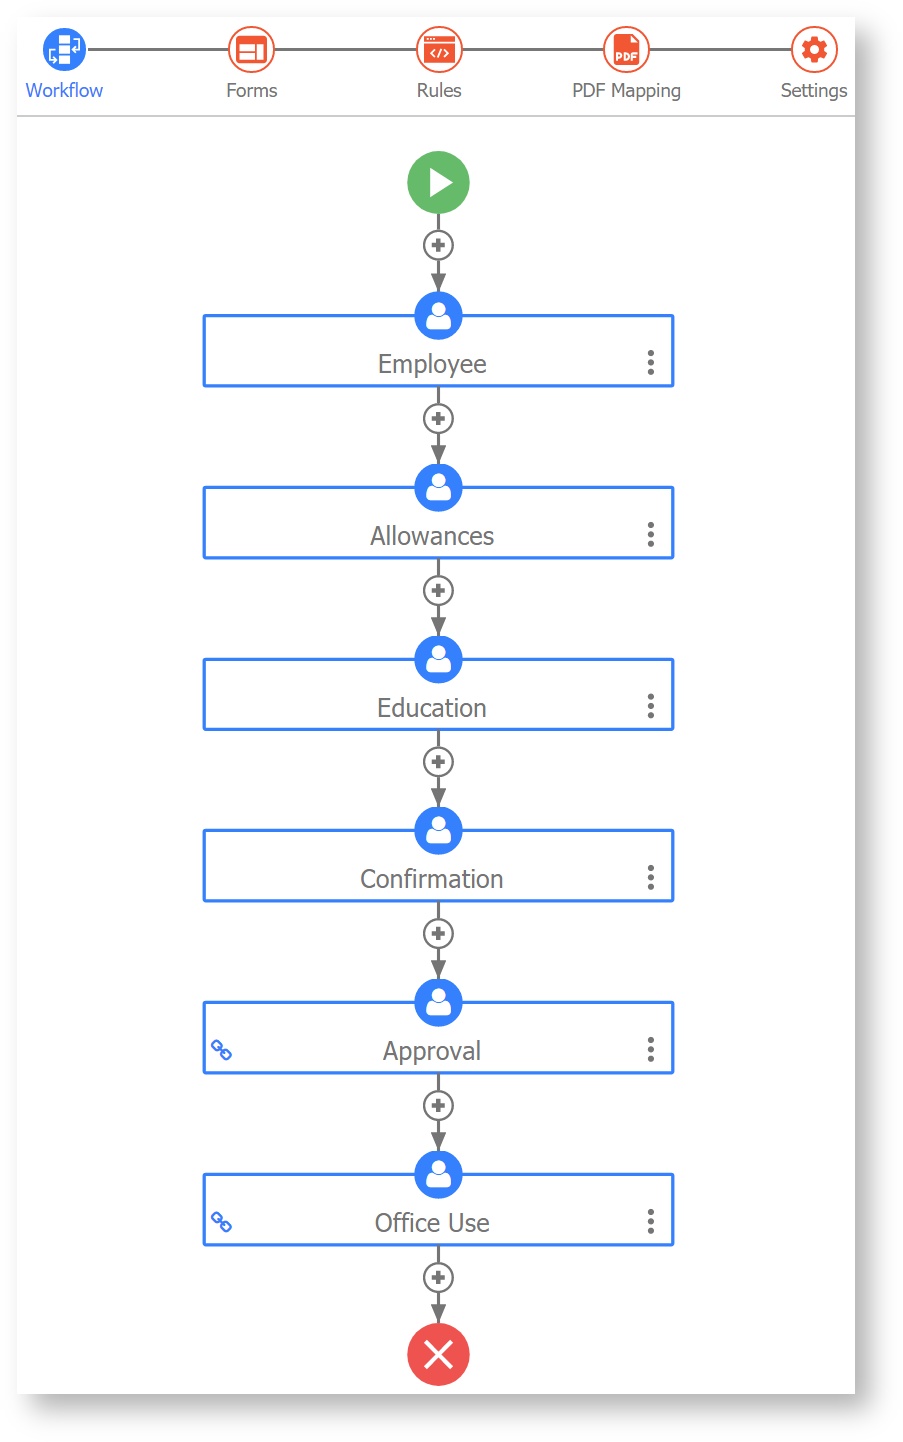
You will immediately see your workflow diagram in the Guided Designer: Workflow editing mode.
Design the Forms
Next, we'll customize each of the new forms created by the Workflow Design Wizard. Go to the Guided Designer: Forms editing mode. Notice that the Employee Form is shown.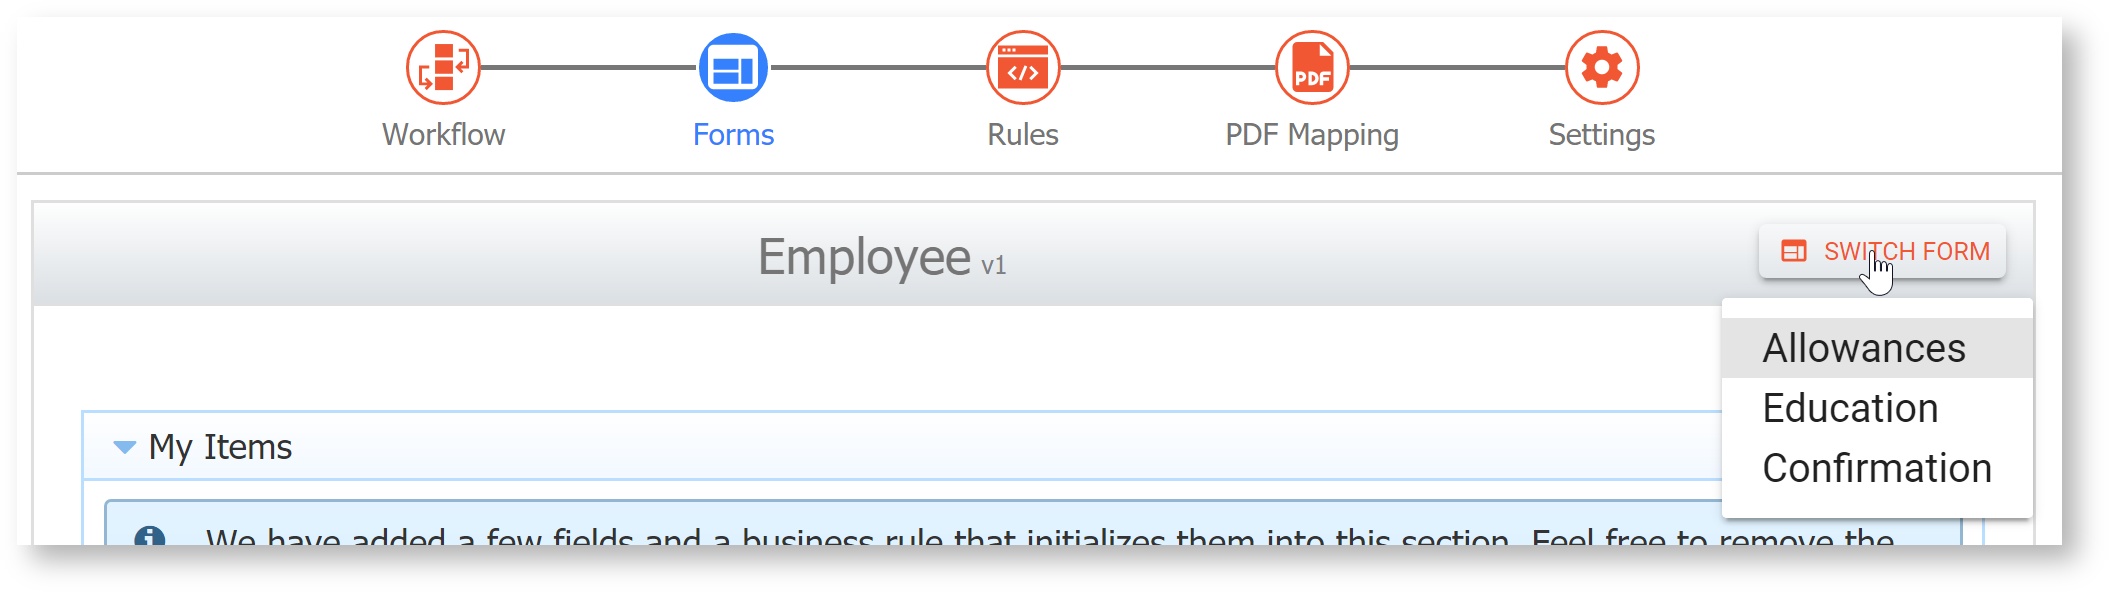
You can switch forms anytime by clicking "Switch Form" and choosing another step in your workflow.
You will also see that a "My Items" section has been added for you - this will save some time when designing this form! Refer to Designing Forms for in-depth information on the frevvo features and controls described in the steps below.
As you create the forms, keep in mind the screen sizes of the devices you are targeting when designing forms for mobile devices. The screenflow for this tutorial consists of four forms: Employee Information, W-4 Allowances, Education History and Confirmation. We expect the new employee will complete the screenflow on an iPad. Let's begin with a close look at how the PageBreak control can be used to divide the Employee information form into sections that will make it very easy to fill in the information on the iPad.
Typically, information about a new employee would include: name, address, SSN, Telephone Numbers, email address and possibly a profile photo. Creating this form for a desktop view would be very simple in the frevvo designer. A form designed for the desktop could look like the image below: Mobile forms work best when they are broken up into small, logical pieces. The PageBreak control lets the designer create a mobile layout consisting of multiple pages where each page contains a small number of controls (logical groupings). The user navigates between the pages via Back/Next buttons, or on a device that supports it, by swiping left/right. We will use sections plus the PageBreak control to illustrate these concepts.
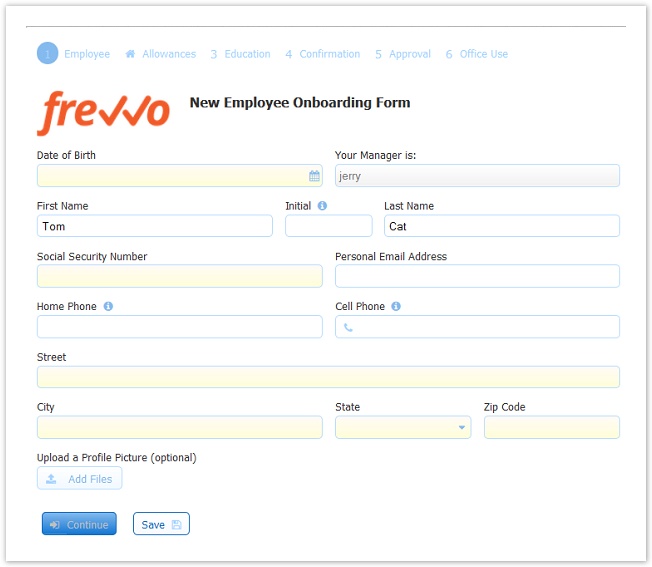
Employee Information Form designed for a Desktop browser
Design the Employee Information Form
Logo and Form Title
Let's add a logo and form title to give users a frame of reference when they open this form.
- Drag and drop an image control from the palette to the canvas. Use this to upload a company logo image, if desired.
Drag a message control from the palette and drop it next to your logo. Type the text "New Employee Onboarding Form" in the message area. You can bold the text by checking bold on the Style tab for the message control.
Employee Information Section
Next we'll add some additional controls to the default My Items section.
- Drag and drop a text controls for the Middle Initial fields. Click the Style tab and adjust the widths of the three fields so that they are next to each other on the same line. Notice the required property on the FirstName and LastName fields is checked; do not make the control named MiddleInitial required.
- Drag and Drop a date control into the section and label it Date of Birth. The Date Format defaults to Automatic. Check Required on the date control's property panel.
Add a text control and name it SSN. A pattern can be used to ensure the correct format number for the Social Security Number. Here is an example of a valid pattern: \d{3}-\d{2}-\d{4}. Apply this pattern to the field by typing it into the Pattern field on the Control property pane. frevvo will display an error message if the entered data does not match the Make sure the required property is checked.
- frevvo takes full advantage of the cameras built into mobile devices. You can give the new employee an opportunity to attach a profile picture by adding an Upload Control to your form below the FullAddress hidden field. Users will see a prompt on mobile devices giving the user a choice to upload an existing image or take a photo with the device camera. You can specify the allowed file types to be uploaded by checking selections in the Restricted Content Types section on the Properties pane. For Example, check jpg if you only want to allow the upload of files with that extension.
- Add a Phone control below SSN. Name the control Home Phone. Help text showing different formats for the phone number is provided when you add the control to the form.
- Add a second Phone control to the right of the Home Phone field. Name the control Cell Phone.
- Add a text control to collect Address information from the new employee. Make the width the size of the form and name it Street.
Drag and drop a text field below the Street control. Label it City. Make it Required.
Drag a dropdown control from the palette, name it State and make it Required. Type in the names of some states into the Options section on the dropdown control property pane.
Drop a text control to the right of the State dropdown. Label it Zip Code and make it Required. Designate a Max Length of 5 characters.
Drag, drop and resize controls as needed. Your form should look like similar to the image at this point: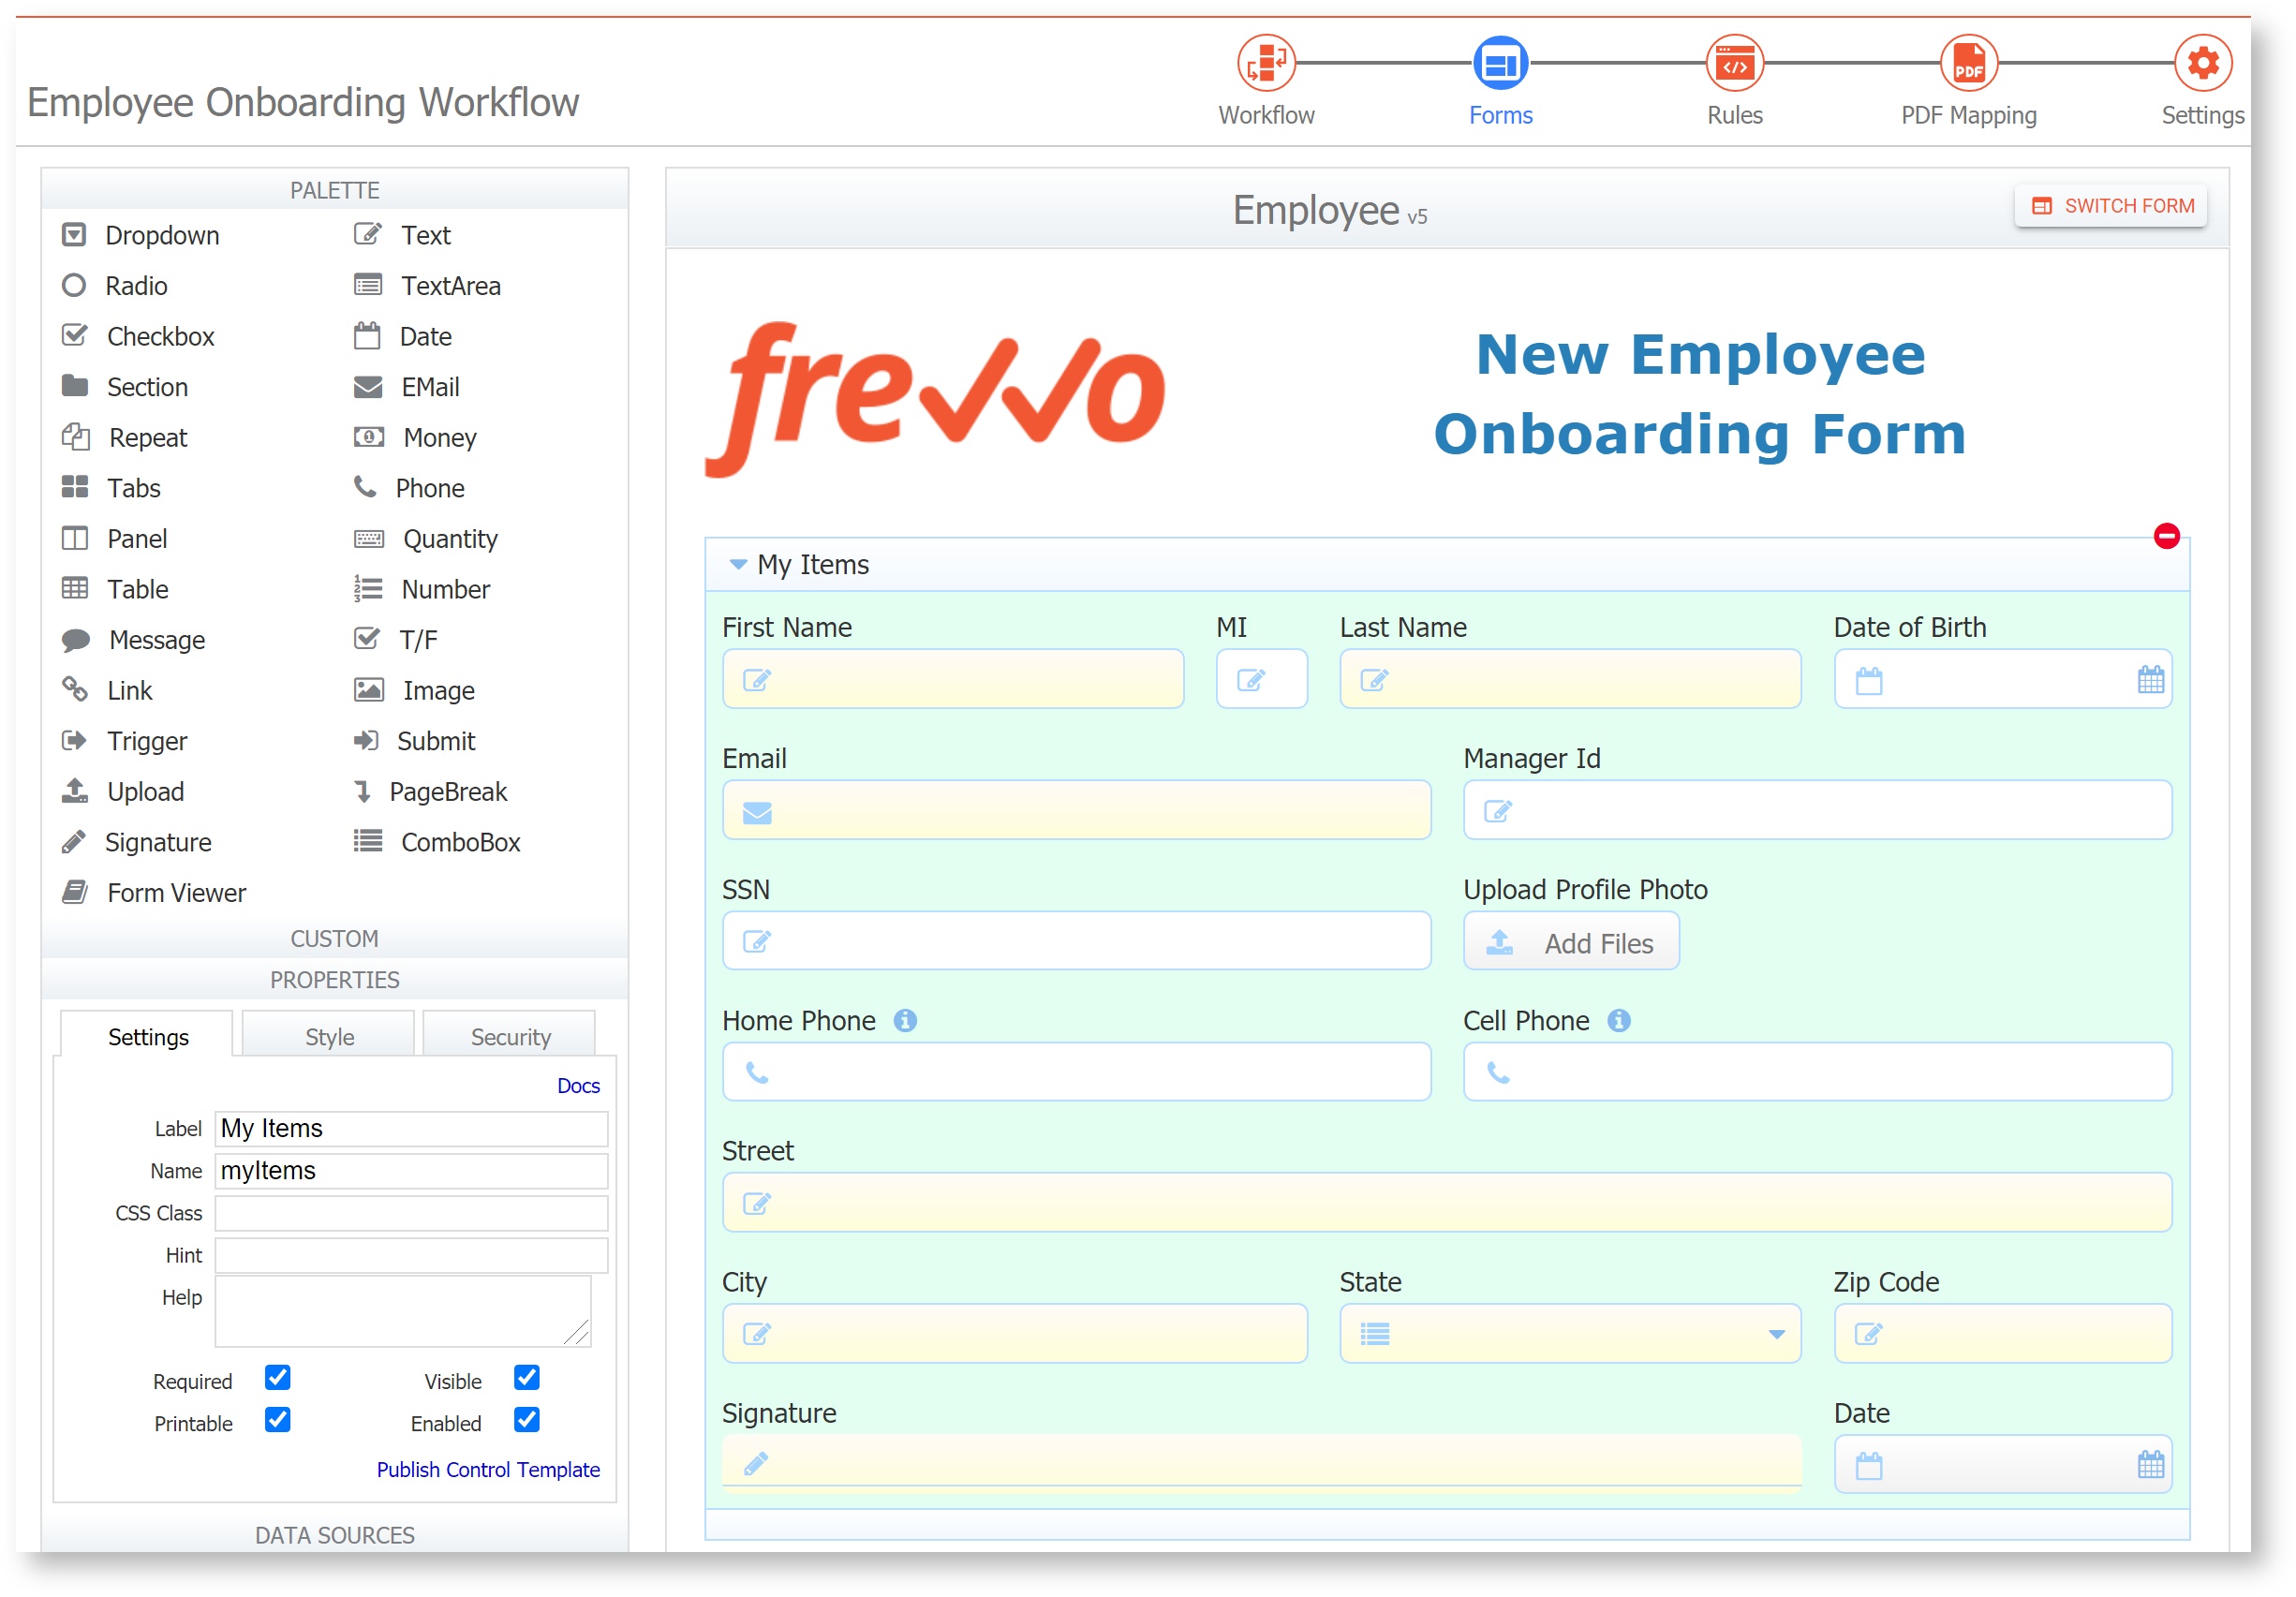
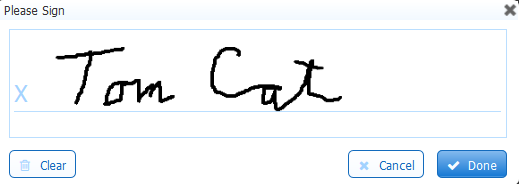
Notice that the My Items section includes a Wet Signature control so the Employee can sign using the a track pad/mouse or a touch screen to verify the allowance selections entered into the form. This is what the new employee will see when signing.
![]() Save your work
Save your work
Hidden for IRS Section
- Add a Section Control and name it hidden for irs. Uncheck the visible property on the section control. This section will remain hidden on the form but we will map it later for the W-4 PDF.
- Add a hidden text control named FullAddress beneath the city, state and zip code fields that will be populated with the City or Town, State and Zip Code via a rule. Uncheck the Visible and Enabled properties.
- Drop another text control below these controls. Uncheck the visible property for this control. Name this field FirstPlusInitial.
- Add a text field for the Employer Name and another one for the Employer Identification Number. Type the Employer's Name and Address into one and the Employer's Identification Number (EIN) into the other.
The Employee Information form should look like this at this point: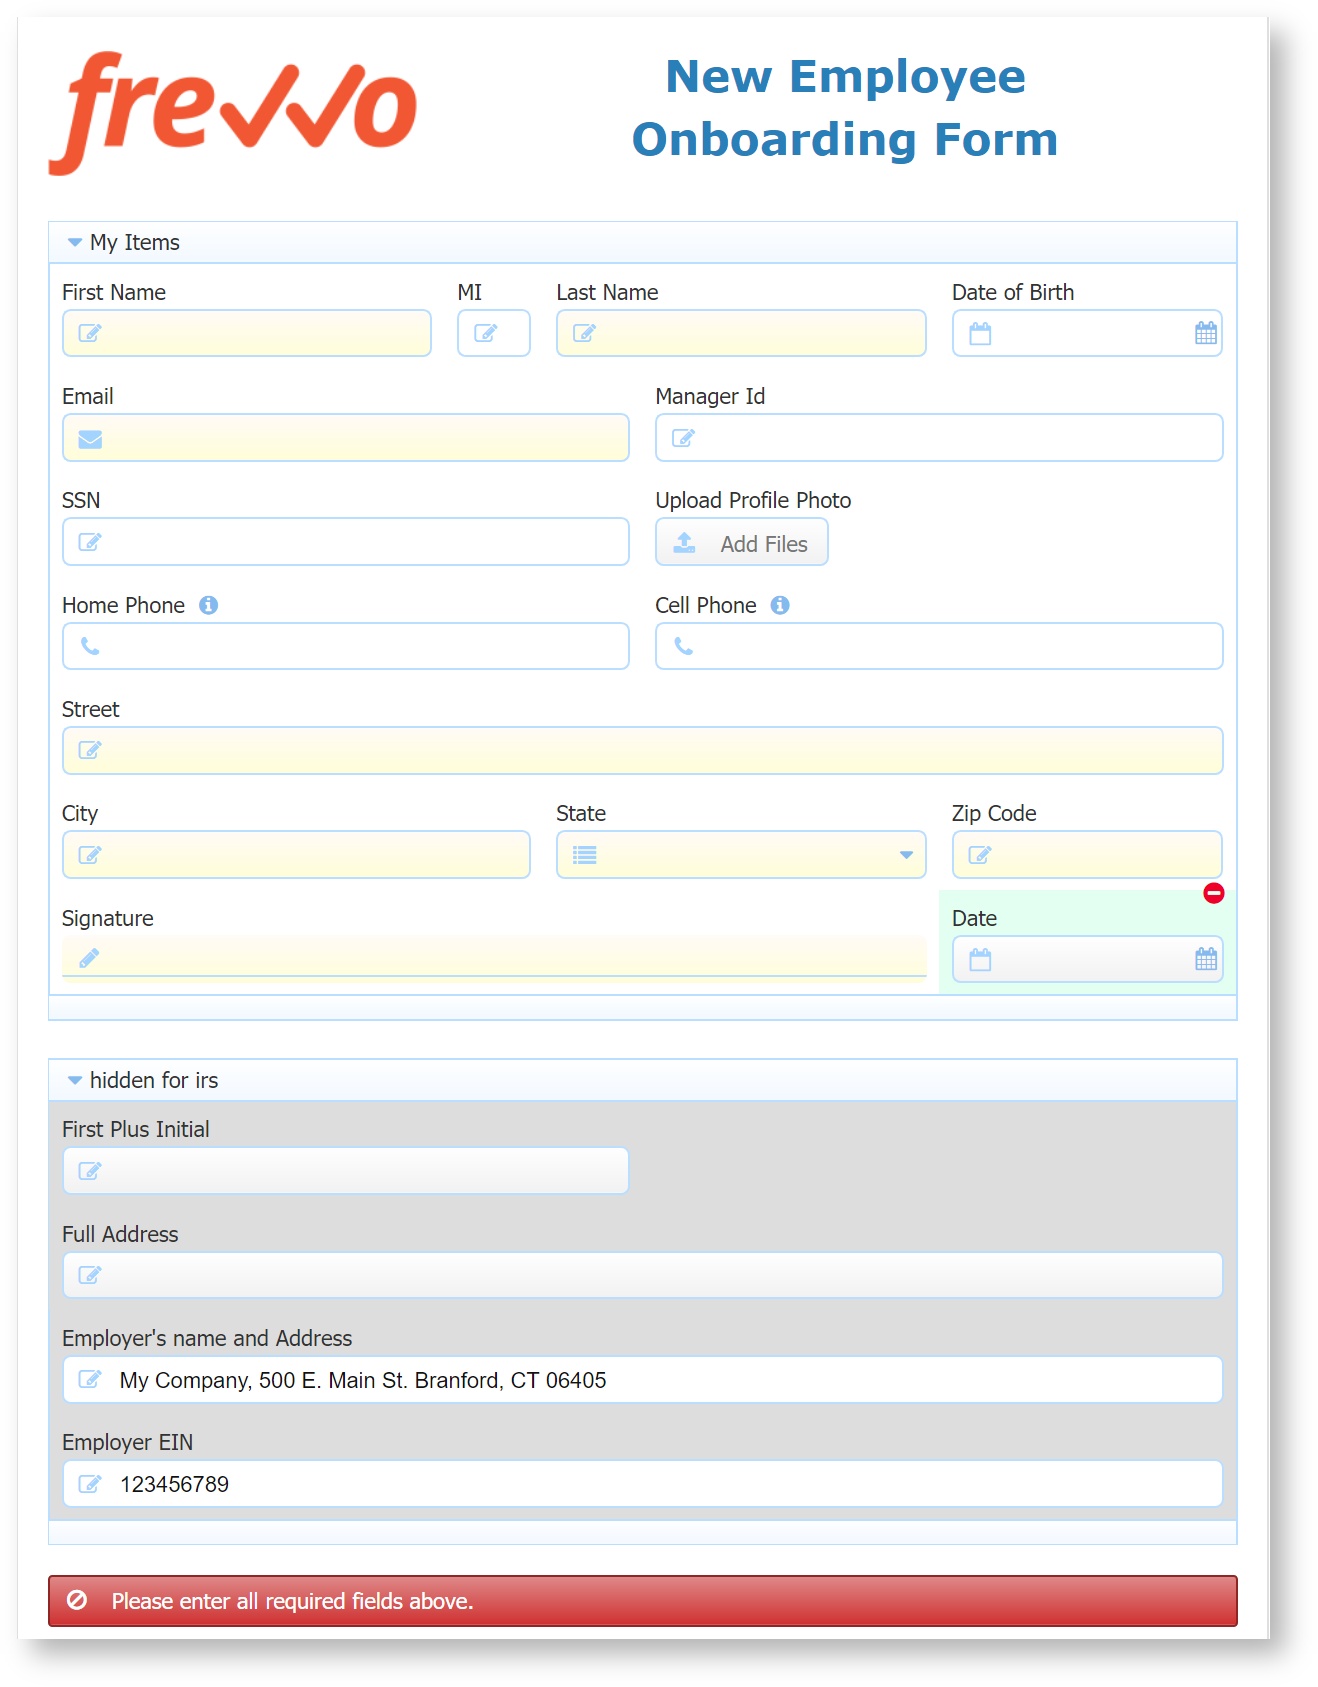
![]() Save your work.
Save your work.
Design the Allowances Form
In this form, we will collect information for the Personal Allowances section of the W - 4 Employee's Withholding Allowance Certificate. The section is shown below. The e-form will have controls corresponding to each field on the W-4.
Here is an example. We will map the data in these fields, along with some others, to the W - 4 PDF later in this tutorial.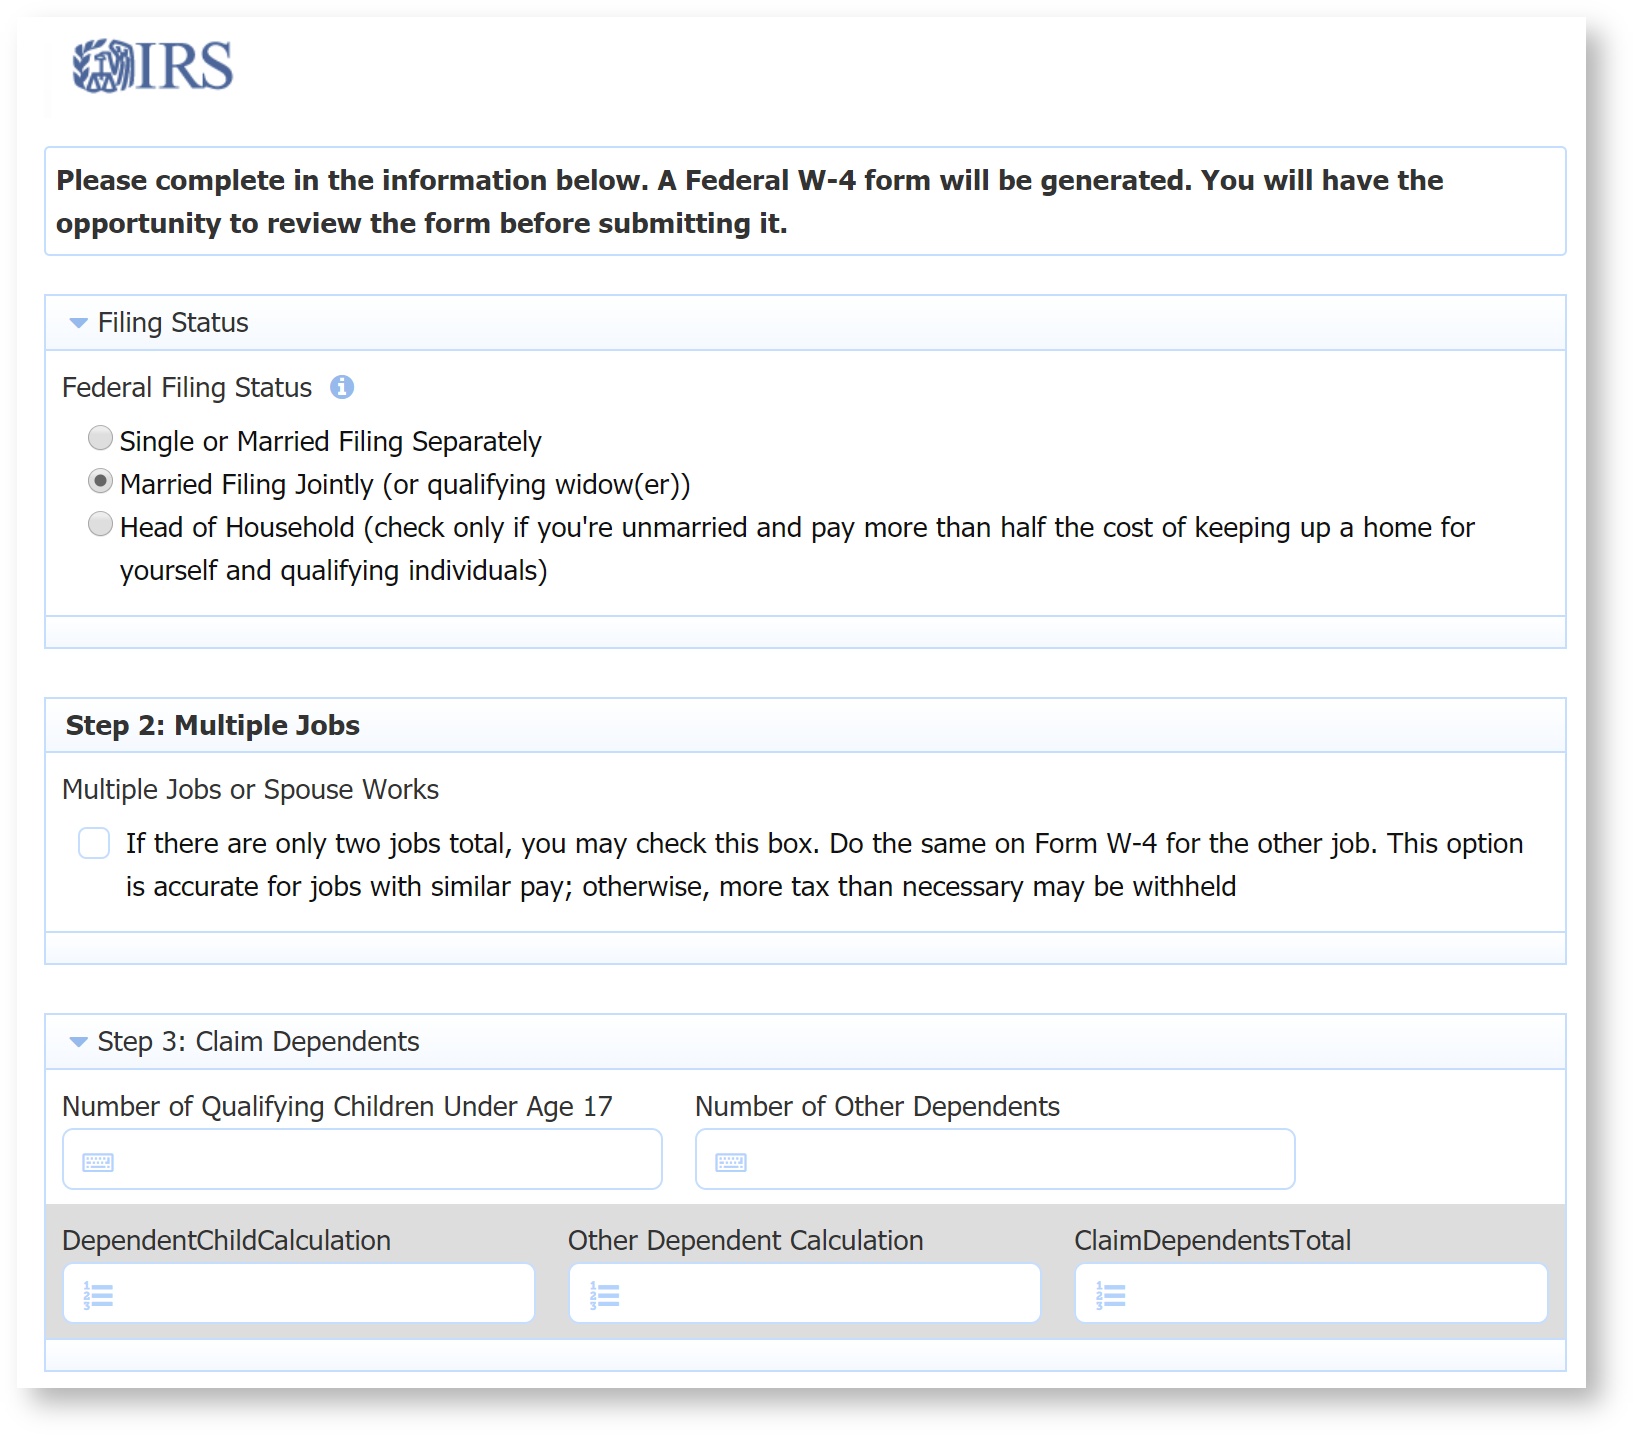
For this tutorial, we'll just create controls for Filing Status, Step 2: Multiple Jobs, and Step 3: Claim Dependent.
Download and install this example EOB workflow which includes a fully-mapped W-4.
- In the Guided Designer: Forms editing mode, click Switch Form and select Allowances.
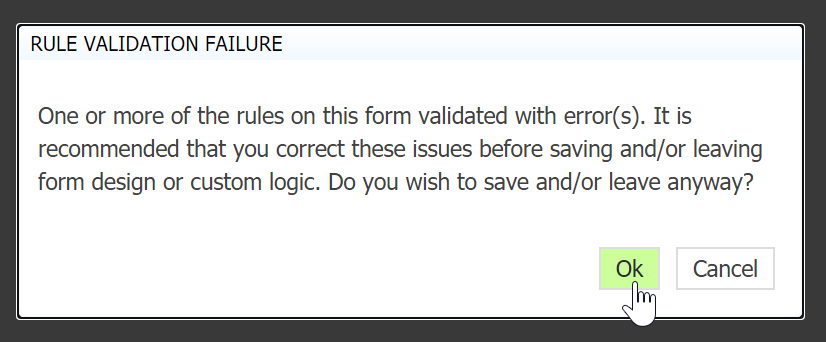
- We don't need the My Items section on this form, so you can delete it. Click Save and notice that you get an error message. Click OK - we'll fix this rule later.
- Drag and Drop an Image control from the palette, and upload an image of the IRS logo or the top of the W-4 form to give your users a frame of reference when they are filling out this form.
Drag a Message Control into the form. In the Message Property, type
Please complete the information below. A Federal W-4 Form will be generated. You will have the opportunity to review the form before submitting.
Change the Type to Bordered. On the Style tab, select Bold.
- Drag and drop a Section control to your form and name it Filing Status
Drag a radio control into that section. Name it Federal Filing Status. Enter these options:
Single_or_Married_filing_separately=Single or Married filing separately
Married_filing_jointly=Married filing jointly (or qualifying widow(er))
Head_of_Household=Head of Household (Check only if you're unmarried and pay more than half the costs of keeping up a home for yourself and a qualifying individual.)
Check the Required property.
- Drag in another section and name it Step 2: Multiple Jobs.
Drag a checkbox control into the Step 2: Multiple Jobs section. Name it Multiple Jobs or Spouse works, and add just a single option:
Only_2_Jobs=If there are only two jobs total, you may check this box. Do the same on From W-4 for the other job. This option is accurate for jobs with similar pay; otherwise, more tax than necessary may be withheld.
Drag in another section and name it Step 3: Claim Dependents.
- Drag two quantity controls inside that section, named "Number of Qualifying Children Under Age 17" and "Number of Other Dependents".
- Drag three number controls inside that same section. Uncheck the Required and Enabled properties (we will set them using rules later, and this is what we'll map to the W-4.) Name them "Dependent Child Calculation", "Other Dependent Calculation", and "Claim Dependents Total".
![]() Save your work.
Save your work.
Design the Education Form
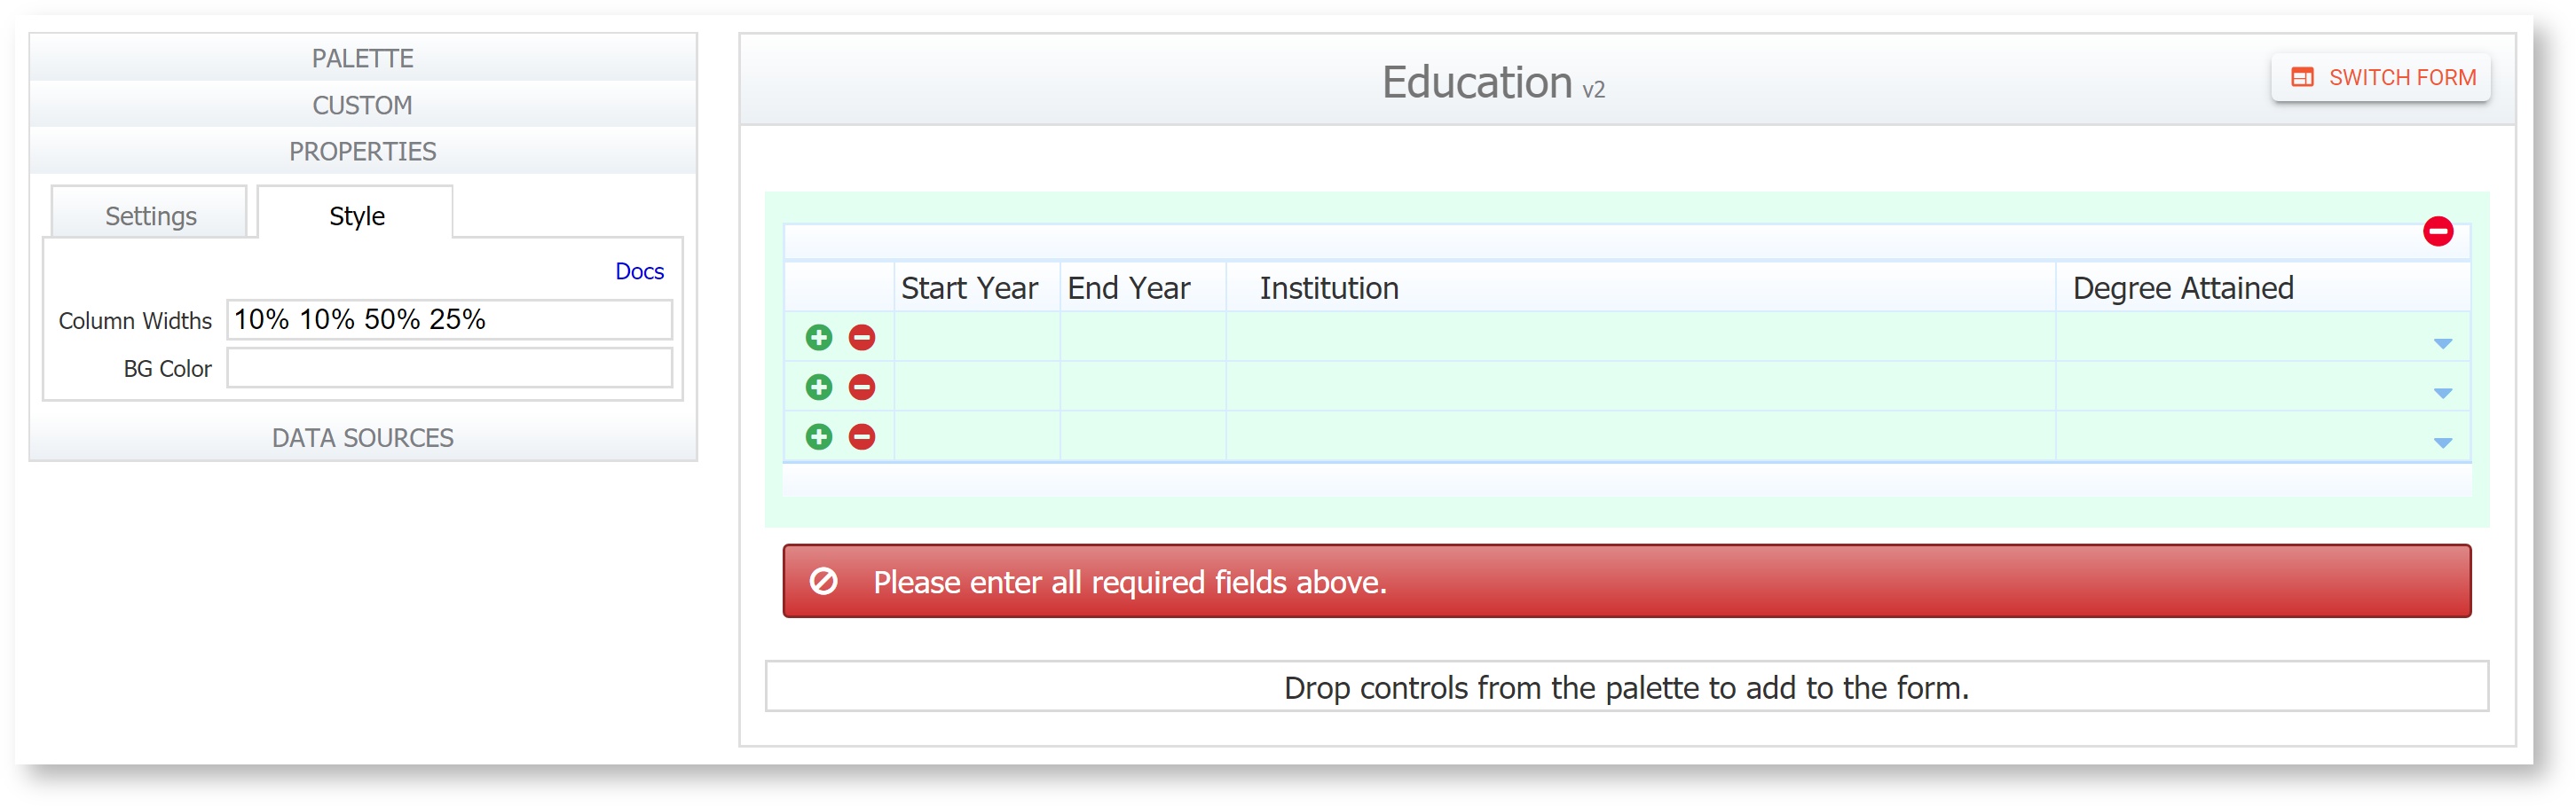
Design an Education form similar to the image below. We'll use a table control to collect information about the new employee's Education. Refer to the Add/Remove columns in a table topic for more information.
- Click Switch Forms and select Education.
- We don't need the My Items section on this form, so you can delete it.
- Drag and drop a Table control to the form. Name it EducationTable.
- Click Col 0 and change the label to Start Year and the Name to StartYear. Repeat for Col 1 and 2 labeling them "End Year" and "Institution." with corresponding names.
- Click the first row in the Start Year and End Year columns and change their Control Type to Quantity. Changes made to one cell in a column will apply to all cells in the column.
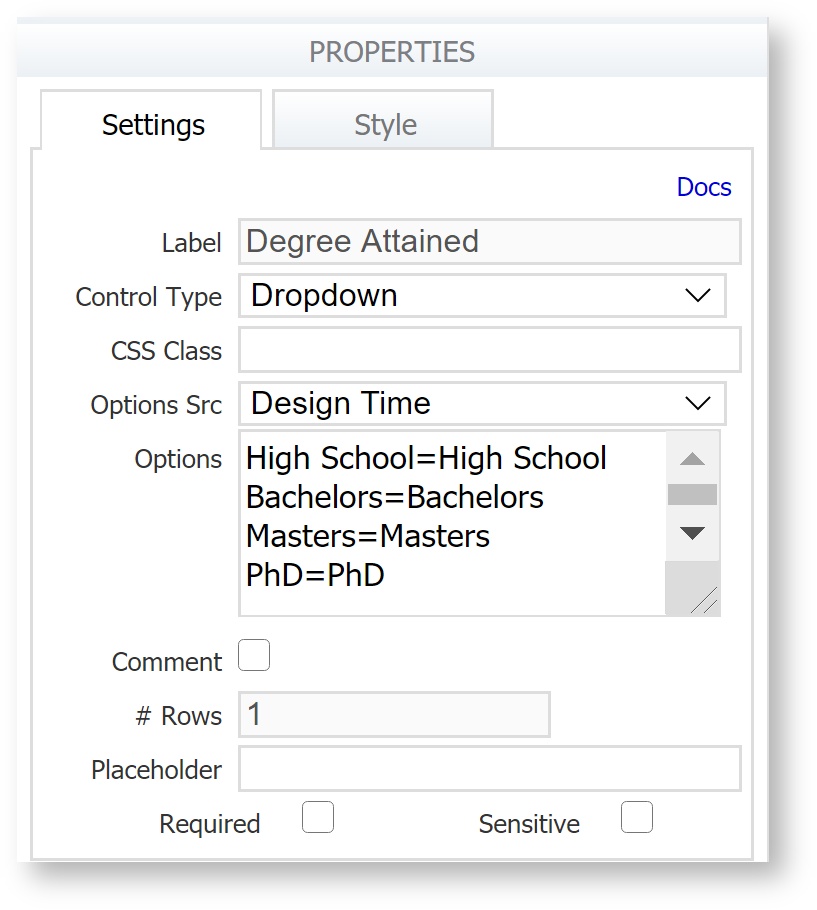
Drag a Dropdown control from the palette, and drop it to the right of the Institution column. Name it "Degree Attained".
Click the first row in that column. In the Options property, type
High School=High School
Bachelors=Bachelors
Masters=Masters
PhD=PhD
Click on the Table control then select the Style tab on the Properties panel. Enter these percentage values, separated by a space, to adjust the widths of the four columns: 10% 10% 50% 25%
![]() Save your work.
Save your work.
Design the Confirmation Form
The purpose of the Confirmation form in the Employee On Boarding workflow is to give the new employee the opportunity to review the information in the generated W-4 PDF and then sign to indicate the information has been reviewed and verified.
- Click Switch Form and select Confirmation.
- We don't need the My Items section on this form, so you can delete it.
- Drag and drop a section to the canvas. Name it "Employee Review".
- On the Security Tab, change the type to Wet Signature and check Must Sign.
- Drag and drop a checkbox control inside the section. Set the Name and Label to CheckConfirm.
- Set a single option "Confirmed=I have reviewed my W-4 and all information is correct."
- Check Hide Label.
![]() Save your work. We will add the Form Viewer control to display the mapped W-4 Pixel Perfect PDF later in this tutorial.
Save your work. We will add the Form Viewer control to display the mapped W-4 Pixel Perfect PDF later in this tutorial.
Approval Section
The Confirmation Form already contains two approval sections for the Manager Approval and the Office Use only steps. Business rules will ensure they only appear on or after their corresponding steps. The Approval section will be used by the new employee's manager to approve or reject the screenflow. In this scenario, the manager, Jerry, will use his iPhone to perform this task when it appears in his Task List. You can use the frevvo Quick Approval feature to make that process easy. Quick Approval requires an Approval control. An approval control is a section control in your form with a text area control inside of it. You can set up a signed section if you want the manager to sign after approving or rejecting the task. The Workflow Design Wizard automatically adds approval sections for each approval-type step you add to your workflow.
Office Use Only Section
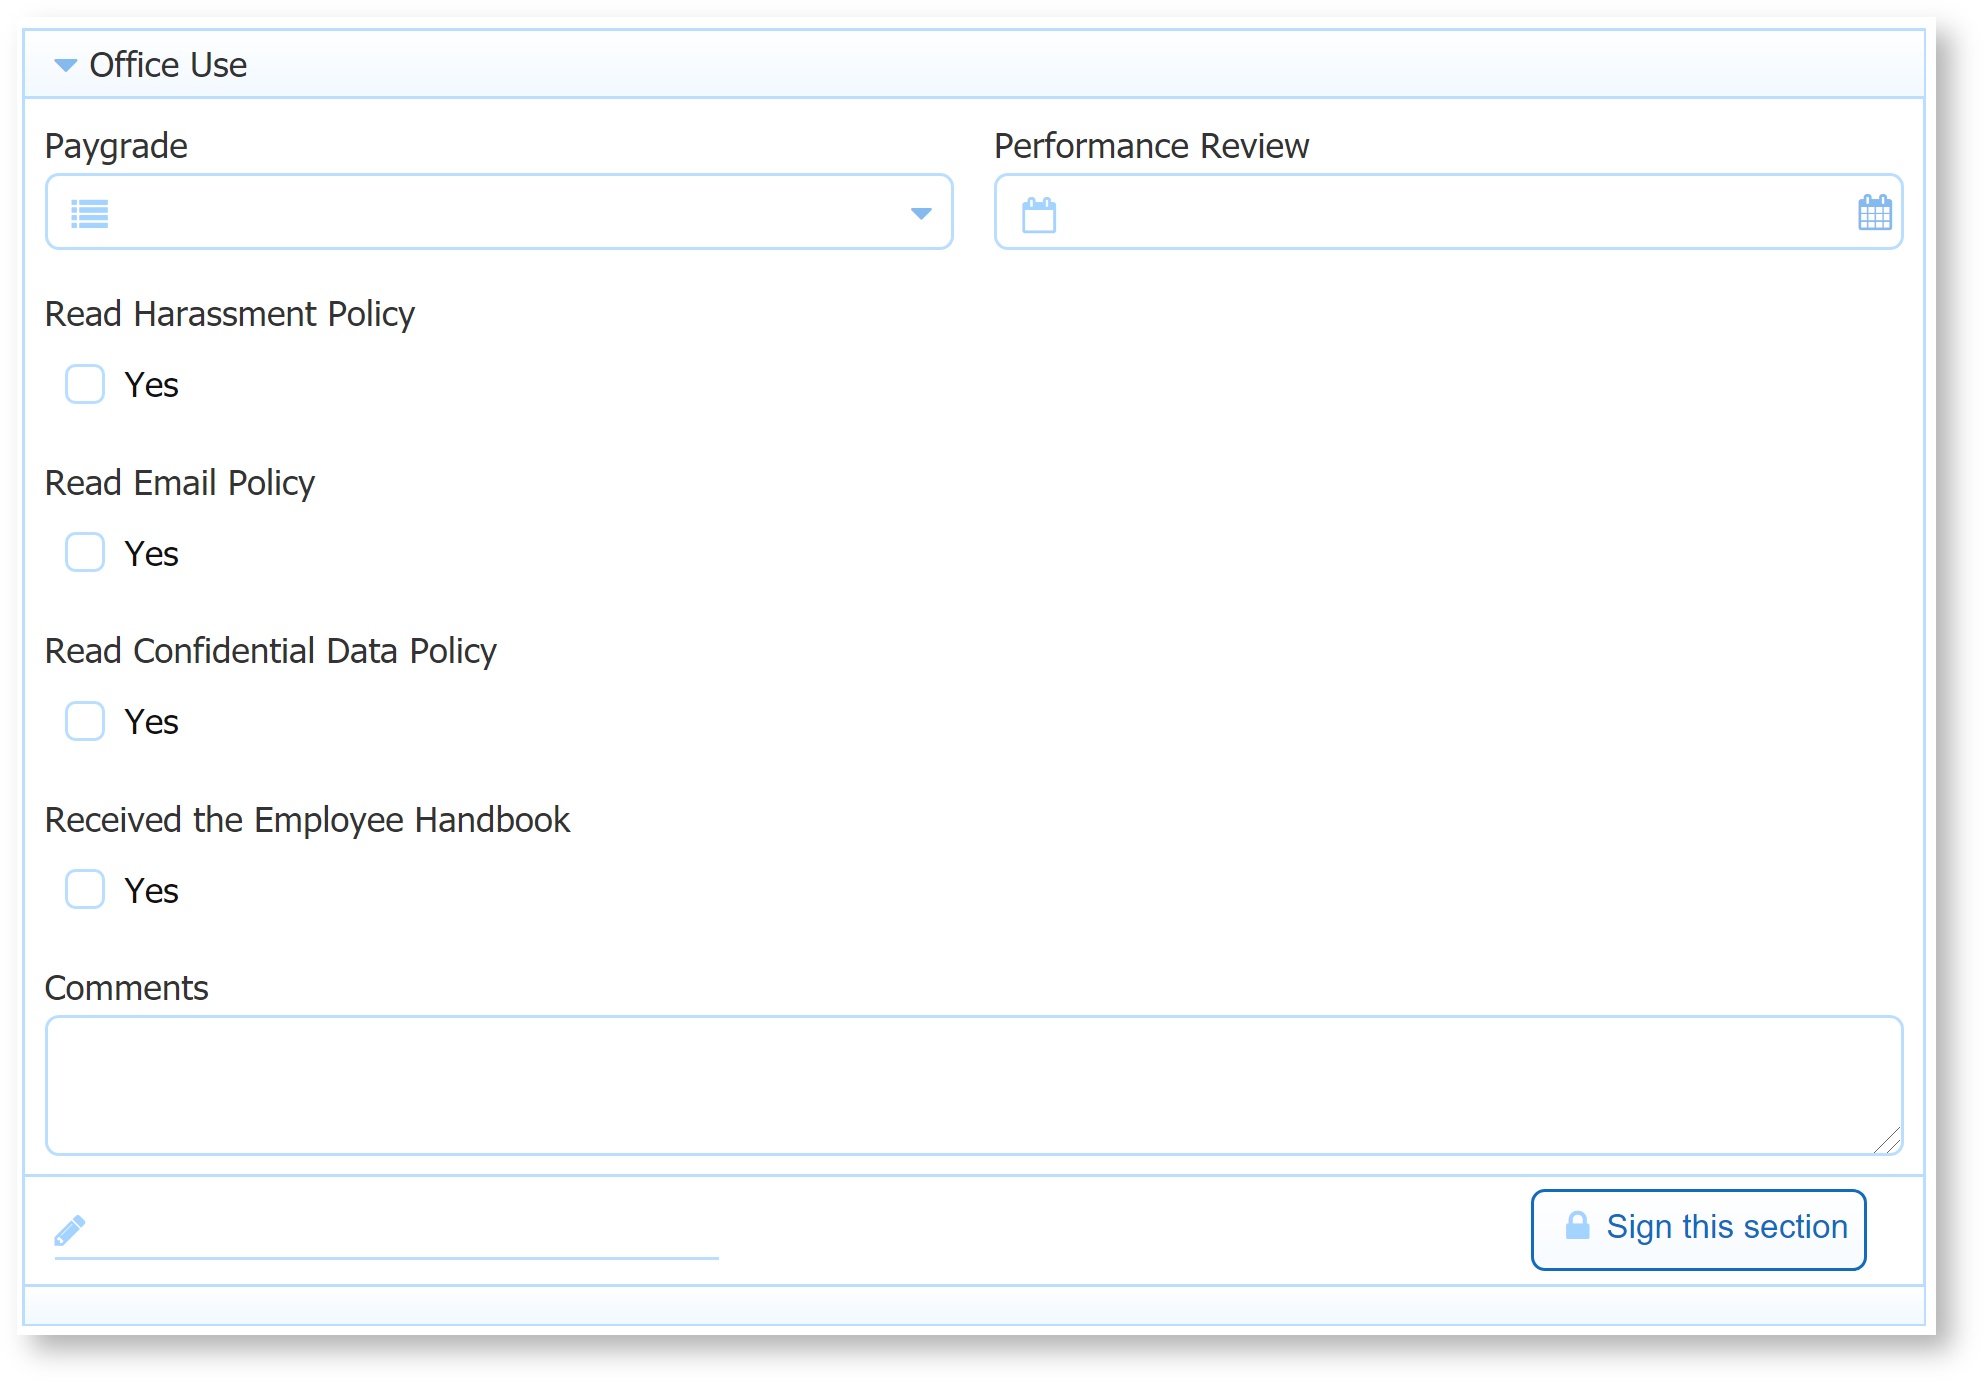
The last step in the Employee On Boarding workflow is performed by Sue, who works in the HR department of the company. Sue receives the task from the manager, Jerry and proceeds to complete the final form, sign it and submit the data to the company database. Create a form similar to the image below.
- The Office Use Only section already exists on the Confirmation Form. Let's add some more controls to it to reflect the HR tasks.
Add a date control for the Performance Review Date and a dropdown control for the Pay Grade.
Use a message control for the instruction: "Confirm that the new employee has completed the following:". One way to bold the message text is to use HTML tags in the message control. For example, the text should be encased in <b>text</b>, as shown in the image. You can also turn on the Rich Text Editor for Message Controls if you require more text formatting.
Use the T/F control for the policy questions - Drag four T/F controls from the palette into the section. Make sure they are below the Message control. Check the New Line property on the Style tab to get the T/F controls to line up underneath each other. Change the labels of the T/F Controls to: Read Harassment Policy, Read Email Policy, Read Confidential Data Policy and Received the Employee Handbook.
![]() Save your work.
Save your work.
Rules
Next we'll configure the business logic that show, hide and calculate fields in our forms. Click the Rules mode in the Guided Designer navigation bar.

Employee Form Rules
- Make sure you're on the Employee Form. (If not, click Switch Form and select Employee)
- Notice that the Workflow Design Wizard already created a rule for you that initializes the form with the logged in user's info.
We will add another rule to combine the First Name and Initial.
The Visual Rule Builder consists of 3 wizards:
- Condition wizard - describe the conditions under which a set of actions should be executed
- Action wizard - declare the actions that should be taken when the condition is true
- Else Action wizard - declare the actions that should be taken when the condition is false
- Click
 to add a rule.
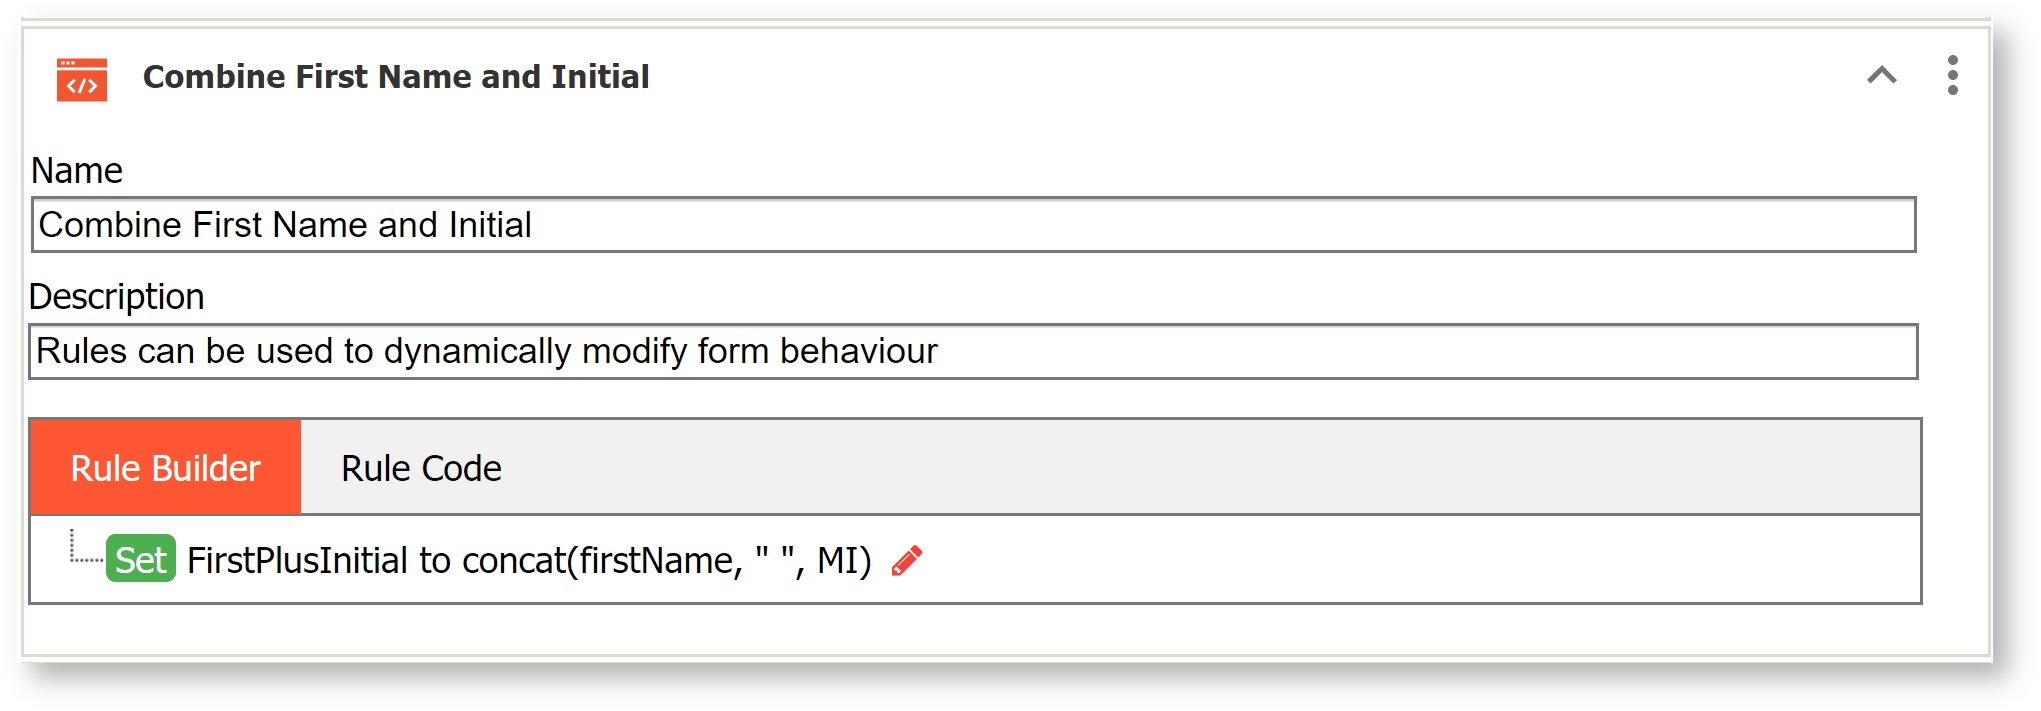
 - Name it Combine First Name and Initial.
- Skip the Condition by clicking next - no condition is needed for this rule.
- On the Action wizard, select FirstPlusInitial in the first dropdown.
- Select to in the second dropdown.
- Enter concat(FirstName, " ", MI) in the third field. (concat() is the concatenate function. The fields available as expressions show in a dropdown as you type the name of the controls.)
- Click Finish.
We will write the third rule to combine the address fields.
The Visual Rule Builder consists of 3 wizards:
- Condition wizard - describe the conditions under which a set of actions should be executed
- Action wizard - declare the actions that should be taken when the condition is true
- Else Action wizard - declare the actions that should be taken when the condition is false
- Click
 to add a rule.
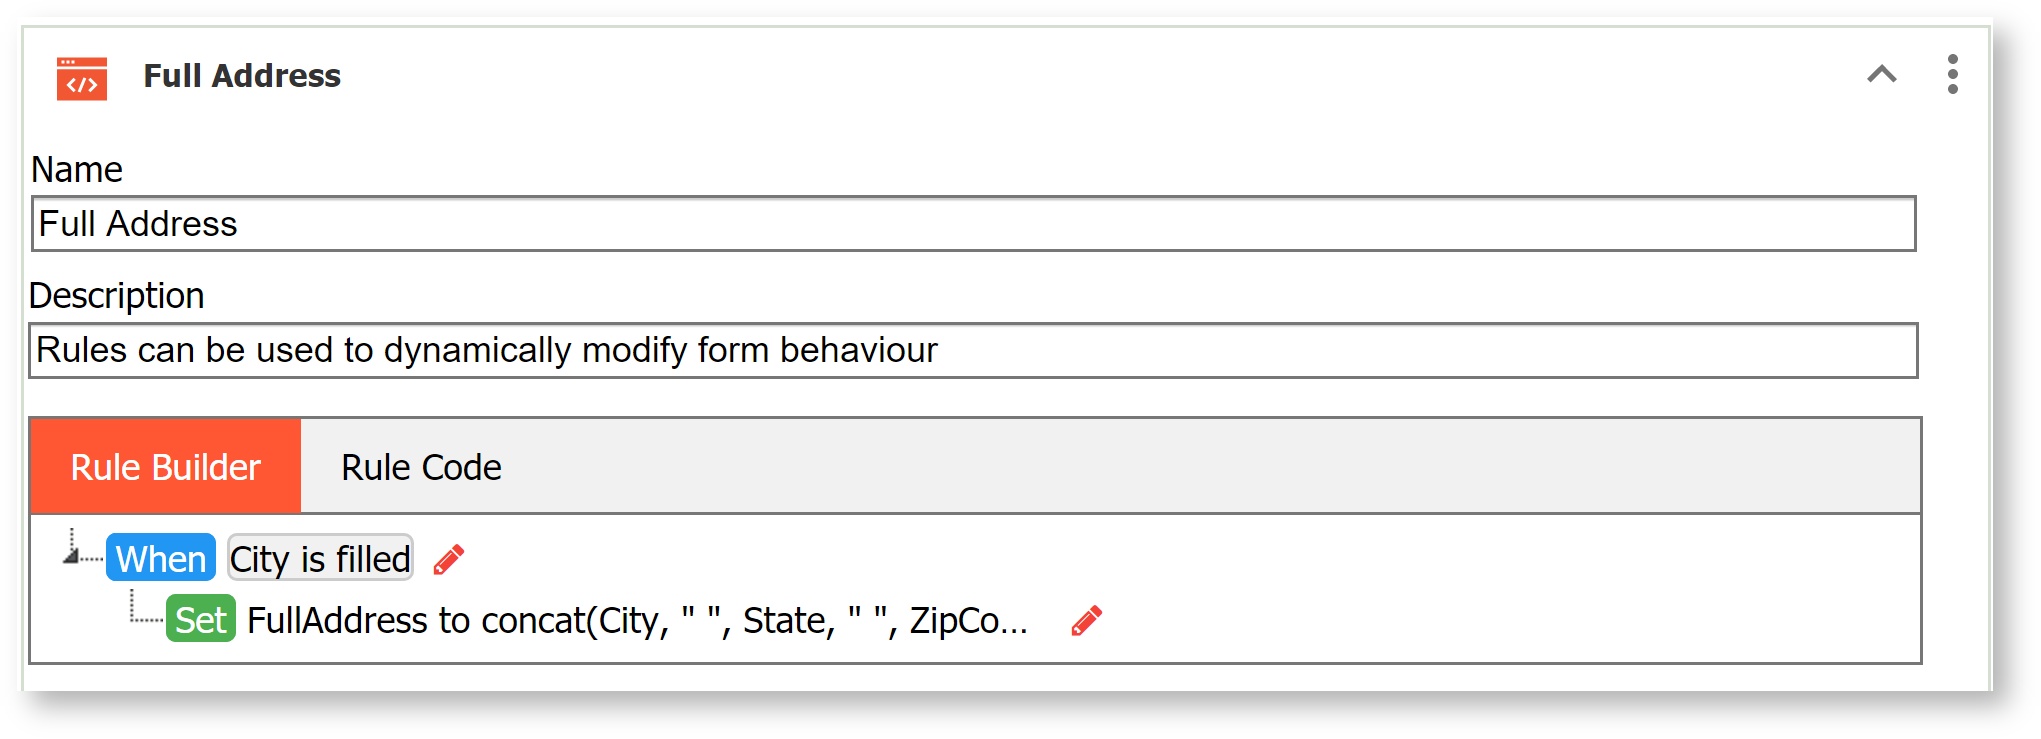
 - Name it Full Address.
- Click the Run Builder button
- Click Add Condition - this is the Condition wizard
- Select City from the first dropdown.
- Select isFilled from the second dropdown
- Click Next
- Select FullAddress in the first dropdown.
- Select to in the second droppdown
- Enter concat(City, " ",State," ", ZipCode in the third field.
- Click Finish
Here is a rule to populate the Date control when the new employee signs on the Employee form.
The Visual Rule Builder consists of 3 wizards:
- Condition wizard - describe the conditions under which a set of actions should be executed
- Action wizard - declare the actions that should be taken when the condition is true
- Else Action wizard - declare the actions that should be taken when the condition is false
- Click to add a rule.
- Name it Populate Today's Date when the new employee signs.
- Click Add Condition - this is the Condition wizard
- Select Signature from the first dropdown.
- Select isFilled from the second dropdown
- Click Next
- Select Date in the first dropdown.
- Select to in the second dropdown
- Start typing today and select function today() from the dropdown
- Click Next and go to false condition
- Select TodaySDate in the first dropdown.
- Select to empty in the second dropdown
- Click Finish
frevvo lets you take advantage of the iPad's location services. The Geo-location feature works with rules. Below is an example of a rule that fills in the street, city, state and zip controls each time the location is updated. Add this rule to your form now and we will turn the feature on in the workflow later in this tutorial.
- Click to add a rule.
Name this rule Location.
Click the Rule Code then Edit Code buttons. Copy/Paste the rule below into the rules canvas.
if (form.positionUpdated) {
  var x = _data.getParameter ("position.street_number");
  Street.value = _data.getParameter ("position.street_number") + ' ' + _data.getParameter ("position.route");
  City.value = _data.getParameter ("position.locality");
  State.value = _data.getParameter ("position.administrative_area_level_1");
  ZipCode.value = _data.getParameter ("position.postal_code");
}
- Click
![]() Save your work.
Save your work.
Allowances Form Rules
Now we'll use rules to calculate the total allowances.
- Click Switch Form and choose Allowances.
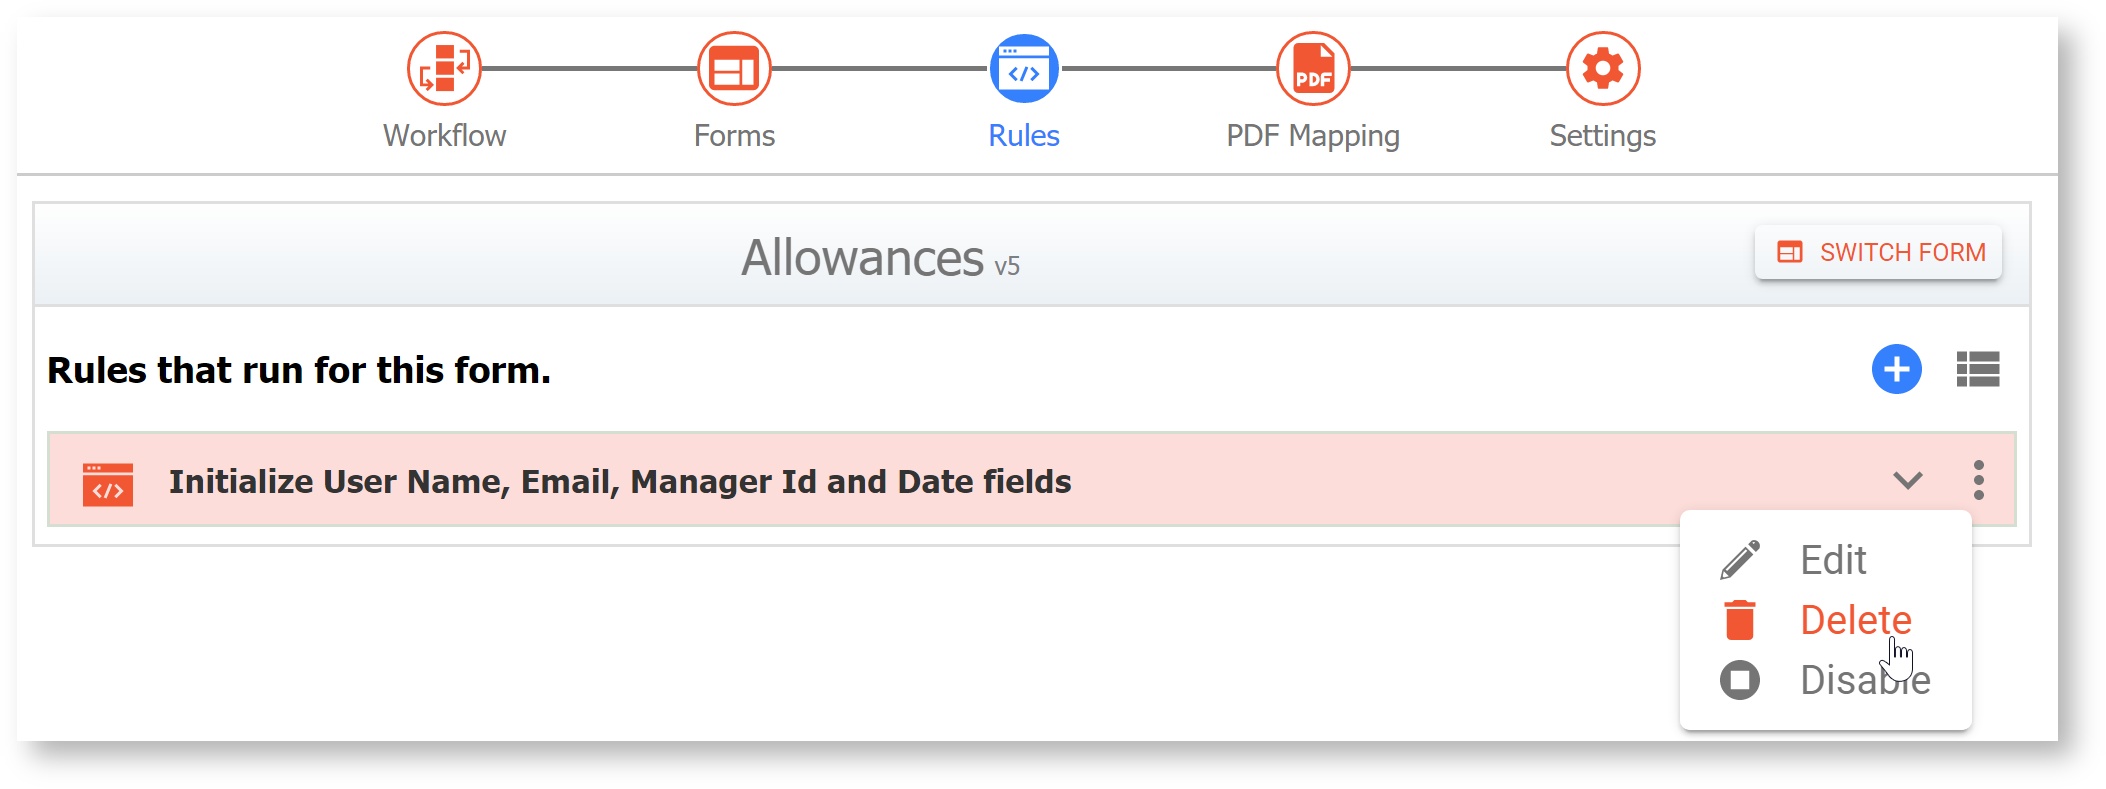
- Notice that the Initialization rule is highlighted in pink, indicating there is an error. The error is that we deleted the My Items section, so the controls it refers to don't exist. So, we can delete this rule. Click the Action Menu and select Delete.
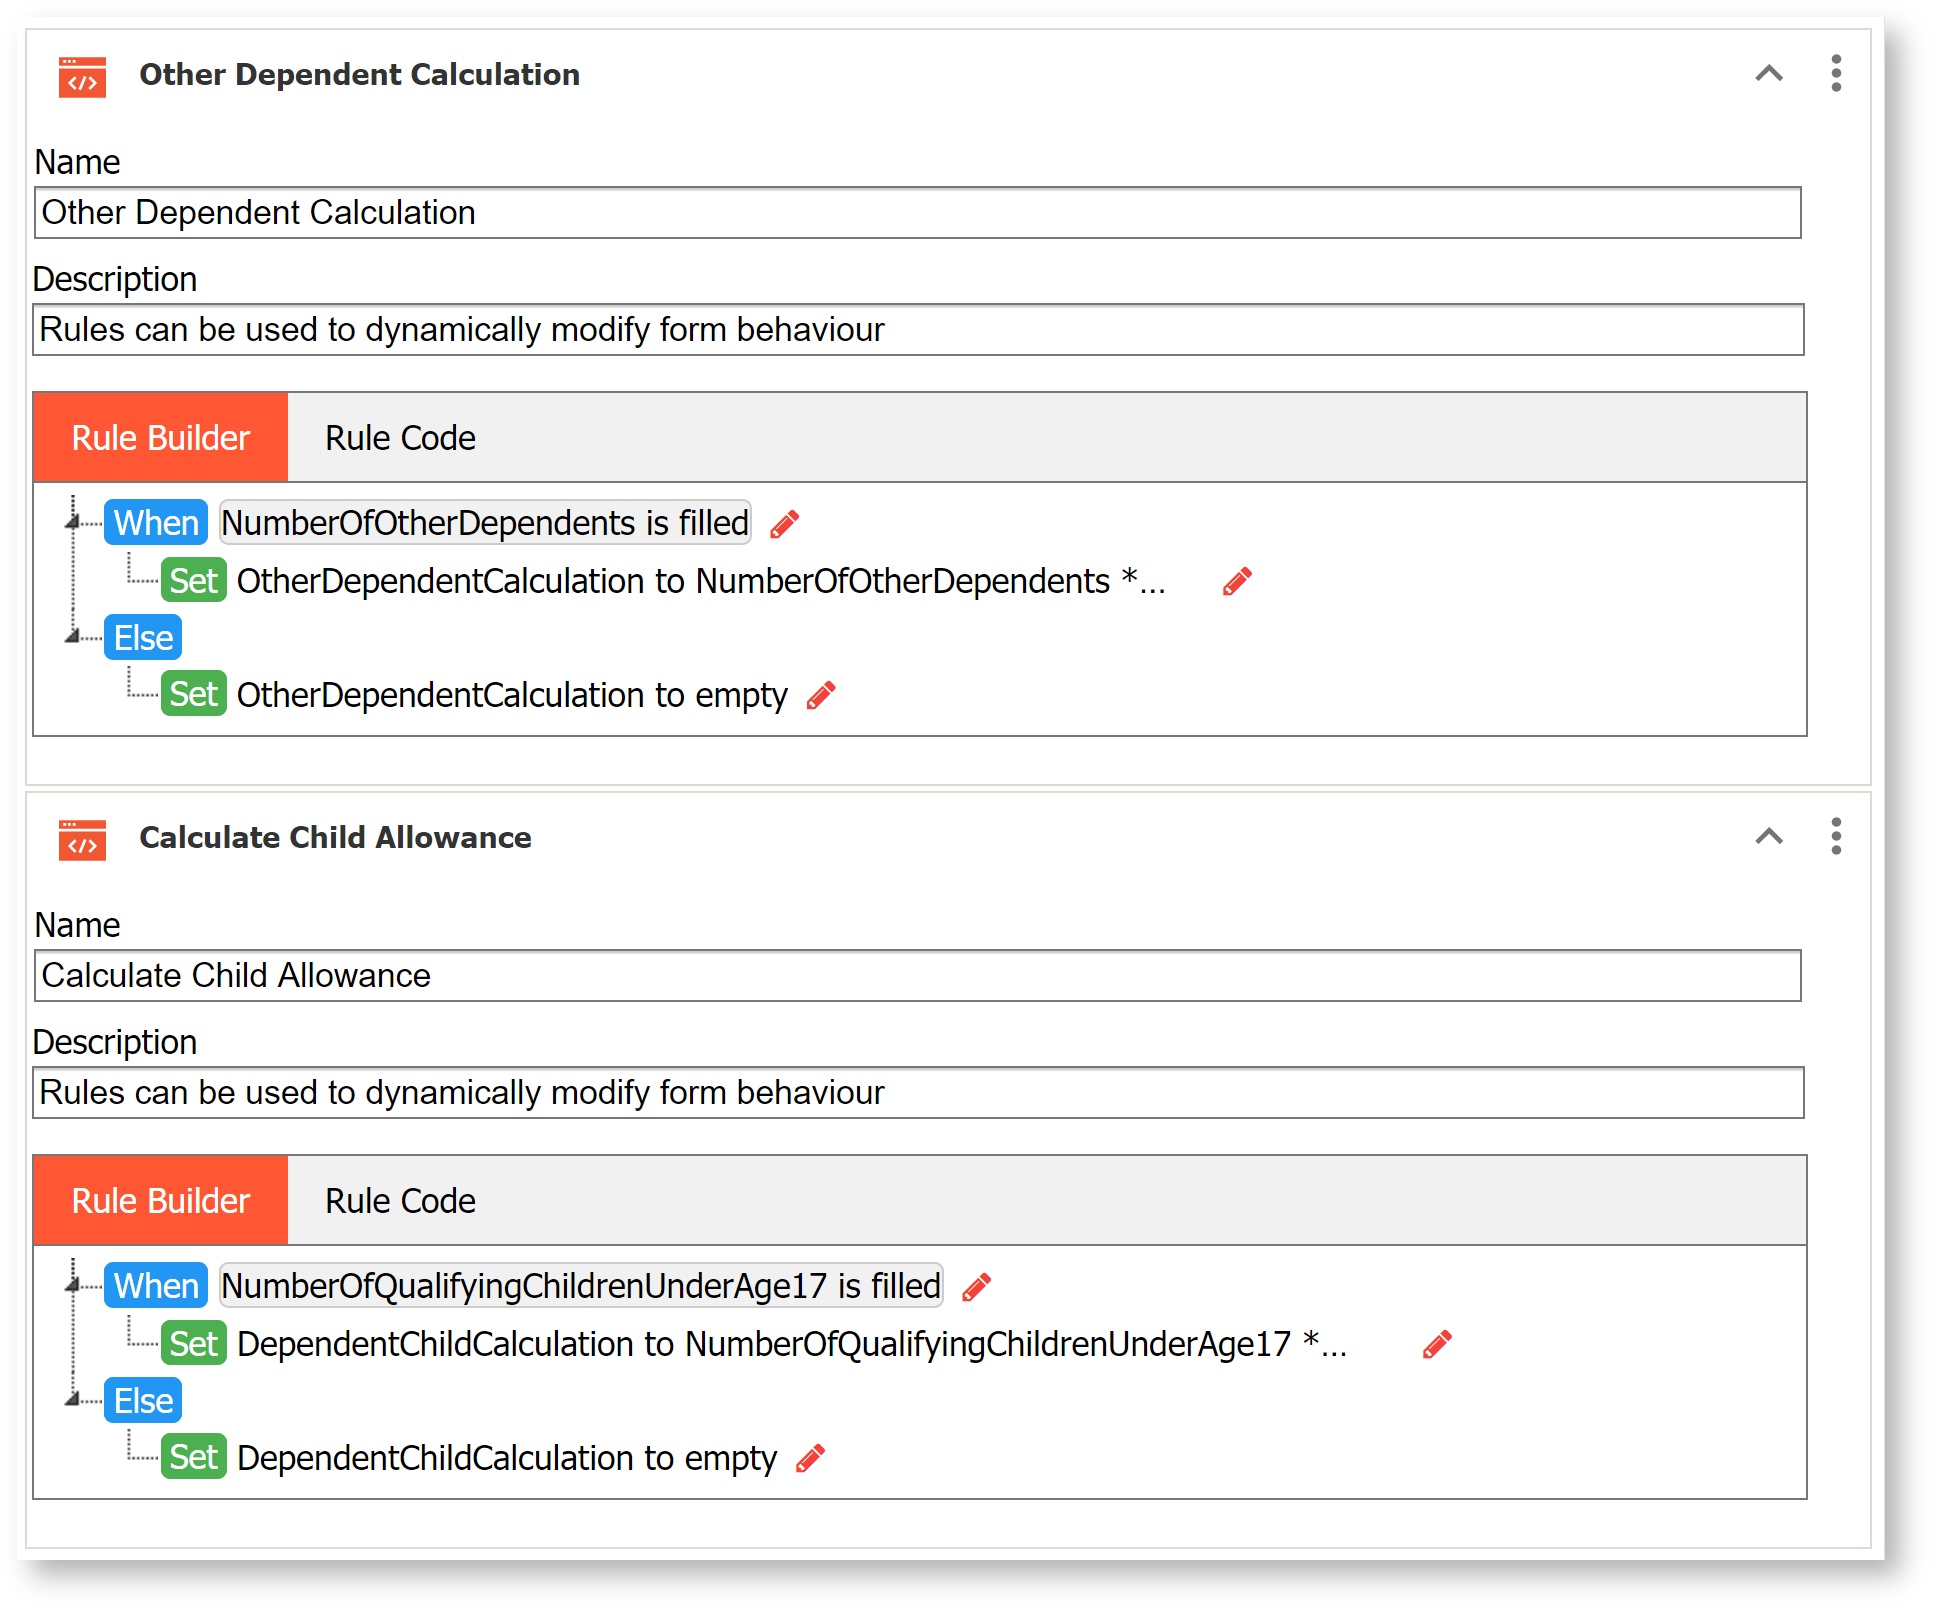
Write two rules that calculate the Dependent Child Allowance and Other Dependent Allowance.
The Visual Rule Builder consists of 3 wizards:
- Condition wizard - describe the conditions under which a set of actions should be executed
- Action wizard - declare the actions that should be taken when the condition is true
- Else Action wizard - declare the actions that should be taken when the condition is false
- Click to add a rule.
- Name it Compute Child Allowances
- Add a condition. Select NumberofQualifyingChildren in the first dropdown, and is filled in the second.
- Click Next
- Select DependentChildCalculation from the first dropdown.
- Select to from the second dropdown
- Type NumberofQualifyingChildren (select field from dropdown) * 2000 in the third field.
- Click Next. We need an else action here in case the user enters then deletes the number of dependents. The else action will be Set DependentChildCalculation | to empty.
- Click Finish
Repeat the steps above for Other Dependents, multiplying the Other Dependents field by 500.
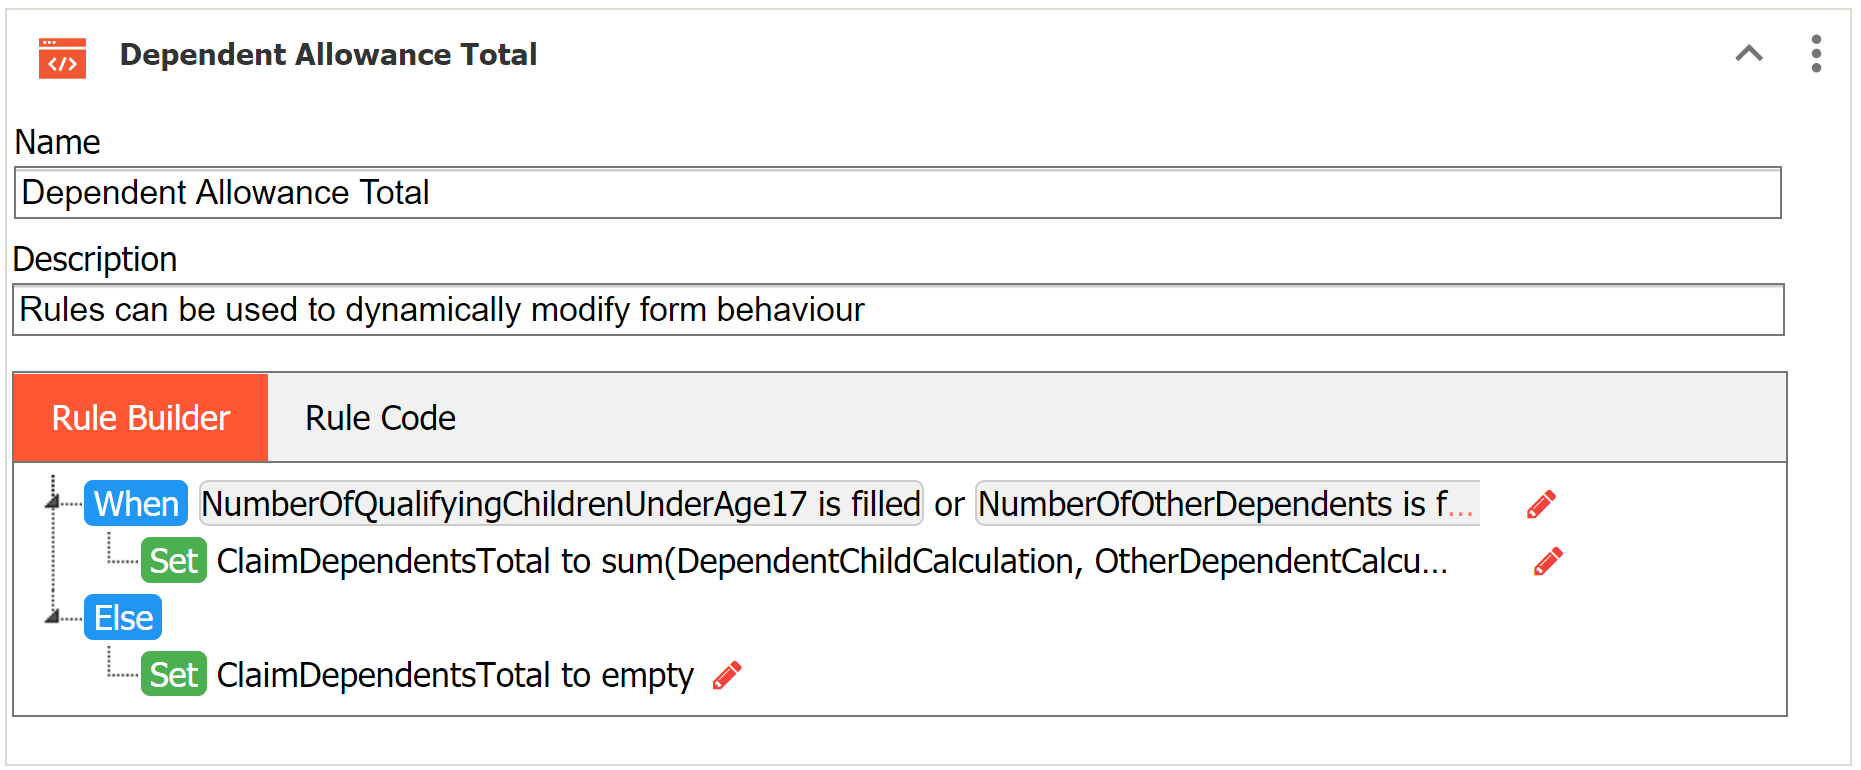
Now add a rule to calculate the Total Dependent Allowances.
The Visual Rule Builder consists of 3 wizards:
- Condition wizard - describe the conditions under which a set of actions should be executed
- Action wizard - declare the actions that should be taken when the condition is true
- Else Action wizard - declare the actions that should be taken when the condition is false
- Click to add a rule.
- Name it Dependent Allowance Total.
- Add two conditions. NumberofQualifyingChildren | is filled and NumberofOtherDependents | is filled
- Click Edit beside the Logic Expression below the conditions. Change the "and" to "or". Click Save.
- Click Next.
- Select ClaimDependentsTotal from the first dropdown.
- Select to from the second dropdown.
- Type sum(DependentChildCalculation, OtherDependentCalculation) in the third field. You will be able to select the exact control names from the dropdown as you start typing.
- Click Next. We need an else action here in case the user enters then deletes the number of dependents. The else action will be Set ClaimDependentsTotal | to empty.
- Click Finish.
![]() Save your work.
Save your work.
Confirmation Form Rules
Click Switch Form and select Confirmation. Notice that the Initialization rule is highlighted in pink, indicating there is an error. The error is that we deleted the My Items section, so the controls it refers to don't exist. So, we can delete this rule. Click the Action Menu and select Delete. The other rules on this form will show/hide the Approval and Office Use only sections on the appropriate step. They should not require any changes, but you can view them to get a sense for the logic.
![]() Save your work.
Save your work.
Generate the W-4 "Pixel Perfect" PDF
Add Writable Signature Field to the PDF
If the W-4 that you downloaded does not have a writable field for the signature, follow these steps to add one using PDFescape:
- Navigate to the PDFescape website and upload the W-4 . It will open in the editor.
- Click on Form Field on the menu on the left.
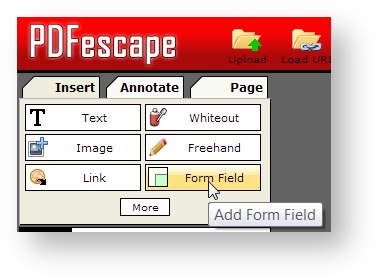
- Select Text as the field type from the dropdown. Then click on the Select box.
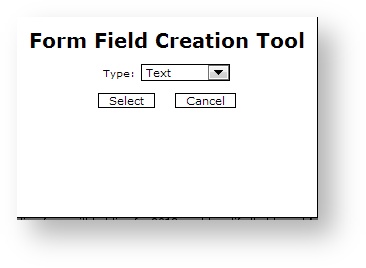
- Draw a rectangular field next to the Employee's Signature label shown in the red box in the image. Repeat for the Date field. Save and download the form. This modified will be used as our W4 template. We will upload it to frevvo later in the tutorial.
Upload & Map to the PDF
The PDF Mapping mode provides functionality to enable designers to map e-form fields to PDF fields.

Mapping is performed one field at a time in the context of a PDF page. Mapping can be accomplished in two ways:
- Dragging mappable fields from the outline and dropping them onto the PDF field (hi-lighted in either yellow or green).
- Clicking on a PDF field to activate the PDF Mapping Dialogue
We will use the Drag and Drop method in this tutorial. Information on using the PDF Mapping dialogue can be found here. Follow the steps in this section to map fields in the Employee Information and Allowance forms in our workflow to the W-4 acroform PDF.
Click the PDF Mapping mode in the Guided Designer navigation bar. Existing mapped PDFs for your form/workflow will be listed. Since we have not mapped a PDF yet, there will be none listed.
Upload the PDF
Use the New Form Generation screen to upload the Acroform for the W-4 Acroform PDF that you downloaded and modified earlier in this tutorial. Click the ![]() New icon to begin. Fill in the name of the template, W-4 in this case, and browse to the location of the W-4 Acroform. Select Generate as fillable form. Click OK.
New icon to begin. Fill in the name of the template, W-4 in this case, and browse to the location of the W-4 Acroform. Select Generate as fillable form. Click OK.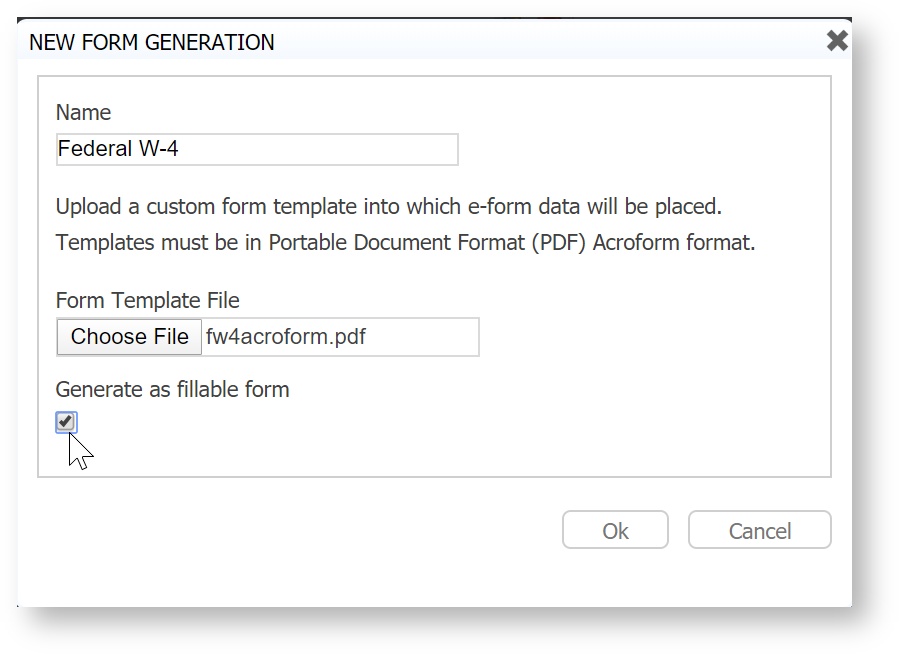
The W-4 will be listed as a PDF to be generated for this activity of the workflow. frevvo makes a copy of the uploaded Acroform template and modifies it with available selections of appropriate e-form fields for each PDF Acroform field. The modified PDF Acroform (Mapper) will be re-generated every time because the e-form fields may have changed.
Map the e-form Fields to the Acroform Fields
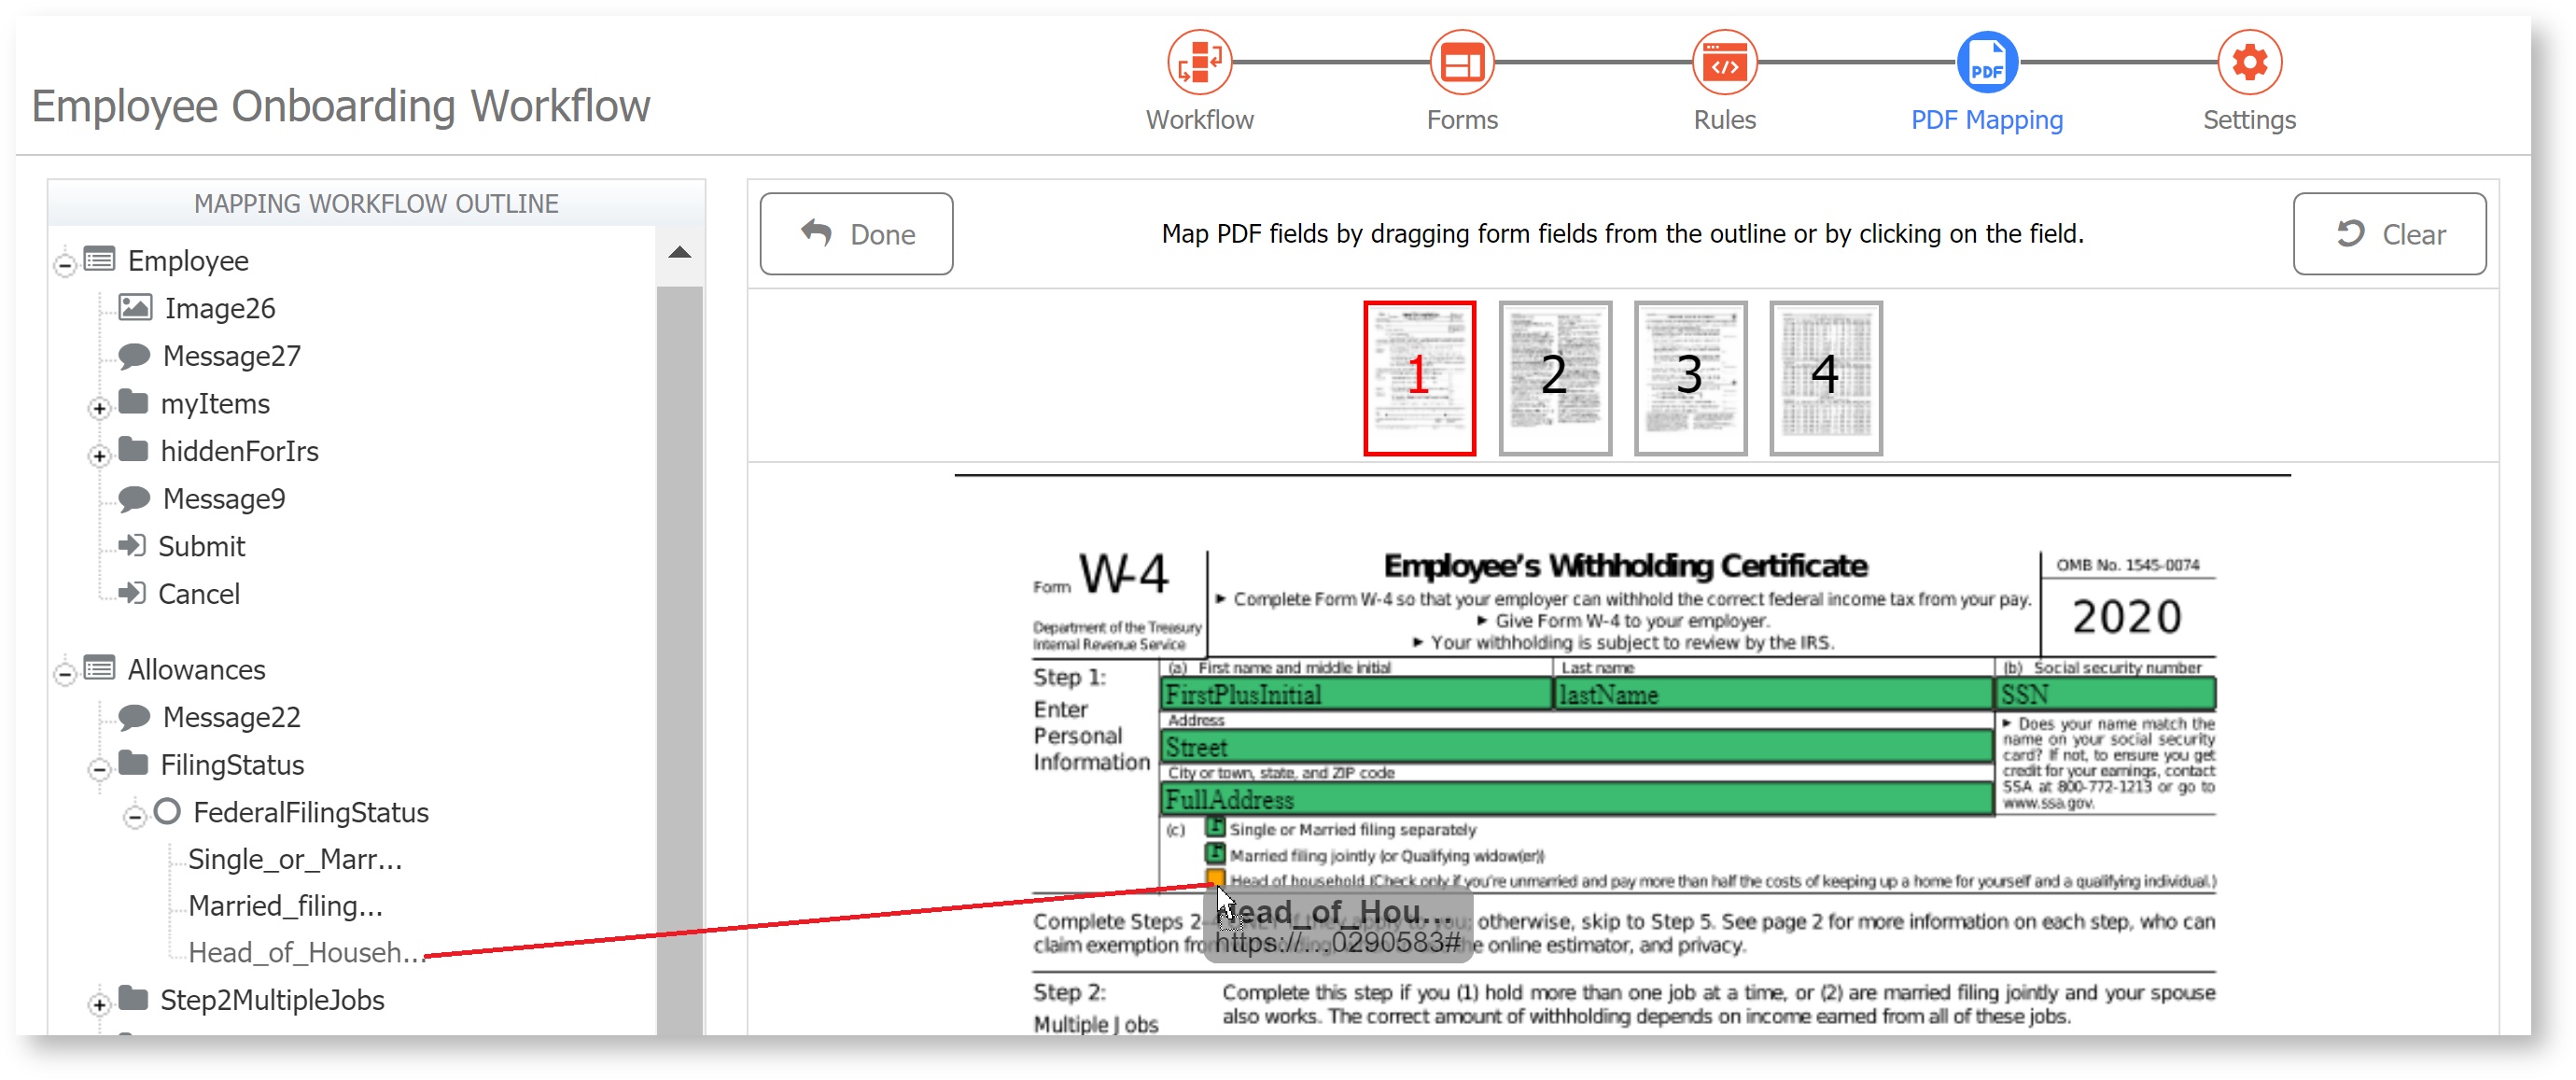
- Click the
 Map Fields icon. Ensure the PDF Page thumbnail Image for page 1 is selected.
 - Expand the Mapping Workflow Outline. Then, click the + icon to the left of the Employee Information and Allowances forms to expand the control list in the Mapping Form Outline.
- Drag controls from the outline and drop them onto the field you want to map it to on the PDF. Drop the control when the color changes to orange as you hover over the PDF field.
We will not map all the fields on the Acroform PDF for this tutorial. Drag and drop controls for these fields in the W-4 mapper. If you have been naming the controls as suggested in this tutorial, control names should be the same as the frevvo Control Name column shown in the table.
| Acroform PDF Field | frevvo Control Name |
|---|---|
| First Name and Middle Initial | FirstPlusInitial |
| Last Name | LastName |
| Address | Street |
| City or town, state and ZIP code | FullAddress |
| Social Security Number | SSN |
| Filing Status | Map each FederalFilingStatus Option to the corresponding checkbox. |
| Multiply the number of qualifying children... | ChildDependentCalculation |
| Multiply the number of other dependents... | OtherDependentCalculation |
| Add the amounts above and enter total... | ClaimDependentsTotal |
| Employee Signature | Signature (from Confirmation step) |
| Date | Signature Date (from Confirmation step) |
| Employer's Name and Address | EmployerSNameAndAddress |
| Employer's EIN | EmployerEIN |
If the control names are truncated in the Mapping Form Outline, hover over the control to see the entire name.
Click the Done button when the mapping is completed and then![]() Save your work.
Save your work.
Add the Form Viewer Control
Go to the Forms editing mode using the Guided Designer navigation bar.

Click Switch Forms and select the Confirmation form. Drag and drop one Form Viewer control from the workflow palette to the form. Change the label of the Form Viewer control to Review Your W-4 form. Change the label color and any other style changes you want to make on the Style tab in the Properties pane. See Style Properties for more information.
Click on the Form Viewer control to select it. Select the W-4 form from the Form dropdown on the properties pane. ![]() Save your work.
Save your work. 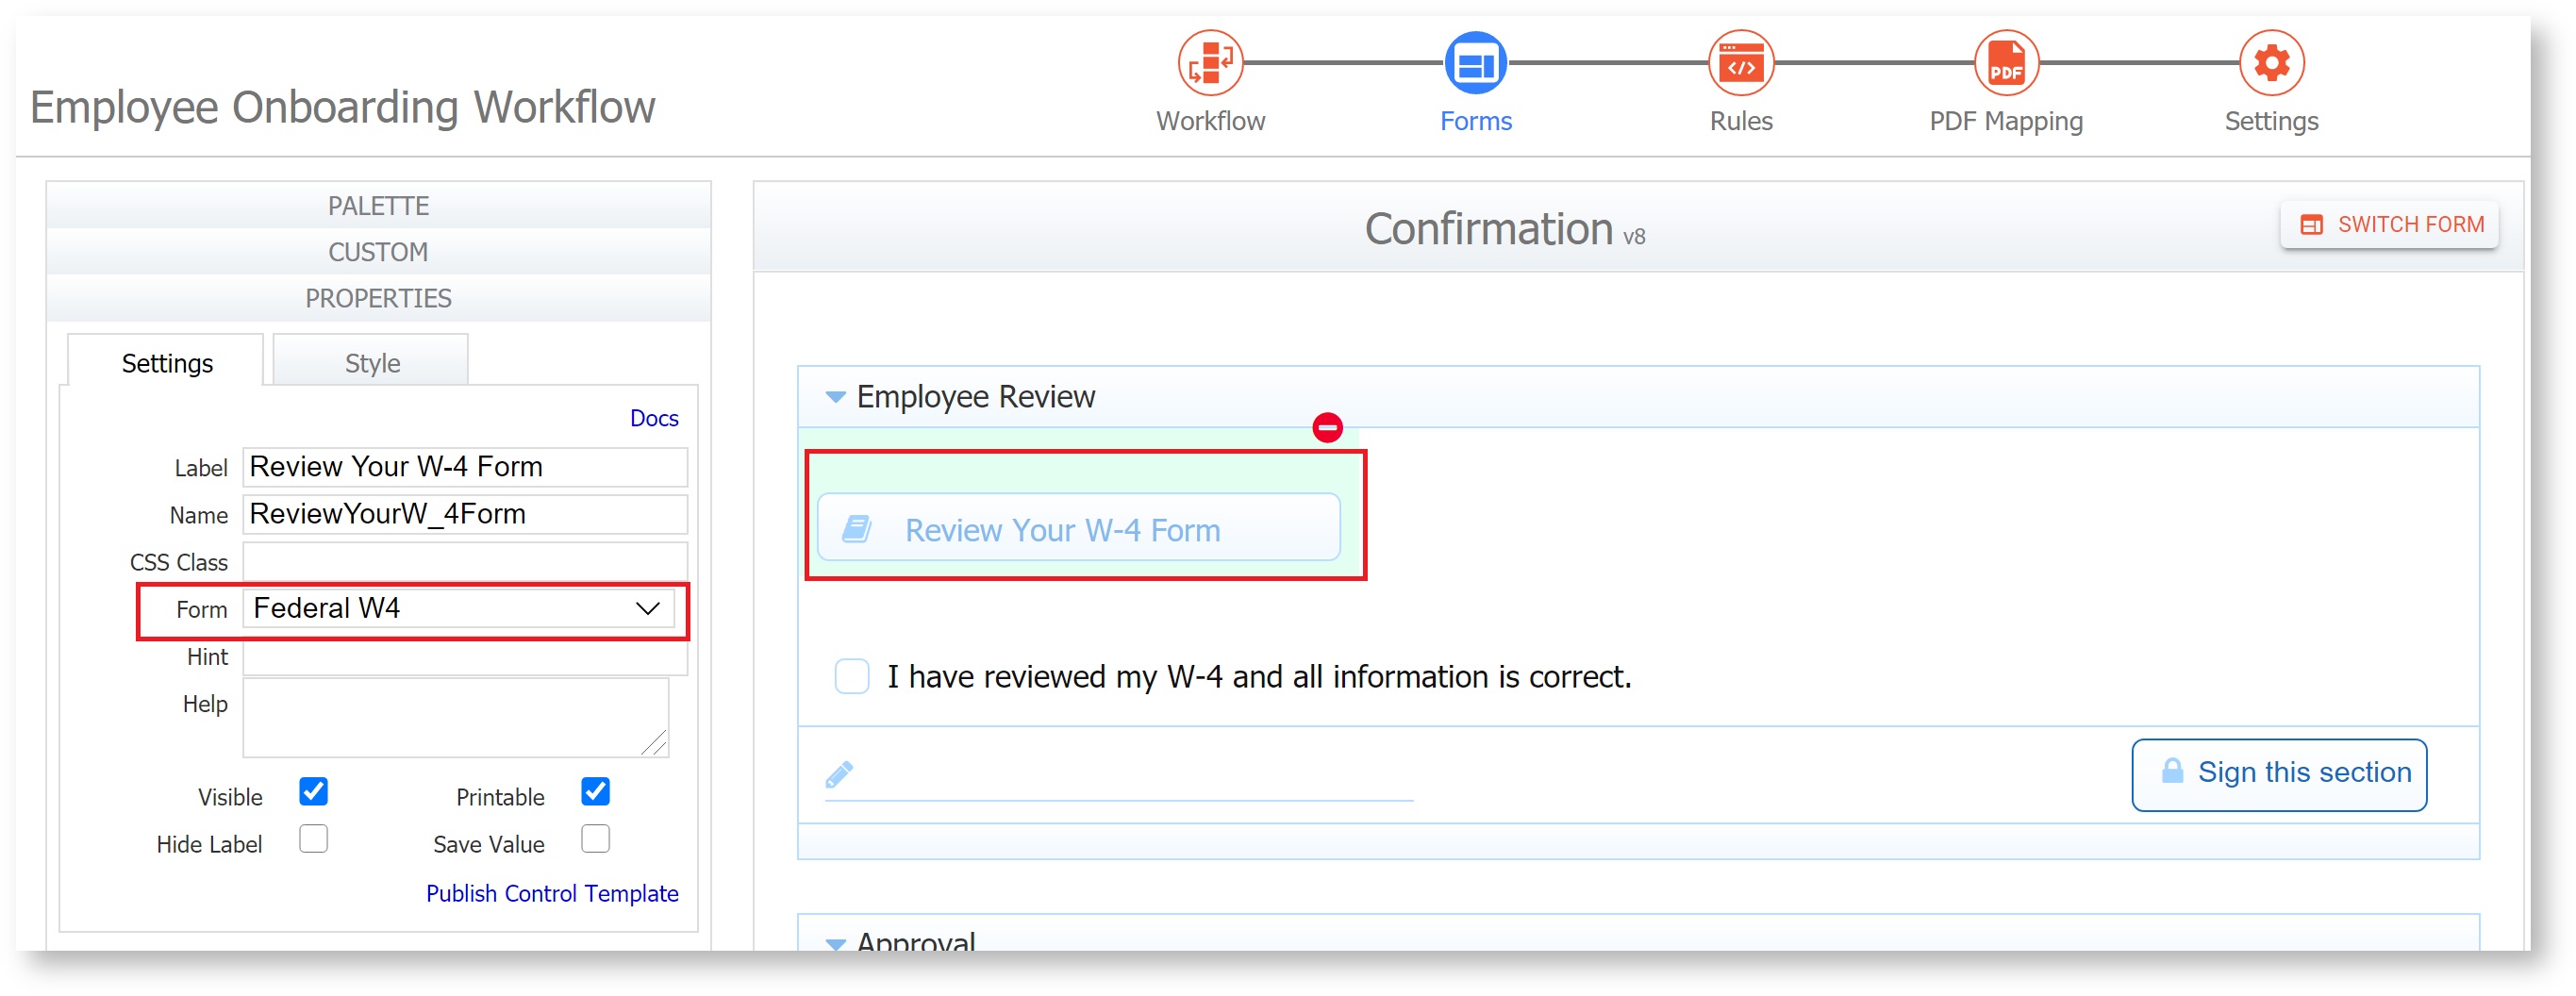
Customize Workflow Steps
We already configured step assignments, or routing, when we built this workflow in the Workflow Design Wizard. However, we'll customize a few things like the Task Assignment emails and Continue Button labels.
Continue Buttons
We'll customize the continue buttons to give the user more context about what will happen when they click it.
- Click on the Employee Step to open the Step Properties Wizard.
- Change the Continue label property to "Enter Allowances".
- Repeat steps 1-2 for each of the other steps, adding Continue labels like "Enter Education Details," "Review Form", and "Send to Manager"
Setup Task Notification Email
You can configure the email that is sent when the workflow is put on someone's Task List. Jerry, the Manager, receives an email notifying him if there is a new task in the Task List. To set this up, click on the Approval Step, and then the Assignments tab. Make changes to the Task Notification Email section at the bottom of the Wizard as shown below. Notice the Templatized Strings in the message shown in the image below. 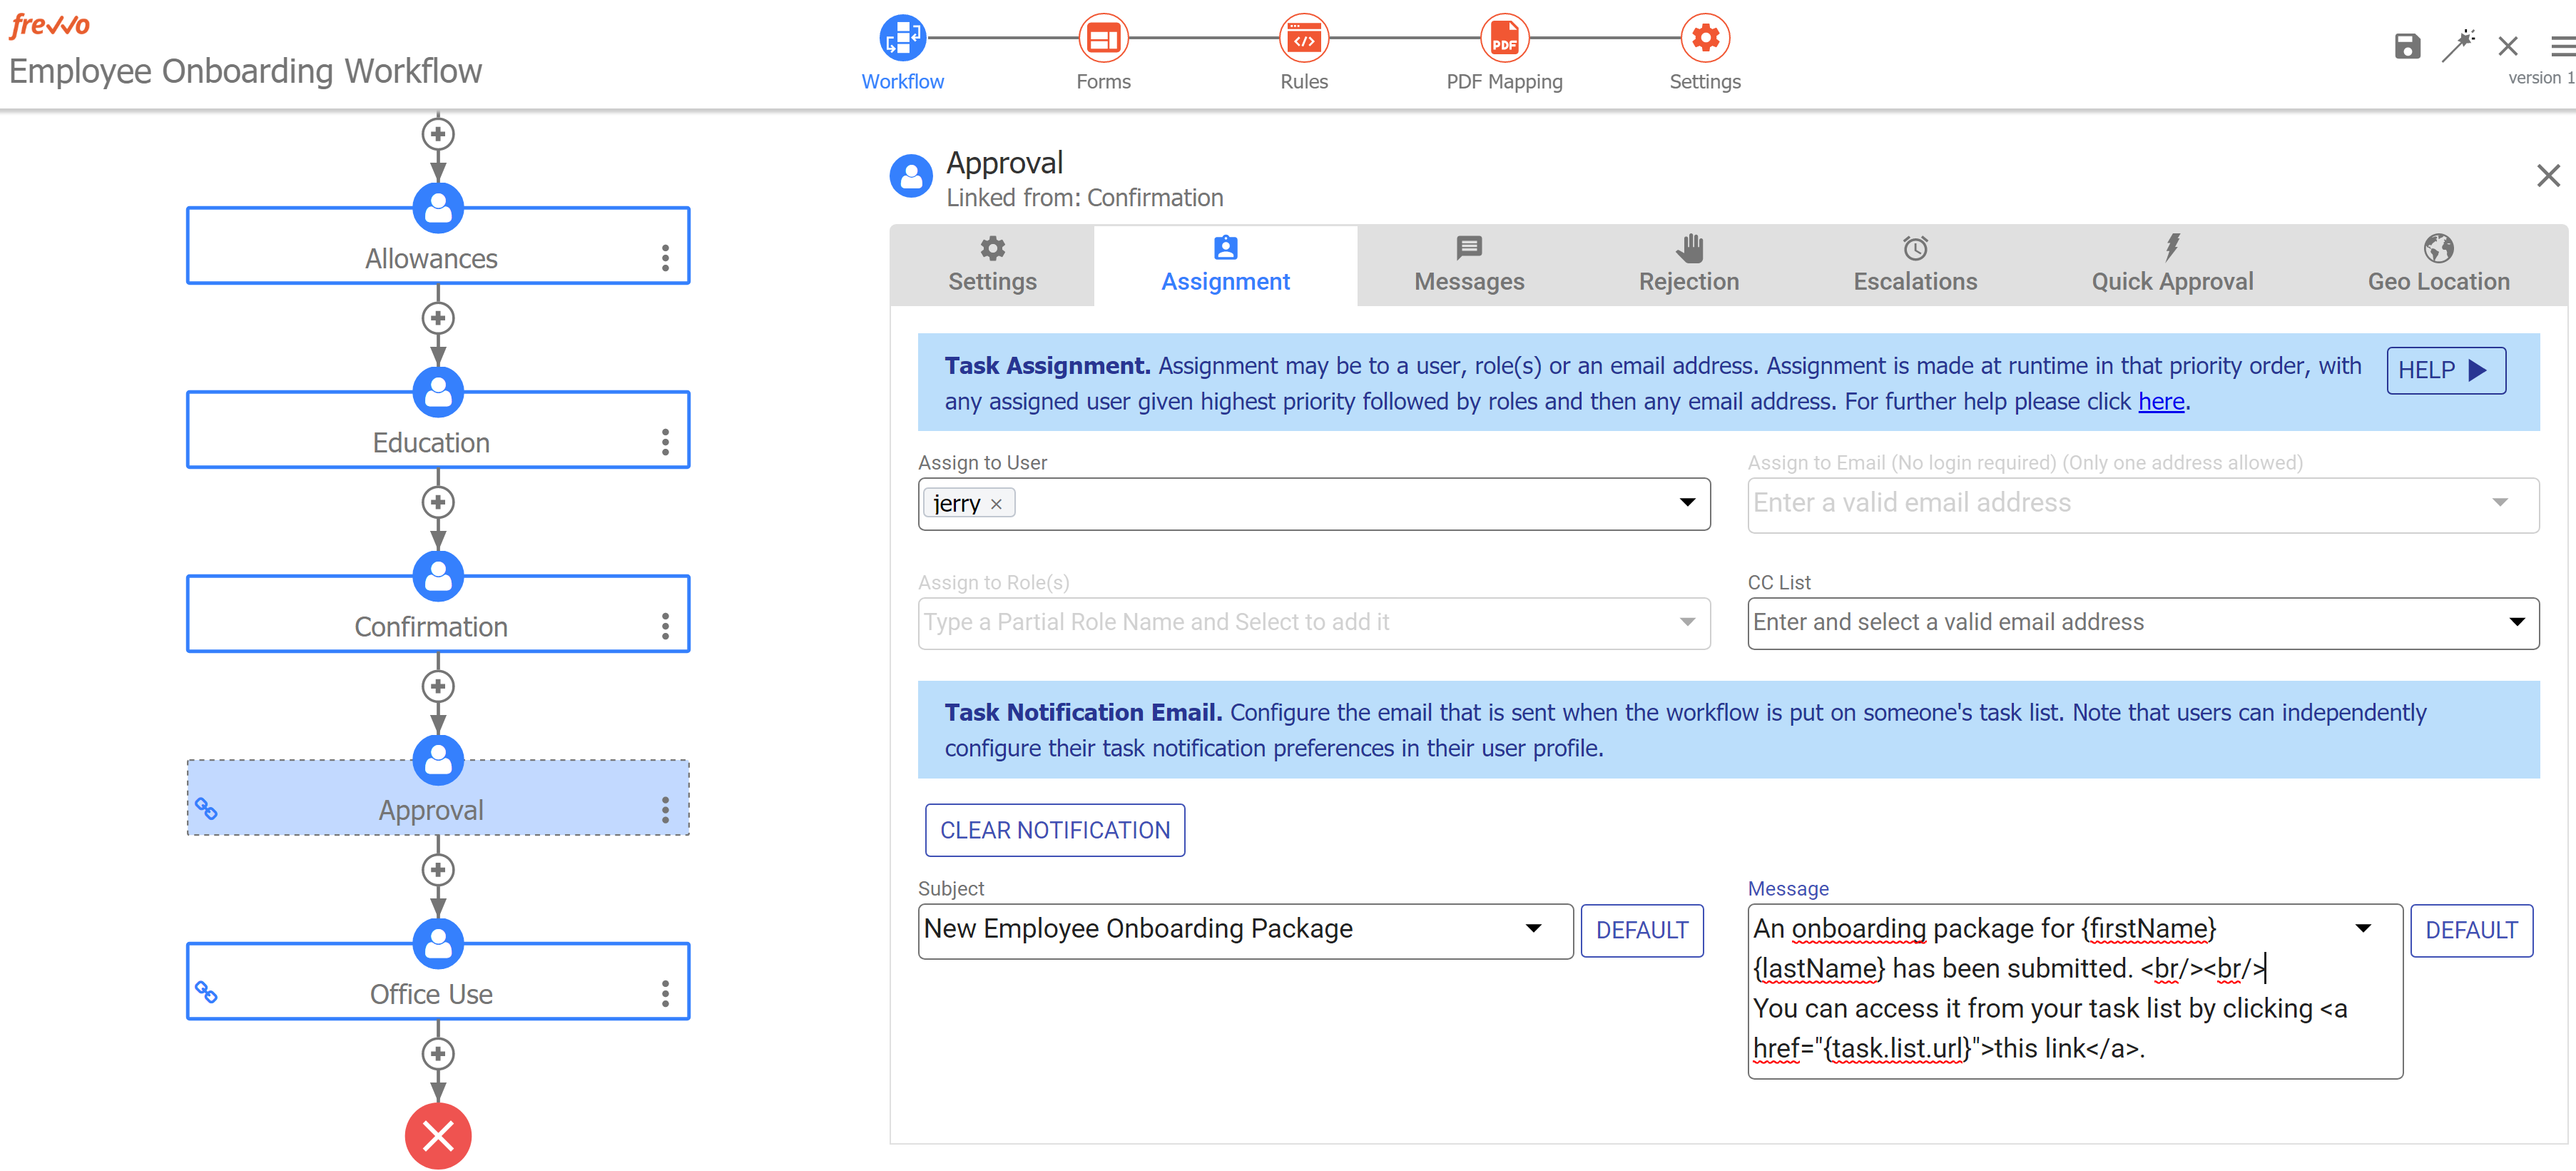
Jerry, the manager, will receive an email informing him that there is a New Employee On Boarding task on his Task List. Notice the {task.list.url} is replaced by the link to Jerry's task list. When Jerry clicks this link, he will be directed to his task list. He will have to login if he is not signed on to access it.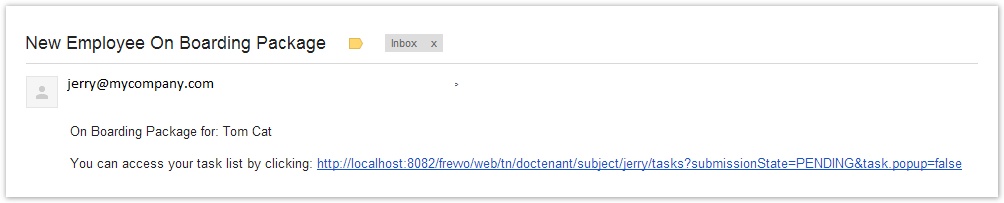
Repeat these steps for the Office Use step that will go to the HR department, customizing the email subject and message however you would like.
![]() Save your work.
Save your work.
Pending Messages
You can customize the message each user will see by typing it into the Pending Message field on the Messages tabs for the following step. For example, to configure the message the new employee will see after the Confirmation step, we'll configure Pending Message on the Approval step.
Pending messages display when the workflow navigates to a different user. In our scenario, you may want to customize the message that the employee sees when they complete the screenflow and the workflow navigates to a user with the Manager role for approval/rejection. Note the Pending message for the step is always placed on the step that comes after the step where you want it to display. This is because the workflow navigates to the next workflow step first then it displays any configured messages. The message that the employee sees when the workflow goes to the Manager must be configured on the Manager Approval step. The message that the Manager sees when the workflow goes to a user in the HR department must be configured on the HR step.
To customize the message the employee sees when the Confirmation step is completed and the workflow goes to the Manager.
- Click on the Approval step to open the Step Properties wizard.
- Click the Message tab.
- Type the message for the employee in the Pending Message field i.e. Thank You {FirstName}. Your New Employee Package has been sent to your Manager for approval. In this message, {FirstName} is a Templatized String, meaning it uses the data from the FirstName field on the form.
To customize the message the Manager sees when the Approval step is completed and the workflow goes to HR: Here is an example: "The On Boarding Package was sent to the Human Resource Department"
- Click on the Office Use step. You will still be on the Message tab.
- Type the message for the Manager in the Pending Message field i.e. The On Boarding Package was sent to the Human Resource Department.
Setup Quick Approval
In our scenario, when the screenflow is completed by the new employee, the manager will receive a notification and access their Task List using a smart phone. The Quick Approval feature lets the manager review a summary of the information and quickly approve/reject the task.
The Confirmation step has a signed section called approval with one textarea control in it. This section meets the criteria for an Approval Control and can be setup for the Quick Approval feature.
- Click the Approval step to open the Step Properties wizard.
- Click the Quick Approval tab.
- Enable the Quick Approval Slider.
- The Approval Control will display all sections of your form that meet the criteria of an Approval control. In this case, there should only be one - the Approval section. Select it.
- Type a Summary statement that will appear on the Task List, if desired. This is essentially the same as the Task Information so if you have set that up already you can leave the summary blank. To add the new employee Personal Email Address to the Quick View, type the left curly bracket - { - then begin typing the name of the Personal Email Address control. Click on Personal Email Address when it displays in the dropdown list. This will add the Personal Email Address information to the Quick Approval summary as a templatized string.
 Save your work. You will see the
  lightening bolt on the Approval workflow activity if Quick View is setup correctly.

Quick Approval Wizard
Task List on Jerry's iPhone
Quick Approval on Jerry's iPhone
Geolocation
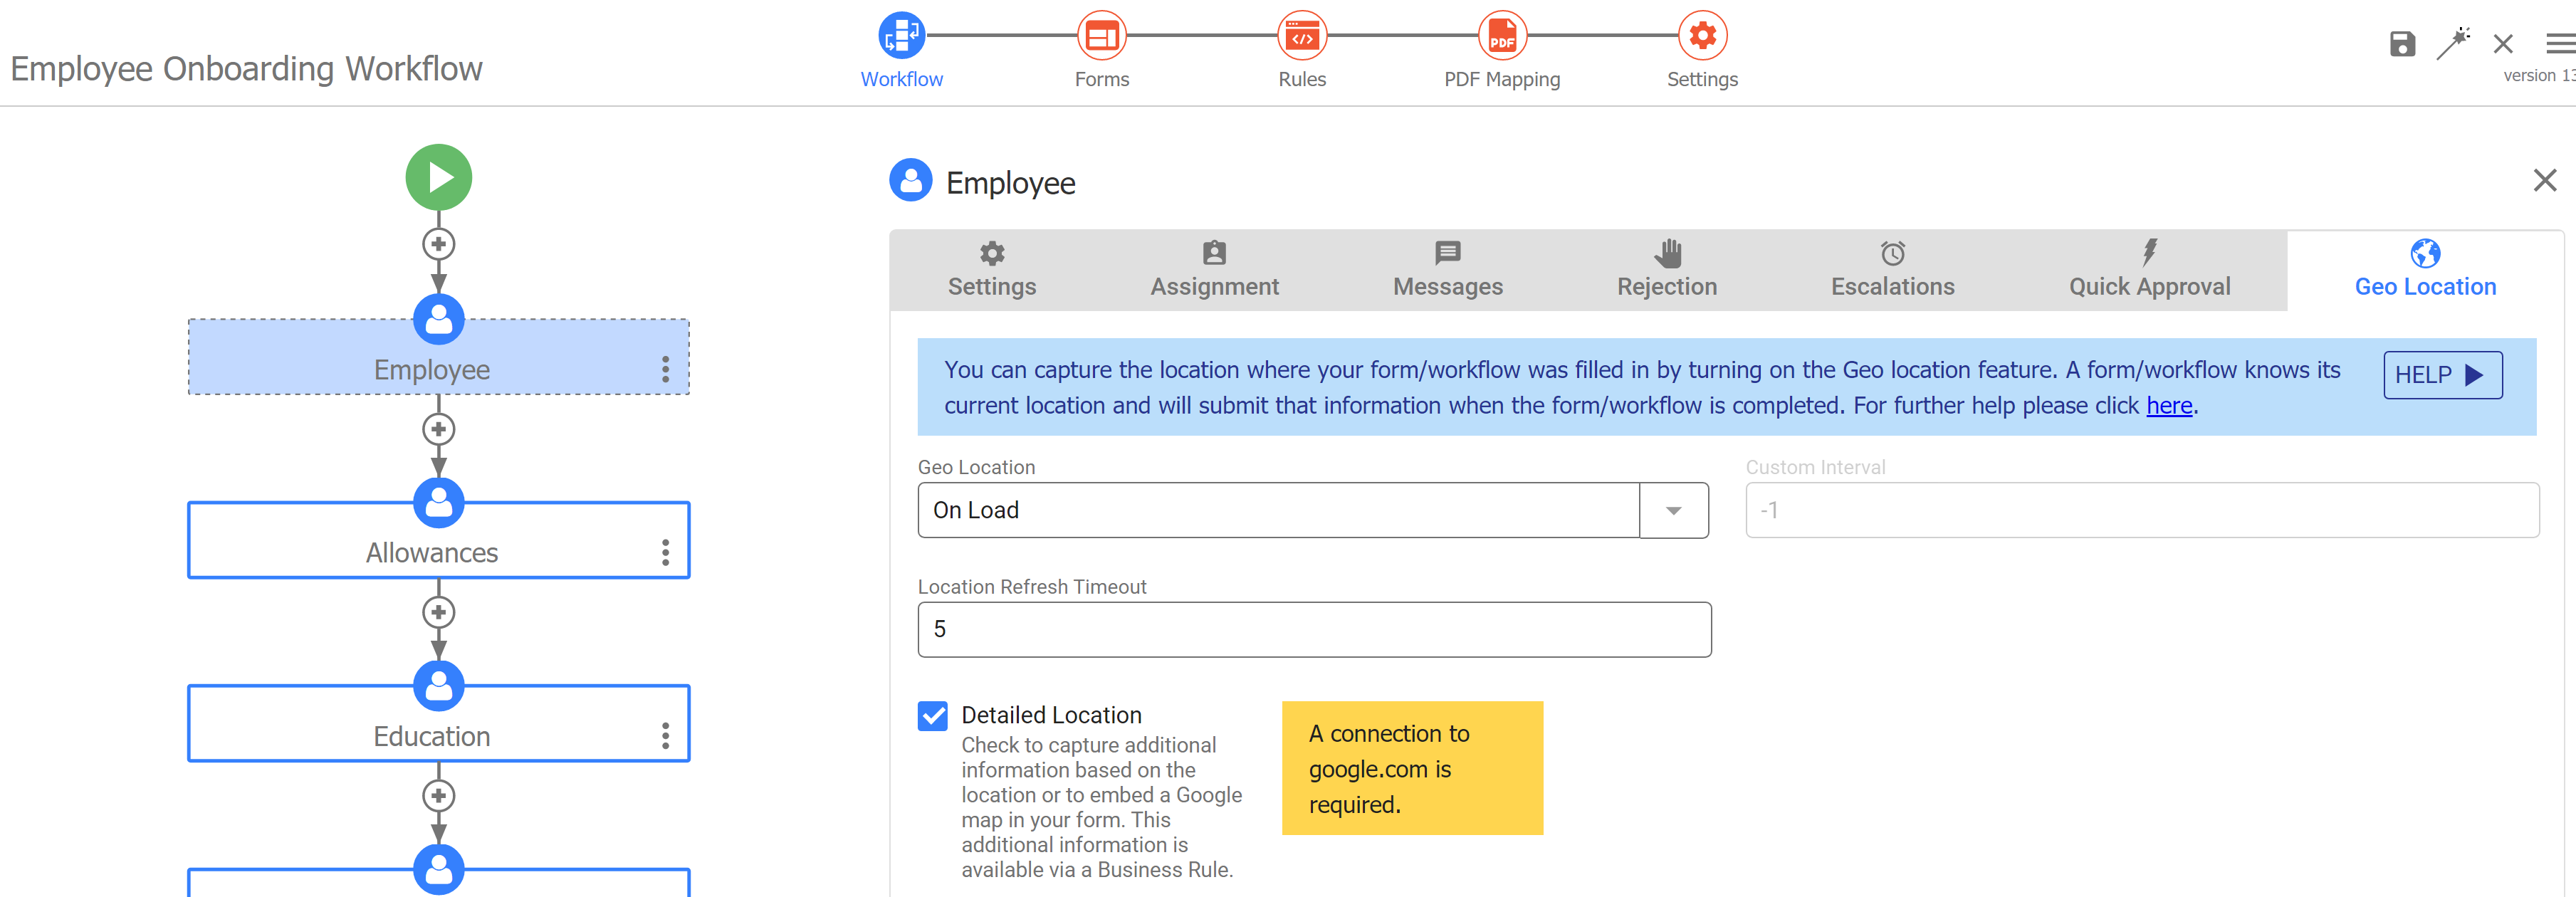
If you want to capture the current location of the new employee when they are filling out the Employee Information form, turn on frevvo' location feature. Click on the Employee Information form and click the Geolocation tab. We added a rule to the Employee information form to take advantage of the iPad location services earlier in this tutorial. Once you have the rules in place, you can choose to have the rules execute when the form loads (the On Load) option of the Geo-Location dropdown or specify a custom time period of how often the rules should execute (the custom option of the Geo Location dropdown). Check Detailed Location to capture additional information, like an address, based on the location.
Workflow Settings
For the next two tasks, click the Setting editing mode in the Guided Designer navigation bar.

Access Control
- Go to the Access Control tab.
- For Who can start the workflow, select Authenticated Users(Login required.) New employees will have to log onto the tenant to access the workflow.
Task Information
You can setup any control on the form that will give the manager more information on the task to be performed by using Templatized Strings in the Task Info field on the form's property panel. In this scenario, the Manager and the HR employee will need to approve/reject the new employee on boarding so we will set up the same task information for all the steps. To do this:
Click the Message tab.
Type New Employee: {FirstName} {LastName} into the Task Information field on the forms Property Panel - the First and Last Name controls are enclosed in curly brackets. These are examples of Templatized Strings. frevvo will substitute the new employee's first and last names for these templatized strings at runtime.
Select ![]() Save and Close from the action menu to return to the Forms & Workflows list.
Save and Close from the action menu to return to the Forms & Workflows list.
Assign a thumbnail to the Employee On Boarding Workflow
On the Forms and Workflows Home page, select ![]() Thumbnail from the
Thumbnail from the ![]() Action Menu to assign a thumbnail to your Employee On Boarding workflow that will display on the iPad and iPhone. You can upload your own icon or select one that frevvo provides.
Action Menu to assign a thumbnail to your Employee On Boarding workflow that will display on the iPad and iPhone. You can upload your own icon or select one that frevvo provides.
Deploy the Workflow
On the Forms and Workflows home page, select ![]() Deploy from the
Deploy from the ![]() Action Menu. You will see a
Action Menu. You will see a![]() flag icon to show you this workflow is deployed to production.
flag icon to show you this workflow is deployed to production.
Create a Space to Test the Employee On Boarding Workflow
There are several ways to test the Employee On Boarding workflow. We will use a frevvo space which can be a valuable tool for testing mobile forms on the iPhone and iPad. Before creating your space, make sure the visibility of your Employee On boarding workflow is set to Anyone or Authenticated Users and that it is deployed to production.
Follow the steps below to quickly create a space to test the Employee On Boarding workflow:
- Log in as the designer. Click on the Spaces tab.
- Click
 Add to create a new space, type a Space ID and Space Name, and then click Create. You will be directed to the space designer.
 - Since we set the state of the Employee On Boarding workflow to Production in a previous step, it will automatically be included, along with the Task List as menu items in the newly created space.
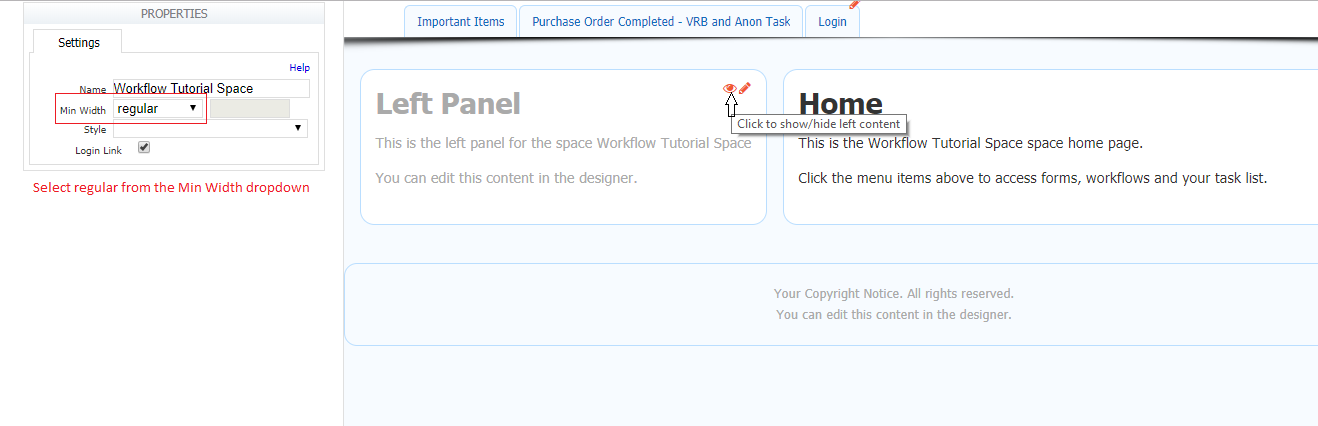
- Verify that the left panel is hidden. If not, click the
 icon to hide it.
 - Select regular for the form width from the Min Width dropdown on the Property pane.
- If your frevvo tenant is in the cloud, click the
 Save and Exit icon and proceed to the TestingtheEmployeeOnBoardingFlow section.
 - If you are using an in-house installation,
- Click the
 menu edit icon. Replace the <localhost:8082> in the urls for the Task List and the Employee On Boarding workflow with your server name and port. If you are concerned about portability to another system, make the URL's relative by removing the protocol, server and port information.
 - Click the Save and Exit icon to save the changes and proceed to the TestingtheEmployeeOnBoardingFlow section.
- Click the
Test the Employee On Boarding Workflow
Get the Share URL
- Logon to your frevvo tenant as the designer on your desktop.
- On the Spaces table, click the
 Action Menu for your space and select
  Share.
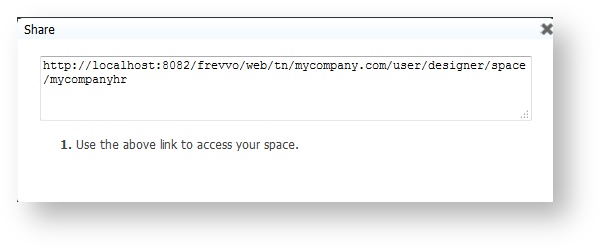
 - frevvo displays your space's URL — this is the link you distribute to those who you want to view your space. Remember, this workflow is designed to only be accessible to users who are logged into the tenant.
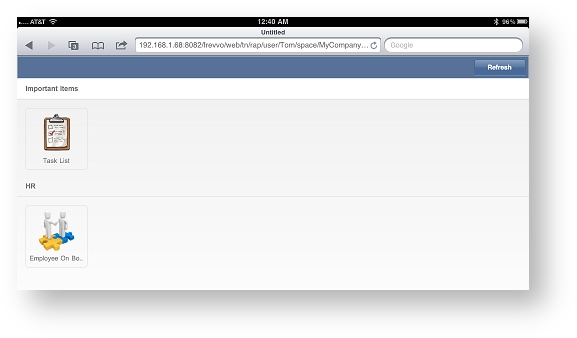
- Type the Share URL for your space into a browser session on the iPad. Your space will look similar to the image below, when accessed from the iPad.
Employee Steps
- Logoff the desktop and logon to your tenant as the user Tom on the iPad.
- Select the Employee On Boarding workflow on the iPad by tapping the icon for it.
- Fill in the screenflow. Use the Back and Next buttons or swipe to navigate the pages of the forms established by the designer's use of the PageBreak control. The Next button will change to Continue when the workflow is navigating to a new form.
- The Manager's name should be filled in by frevvo on the first page of the screenflow if you added the rule to do that from the logon information.
- The address should be filled in if you implemented the location feature on the Employee Information Form.
- Take a profile picture with the iPad camera and upload it to the Employee Information form.
- Enter the Allowances info, using the Debug Console to verify the calculation rules are working as expected.
- Enter data into the table control on the Education History page. Be sure to try the Degree attained dropdown choices.
- Review the data in the W-4 PDF. Remember, we only mapped a small section of the Employee's Withholding Allowance Certificate.
- Click the Send to Manager button when the screenflow is complete. Verify your customized message is displayed to the new employee. Logout as Tom.
Approval Step
- Verify Jerry received a task Notification email. Do not click on the link in the email as that will take you to the login screen on the desktop.
- Logon to the iPhone as Jerry.
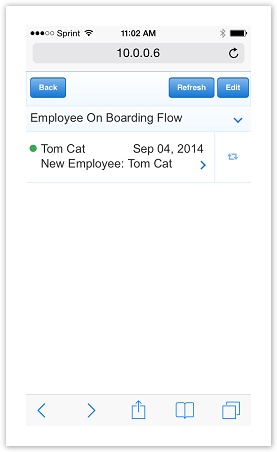
- Check that the Employee On Boarding task from Tom Cat shows up in Jerry, the manager's Task List.
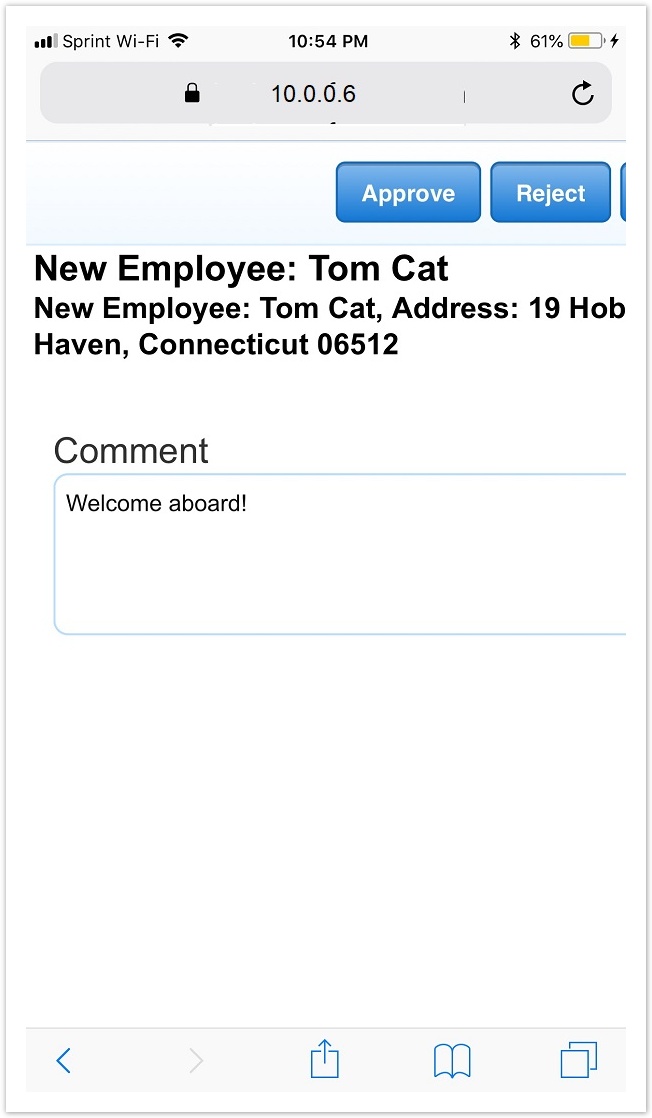
- Tap the task for Tom Cat's Employee On Boarding information. Since we enabled the Quick Approval feature, you will see the task information, a field to enter a comment and Approve, Reject, Details and a Cancel button. Enter a comment and approve the task.
- You can run through the workflow again to see what happens if the task is rejected.
- Check to see that the correct pending message is displayed. Logout as Jerry.
Office Use Step
- Logon to frevvo from a desktop computer as user Sue.
- Click the Perform this Task icon from Sue's Task List to complete the workflow.
- Verify the correct completion message is displayed. Logout of frevvo.