Project Uploader API Example
Imagine being able to automate uploading multiple frevvo Projects to all the designer users in a tenant! The Project Uploader described here uses the frevvo Java client API to do exactly that. Once the simple configuration is complete, the Project Uploader uploads the specified project(s) to specified users.
frevvo uses this program before each training class to upload the projects required for the class to the registered students' frevvo user accounts.
These instructions apply to the Windows operating system.
On this page:
Prerequisites
- The Project Uploader requires Java OpenJDK version 11.0.2. Click here to download Java 11.0.2 if necessary.
- Verify that your JAVA_HOME environment variable is pointing to the Java 11.0.2 installation directory. If not, follow these instructions to modify:
- Type the set command (Windows and Mac) to review the current value of the JAVA_HOME environmental value
- Locate the OpenJDK Installation Directory
- Set the JAVA_HOME Environment Variable
- The projects must be uploaded to users that have the role of frevvo.Designer.
- You must have an on-premise installation of frevvo or a tenant in the frevvo cloud that has access to the API turned on. Contact frevvo to request this, if necessary.
Configuration
- Download the Project Uploader zip file.
Unzip it to a location on your desktop.
Prior to frevvo v9.1.x, Projects were known as Applications. Some of the files and folders included in the Project Uploader .zip file will reference this terminology, such as "ApplicationUploader.jar" and "appuploader." Their function remains unchanged.
- Edit the config.properties file.
- The URL parameter specifies the location of your frevvo installation:
- Cloud customers: change the URL parameter to https://app.frevvo.com:443
- On-premise customers: URL=http://localhost:8082 should work if frevvo is running on your local PC. If not, change the localhost:8082 to your frevvo server and port.
Edit the path to point to the location of the Testdata_Folder directory. Be sure to keep the double backslashes to separate the directory names. In the example, frevvo is running on a local PC and the Testdata_Folder is located on the C drive of that PC in the Users\My Documents\Project Loader\ directory on a Windows system.
URL=http://localhost:8082
PATH=C:\\Users\\Owner\\My Documents\\Project Loader\\Testdata_Folder\\
- Modify the testdata.csv file:
- Delete all the text in row 1 of the csv file
- Add the users you want to upload projects to in the user@<your tenant> format in Column A.
- Add the passwords for the users listed in Column A to Column B.
- Add the complete project name (with the extension) for the first project you want to upload in Column C. Ex: EOBExercise_project.zip. Additional project names should go in Columns C, D, E etc.
Save the file with a .csv extension.
With a testdata.csv file configured as shown in the image the MiniTraining_forms, MiniTraining_Rules and MiniTraining_Workflows projects will be uploaded to users max, jack, andrea and meg in the training tenant when the ApplicationUploader.jar file is executed.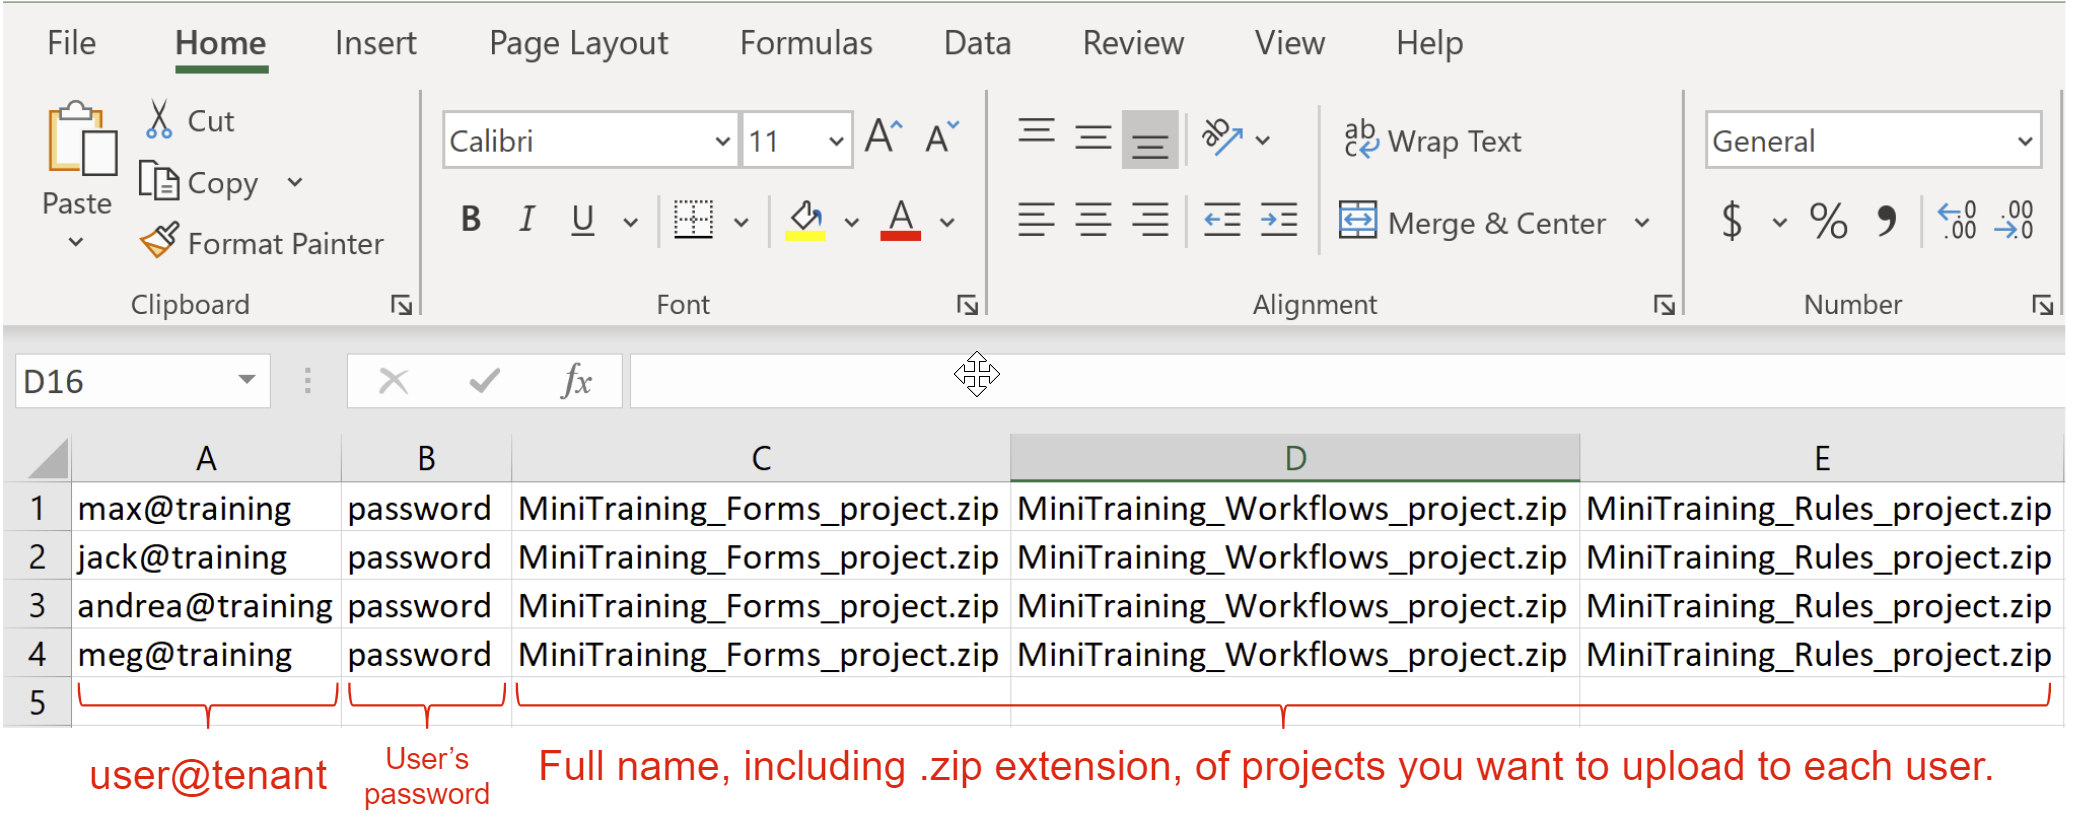
- Delete all the text in row 1 of the csv file
- Delete the existing EOBExercise project ("EOBExercise_app.zip") in the Testdata_Folder. Copy the project zip files that you want to upload to this location.
Upload Projects Command
- Open a command prompt
- Navigate to the directory where the ApplicationUploader.jar is located.
- Run the jar file :
java -jar ApplicationUploader.jar
If successful, you should see the results in the command window. (This image refers to "Applications" in versions prior to v9.1. In v9.1 and later you will see Project names listed.)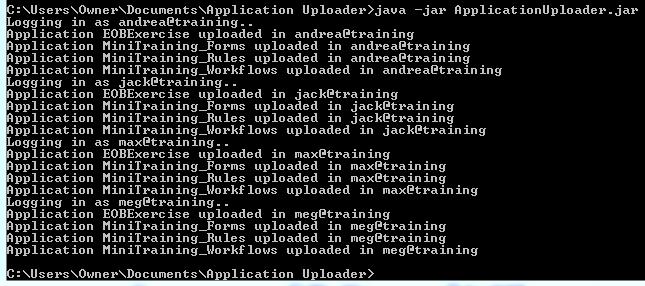
- Navigate to the directory where the ApplicationUploader.jar is located.
- Log into your frevvo tenant as each of your specified users to verify that your projects were uploaded.