Live Forms v7.4 is no longer supported. Please visit Live Forms Latest for our current Cloud Release. Earlier documentation is available too.
Linked Steps in a Flow
- Former user (Deleted)
- Former user (Deleted)
Many work flows often involve a number of people filling out different sections of a single form. So when you're designing this type of flow, you're most likely dragging the same form into the flow designer repeatedly to create the different steps in the flow.
Another way to create this type of flow is to use the Linked Steps feature of the flow designer. In this method, you create a linked version of a form for each step you want in your flow. One great advantage of this method is that if you need to make changes to the form after you've created your flow, you only have to edit the "parent" form — the editing changes are automatically propagated to its linked forms in the flow. Conversely, if you drag multiple copies of the same form into a flow to create steps, you'd have to make any changes to each copy of the form in each step.
If you want to show or hide different parts of a form depending on which user is filling it out, you can easily do this in a flow designed with linked steps using the Security tab or Business Rules.
One circumstance in which you might not want to use linked forms is a flow in which each user is filling out a different form.
- To create linked forms in a flow, first drag a form into the flow designer.
- Click on the form, and then click
 to create a linked form.
 - Continue clicking to create as many of the linked forms as you want.
On This Page:
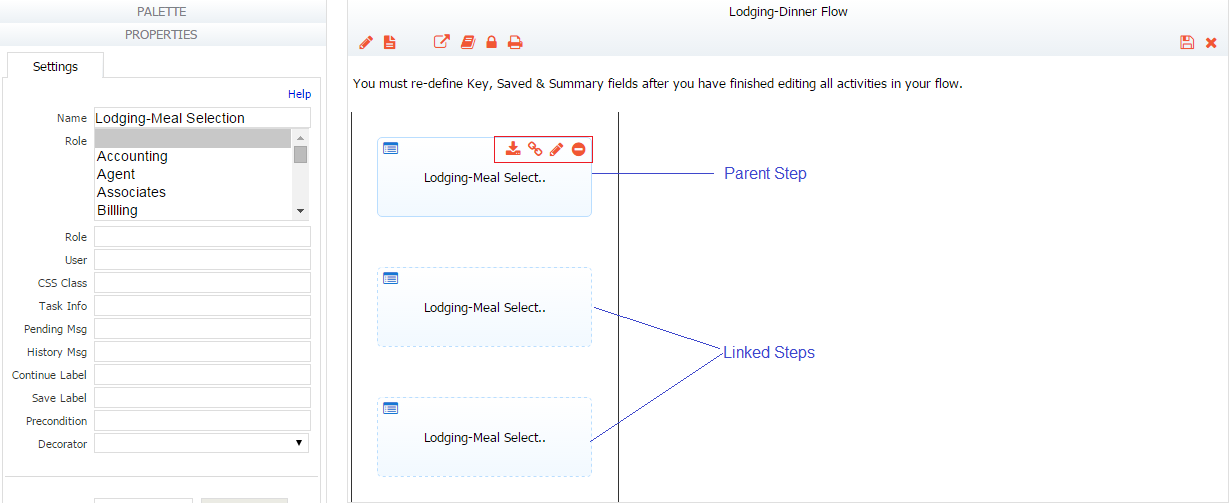
The example below shows the parent Lodging-Meal Selections form and its two linked forms. Notice that the parent form and its linked forms initially all have the same name, but the linked forms are outlined by dashed lines rather than solid lines. Note also that the form displays three icons when you click on it, while the linked forms display only the remove icon.
- Click to create a linked step.
- Click
 to open a step in the Form Designer to edit it.
 - Click
 to remove a linked step.
 - Click
 to download the parent step as a standalone form. This icon will not display on the linked steps.
Linked Steps Workflow Example
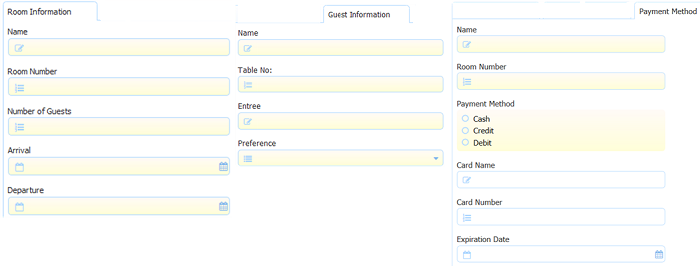
Because the parent forms and its linked forms represent steps, you'll want to give them unique names. The parent form in this example has three tabs used for hotel check in, dinner selection, and hotel check out.
To rename the parent step and its linked steps, click on them and then use the Name setting in the Properties panel as shown below.
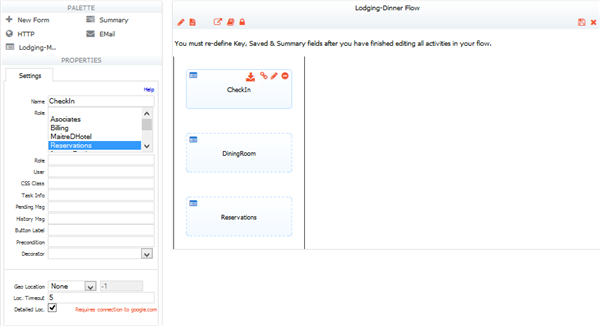
As with other forms you use to create steps, you can assign a linked-form step to a Role,so that the step is performed by someone with that role, or even by a specific user. In this example, we rename all three steps and assign each to a different role.
- CheckIn is assigned to the Reservations role.
- DiningRoom is assigned to the MaitreDHotel role.
- CheckOut is assigned to the Billing role.
You may also want only certain sections of the form to be visible in an specific step so that only users in a certain role see those sections. For example, in this flow, perhaps only the dining room staff needs to see the form's Guest Information tab.
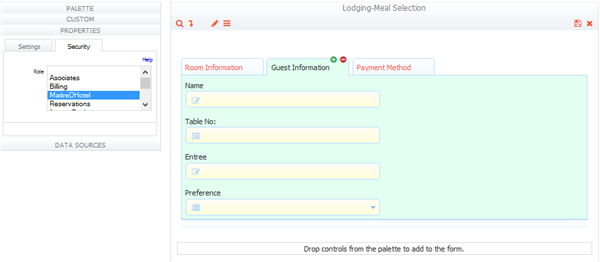
To do this, you can edit the the form via the Flow Designer and use the Security Tab in the Forms Designer to assign a role to sections of the form. Click the form, and then click to open the form in the Form Designer.
In this example, we assign the Guest Information tab to the MaitreDHotel role.
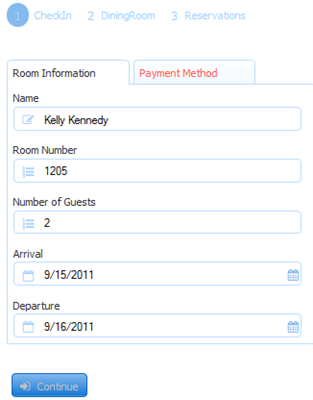
When the flow runs, the first step, CheckIn, is performed by a user with the Reservations role, so that user does not see the form's Guest Information tab, which is only visible to a user with the MaitreDHotel role.
The next step in the flow, DiningRoom, is assigned to the MaitreDHotel role, so that user sees the Guest Information tab.
You can also use rules to show or hide parts of a form in an step. For example you could use the rule below to show the Guest Information tab only when a MaitreDHotel role is using the form.
This rule is useful in a workflow where you want to make the tab named Review visible only for the workflow step named Manager Review.
if (form.load) {
   if (_data.getParameter('flow.step.name') == 'MaitreDHotel') {
     GuestInformation.visible = true;
   }
}
For more information about using rules this way, see the Security Subject topic in the Rules Examples section.
Linked Forms and the Submissions PDF
If you check the Save PDF property on the flow properties panel, a PDF image of the flow is saved in the Live Forms' submission repository. It is no longer necessary to uncheck the printable property for all but one of the steps to prevent the form from being printed more than once in the default pdf. This was required in previous versions of Live Forms. Refer to this Printable property for more information.