/
Order Line Items Grid
Order Line Items Grid
- Megan Ellis
Owned by Megan Ellis
Aug 23, 2022
Previous Section | Next Section
Example - Order Information
We'll add an Order Line Items Grid to the Client information we created in the previous example.
Update the Client Information Form
- From the Forms & Workflows Homepage, click the
 Action Menu and select
  Duplicate to make a copy of the Client Info form. Then, click the name of the new form to open the Form Designer.
 - Change the form name to Order Info.
- Drag and drop a Table from the palette below the Client Information section created earlier. frevvo will automatically create a grid with 3 columns and 3 rows.
- Items drop down:
- Drag a Dropdown from the palette and drop it to the right of Col 0 in the Table. Then click the left arrow on the column of dropdown controls to move it to the left into the 1st column position.
- Click the header of this dropdown control and in the Properties panel, change the Label and Name to Item. Make sure both Label and Name are set to Item.
- Click the actual dropdown control in any row. In the Properties panel, check Required and set the Options to
Chevrolet
Chrysler
Ford
- Select the next column (Col 0) by clicking the header. Change the Label to Price ($) and Name to Price. Click one of the Price controls in any row and in the Properties panel, change the Control Type to Money.
- Select the next column (Col 1), change the Label and Name to Quantity. Shortcut: after changing the Label, simply delete the Name and tab out. frevvo will set the name automatically from the label. Click one of the Quantity controls in any row and in the Properties panel, change the Control Type to Quantity.
- Select the last column (Col 2) and change the Label to Subtotal ($) and Name to Subtotal. Click one of the Subtotal controls and in the Properties panel, change the Control Type to Money.
- Now select the entire Table by clicking on the header bar above all the columns. Change the Label to Order Items. The Name should automatically get set to OrderItems. If not, delete it and tab out. frevvo will set it automatically.
- Change the Min to 1. This means at least one Order Line Item is required. At runtime, frevvo will ensure that at least one row of the table is filled in with valid values. The Max is set to 10 meaning you can have at most 10 line items. You can change this to whatever you want.
- Click the Style Tab and set the Column widths to the string: 40% 20% 20% 20%. This will resize the columns of the table. You can set it to any combination of values (as many values as columns in the table) that adds up to 100%.
- Drag and drop a Money control from the palette below the Table. Change the Label to Grand Total. The Name will be set to GrandTotal. Change the width to 3 columns. In the Properties panel, disable this control i.e. uncheck Enabled.
- Finally, we'll use a message control as a spacer, so the grand total will sit underneath the subtotal column. Drag a Message Control to the left of the GrandTotal control. Erase the word "Message" in the message property and leave it blank. Change the Message type to None. Change the width to 9 columns.
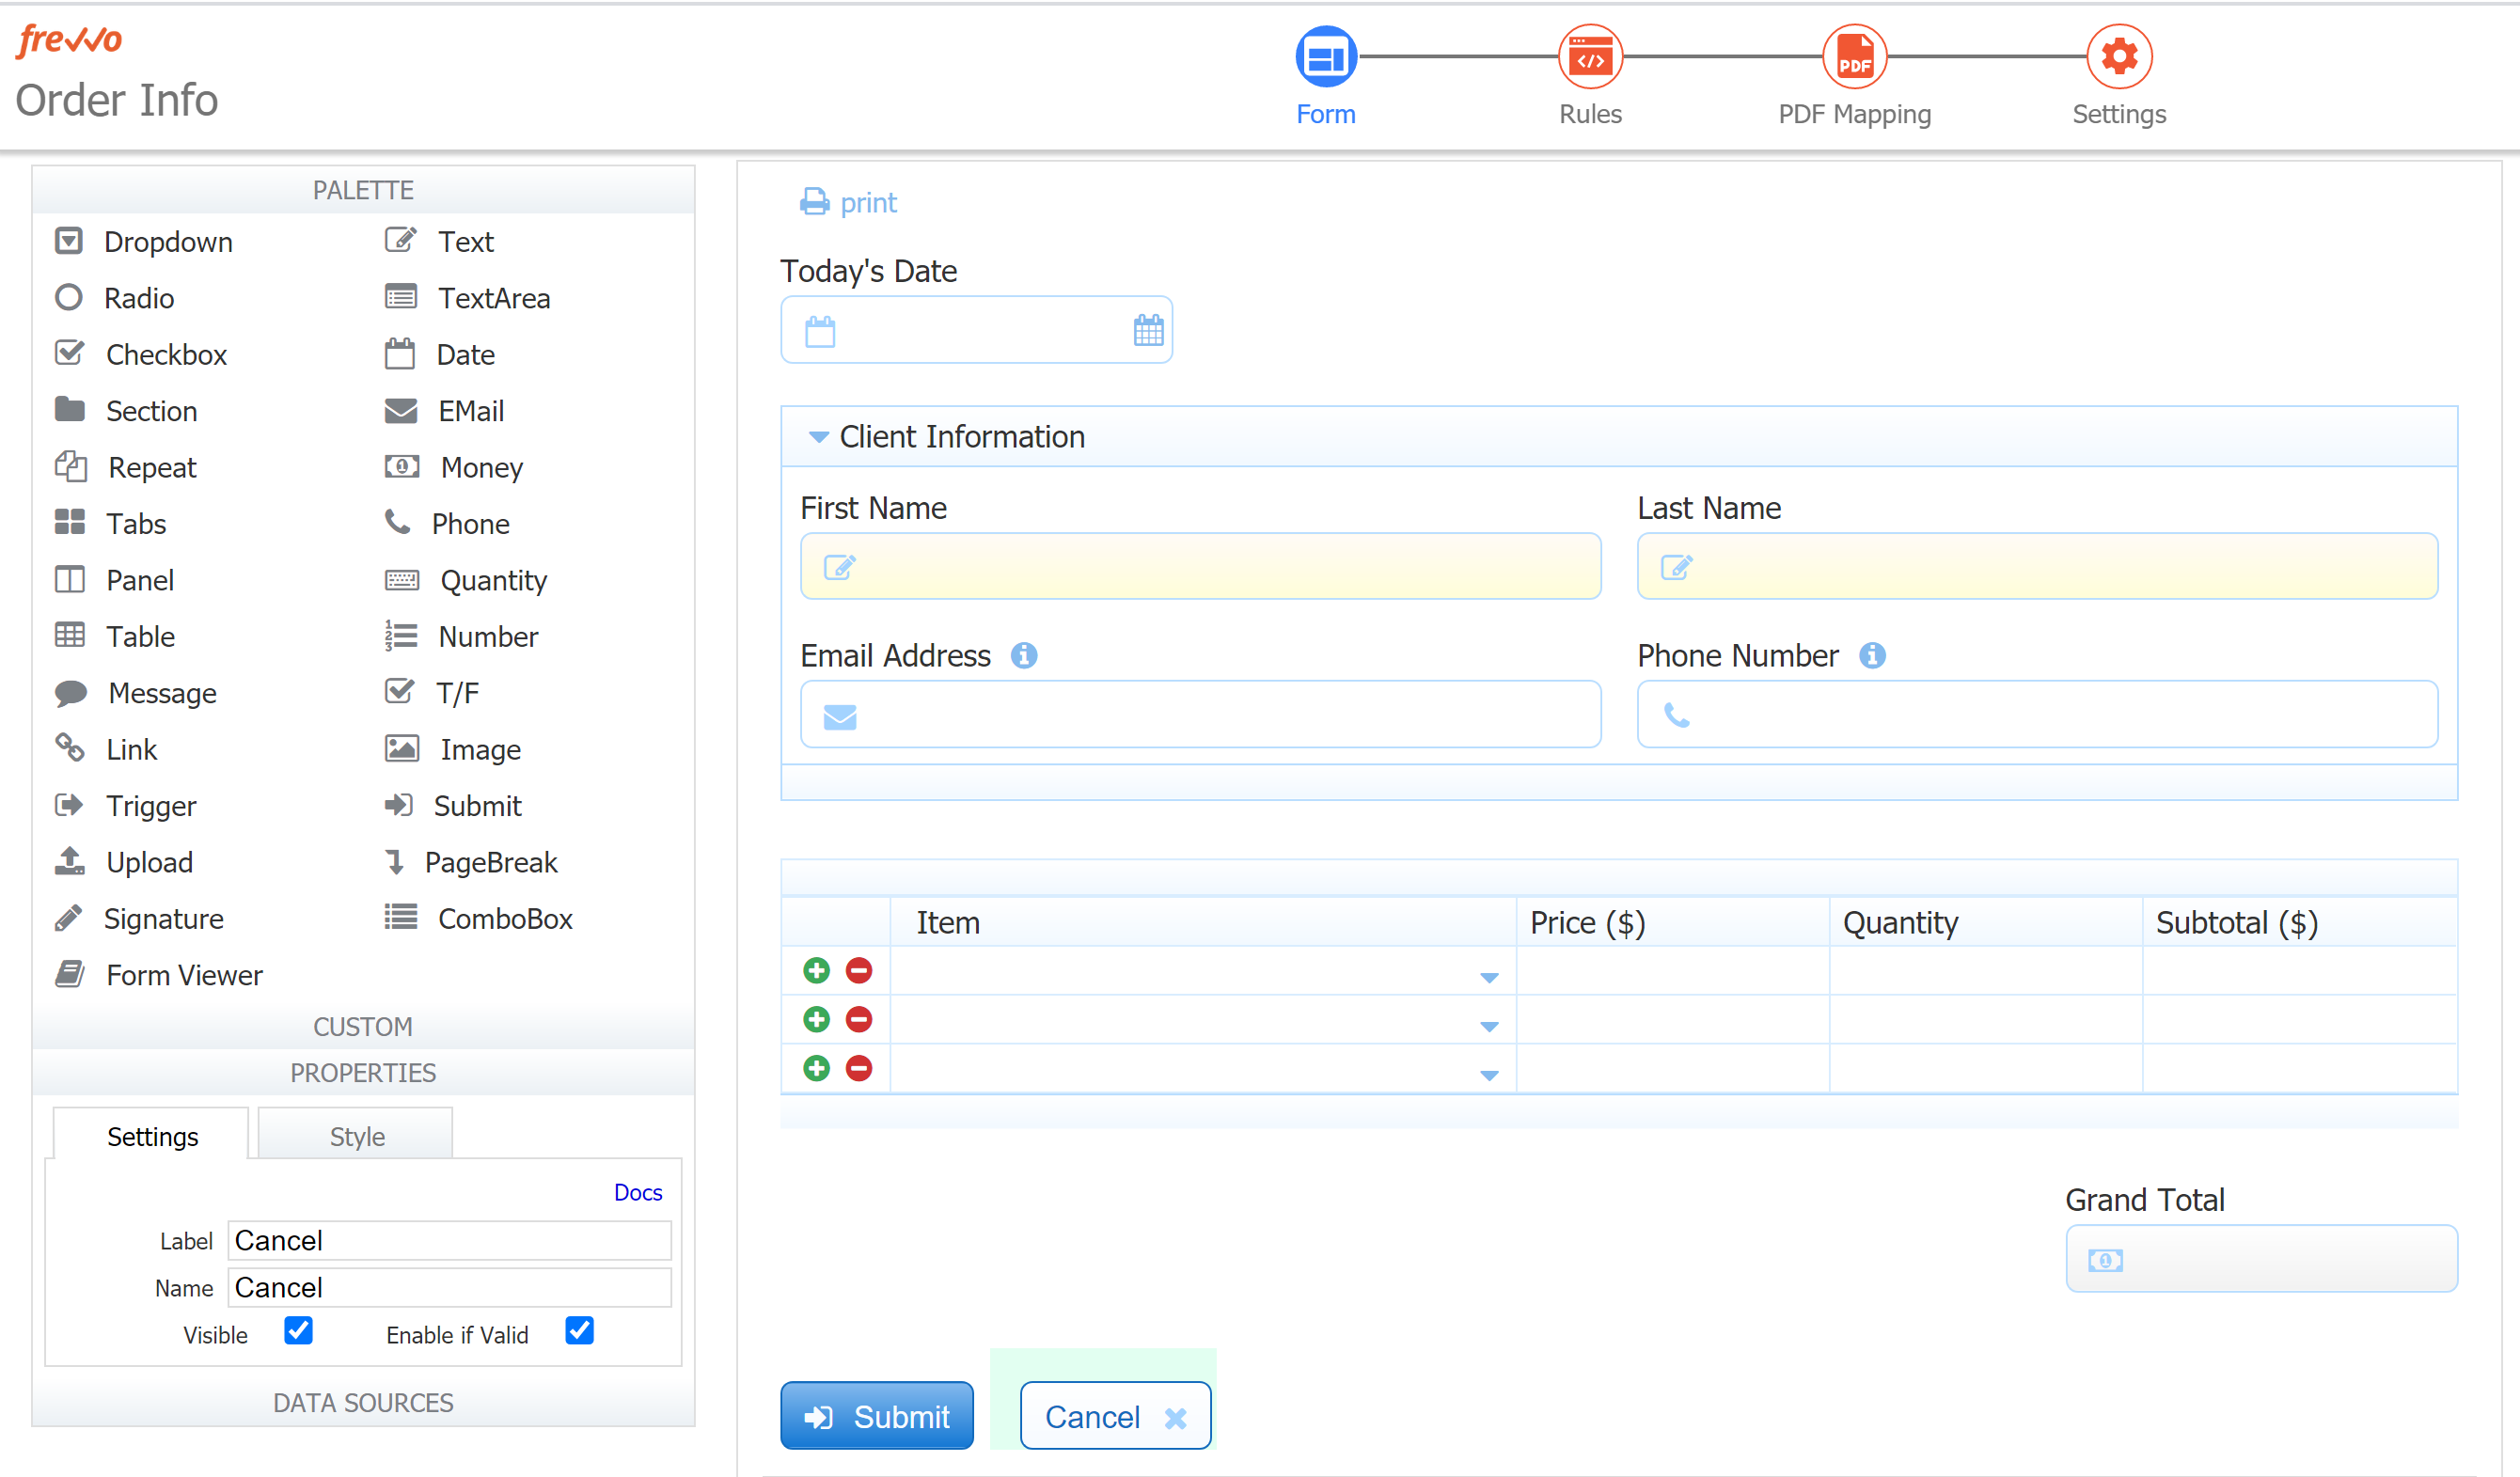
- At this point, your form should look like this:
Select
 Save and Close from the action menu (top right) to save your work and return to the Forms and Workflows homepage.
Test this Example:
- Click the
 Test icon for your form and fill out the top part as in the previous example.
 - See that the first row of the table is required. You can add rows up to the Max you set earlier and you cannot remove the last remaining row.
- The Money and Quantity controls will only accept values that make sense for their types.
In the next example, we'll use business rules to set the Price, and calculate the Subtotal and Grand Total automatically.
, multiple selections available,